Quantcast
Channel: Help & How To
Viewing all 5861 articles
Browse latest View live

How to use the Oculus Store

$
0
0

How to use the Oculus Store

The Oculus Store received an overhaul with the Rift Core 2.0 update.

The Oculus Store can be accessed from either the desktop app on your PC or from inside the Rift when you have it strapped on. Here's how to use both versions of the Oculus Store so you can buy, download, and play your VR experiences without any hassle.

How to use the Oculus Store in the Oculus app

How to use the Oculus Store in the Oculus app

If you want to buy games without plugging in and donning your Rift, you can access the Oculus Store from the desktop app.

How to buy an Oculus Rift experience

Here's how it all works:

  1. Launch the Oculus app from your Start menu, desktop, or taskbar.
  2. Click Store.
  3. Click an experience.

    Click Store. Click an experience.

  4. Click the price tag to begin the checkout process.
  5. Click to add a payment method.

    Click the price tag. Click to add a payment method.

  6. Enter your payment information.
  7. Click Save.

    Enter your payment information. Click Save.

  8. Type your Oculus PIN.
  9. Click Purchase.

    Type your Oculus PIN. Click Purchase.

How to review your purchase history

Follow these steps to check your purchase history:

  1. Launch the Oculus app from your Start menu, desktop, or taskbar.
  2. Click Settings.
  3. Click Purchase History.

    Click Settings. Click Purchase History.

Here you'll be able to see any experiences that you've purchased with your Oculus account.

How to add an Oculus experience to your wishlist

You can add the experience to your wishlist like this:

  1. Launch the Oculus app from your Start menu, desktop, or taskbar.
  2. Click Store.

    Launch the Oculus app. Click Store.

  3. Click an experience.
  4. Click Add to wishlist. You might have to scroll down to find it.

    Click an experience. Click Add to wishlist.

To remove a game from your wishlist, repeat the steps but click Remove from Wishlist in step 4.

How to change your Oculus PIN

Modify your Oculus PIN using these steps:

  1. Launch the Oculus app from your Start menu, desktop, or taskbar.
  2. Click Settings.

    Launch the Oculus app. Click Settings.

  3. Click Oculus PIN.
  4. Type a new Oculus PIN.

    Click Oculus PIN. Type a new PIN.

  5. Type your password.
  6. Click Submit.

    Type your password. Click Submit.

How to redeem a code

Here's how to redeem a code:

  1. Launch the Oculus app from your Start menu, desktop, or taskbar.
  2. Click Settings.
  3. Click Redeem Code.

    Click Settings. Click Redeem Code.

  4. Type the code.
  5. Click Redeem.

    Type a code. Click Redeem.

How to add a payment method

It's easy to remove a payment method, just follow these steps:

  1. Launch the Oculus app from your Start menu, desktop, or taskbar.
  2. Click Settings.
  3. Click Payment.

    Click Settings. Click Payment.

  4. Click Add Payment Method.
  5. Click a payment method.

    Click Add Payment Method. Click a payment method.

  6. Type your information.
  7. Click Save.

    Type your information. Click Save.

How to remove a payment method

If you want to get rid of a payment option, do this:

  1. Launch the Oculus app from your Start menu, desktop, or taskbar.
  2. Click Settings.
  3. Click Payment.

    Click Settings. Click Payment.

  4. Click the Remove button next to the payment method you'd like to remove.
  5. Click Remove.

    Click the Remove button. Click Remove.

How to receive a notification when a game is released

To get game-release alerts, follow these steps:

  1. Launch the Oculus app from your Start menu, desktop, or taskbar.
  2. Click Store.

    Launch the Oculus app. Click Store.

  3. Click an experience that hasn't yet been released.
  4. Click Notify Me.

    Click an unreleased experience. Click Notify Me.

You'll now receive an email when availability changes.

How to use the Oculus Store inside the Rift

If you're already strapped into the Oculus Rift, you can easily navigate the Oculus Store in a VR environment. This is how:

  1. Hit the Oculus button on your Touch controller.
  2. Select Store.
  3. Select an experience.

    Select Store. Select an experience.

  4. Select Details to see more information about the experience.
  5. Select Related to see games within the same genre.

    Select Details. Select Related.

  6. Select the right or left arrow below the image to move through screenshots.
  7. Select the right or left arrow below the star rating to see more reviews.

    Select the right or left arrows.

  8. Select the price tag to check out.
  9. Select Purchase.

    Select the price tag to check out. Select Purcahse.

More resources

Be sure to check out these other articles for more information about the Oculus Rift!

Updated March 20, 2018: We updated this guide with new steps and screenshots for Rift Core 2.0.


How to use Mixer to stream Xbox One games

$
0
0

Mixer

Here's how to stream your Xbox games on Microsoft's Mixer live-streaming service.

What on earth is Mixer, you ask? You thought everyone streamed on Twitch or YouTube? A relative upstart in the streaming game was scooped up by Microsoft and suddenly found itself in the limelight.

You might find yourself wondering how to get started with it, and how to share your Xbox One games (other consoles are also available) with the world. Well, you have two options: You can share directly from the console, or by using additional hardware and software for a more customized broadcast.

That hardware will be a capture card and your PC, as well as some broadcasting software. Two of the most popular options are Open Broadcaster Software (OBS) which is free, and XSplit, which requires a subscription for the full feature set.

You'll also need to sign up for a free account on the Mixer website. You can either sign up using your email or login with Twitter, Discord or your Microsoft Account.

The best capture card

Elgato HD60S

If you're going down the capture card route, our current top pick is the Elgato HD60S. It offers fast, almost lag-free capture over USB-C 3.0 while maintaining a portable external card form. Ultimate performance is better on the HD60 Pro and the new 4K60 Pro, but for streamers, the latter is overkill.

And not everyone has a desktop PC to house an internal capture card.

The HD60S is about $160, which isn't a small investment, but you can guarantee some quality results.

More: Elgato HD60 S review

See at Amazon

How to stream on Mixer from the Xbox One

This one's easy, but you have to have your Microsoft Account and your Mixer account linked if you signed up in the old days of Beam.

While you're inside any game on your console, simply press the Xbox button on your controller to open the guide. Scroll down to the broadcast tab and select broadcast your game.

You have some simple options to deal with first, such as naming your stream and setting up your audio and camera if you're using a Kinect. Hit start broadcast when you're ready, and off you go.

How to stream on Mixer using OBS

Mixer

  1. Login to your account at mixer.com
  2. Click on your avatar.
  3. Click manage channel.
  4. Click the copy button next to the blurred box that houses the stream key.

    That's what you need to do on the Mixer website. Next, you should fire up your broadcasting software, in this case, OBS Studio.

  5. Select Settings in OBS Studio.

  6. Select the Stream tab on the left sidebar.

    OBS

  7. Select Mixer from the drop-down box for desired streaming service.
  8. In the box below paste the stream key you copied from your Mixer dashboard.

    OBS

More: Beginner's guide to setting up and streaming with OBS

How to stream on Mixer using XSplit

XSplit

The first thing to do is ensure you have the Mixer extensions added to XSplit.

  1. In XSplit Broadcaster select Extensions.
  2. Scroll down and select Get more extensions.
  3. In the Plugin Store you see, click on the Show Outputs button.
  4. Select Mixer.
  5. To add Mixer chat, select Show Sources in the Plugin Store.
  6. Select Mixer Chat Viewer.

You now have native support for streaming to Mixer added to XSplit. From here it's very easy to set up your stream:

XSplit

  1. In XSplit Broadcaster, go to the Outputs menu.
  2. Scroll down to Set up a new output, and then select Mixer.
  3. In the window that appears, click Authorize.
  4. You'll now be taken to Mixer to log in with your account information.
  5. Once you're all logged in, go to the Outputs menu again.
  6. Click on the settings cog next to your account.
  7. The settings menu will now open allowing you to customize your output, including audio and video bitrate, as well as name your stream.

That's all there is to it. These basic steps will help you set up your Mixer account for streaming, but there are other things to consider, such as bitrate. You might have the fastest broadband on earth, but your viewers may not, so you need to strike a balance.

XSplit does allow you to test your bandwidth against your stream settings before going live, which is handy. In my case, I'm set to 900p at 3500 bitrate as it strikes a good balance of quality, what my upload speed can handle and most of all, providing a good experience for the viewers.

More: Beginner's guide to setting up and streaming with XSplit

How to 'co-stream' on Mixer

"Co-streaming" is one of the best features to arrive along with the relaunch of Beam as Mixer. It means you and up to three other people can stream at the same time and broadcast through one channel. For example, if you're all playing on the same team in a first-person shooter such as Battlefield 1 or Destiny, you can all show a different point of view while also broadcasting your party chats. It's insane!

The set up can be a bit involved, but we have a comprehensive guide with everything you need to know.

How to start a co-stream on Mixer

If you're ever lurking on Mixer, be sure to give Windows Central a follow!

Updated March 20, 2018: Steps and images updated to reflect current versions of XSplit, OBS and the Xbox One OS.

The difference between SIM and eSIM (and what the future holds)

$
0
0

The difference between SIM and eSIM (and what it means for you)

eSIM is becoming more common, and you should know how it differs from traditional SIM.

Pretty much ever since modern smartphones have been available to us, we've been dealing with the small piece of plastic inside known as a subscriber identification module (SIM). When you get a new phone, your service provider likely pops in a SIM and you go on your way, or you switch it over yourself from your old device. While SIM cards are a big part of an enormous mobile market, there's a new type of technology causing a bit of a disruption. You'll be hearing more about embedded SIM (eSIM) as it becomes more common, but what's the difference?

The 3 best Androids for former Windows Phone users

The difference between SIM and eSIM

SIM slots on the Lenovo X1 Yoga

If you're carrying around a phone that has network access, you can probably also see your provider's name in a top corner. This is all brought to you by the SIM card inside, which identifies your phone and what type of plan it's using based on a profile. Traditional SIM cards can only be linked up with one profile and are generally useless if that profile stops being used.

Phones are not the only devices using SIM cards, and we've seen plenty of laptops and tablets take advantage of the tech for years, especially in the enterprise sector. Lenovo's ThinkPad lineup of business laptops is a great example.

SIM cards come in a few different sizes, evolving as phones have been slimmed down and packed with other hardware. You have Standard SIM that's about the size of an SD card, Micro SIM that's slightly smaller (15mm x 12mm), and finally Nano SIM (12.3mm x 8.8mm) that is the smallest of them all.

Standard, Micro, and Nano (left to right) Image courtesy of Wikipedia.

An eSIM, however, isn't a removable card. Instead, it's embedded (that's the 'e') on the device's motherboard or part of the processor — there's nothing to insert and nothing to remove. Because an eSIM cannot be removed if you'd like to switch providers, remote provisioning is used instead. Instead of going to a store, acquiring a new SIM card, and swapping it out, with an eSIM the changeover is handled entirely virtually.

eSIM has the ability to use and store multiple profiles. If you travel, for example, getting access to a new country's mobile provider won't require tracking down and swapping out SIM cards. You also won't have to worry about cutting a Micro SIM down to fit the Nano SIM slot on your phone (which is seriously not fun). eSIM also takes up far less physical room inside a device, which is much more important in wearables but also becomes a factor as phones, tablets, and laptops get thinner.

What does the future of eSIM look like?

What does the future of eSIM look like?

The Apple Watch 3, Google Pixel 2, and Microsoft Surface Pro LTE are a few high-profile devices that feature eSIM technology right now, and the new Always Connected PCs from Microsoft's partners are adding to the list.

It's clear that the need for eSIM is growing, and its flexibility is no doubt attractive to a large audience. As Executive Editor Daniel Rubino wrote in his feature on eSIM, "The ability to take a PC or 2-in-1 wherever in the world you are and still have multiple ways to get on the internet is going to be critical for businesses, the modern nomadic millennial workforce, creators, those who are self-employed, and even regular consumers."

Still, it must continue to be accepted, served, and utilized by more mobile carriers and device manufacturers. For example, the eSIM inside the Surface Pro LTE is currently sitting dormant (there's also a traditional SIM slot), but that will soon change. Microsoft is expected to start selling chunks of data rather than full plans, letting anyone with an eSIM device pick up a few gigabytes here and there when necessary.

Microsoft announces first mobile carriers to support Always Connected PCs

As eSIM becomes standardized by the GSMA and more people get turned onto the benefits, it's hard to imagine we'll still be dealing with the plastic traditional SIM cards in the future. When you can visit, say, the Microsoft Store and browse and pick out a data plan just like you're buying an app or movie, it will be hard to think about ever going back to the way it was.

More resources

How to use Xbox One Mixer controller sharing

$
0
0

Hand off to your viewers with Xbox One's controller sharing feature for Mixer streaming.

Xbox One has received a unique new feature for streamers, as a part of the Xbox Spring Update. Following recent improvements to Microsoft's Mixer live streaming platform, its interactive offerings between broadcasters and audiences continue to expand.

Mixer "controller sharing" builds upon the service's interactive roots, allowing viewers to directly control a streamer's gameplay. Controller inputs can be handed off to audience members while using the feature –whether this is used for bad or good is up to you. These are the steps to enable Mixer controller sharing on Xbox One, as well as how to use it.

Enabling Mixer controller sharing on Xbox One

Mixer controller sharing is currently limited to those broadcasting through the Xbox One's integrated streaming capabilities. This is used to establish a direct, low-latency link between your console and the service. Here's how to use it:

  1. Open any game on your Xbox One.
  2. Press the Xbox button on your controller to open the Guide menu.
  3. Press RB two times on your controller.
  4. Select the Start broadcast option. (Your game will begin broadcasting on Mixer.)
  5. Turn on Share your controller.

After following the above steps, your selected game will broadcast on Mixer. Controller sharing will also be enabled, allowing viewers to take control of the game.

Using Mixer controller sharing on Xbox One

While an Xbox One is required to broadcast games with Mixer controller sharing, connecting to a streamer is limited to the Mixer website. When signed into a Mixer account, options to use controller sharing will be displayed below select video streams. Follow this process to use the feature:

  1. Connect an Xbox One controller to your Windows PC. Alternatively, when a controller isn't connected, an on-screen controller emulator is displayed.
  2. Click Share controller while viewing a stream to take control of the broadcaster's console. (Only one user can share with a streamer at a time, while the streamer's controller also stays connected.)
  3. Click Stop sharing controller to forfeit control of the game.

When a viewer is connected, the broadcaster will be notified through an on-screen notification. Connected users can interact with any aspect of a game, although they are restricted from interacting with the console's OS.

Have you used Mixer controller streaming? Let us know your thoughts in the comments.

See Xbox One X at Microsoft StoreSee Xbox One X at Amazon

How to share Xbox One gameplay clips on Instagram

$
0
0

Instagram

Dealing with clips from your Xbox One isn't the easiest thing in the world. Here's how you can share them with your Instagram followers.

Instagram isn't just for photos and hipster filters — it's a huge social network and it's a great way to show off your gaming achievements with the world in awesome video form.

The Xbox One makes it super simple to capture clips, but if you want to share them to Instagram there's a little bit of work to be done. It's not straightforward, but once you've got it down the process is relatively painless.

Save clips to an external drive

Xbox external drive

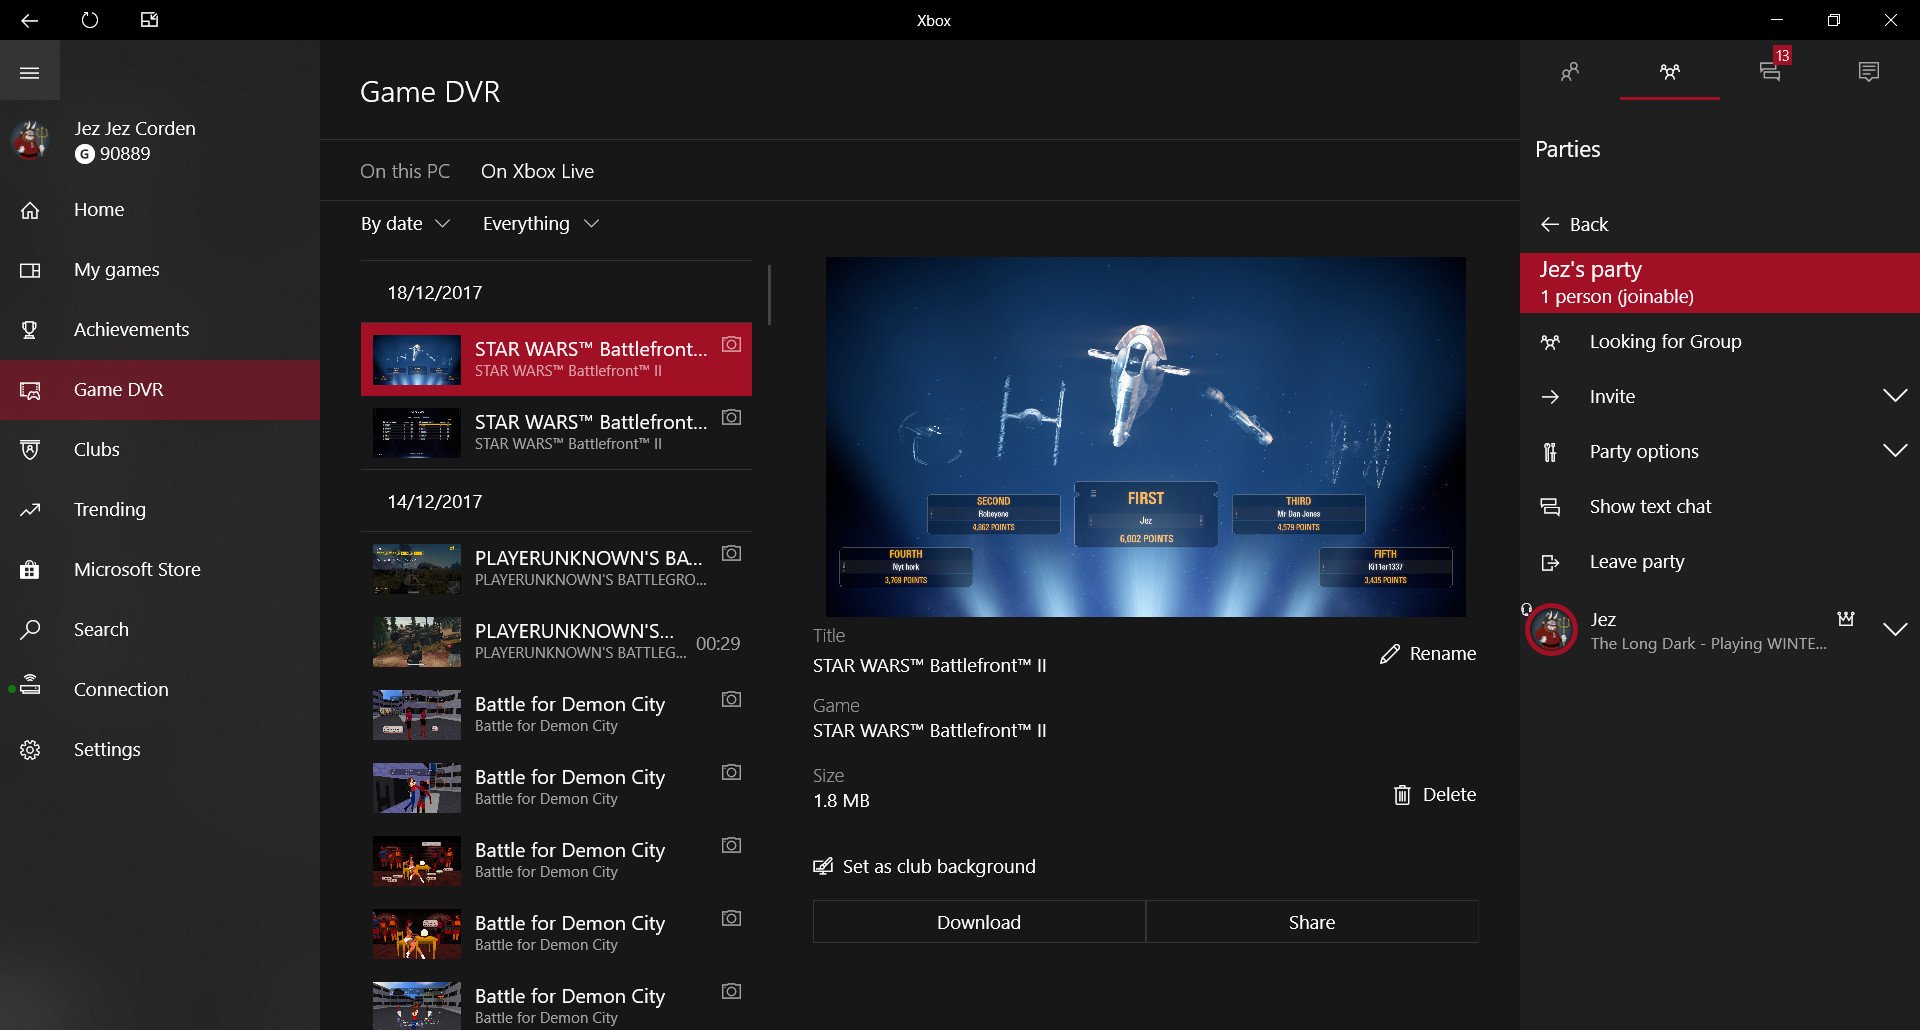
The key to sharing clips to Instagram is how you get them off the console and on to something you can then post with. Since the last major update to the Xbox One's OS, you have been able to save clips to an external drive.

Having the files on an external drive makes it easier to access them from a separate computer, and some drives even allow you to plug directly in with a smartphone (though you may need an adapter or special cable. In this case, you can then just take files with your phone and upload them with your mobile Instagram app.

How to record Xbox One Game DVR clips to an external drive

Using the Xbox app for Windows 10

Xbox app

While there are Xbox apps for iOS and Android, only the Windows 10 Xbox app allows you to download clips from your Xbox Game DVR. If you're using a Windows 10 Mobile phone, you can download directly to your phone and then upload to the Instagram app right away (you can also do this on most Windows 10 tablets).

PC users will need to download the clips from Game DVR, but then they need to get them onto a smartphone to upload to Instagram — and the most straightforward way these days is to sling it through the cloud.

OneDrive

OneDrive

OneDrive doesn't get the nod just for being a Microsoft service, but for being a Microsoft service that's also baked into the Game DVR feature on the console. Clips will automatically save to Xbox Live, but you can also upload them directly from the console to your OneDrive account.

OneDrive isn't the only place you can share clips to from the console, but for the purposes of putting them on Instagram, it's the best one. The guide below will show you everything you need to know.

How to record, delete, and share Xbox game video clips

All you need now is a smartphone and the OneDrive app. From here you can download and export your clips to other apps on your phone, including Instagram.

Bluestacks

Bluestacks

The Windows 10 Instagram app doesn't let you upload photos or videos (unless you're using a tablet), which makes it pretty useless. So if you want to use a computer, you have to think outside the box a little. While a number of modern Chromebooks run Android apps natively, on Windows we have to turn to the Bluestacks emulator.

It isn't perfect, but it's improved a lot in recent years and is free to use. The latest version currently in beta even runs on Android 7 Nougat, so it's not all that far behind as you might think. But if you're going to use a PC it'll give you a way to access the Instagram app and upload the clips you've got either on an external drive or from the Xbox app as detailed above.

Download Bluestacks for Windows 10

Your tips

If you've got a workflow that isn't covered here be sure to share it in the comments below

How to backup photos and videos from your smartphone to a Synology NAS

$
0
0

Synology DS218+

It's easy to start backing up photos and videos from your smartphone to a Synology NAS. Here's how.

As well as backing up important Windows installations and making sure all your files have a redundant copy, there's nothing worse than losing photos and videos of sacred moments in your life. We're going to run you through how to configure a Synology Network Attached Storage to automatically backup media from your smartphone. It's really easy, and you have a few options available.

See at Amazon

Synchronizing clouds

Synology Clouds Sync

The easiest way to configure the backup of photos and videos taken on your smartphone to your home NAS is to synchronize everything saved to popular clouds services like OneDrive and Google Drive. This is also the option you'll wish to go with should you already rely on a cloud service for storing files from a smartphone.

Synology allows you to have all this configured using just the Cloud Sync app. Simply follow the below instructions, and you'll have copies of photos and videos transferred across from popular cloud storage solutions.

  1. Log into your NAS using your favorite web browser.
  2. Download and install Cloud Sync (if not already installed) using the Package Center.
  3. Open Cloud Sync.

    Synology Clouds Sync

  4. Select the cloud storage service.
  5. Log in using your credentials.

    Synology Clouds Sync

  6. Configure how you wish the NAS to synchronize the files:
    • Local path: Where all the synchronized files will be stored.
    • Remote patch: The folder you wish to synchronize from the cloud service. ("Root" saves everything.)
    • Sync direction: Select how you wish for the NAS to synchronize with the service.
  7. Click "Schedule settings" to control when the synchronization task runs.

And you're all set! You can use this to save just photos and video or all files, depending on what you have stored on the cloud server, as well as which root path you choose. You can even stack the scheduled tasks by connecting multiple cloud services, keeping all your data in a single location.

Saving from the phone

Synology DS Cloud

  1. Download DS Cloud for Android or iOS.
  2. Open the app and fill in your NAS details.
  3. Select the server folder to sync.
  4. Hit next.
  5. Select the local folder to sync.
  6. Hit next.
  7. Configure the synchronization profile.
  8. Hit OK.

Your smartphone should now begin synchronizing all selected files with the NAS unit, and by using the QuickConnect connection, you will be able to achieve this from anywhere with a network connection.

Related resources

Best tips to keep your Windows 10 PC protected against malware

$
0
0

Here are the best tips you should know to protect your Windows 10 computer and personal files against malware attacks.

In a world where the internet is already part of our daily lives, and our computers store most of our personal information, more than ever, we're quickly becoming targets of malicious actors. As a result, if you don't take the necessary steps to protect your device and data, you'll be leaving the doors wide-open to malware and hackers that only want to steal your information and harm your computer.

Although malware come in many forms, one thing is certain; you don't want one inside your computer. Thankfully, you have a lot of tools to fight back all sort of malware, many of which come built into Windows 10. However, protecting your system and files isn't just about installing a security app and hoping for the best. It's a combination of software and knowing how to avoid potential threats.

In this Windows 10 guide, we'll walk you through nine tips to keep your desktop, laptop, or tablet and data protected against virtually every type of malware, including viruses, ransomware, worms, Trojans, spyware, adware, and other malicious programs.

1. Update Windows 10 and software

Perhaps the single most important step you can take to keep your device and data safe and secure is to maintain Windows 10 and programs always updated.

Software companies, such as Microsoft, are continuously rolling out updates to patch potential vulnerabilities that can be exploited by hackers.

Although updates download and install automatically on Windows 10, you can always make sure that your system has the latest patches installed on Settings> Update & Security> Windows Update, and clicking the Check for updates button.

Also, it's important to periodically check and install updates for any software installed on your computer. On Windows 10, apps you acquire from the Microsoft Store will update automatically as soon as a new version becomes available. However, classic desktop applications will not (in most cases) because they have different update mechanisms. Always check the software company's support website to download and update your programs.

2. Upgrade to the latest version of Windows 10

Because your device is running Windows 10, it doesn't necessarily mean that it's using the latest version.

Windows 10 was originally launched in 2015, and since then, Microsoft has released multiple feature updates adding new features and changes to improve performance, productivity, and more importantly, the company has been implementing many security enhancements.

If you want to keep your device protected against malware, you always want to be running the latest version.

Similar to those updates you get every month, new versions of Windows 10 are available free of charge, and they usually download an install automatically. However, if you're still not running the latest version, there are multiple ways to upgrade manually, including using Windows Update, Update Assistant, and Media Creation Tool, which allows you to perform an in-place upgrade as well as perform a clean install of the latest version.

Quick Tip: To find out which version of Windows 10 your PC is running, use the Windows key + R key combo, type winver, and click OK. If it reads version 1709, then you're running the Fall Creators Update.

It's worth noting that at the time of this writing the Windows 10 Fall Creators Update (version 1709) is the latest version. The Spring Creators Update (version 1803) is expected to roll out in April 2018.

3. Use antivirus

Antivirus is a must-have component on every computer to detect and remove malware before they can compromise your files, affect performance, or crash your device.

However, it's not a piece of software that you install once and never think about again. You must keep it up to date to stay protected against the latest threats, including viruses, worms, ransomware, and other malicious code.

Windows Defender Antivirus

Out-of-the-box Windows 10 includes the Windows Defender Antivirus, part of the Windows Defender Security Center, and it offers excellent real-time protection from viruses, ransomware, spyware, worms, rootkits, and Trojans.

If you want even more protection, it's also possible to change the Windows Defender Antivirus cloud-protection level on Windows 10.

Third-party antivirus

The Windows 10 built-in malware solution should be more than enough protection for most users. However, there are a lot of third-party security solutions that you can use. Some of them are free and others you have to pay a subscription feed.

If you don't know which one to get, check out our antivirus recommendation guide for Windows 10.

Malwarebytes

If you're using the Windows Defender Antivirus, you can also add Malwarebytes as another layer of defense. Malwarebytes is a popular anti-malware solution that can scan, detect, and remove the toughest malware already infecting your computer.

It's a free tool, and it can be installed alongside the built-in antivirus on Windows 10, but you must periodically scan your device manually. If you're interested, there's a paid version of Malwarebytes that offers real-time protection, the ability to schedule scans, and many other features.

4. Use anti-ransomware

Although viruses remain one of the most common types of malware threats, ransomware attacks are becoming very popular. Ransomware is another kind of malware that's capable of locking you off your device by encrypting all of your files and demanding you to pay a ransom, typically in Bitcoin, to unlock everything (without any guarantee).

Controlled folder access

Starting with the Fall Creators Update, Windows 10 includes an anti-ransomware feature known as "Controlled folder access." This feature not only prevents ransomware from taking over your device and taking your data hostage, but it also blocks other malicious programs from trying to make unwanted changes to your files.

If you're concern about these new types of attacks, you can follow this guide to enable and configure Controlled folder access on your Windows 10 computer.

It's worth noting that this is a security feature part of Windows Defender Exploit Guard, which means that it's only available when using Windows Defender Antivirus.

RansomFree

Alternatively, if Controlled folder access isn't for you, or you're using a third-party anti-malware solution, you can add extra protection against ransomware with third-party tools, such as RansomFree.

RansomFree is a relatively new security software from Cybereason that doesn't use traditional definition updates. Instead, it uses behavioral system analysis to prevent ransomware from taking over your computer.

After it's installed, the tool will stop any suspicious activity that looks like a ransomware attack. Then you'll be prompted to allow or deny the activity. If you deny the activity, then RansomFree will send it to quarantine.

Cybereason's RansomFree is available to anyone free of charge, and you can get it from its official website.

5. Use firewall

Another way to protect your desktop, laptop, or tablet from malware is to use a firewall.

A firewall is a software- or hardware-based program that helps to block malicious attacks from hackers, worms, ransomware, viruses, and other types of malware trying to access your computer from the internet and local network to steal your information.

You'll find a lot of third-party security tools that provide network security protection, but Windows 10 includes a very efficient firewall built-in.

Windows Firewall is usually enabled by default, but it's important to make sure it's working correctly on Windows Defender Security Center> Firewall & network protection, and make sure that each network connection reads "Firewall is on." If it reads "Firewall is off," click the Turn on button. Or click the network connection link, and under "Windows Defender Firewall," turn on the toggle switch.

If you have a third-party solution, make sure to check your software vendor support website to learn the steps to manage your firewall.

6. Use verified apps only

We can't stress this enough. At all cost, avoid downloading and installing apps from unknown sources, always try to download software from their official websites. On Windows 10, whenever possible, only download apps from the Microsoft Store, which have been verified by Microsoft to ensure that they don't include malicious code, and they work as advertised.

If you want to take malware protection one step further, you can enable a feature on Windows 10 to block users from installing classic desktop (win32) programs outside of the Microsoft Store. This option will not only prevent anyone from getting apps from untrusted sources, but it'll also block potentially harmful programs that try to install automatically without your consent.

Alternatively, you can also use a standard user account instead of an administrator account to prevent installing harmful programs or malicious code from trying to execute code using elevated privileges.

However, if your account is the only administrator account on the computer, you don't just want to change the account type to standard. First, you want to create a new administrator account, then from the new account, you want to change your original account type to standard.

Using a limited account, you'll still be able to run applications, but you won't be able to install new programs. You'll be able to change settings, but it'll prevent you from making unwanted changes to other accounts. If a task requires administrator privileges, you'll get a User Account Control (UAC) prompt to provide the username and password of the new administrator account you created to allow the task to run.

7. Create multiple backups

One of the best ways to protect your computer and files from malware attacks is to make regular backups. If you're concern about your files getting compromised, you should always consider creating a least two backups: one to keep offline and another to keep off-site, in the cloud.

Offline backup

Your recovery plan must include a full backup of your system and data to keep offline using an external hard drive or a local network location (for example, Network-attached Storage (NAS)). This is the kind of backup that will ensure you can recover from any malware infection, errors, hardware failure, and accidents.

When it comes to protecting your data, there's no such thing as too many backups. If you can make a backup of the backup that you can store off-site, don't hesitate and just do it.

After creating a full backup, always remember to disconnect the drive and store it in a safe location, or disconnect the network location where you store the backup. This is because if the drive stays online and accessible from your device, malware can still get to it and infect those files too.

If you're running Windows 10, you don't need to get a third-party backup program, as you can use the built-in System Image Backup tool to make a copy of everything on your computer, including files, apps, settings, and Windows installation.

In addition to having a backup of your entire system, File History is another form of offline backup that you can use to create a backup of all your files locally.

Alternatively, if you don't have a lot of files, you could just copy and paste your documents on a USB flash drive regularly.

You should be making a full backup once a day, but if your files don't change very often, you should consider backing them up at least once a week. If you're dealing with business data, you should be making backups at least once or twice a day.

Online backup

An online backup is perhaps one of the best ways to protect your files against malware as well as to protect yourself from data loss as a result of accidental deletion, hard drive failure, and natural disasters.

OneDrive is the simplest online backup solution a Windows 10 user can use, but this solution should only be considered to protect files against hardware failure, theft, or natural accidents. If malware infects your files, OneDrive is likely to sync the modified files rendering them unusable.

It's worth noting that you can recover your data using Version History on OneDrive or File Restore on OneDrive for Business, but in either case, it's a tedious process as you have to recover files one at a time.

Although you can use OneDrive to protect your data, using a third-party online backup service, such as Carbonite or IDrive are more suited solutions. These services let you schedule and trigger backups on demand to prevent uploading infected or encrypted files.

The only disadvantage with most cloud storage services is that they don't offer bare-metal recovery. If that's something you must be able to do, you could create a full backup using the System Image Backup tool, for example, and then upload the package to a paid cloud storage service, such as Amazon Drive, Google Drive, etc.

8. Train yourself

The best tool to protect your system and data is yourself. Usually, a device gets infected with malware and data gets compromised as a result of someone clicking a link on a specially crafted email or a website pop-up, or someone installing an application from an untrusted source.

When checking emails, only open those emails from senders you know, or from senders you're able to identify, and then delete anything that looks suspicious. Typically, you can quickly detect spam emails because they have a lot of grammar errors and typos.

Malware can hide on pop-ups that appear on websites you visit. If the pop-up doesn't look legit, do not click the image or link, just close the window. Sometimes specially crafted pop-ups will be impossible to close, if this is the case, go ahead and just restart your device.

Only use your typical modern web browsers, such as Microsoft Edge, Google Chrome, and Mozilla Firefox. These applications are always getting updated, and they feature excellent built-in security, and most of them can warn you of a potential security problem and keep you away from unsafe websites. If you get a warning, don't try to find a way around it, as there's probably a good reason that it's not letting you load the page.

9. Dealing with a malware infection

If a virus, worm, ransomware, or another type of malware sneaks in, the first thing you want to do is to disconnect your computer from the network. You can do this by unplugging the Ethernet cable, disabling the Wi-Fi adapter, or turning off the router to prevent spreading the malware to other devices.

Then open Windows Defender Antivirus and use the offline scan feature. Alternatively, if you don't have control of your computer, on a different device, use these instructions to create a bootable media with Windows Defender to perform an offline scan to remove the threat.

Many antivirus software supports the ability to perform an offline scan. If you're using a third-party security software, check your vendor support website for the instructions on how to perform an offline scan.

If none of the steps have worked to remove the malware, then you should restore your system using the latest backup available. In the case, you only have a backup of your files, use these steps to do a clean install of Windows 10. After the installation, you'll need to reinstall your applications, re-apply settings, and restore files using the most up-to-date backup.

Finally, if you realize that these instructions are above your pay grade, or you don't have any form of backup, it's now the time to contact a computer professional for help. If you live near a Microsoft Store, you should go to the store to get help. As always, remember that you can use the Windows Central forums to post questions and seek help.

More Windows 10 resources

For more helpful articles, coverage, and answers to common questions about Windows 10, visit the following resources:

How to properly clean your Oculus Rift

$
0
0

Time to bust out the cleaning supplies

It doesn't matter if you're the sole user of your Oculus Rift or if it's the life of the party for you and your friends and family, it's going to get dirty. Oils, grease, fingerprints, and who-knows-what-else are going to end up all over it. Or, I don't know, maybe you took it out in the winter for some cool aesthetic pictures and now need to get that inconvenience dust we call snow off of it! You spent good money on your favorite new toy, so don't let it become a host for bacteria and start showing you some issues. Keep it clean on a regular basis and you'll feel better wearing it. Here's how.

Cleaning the face cushion

The facial interface foam on the headset is soft and comfortable and almost feels like felt. Unfortunately, it's also super absorbent if you start sweating. You will need non-abrasive facial or baby wipes (anything that is safe for skin).

  1. Use your wipe to clean off all fo the rubber and plastic pieces of the Rift.
  2. Use a new wipe to clean off the cloth pieces.
  3. Allow the device to dry COMPLETELY before using again.

If you feel as though your device is too far gone, thankfully you can find replacements for these parts for better hygiene for about 49.99 on Amazon.

See on Amazon

Cleaning the head strap

The vertical and horizontal head straps are going to take on oils from your hair and scalp. If you have multiple people regularly using your headset they're going to need cleaning, too. The same non-abrasive, antibacterial wipes that you use to clean the face cushion can be used to clean the straps. An alternative would be to use a clean cloth, soaked in soapy warm water and wrung out extremely well; wipe the head straps down and then promptly dry them with a clean towel.

Remember to dry the system and allow it to completely dry before next use!

Cleaning the Oculus Remote

Think about the last time you cleaned your TV remote... come to think of it, have you ever cleaned your TV remote? Grease, oils, fingerprints, you name it and it gets all over the remote. A daily wipe with a dry cloth is good maintenance, but a more thorough and careful clean with a non-abrasive, antibacterial wipe would also be a good idea.

If you feel you have ruined them beyond repair you can find a new set on Amazon for about $99.99!

See on Amazon

Cleaning the lenses

No matter how hard you try to avoid fingerprints on your lenses, they're going to end up there. You'll need a can of compressed air, a Q-Tip and a dry microfiber lens. Do not use anything wet or with any sort of alcohol on your lenses.

  1. Use the dry microfiber cloth to start in the center of the lens and wipe in a circular motion until you reach the end.
  2. Do a final swipe of the ring of the lenses.
  3. Use your can of compressed air to gently spray the nook between the headset and the lens to release any compacted dust.
  4. Finally, use your Q-Tip to wipe away the remainder of the dust!

Cleaning the sensor

To clean the sensor (which is a pretty important part of this whole package) use a dry microfiber cloth and wipe carefully in a circular motion to remove any fingerprints, dust, or other grime that may have found its way onto it.

For cleaning the sensor stand, use a dry cloth if you're just looking to remove any dust or other particles; use a non-abrasive, antibacterial wipe if it's in need of a more thorough cleaning.

Cleaning the headphones

Thankfully the headphones to an Oculus Rift are detachable and quite easy to clean. Should they require a little wipe down, use a skin-safe, non-abrasive, antibacterial wipe and a dry paper towel.

  1. Remove the headphones from the Oculus Rift if they are currently attached.
  2. Wipe down the headphones with the antibacterial wipe, be careful not to get the cushions too wet.
  3. Go over it once more with a dry paper towel.
  4. Give the headset a good minute or two to air out before next use! If you got the cushions wet, wait until they've tried completely before use.

If you feel you have ruined them beyond repair you can find a new set on Amazon for about $49.99!

See on Amazon

Extra helpful tips

  • Remove any makeup before putting the headset on, especially stuff like foundation and eyeshadow.

  • Wipe your face with a skin-safe cleansing cloth and let it dry before you play. By doing this, you're not only stopping bacteria and sweat from ending up on the face cushion, you're stopping your pores from clogging with oils while you play.

  • If you plan on some intense, prolonged gameplay, wear a sports headband to keep sweat from dripping down your forehead and into the face cushion.

  • Consider buying a VR headset cover. There are several companies currently manufacturing cotton covers for VR face cushions that are removable and machine washable.

Thoughts?

What are your favorite tips and tricks for keeping your system clean? Let us know in the commnet section below!


How to fix common Plex Media Server issues

$
0
0

Plex

Plex is a great tool for storing and streaming all your music and videos but sometimes issues arise. Here are a few common fixes.

The Plex Media Server is an awesome package enjoyed by millions. Installing the server software on a PC or NAS can turn your home or office into a connected hub that can stream all kinds of media. Unfortunately, things can go wrong, so I rounded up some common issues and solutions that can help you get back on track.

Check for updates

Plex

One thing many people seem to sometimes ignore is updates, be it on the smartphone, PC or on a server. The Plex server is something you're likely to set up and forget, but you really do need to remain on top of things, especially if you encounter a problem that has already been fixed in a newer release. The first step to carry out is a version check. Follow this process:

  1. Log into the server web interface (http://SERVER-IP-ADDRESS:32400).
  2. Click the settings icon in the top-right corner.
  3. Choose the server tab. (The server should automatically check for updates and alert you if one is available.)
  4. Install a later version.
  5. Restart Plex Media Server.

Access the logs

Plex

To get an idea of what's going wrong (and to supply material to better assist you) be sure to download and read through the server logs. Here's how:

  1. Log into the server web interface (http://SERVER-IP-ADDRESS:32400).
  2. Click the settings icon in the top-right corner.
  3. Choose the server tab.
  4. Select help.
  5. Click Download logs.

Suffering with Buffering

Plex

There's nothing worse than having to wait forever for a video to start playing, but this can be caused by a variety of potential issues. Should you be connecting to the network over Wi-Fi, you might want to try a wired connection to see if that remedies the problem. It's also worth checking the devices you're attempting to stream content to and make sure they are up to the job (some TVs may struggle with high-definition content, for example).

Also, check to see what powers the network attached storage (NAS) or device you have the server running on, as this handles all the transcoding (you need a beefy CPU for 1080p and 4K media). Finally, if you're attempting to connect remotely, run a speed test — is the connection the server is running capable of stable upload speeds?

Connection trouble

Plex

No remote access

If you're able to access the Plex server using a client on the same network but are unable to connect outside, the most likely cause of the problem is the router. Universal Plug and Play (uPnP) can be enabled to allow Plex to "talk" with the router and have ports and routes opened up for access from the outside world. Or you can go down the manual route by opening up a port yourself.

How to forward ports on a router differs between manufacturers but the details you need to know are as follows:

  • Type: TCP
  • Port: 32400

This is the required port you need to have open but others can be added for additional Plex services like DLNA.

How to enable remote access in Plex

Cannot access server on LAN

Should you be unable to access the Plex server on the network as well as outside the home or office, you may have a misconfiguration of your NAS, which may include discrepancies between the router or access point and the unit. Double check manual IP assignment to ensure all numbers match (and the IP address you reserved for the NAS is actually available and offered by the router). If all else fails, switch to DHCP to have the router assign the NAS an IP.

Related resources

How to delay the Windows 10 Spring Creators Update while still getting updates

$
0
0

If you're not ready to start using the Windows 10 Spring Creators Update, there are a few ways to delay the new version temporarily.

The Windows 10 Spring Creators Update (version 1803) is scheduled to arrive in April, and during the next several months the Microsoft servers will be busier than usual delivering the new major update to millions of compatible devices.

The update will be slowly rolled out, initially targeting newer devices and then slowly expanding to older and untested Windows computers. This is to ensure a smooth roll-out, and to take care of any showstopper bugs before they reach too many PCs. If you're not ready to deal with a major update, or just want to wait for a while, there are a few ways to delay the Windows 10 Spring Creators Update while still receiving maintenance updates.

In this Windows 10 guide, we'll walk you through three different methods to delay the Spring Creators Update on your device running Windows 10 Pro or Windows 10 Home — All while still being able to receive quality updates to fix bugs and keep your computer and data safe and secure.

How to delay the Windows 10 Spring Creators Update installation

If you're ready to upgrade to the new version of Windows 10, but you just can't install it the minute is ready, you can postpone the installation to a later time or different day using the Settings app.

Pausing updates

To temporarily stop the Spring Creators Update from downloading and installing on your device, do the following:

  1. Open Settings.
  2. Click on Update & Security.
  3. Click on Windows Update.
  4. Under "Update settings," click the Advanced options link.

  5. Turn on the Pause Updates toggle switch.

Once you've completed the steps, quality and feature updates will not download on your computer for up to 35 days since you turned on the option.

Postponing installation

If the new version has already downloaded, and it's ready to install you can postpone the installation to a later time using these steps:

  1. Open Settings.
  2. Click on Update & Security.
  3. Click on Windows Update.
  4. Under "Update settings," click the Restart options link.

  5. Turn on the Schedule a time toggle switch.
  6. Select the time and date you want the upgrade to occur (up to seven days in the future).

If you're planning to install version 1803 the same day, but on a different time, while in Windows Update, you can click the Change active hours link, and specify a time range that you don't want the installation to happen. After applying the settings, the Windows 10 Spring Creators Update will install outside the active hours you've specified.

How to defer the Windows 10 Spring Creators Update installation

If your device is running the professional or enterprise version of Windows 10, you can use the Settings app to defer the feature update for several months. To skip the upgrade on your device running Windows 10 Pro, do the following:

  1. Open Settings.
  2. Click on Update & Security.
  3. Under "Update settings," click the Advanced options link.
  4. Under "Choose when updates are installed," select the readiness level that you want to delay the update:

    • Semi-Annual Channel (Targeted): Defers feature updates up to 365 days since the original release of version 1803.
    • Semi-Annual Channel: Defers feature updates up to 365 days since the update is considered stable for organizations. Usually, this happens four months after a new version becomes available in the Semi-Annual Channel (Targeted) branch.

  5. Select the number of days using the feature update drop-down menu.

After completing the steps, Windows 10 version 1803 won't install until after the date you specified, or until you change the settings. However, no matter which option you choose, your computer will continue to receive fixes and security updates to patch any vulnerabilities with the release you're running.

How to block the Windows 10 Spring Creators Update installation

Windows 10 Home is a more restricted version of the OS when it comes to updates. If you're running this version, you won't find any options in the Settings app to defer the Spring Creators Update, but it's possible to temporarily block the update using a metered connection.

A metered connection is a feature that allows you to reduce the data usage of Windows 10 on capped internet data plans. However, because using a metered connection prohibits the download of updates to save data, you can use this option to block version 1803 from downloading and installing on your PC.

It's never a good idea to skip updates as it can potentially be a security risk, but if you're using Windows 10 Home and really want to block this update, you can temporarily set up your network adapter as metered with almost no risks.

Setting a Wi-Fi metered connection

To set a Wi-Fi connection as metered on Windows 10, do the following:

  1. Open Settings.
  2. Click on Network & Internet.
  3. Click on Wi-Fi.
  4. Click the network connection you use to connect to the internet.

  5. Turn on the Metered connection toggle switch.

Setting a Wi-Fi metered connection

To set an Ethernet connection as metered, do the following:

  1. Open Settings.
  2. Click on Network & internet.
  3. Click on Ethernet.
  4. Click the network connection you use to connect to the internet.

  5. Turn on the Metered connection toggle switch.

Once you've completed the steps, feature updates, as well as quality updates, will no longer download on your computer. However, priority updates to address a severe problem with Windows 10 will continue to download regardless of the settings you use.

As a result of a metered network connection, apps you acquired from the Microsoft Store will stop updating, the Start menu may stop showing live updates in tiles, and offline files may stop syncing to the cloud automatically.

At any time, you can use the instructions outlined above to remove the block, but on step No. 5, make sure to turn off the Metered connection toggle switch.

If you're concerned about missing security updates and fixes while using a network connection as metered, you can periodically check the Windows 10 support website to find out if there's a new quality update available. If an update is available, you manually install Windows 10 updates.

Wrapping things up

Although this guide outlines several methods that you can use to delay Windows 10 version 1803 on your computer, these are not steps meant to discourage you from discarding the update entirely.

Updates are extremely important to maintain the health of your machine, keep your data safe with new security enhancements, and start taking advantage of new features that can make you more productive. However, it's also true that during the early days, you may want to consider deferring a new release to evade potential unknown issues that could negatively affect your experience.

This is something that Microsoft knows, and in order to provide the best experience possible, the company never pushes significant updates to every device at once. Instead, rollouts happen slowly in stages, and updates take several months to ship to business customers.

It's worth noting that temporarily delaying a new version of Windows 10 is not a significant security risk either. If this was the case, computers that aren't initially compatible, and organizations that need to wait even longer to deploy new updates would be a risk, and that wouldn't be a good experience.

Typically, new versions of Windows 10 are supported for at least 18 months, and while the release you're using still supported, it'll continue to receive maintenance updates to patch security vulnerabilities, fix problems and compatibility issues, and improve performance.

Are you planning to upgrade immediately or are you delaying the Windows 10 Spring Creators Update? Let us know in the comments.

More Windows 10 resources

For more helpful articles, coverage, and answers to common questions about Windows 10, visit the following resources:

How to use NVIDIA Ansel to capture perfect gaming screenshots

$
0
0

Take your digital memories to the next level with NVIDIA Ansel – a free tool for professional in-game screenshots.

While today's games look better than ever, you're likely not capturing their full potential from screenshots alone. NVIDIA's Ansel technology helps any gamer take professional in-engine captures, rivaling those of game developers themselves. Here's what you need to know about the technology and how to get started.

See our ultimate GPU buyer's guide

What is NVIDIA Ansel?

Ansel is NVIDIA's dedicated application for capturing in-game screenshots, offering direct integration into your PC games for increased flexibility. Only a keyboard shortcut away in supported titles, Ansel integration makes it easy to set up and tweak screenshots without leaving the game. Packing a specialist toolset to help screenshots look great as can be, it's the perfect companion for a digital photographer.

Support for NVIDIA Ansel is baked in by developers, meaning the application hooks directly into the game's engine for improved versatility. When activated, shots can be repositioned and reangled, with all changes rendering in real time. A variety of post-processing effects are available too, allowing for fine tuning of image properties. Other benefits include the ability to output screenshots at a higher resolution than your display and create immersive 360-degree panoramas.

Getting started with NVIDIA Ansel

Before using NVIDIA Ansel, you'll need to check your PC is up to specification. As an NVIDIA technology, the application is only available to a subset of its graphics cards. Fortunately, supported cards range from high-end desktop solutions to notebook chips, spanning a variety of devices currently on the market. You'll also need to accompany this with the latest Game Ready Driver via GeForce Experience. Below is a complete list of NVIDIA cards with Ansel support:

Going forward, we can expect future graphics card releases from NVIDIA to support Ansel at launch.

Using NVIDIA Ansel

If your PC meets the requirements, you'll now be ready to use Ansel on your PC. However, with developers manually adding support for the feature, adoption is limited to a small pool of titles. While the list continues to grow, most blockbuster releases don't offer Ansel integration right now.

Where you buy games also factors into whether Ansel is available, with Microsoft Store titles restricted by limitations of the Windows Universal Platform. Below is a complete list of titles with support for Ansel as of publication:

  • Agents of Mayhem
  • ARK: Survival Evolved
  • ATOM RPG
  • Aven Colony
  • Bulletstorm Full Clip Edition
  • CAT Interstellar
  • CHKN
  • ClayBook
  • Conqueror's Blade (Zhan Yi)
  • Conan Exiles
  • Dark and Light
  • Dishonored 2
  • Fade to Silence
  • For Honor
  • Formula Fusion
  • Hellblade: Senua's Sacrifice
  • Kona
  • Mass Effect Andromeda
  • Middle-earth: Shadow of War
  • Mirror's Edge™ Catalyst
  • Nioh: Complete Edition
  • Obduction®
  • Paragon
  • PixArk
  • Pro Evolution Soccer 2018
  • Raiders of the Broken Planet - Prologue
  • Snake Pass
  • Tekken 7
  • The Witcher 3: Wild Hunt
  • The Witness
  • Tom Clancy's Ghost Recon Wildlands
  • Transformers Online
  • War Thunder
  • Watch_Dogs 2
  • WRC 7 FIA World Rally Championship

If your chosen game is among the list of supported titles, you'll now be ready to take advantage of its toolset. At any time while in-game, press "Alt + F2" to automatically pause and open the Ansel control panel. From here, it's your chance to get creative with its offerings.

Over to you

Have you used NVIDIA Ansel on your PC? Make sure to drop into the comments section and share your thoughts on the application.

NVIDIA GeForce MX150 graphics card: Everything you need to know

$
0
0

NVIDIA GeForce MX150 GPU: Everything you need to know

The NVIDIA MX150 packs a considerable punch. But what can it actually be used for?

NVIDIA's lineup of discrete graphics chips (GPU) for notebooks hasn't gone stale, with the GeForce MX150 effectively replacing the aging GeForce 940MX. It was announced about a year ago, but it's starting to show up in more and more high-profile laptops, like Samsung's 15-inch Notebook 9, Huawei's MateBook X Pro, and the ASUS ZenBook. The MX150 also promises considerably increased performance over integrated processor (CPU) graphics, but what can it actually be used for? Let's take a look.

See our laptop buyer's guide

What does the NVIDIA MX150 replace?

NVIDIA GeForce MX150

The NVIDIA GeForce MX150 with 2GB of GDDR5 VRAM is primarily intended to replace the GeForce 940MX, which can still be commonly found in many laptops. In general, the new discrete GPU is about 25 percent more powerful than the older model. The MX150's Pascal architecture allows (in many cases) for a lower or similar thermal design point (TDP) without sacrificing any of the 384 CUDA cores, and it also has support for newer APIs.

This is essentially the mobile version of NVIDIA's GT 1030 desktop GPU, an enticing low-cost product intended to add a bit of graphics acceleration to your home PC.

Is the NVIDIA MX150 meant for gaming?

Is the NVIDIA MX150 meant for gaming?

Make no mistake, the MX150 is not intended as a high-end gaming chip, though it can certainly provide an enjoyable experience. A lot of well-optimized, popular games should be more than playable (as long as the rest of your hardware can keep up) at 1080p, but don't expect to hit 144 frames-per-second (FPS) in PlayerUnknown's Battlegrounds with ultra settings. For an idea of how well an MX150 performs with some of the most popular games today, check out this video from YouTube user yasin erkan:

In most cases, 30FPS can be averaged as long as you don't mind tweaking in-game settings to sacrifice a bit of detail. For a low-cost option, I'd say this is certainly acceptable performance.

NVIDIA didn't just market the MX150 for play; you're going to get the same performance boost for video and photo editing apps, making it a suitable piece of hardware for anyone who often needs to make some quick edits when they're on the go.

How does the NVIDIA MX150 compare to other hardware?

How does the NVIDIA MX150 compare to other hardware?

Benchmark testing reveals the promised performance boost over the 940MX. With the 15-inch HP Spectre x360 using a 940MX, a Geekbench CUDA test brought back a score of 28,868. In comparison, the new Samsung Notebook 9 with MX150 brought back a score of 48,536.

Testing with Geekbench OpenCL, the 940MX in Lenovo's IdeaPad 320S got a score of 30,539, while the MX150 in Acer's Aspire 5 got a score of 45,812.

While it's certainly a step up against the previous mobile GPU, the MX150 begins to pale even against the full-sized but low-end GTX 1050. You can expect a Geekbench CUDA score somewhere around 80,000 for a GTX 1050, which is almost double the score of the MX150.

Buying an NVIDIA MX150

NVIDIA GeForce MX150

Unfortunately, not all MX150 GPUs are the same, and NVIDIA hasn't really been clear on a designation. Reported by Notebookcheck, MX150s come in 25W and 10W variants, each with a considerable difference in performance.

To save room, some slim Ultrabooks are receiving the 10W chip that has "1D12" in the device ID. This chip has, in some cases, up to 25 percent less performance than the standard 25W chip, which has "1D10" in the device ID.

MateBook X Pro using the 10W MX150

Our own testing of the Huawei MateBook X Pro (using the 10W chip) and the Samsung Notebook 9 (using the 25W chip) shows a big difference in performance. The former received a Geekbench CUDA score of 41,593 compared to the latter's score of 48,536.

The bottom line here is that if you're in the market for a laptop with an MX150 inside and want the best performance possible, do some research to ensure you're getting the 25W version.

As for comparing notebooks with full-sized GPUs, it really comes down to price. If you can find a laptop with a GTX 1050 inside for a similar price as one with an MX150, know that you'll be getting considerably more performance from the former device. The performance gap with 10-series GPUs only increases from there.

If you're an AMD fan, you can likely find a laptop with a comparable Radeon RX 540 for a bit cheaper depending on the CPU and other hardware inside. The RX 540 is a real performer in the right circumstances, though it's commonly paired with an ancient CPU that can't stand up to an MX150 and eighth-gen Intel Core CPU combo. Best thing to do is read plenty of reviews before making a final decision.

More resources

Check out these other links for more information about GPUs!

How to install and upgrade GPU drivers on Windows 10

$
0
0

GTX 1070

Do not ignore new GPU driver updates. Keep your PC games running as the developer intended with this guide.

GPU drivers are incredibly important to have installed and up to date, to ensure your graphics cards work as intended and you avoid encountering issues in PC games. A GPU driver is essentially software that handles communication between Windows 10, games and applications, and the graphics card component. It's very important.

Luckily, regardless as to whether you're an NVIDIA fan or on team red with AMD, it's easy to install drivers with a new GPU and keep them updated.

AMD GPU drivers

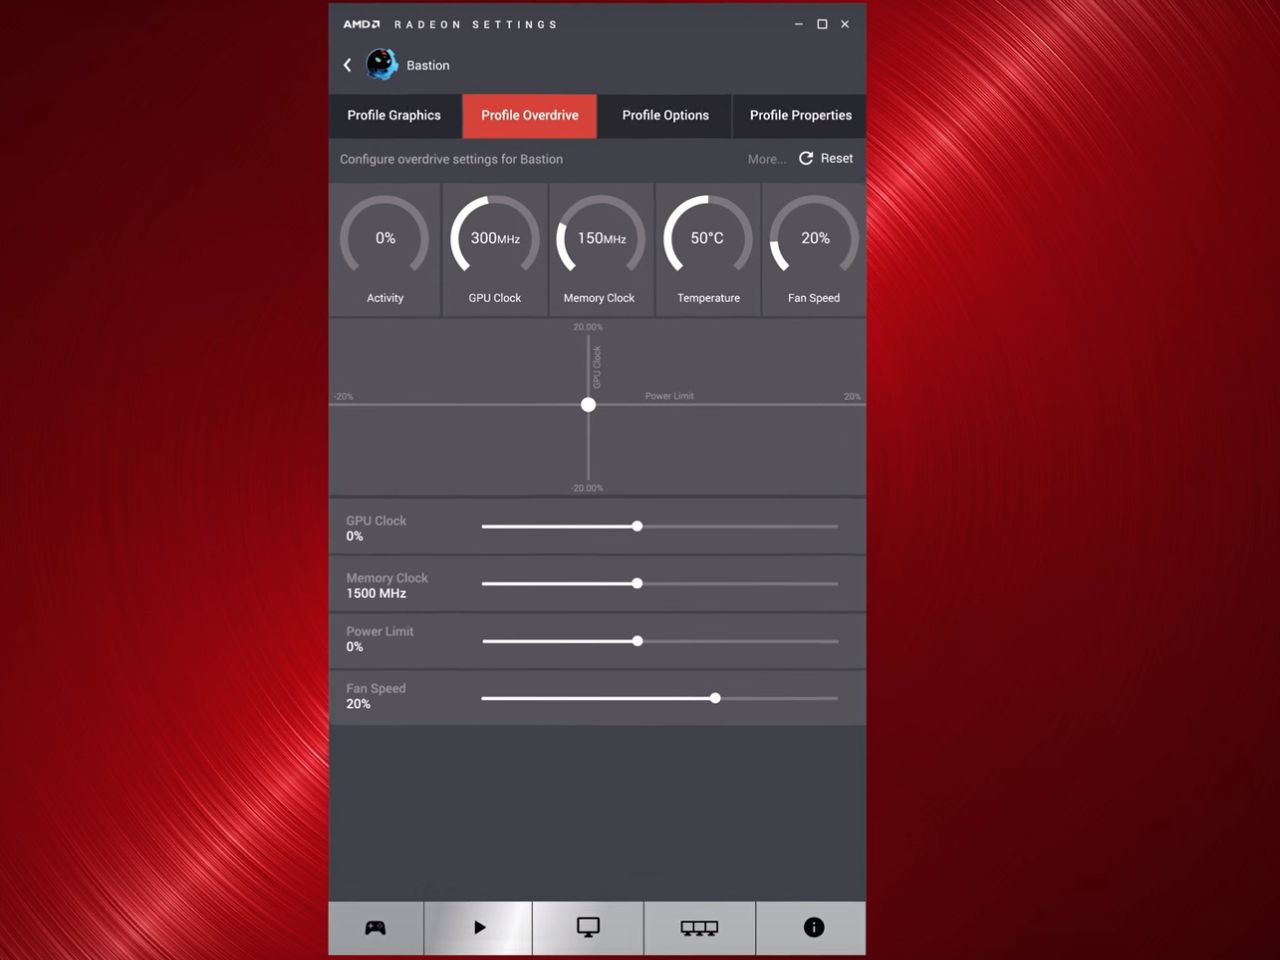
AMD Radeon Software

AMD uses the new Radeon Software to manage drivers, GPU settings, and game-specific options. Downloading and installing the software is straightforward, and if you're not sure of the GPU you have, AMD offers an auto-detect utility that can point you in the correct direction.

Checking for updates within Radeon Software can be achieved by opening up the suite and clicking on the update button in the lower left-hand corner of the window. The software will periodically check for updates and alert you with a notification, which can serve as a shortcut to the update process.

NVIDIA GPU drivers

NVIDIA GeForce Experience

NVIDIA's current software package is a strange one. Like AMD, the company has rolled out an updated suite that looks modern and fresh but bundles it with the older settings app, so you have two places to manipulate settings. Installing the driver can be achieved by heading to the NVIDIA website and either downloading the detector tool or specifying the GPU you have installed.

To check for updates, you'll need to launch the GeForce Experience app, since the traditional settings area does not sport this feature. With the GeForce Experience window open, choose the Drivers tab at the top and hit "check for updates." If an update is available it'll be displayed below with a button to install.

Related resources

How to get the best visuals from your Xbox One

$
0
0

Push the most out of your Xbox One with these tips for display settings and calibration.

The Xbox One cuts out the complexities of gaming, with a seamless setup and gaming experience. Unbox it, plug it in, walk through a few steps of set up, and then you're good to go, with games, movies, and more just a few button presses away.

But to truly get the most from your Xbox One, you'll need to take a deeper dive into the console. Jumping into its settings and tweaking just a few options, you may be able to squeeze the most from your console's power.

See at Microsoft StoreSee at Amazon

Understanding your console

Microsoft has sold three revisions of the Xbox One over its four years on the market. Each major revision of the console has delivered various visual enhancements, with its current flagship, the Xbox One X, leading the family. The Xbox One X supports 4K resolutions for both games and videos, while also supporting High Dynamic Range (HDR).

Xbox One S is the current entry-level console, delivering a middle ground between Xbox One X and the base unit. This console supports HDR across all supported content but only delivers 4K for video.

The original Xbox One is no longer sold by Microsoft, yet still makes up a sizeable portion of the install base. This console is limited to 1080p resolution and doesn't offer support for HDR.

The ultimate Xbox One buyer's guide

Choose the right resolution

While the Xbox One packs cutting-edge visuals for games and video, it's important to choose the right resolution settings for you. Making sure the output resolution of your console matches the maximum supported by your console ensures you're leveraging its full potential.

To get the most of your Xbox One X and Xbox One S, 4K resolution can be enabled on compatible displays. Following the Xbox Spring Update, support for 1440p monitors is available too, alongside existing 1080p and 720p compatibility. By selecting the maximum supported resolution, you'll be getting the sharpest, most defined image possible.

  1. Connect your Xbox One directly to your TV or monitor over HDMI. Avoid using any HDMI switches and splitters to prevent throttling your maximum resolution.
  2. Open the Settings app on your Xbox One.
  3. Navigate to the Display & sound tab.
  4. Select the Video output tile.
  5. Choose the maximum supported resolution for your display.

Check HDR is enabled

Both the Xbox One X and Xbox One S offer support for High Dynamic Range (HDR), serving up a wider color gamut and increased contrast ratio. Offered across a growing range of gaming and video content, colors truly pop with the feature enabled.

The Xbox One's HDR support is limited to HDR10– an open standard supported by a majority of modern high-end displays. However, even with the right display, many unknowingly lose out on HDR content due to the default manufacturer settings. We previously compiled a guide on setting up 4K HDR displays with Xbox One consoles, with specific breakdowns for popular brands.

How to enable HDR for Xbox One X on popular 4K TVs

Choose the best color depth

The color depth setting indicates the number of bits used per pixel to represent on-screen colors. Essentially, when set to a higher value, your Xbox One will output a wider range of colors, with more incremental steps between color values.

Xbox One consoles can output signals at 24 bits per pixel (8-bit), 30 bits per pixel (10-bit) and 36 bits per pixel (12-bit), and while higher is often better, don't mindlessly crank up the value to the maximum. Both your TV and game content set limitations on how significantly increased color depth is reflected on screen, with most consumer displays not supporting 12-bit video. While HDR10, the standard used by Xbox One X, requires a 10-bit panel, many without HDR support only offer 8-bit.

  1. Open the Settings app on your Xbox One.
  2. Navigate to the Display & sound tab.
  3. Select the Video output tile.
  4. Select the Video fidelity & overscan tile.
  5. Choose your Color depth from the available options.

Push the best with a PC monitor

Xbox One also allows players to customize the color space of the console, with "Standard (recommended)" and "PC RGB" settings available. Relating to different color spaces, this determines the which colors are displayed, according to your display's supported space.

While PC monitors are built to output "RGB Full," TVs are often built to output a narrower space, known as "RGB Limited." By changing this option, you'll be changing how the video signal is sent from your console and colors are represented by your TV.

Even though it might make sense to display the full RGB range regardless, using this on many TVs results in an unwanted side effect known as "black crush." When attempting to output full RGB, darker parts of images can lose detail, making certain scenes much harder to view. In short, PC RGB can be recommended for some PC monitors, though for many, especially those on TVs, the recommended standard setting should be used.

  1. Open the Settings app on your Xbox One.
  2. Navigate to the Display & sound tab.
  3. Select the Video output tile.
  4. Select the Video fidelity & overscan tile.
  5. Choose your Color space from the available options.

Get smoother gameplay

Variable refresh rates (VRR) are seeing increased adoption among PC gamers, reducing screen tearing, making for overall smoother gameplay. Unlike software solutions for screen tearing such as "V-Sync," VRR allows for a direct communication with your monitor, adapting its refresh rate on the fly.

Following the Xbox Spring Update, VRR is available for Xbox One in the form of AMD's in-house FreeSync technology. When connected to a display compatible with FreeSync over HDMI, you'll see noticeably smoother gameplay across certain titles. FreeSync is available on all three Xbox One models, while FreeSync 2 with HDR is limited to Xbox One X and Xbox One S.

Xbox One FreeSync and Variable Refresh Rates: Everything you need to know

Fixing the finer details

After configuring the video settings for your Xbox One, you'll want to find a reliable way to test if they're for you. A calibration tool hidden away within the console's settings is the best way to do so, allowing you to check that both your console and TV settings are displaying images correctly. This can be found within the Settings app, under Display and Sound > Video output > Calibrate HDTV.

It's important that this calibration tool is run after completing all aforementioned steps and used to fine-tune your TV's settings for improved compatibility. By doing so you'll be getting the best out of your TV, while also accounting for external factors, such as lighting conditions. This provides a more accurate representation of on-screen images, closer to those intended by developers.

Through the process, you'll be given prompts to change your display's color settings, brightness, sharpness and other display traits. If correctly configured, you should be getting some of the best results out of your Xbox One. And while discreet at times, this makes for the most consistent experience you can get.

Over to you

If you have any further tips for pushing the most from your Xbox One, drop into the comments with your thoughts.

See at Microsoft StoreSee at Amazon

Best FreeSync monitors for Xbox One

$
0
0

Keep your Xbox One games smoother than ever with these FreeSync monitors.

The Xbox Spring Update brings a range of new display features to all Xbox One consoles, including support for Variable Refresh Rates via AMD's FreeSync. Establishing a direct connection with your console, FreeSync monitors can adjust refresh rates on the fly, reducing screen tearing and stuttering for games.

To take advantage of FreeSync for Xbox One, you'll need a compatible monitor. While hundreds of FreeSync displays are on the market, Xbox One consoles are limited to a subset with HDMI support. We've rounded up our top FreeSync monitors for Xbox One across a range of price points.

Xbox One FreeSync and Variable Refresh Rates: Everything you need to know

Samsung C32HG70

Leading the pack is Samsung's C32HG70, a 32-inch vertical alignment (VA) monitor sporting a variety of features complementing the Xbox One X and Xbox One S. While it doesn't offer 4K, both consoles can take advantage of its 1440p resolution following the Xbox Spring Update.

What makes this monitor stand out is FreeSync 2 support – the latest revision with various improvements upon AMD's original specification. This allows for High Dynamic Range (HDR), with a wider gamut of colors and increased contrast ratio over traditional images. Paired with this monitor's HDR10 compliance, you'll see sharp, popping colors across supported Xbox One titles. This monitor offers a 48-100Hz frequency for FreeSync over HDMI, going above and beyond the Xbox One's current capabilities.

With only a few FreeSync 2 displays currently on the market, we'll have to wait some time until more surface. While the 32-inch C32HG70 is recommended at $549.99 from Amazon, a 27-inch model is also available for $532.80.

See at Amazon

LG 32UD89

The LG 32UD89 has a high price tag but is among the best FreeSync IPS monitors on the market today. Boasting 4K resolution at 60 Hz over HDMI, you'll be getting a crisp and equally smooth experience across your Xbox One library. Paired with a premium build, its display is encased with thin bezels, sits on a stand with adjustable pivot and height and offers a USB-Type C input for more devices.

FreeSync is supported across this monitor's HDMI ports, with a 40-60Hz frequency while connected to Xbox One. If the lack of HDR isn't a dealbreaker, the LG 32UD89's complete feature set is hard to beat. The LG 32UD89 is available for $799.99 via Amazon.

See at Amazon

HP ENVY 27

Dropping in screen size without comprising resolution, the HP ENVY 27 is an ideal 4K display for smaller setups. This IPS monitor comes in at 27 inches, supporting up to 4K resolutions at 60 FPS.

Alongside a 5ms response time, this display serves up a 40-60Hz frequency for FreeSync over HDMI. This monitor's stylish looks also can't be ignored, rocking thin bezels, a sleek metallic frame, and detachable stand. The HP ENVY 27 is available from Amazon starting at $399.99.

See at Amazon

Acer KG270

Xbox One and Xbox One S gameplay is restricted to 1080p resolution, meaning a majority of high-end displays will go to waste. Dropping to 1080p, the Acer KG270 compiles a variety of premium features into a package that won't break the bank.

This 27-inch twisted nematic (TN) display is designed for FreeSync over HDMI, with two compatible ports and a VGA input on the rear. With a 1ms response time and frequency topping out at 75Hz, you'll be getting a responsive and smooth FreeSync experience. The Acer KG270 can be found at the low price of $182.38 at Amazon.

See at Amazon

LG 24MP59G

Just because you're on a budget doesn't mean FreeSync isn't for you. With adoption rapidly increasing among manufacturers, devices like LG's 24MP59G are a great way to experience the technology on the cheap. This 24-inch IPS display supports FreeSync over a 40Hz to 75Hz frequency at 1080p resolution. With a low response time and various software features to aid gamers, this is a great entry point into the FreeSync range.

While the 24-inch display comes in at just $149.99 at Amazon, a slightly larger 27-inch model is available for $180.07.

See at Amazon

Over to you

Know any FreeSync monitors you want to see on this list? Drop into the comments section below and share your top picks.


How to fix the most common Oculus Rift error codes

$
0
0

How to fix the most common Oculus Rift error codes

Take a look at how to fix some of the most common error codes encountered.

Oculus Rift is a top-tier VR headset, but that doesn't mean you won't occasionally see an error code pop up. There is no official list of error codes and how to fix them, but I scoured the internet and came up with a list of some of the most common ones out there. Best part: there are fixes.

See Oculus Rift at Microsoft Store

Error code 7

This is an error that occurs when attempting to install the Oculus app on your PC. It has something to do with permissions out of whack, and the fix that seems to work for a lot of people involves reordering permissions through your PC's registry.

Note: Remember, dealing with your registry can go awry, so always create a backup of your PC before making any changes.

  1. Right-click the Start button.
  2. Click Search.
  3. Type regedit and hit Enter on your keyboard.

    Click Search. Type regedit.

  4. Double-click HKEY_LOCAL_MACHINE.
  5. Double-click SOFTWARE.

    Double-click HKEY_LOCAL_MACHINE. Double-click SOFTWARE.

  6. Double-click WOW6432Node.
  7. Double-click Oculus VR, LLC.

    Double-click WOW6432Node. Double-click Oculus VR, LLC.

  8. Right-click Oculus.
  9. Click Permissions.

    Right-click Oculus. Click Permissions.

At this point, a small window should appear asking you if you'd like to reorder permissions. Click OK, click OK again when the process is complete, then attempt to install the Oculus app again.

Error code 43

This error pops up when attempting to update the firmware of your Rift. One potential fix seems to involve reinstalling your USB drivers.

  1. Right-click the Start button.
  2. Click Device Manager.

    Right-click the Start button. Click Device Manager.

  3. Double-click Universal Serial Bus controllers.
  4. Right-click the top option in the dropdown list.

    Double-click Universal Serial Bus controllers. Right-click the top option.

  5. Click Update driver.
  6. Click Browse my computer for driver software.

    Click Update driver. Click Browse my computer for driver software.

  7. Click Let me pick from a list of available drivers on my computer.
  8. Click the option in the Model pane of the window.

    Click Let me pick from a list of available drivers on my computer. Click the option in the Model pane.

  9. Click Next.
  10. Click Close.

    Click Next. Click Close.

You now want to repeat steps 4-10 with each item in the Universal Serial Bus controllers dropdown list.

Error code 3000

You will no doubt only see error code 3000 if you're running a Kepler NVIDIA card and attempt to enable Asynchronous Spacewarp (ASW). As it stands now, only Maxwell and Pascal NVIDIA GPUs support ASW.

Error code 8602

The 860X errors all seem to stem from sensor/USB issues. In this case, it's something to do with your PC not being able to recognize all sensors at once. A possible fix is to plug them in one at a time and run the sensor setup through the Oculus app.

  1. Unplug all sensors from your PC.
  2. Launch the Oculus app from your Start menu, taskbar, or desktop.
  3. Click Devices.

    Launch the Oculus app. Click Devices.

  4. Click Configure Rift.
  5. Click Sensor Setup.

    Click Configure Rift. Click Sensor Setup.

  6. Click Continue.
  7. Plug one sensor into a USB port.
  8. Click Try Again.

    Click Continue. Click Try Again.

Your first sensor should be detected and a green OK should appear next to it in the list. Plug in the next sensor and let it be detected before continuing.

Error code 8603

Many people experience this issue after rearranging their room-scale setup. Why? It usually involves unplugging your Rift's sensors. Upon being plugged back in, one might throw the 8603 error code. There's no certain fix here, and unplugging the sensor and plugging it back in until the error goes away seems to be the best option.

Error code 8606

Another tracking/sensor error, code 8606 has been solved by cleaning the face of the sensor in question (you might as well clean all of them), but it's also been solved by plugging the sensors into different USB ports on the PC.

For example, if you have two or three sensors all plugged into the same USB 3.0 hub on the back of your PC, try unplugging one and using a USB port on the front of the PC. Even if it's a USB 2.0 port, it might solve the problem.

Error code 8609

Error code 8609 is seen frequently by people who have extended their sensor's USB cable. It likely has something to do with an insufficient amount of power reaching the sensor.

However, others without cable extensions have also seen this error when setting things up. One possible problem is that not all sensors can see the head-mounted display while the setup is running. Place the HMD in the middle of the VR space and try going through the setup again.

  1. Launch the Oculus app from your Start menu, taskbar, or desktop.
  2. Click Devices.

    Launch the Oculus app. Click Devices.

  3. Click Configure Rift.
  4. Click Full Setup.

    Click Configure Rift. Click Full Setup.

Error code 197100

This error usually occurs when you're trying to run through a full setup, as in from scratch. The problem is that not all connected sensors can see your Rift headset. Try repositioning the sensors or headset and ensure nothing is blocking the line of sight.

If you have, say, Christmas lights set up in the same room (or any other direct source of light) try turning them off for the time being. Many people have been thrown off by extra lights messing with IR!

Error code OVR18154622 or OVR89313696

When downloading new experiences, you might notice that they aren't actually downloading and are instead sitting in a queue. Attempting to force any experiences in the queue to download then results in an internal error with either code OVR18154622 or OVR89313696.

There's no concrete reason why this occurs, but a fix involves signing out of the Oculus app.

  1. Launch the Oculus app from your Start menu, taskbar, or desktop.
  2. Click your username in the bottom-left corner.
  3. Click the More button in the top-right corner.

    Click your username. Click the More button.

  4. Click Sign Out.
  5. Click Sign In.

    Click Sign Out. Click Sign In.

  6. Type your credentials.
  7. Click Sign In.

    Type your credentials. Click Sign In.

This should kick your download queue into gear. If it doesn't, try restarting your PC between signing out and signing in.

More troubleshooting

Have another problem with your Rift? Be sure to check out the full VRHeads troubleshooting guide.

Oculus Rift troubleshooting guide

How to batch rename multiple files on Windows 10

$
0
0

When you have to rename a lot of files in a folder, it can be tedious changing the names one at a time, but Windows 10 offers various ways to make this process easier.

On Windows 10, renaming a single file is a straightforward process, but it can quickly become a laborious task when you need to change the name or extension of a long list of files inside of a folder.

Although you can use many third-party tools to get this job done, Windows 10 provides some ways to quickly rename multiple files using File Explorer, and even with more flexibility using a single command with PowerShell and Command Prompt.

In this Windows 10 guide, we walk you through three different ways to quickly rename multiple files without third-party tools.

How to rename multiple files using File Explorer

Using File Explorer, you can select a file and hit the "F2" key to rename it, but this experience also allows you to quickly rename multiple files in bulk in at least two different ways.

Renaming multiple files using the Tab key

If you want to rename multiple files quickly with different names, you can use these steps:

  1. Open File Explorer.
  2. Browse to the folder that includes all the files you want to rename.
  3. Select the first file in the list.
  4. Press the F2 key to rename it.

    Quick Tip: Alternatively, you can click the Rename button in the "Home" tab. You can right-click the file and select Rename. Or you can click the file and then click it again to rename it.

  5. Type a new name and press the Tab key to jump to the next file automatically.
  6. Type a new name for the file and press the Tab key again to continue renaming files.

Renaming multiple files in bulk

If you need to rename multiple files at once using the same name structure, you can use these steps:

  1. Open File Explorer.
  2. Browse to the folder that includes all the files you want to rename.
  3. Select all the files.

    Quick Tip: You can use the Ctrl + A keyboard shortcut to select all the files. You can press and hold the Ctrl key and then click the files you want to rename. Or you can select one file and press and hold the Shift key, and then click the last file to select a range of files.

  4. Press the F2 key to rename it.
  5. Type a new name for the file and press Enter.

As you enter the new name and press the Enter key, all the selected files will be renamed using the same structure. However, you'll notice that they will use a different number between parentheses. For example, nyc_trip (1).jpg and nyc_trip (2).jpg.

How to rename multiple files using Command Prompt

It's also possible to the use the ren (or rename) command to change the name of a single file as well as multiple files and extension in bulk.

Use these steps to open Command Prompt in the desired folder location with the files you want to rename:

  1. Open File Explorer.
  2. Browse to the folder that includes all the files you want to rename.
  3. In the address bar, type cmd and press Enter.

    Quick Tip: You can follow these steps to return the "Open command windows here" option to the Windows 10's context menu.

While in the folder location, you can use the ren or rename command to bulk rename your files in a number of ways:

Renaming a single file

To rename only one file, use the following command syntax and press Enter:

ren "old-filename.txt""new-filename.txt"

Command syntax example:

ren "nyc_trip_notes.txt""nycTripNotes.txt"

It's worth noting that you can run the command without the quotation marks, but they're required if you're trying to change the name of the file that includes one or multiple spaces.

Renaming multiple files

To rename multiple files, use this command syntax and press Enter:

ren *.ext1 ???-new_filename_part.*

Command syntax example:

ren *.jpg ???-hikingTrip.*

In the command syntax example, the asterisk (*) is a wildcard that tells the ren command to match everything with a .jpg extension. The question mark (?) is also a wildcard, but it represents a character of the original file name. So, in the syntax, we're using three question marks, which means that the output file name will include the first three characters of the original file (which works as a unique identifier to avoid duplication) plus whatever name you're using after the question mark.

For instance, if you're renaming mountain-day2.jpg and lake-day3.jpg, using this command syntax, the output will look like this: mou-hikingTrip.jpg and lak-hikingTrip.jpg.

Making filenames shorter

In the case that you have a long list of files using long names, and you simply want to make them shorter, you can use this command syntax:

ren *.* ?????.*

In the command syntax example, the asterisk (*) matches all the file names and extensions in the folder, and the question marks (?) indicates how many characters to use for the file name. In this case, if the file name is less than five characters, then the name will not change. (If you want to make the file name longer add extra question marks.)

Changing part of the file name

To rename part of the file name on similar files, use the following command syntax structure and press Enter:

ren old_filename_part*.* new_filename_part*.*

Command syntax example:

ren nyc_*.* newYork_*.*

The command syntax example changes the first four characters of all files beginning with "nyc_" to "newYork_." For example, running the above command, the nyc_trip (1).jpg and nyc_trip (2).jpg files will be renamed to newYork_trip (1).jpg and newYork_trip (2).jpg.

Changing files extension

If you have a lot of files with a particular file extension, and you want to change it to another compatible extension, you can use the following command:

ren *.ext1 *.ext2

Command syntax example:

ren *.txt *.doc

The command syntax example changes the .txt file extension to .doc format of all the files in the folder.

In the case that you're only changing the extension of a single file, you don't need to use the wildcard (*). Here's a command syntax example: ren old_filename.txt new_filename.doc

Renaming files with a specific file extension

The Command Prompt command syntax examples shown above will rename all the files within the location. However, if you simply want to rename a particular file format, such as documents, images, or videos, you need to specify the extension in the command.

For instance, using the ren nyc_*.* newYork_*.* command will rename all files in the folder. If you want to rename only images files with a .jpg extension, you can use the following command syntax and press Enter: ren nyc_*.jpg newYork_*.jpg.

How to rename multiple files using PowerShell

PowerShell is an advanced command line tool built into Windows 10, which allows you to manipulate filenames in numerous ways. However, in these instructions, we'll walk you through the most common scenarios to rename one or multiple files in bulk.

To open PowerShell in the location that contains the files you want to rename, use the following steps:

  1. Open File Explorer.
  2. Navigate to the folder with the files you want to rename.
  3. Click and hold the Shift key, right-click an empty space in the folder, and select the Open PowerShell window here option.

While in the folder location, you can use the Dir command to list the files along with Rename-Item command with different options to batch rename your files in a number of ways:

Renaming a single file

To rename only one file, use the following command:

Rename-Item "original_filename.ext1""new_filename.ext1"

Command syntax example:

Rename-Item "nyc_trip_notes.txt""nycTripNotes.txt"

You can run this command without the quotation marks, but they're required if you're trying to change the name of the file with one or multiple spaces.

Renaming multiple files in bulk

To rename multiple files in bulk when the name structure isn't important, use this command syntax and press Enter:

Dir | %{Rename-Item $_ -NewName ("new_filename{0}.ext1" -f $nr++)}

Command syntax example:

Dir | %{Rename-Item $_ -NewName ("nyc_trip_{0}.jpg" -f $nr++)}

If you run the command syntax all the images with a .jpg extension will be renamed using the same structure. However, you'll notice that they will use a different number at the end of the name. For example, nyc_trip_0.jpg and nyc_trip_1.jpg.

Making file names shorter

To make file names shorter, or trim part of the names by an N number of characters, use this command syntax and press Enter:

Dir | Rename-Item -NewName {$_.name.substring(0,$_.BaseName.length-N) + $_.Extension}

Command example:

Dir | Rename-Item -NewName {$_.name.substring(0,$_.BaseName.length-4) + $_.Extension}

In the command syntax example, you'll notice the "$_.BaseName.length-4" part of the syntax that includes number "4" (you can use any number you want) this indicates that the command will trim the name of your files by four characters.

Removing part of the filename

To remove part of the filename on multiple files, use the following command syntax structure and press Enter:

Dir | Rename-Item -NewName {$_.name -replace "old_filename_part",""}

Command syntax example:

Dir | Rename-Item -NewName {$_.name -replace "tower",""}

The command syntax example removes the word "tower" from the name of all files in the folder.

Renaming part of the file name

To rename the same part of the file name on similar file names, use the following command syntax structure and press Enter:

Dir | Rename-Item -NewName {$_.name -replace "old_filename_part","new_filename_part"}

Command syntax example:

Dir | Rename-Item -NewName {$_.name -replace "tower","building"}

The command syntax example replaces the word "tower" for "building" of all the files that contain the word "tower" as part of the file name.

Removing spaces in file names

To remove and replace spaces with underscores, use the following command syntax and press Enter:

Dir | Rename-Item -NewName { $_.Name -replace "","_" }

The above command syntax example replaces any spaces with an underscore of all files in the folder. (You can always change "_" for anything you want, including "-," and "$".)

Changing files extension

To change the file extension for a bunch of files, you can use the following command and press Enter:

Dir | Rename-Item -NewName { [io.path]::ChangeExtension($_.name, "ext2") }

Command syntax example:

Dir | Rename-Item -NewName { [io.path]::ChangeExtension($_.name, "doc") }

The command syntax example replaces the ".txt" extension for the ".doc" extension.

Renaming files with specific file extension

The PowerShell command syntax examples shown above will rename all the files within the location. However, if you simply want to rename a particular file format, such as documents, images, or videos, then you can use the "-filter" option.

For instance, if you want to rename only image files with a .jpg extension, use the following command syntax and press Enter:

Dir -filter *.jpg | %{Rename-Item $_ -NewName ("nyc_trip_{0}.jpg" -f $nr++)}

In the above command remember to replace jpg in the "-filter *.jpg" part with the extension of the files you want to rename. Also, remember to change "new_filename" and "jpg" in the "new_filename{0}.jpg" part with the file name and extension you want to rename your files.

The output of this command will look like this: nyc_trip_1.jpg, nyc_trip_2.jpg and nyc_trip_3.jpg.

These commands have been tested by us, but it's always recommended to test them before running them in the folder with the actual files you want to rename.

More Windows 10 resources

For more helpful articles, coverage, and answers to common questions about Windows 10, visit the following resources:

5 simple steps you can take to fix your own Windows 10 PC

$
0
0

WC Testbench

You don't need to pay big bucks to get your PC fixed by an expert. At least not immediately. Here are a few things you can do yourself.

A Windows 10 PC is designed to last for years, but with all the malicious content available online, advancements in technology, and the off-chance of something going wrong, it can be difficult to keep it running at peak performance all the time. Before you book an appointment at your local PC repair shop, here are a few steps you can follow to try and fix common issues.

I'm not going to help you troubleshoot a PC since there are so many variables involved, but these handy steps should help fix basic issues.

Removing malware

Windows Defender Security Center

Windows 10 comes with the Defender Security Center, which is actually pretty good. If you don't have any commercial software installed, fear not as Microsoft provides tools to run a scan and see if anything has infected your PC — it's also worth noting that this security feature works in the background and should prompt you if anything is automatically detected.

How to use Defender Security Center

But the built-in Windows protection isn't always quite enough and tools like Malwarebytes are a great supplement that can be run periodically, just in case something slips by Defender. Best of all, they're usually available for free.

Bad storage and memory

WD Blue

Hard drive technology advancements and solid-state drive (SSD) storage have made keeping your data safe and secure more convenient than ever. Mechanical drives should last for a few years, depending on use, and SSDs today have a solid lifespan. Still, issues can arise when your storage drive simply fails or starts to slow down to a halt.

Mechanical drives require regular maintenance, including defragmentation to keep them running optimally. If your drive should fail completely (be it mechanical or SSD), there are some ways to recovering your data, which is made easier if you back up regularly— and you totally should.

How to check your PC for RAM issues

Should you not have backups available, there are some software suites (like Data Recovery Technician by R-Studio) that can help recover your data if Windows refuses to detect the drive at all. If all else fails, you may need to ship it out to a data recovery specialist, but this will be costly.

Also, if you happen to be using a mechanical hard drive for Windows 10, you should consider ordering an SSD as a replacement. The improvement in speed and reliability make it worth every penny.

Best SSDs for a Windows 10 PC

Recovering deleted data

Recuva

We've all been there. You deleted a file you didn't mean to and emptied the recycle bin without checking through everything first. Luckily, Windows only deletes the record of said files on the storage drive, not the actual files themselves. This means it's possible to recover the data with a specific tool.

We covered the excellent software suite Recuva in our file shredders roundup, but the tool also allows for the recovery of files. Unfortunately, if the software you download is unable to recover what you've lost, much like a damaged hard drive, you'll need to contact professionals.

How to shred your files permenantly

Time for an upgrade

HP Omen 15

As touched on above, upgrading components yourself can really improve the overall experience. Moving up from a mechanical drive to an SSD for the main Windows 10 partition can make a world's difference.

The same goes for bumping up the amount of available RAM if you frequently find yourself running out or have bad modules.

RMA

Alienware X51

Return merchandise authorization (RMA) is what you can do with a pre-built PC or laptop. If you're having trouble with a system you bought from a retailer, it's possible to arrange the collection of your PC for it to be shipped to the nearest OEM repair center. This is where technicians from ASUS, Acer, MSI, Razer, and other manufacturers can diagnose problems and make repairs.

This is the main advantage of purchasing a pre-built PC over building one yourself. Should you have an issue with a specific component in your custom build, you'll need to contact that company directly and ship out the faulty unit for diagnosis. This is where things can get a little tricky, as you first need to work out exactly what is causing the problem in the first place.

The good and bad of buying a pre-built PC

How to enable Xbox One Auto Low Latency Mode (ALLM)

$
0
0

Here's how to enable Auto Low Latency Mode on Xbox One, following the console's latest update.

Xbox One gained support for various new display options with the Xbox Spring Update, including highly-anticipated features such as variable refresh rates and compatibility for 1440p monitors. This update also begins to establish a foundation for the future with partial integration of HDMI 2.1, adding support for Auto Low Latency Mode (ALLM). Allowing for automatic management of display settings, this ensures the most responsive gaming experience.

When ALLM is enabled, your display's settings can be automatically configured to provide the best experience for specific content. On Xbox One this ensures consistent visuals across different content types while reducing gaming latency.

What you need for Xbox One Auto Low Latency Mode

To take advantage of ALLM on Xbox One, the connected TV or monitor must also support the feature. ALLM is tied to the HDMI 2.1 revision, finalized by the HDMI Forum in November 2017. However, displays with compatible ports are still in the early stages of production, meaning public availability is limited. The addition of ALLM is mostly a forward-thinking addition, securing support for the coming years when adoption has increased.

Although Xbox One isn't fully compliant with the HDMI 2.1 specification, ALLM has been added via a firmware update. Depending on hardware limitations, some manufacturers could also take a similar approach to expand availability to existing displays.

ALLM is restricted to Xbox One X and Xbox One S consoles, following the Xbox Spring Update. While currently in testing to members of the Xbox Insider Program, a wider public rollout is scheduled for the coming weeks.

How to enable Xbox One Auto Low Latency Mode

Once you've secured the right hardware, enabling ALLM for Xbox One is relatively simple. Diving into the console's advanced video settings, a checkbox enables the feature. This checkbox is available when using a compatible display, while incompatible setups will see the option faded out. Here's how to turn the setting on:

  1. Open the Settings app on Xbox One.
  2. Navigating to the Display & sound tab.
  3. Select the Video output tile.
  4. Select Video modes.
  5. Enable the Allow auto low-latency mode checkbox.

After following these steps, ALLM mode will be available on your console. Going forward, your display's settings should be seamlessly adjusted in accordance with on-screen content.

See at Xbox One X Microsoft StoreSee at Xbox One X Amazon

What do you think of these recent display features available for Xbox One? Drop your thoughts into the comments below.

How to claim free Twitch Prime loot in Fortnite Battle Royale

$
0
0

Fortnite Battle Royale

Wondering how to get that sweet, sweet loot with your Twitch Prime subscription? Read this.

Amazon-owned Twitch currently has a cross-promotion going on with Epic Games where Amazon Prime subscribers can get some free in-game loot. You get two outfits, one back bling, one glider, two in-game emotes, and four Twitch emotes. There are two operators for the Save the World game mode as well. All for free!

Following the initial batch, the two companies have continued the relationship and there's now more free loot being given away!

If you want it (and why wouldn't you?) but aren't sure if you have Twitch Prime or how to get your loot, read on and I'll walk you through it.

See at MicrosoftSee at Epic Games

What's Twitch Prime, and how do you get it?

Twitch Prime

Simply put, if you're an Amazon Prime subscriber, you also have Twitch Prime. Twitch Prime is, however, available everywhere globally except for China, India and "embargoed territories." In countries where Amazon Prime is supported (U.S., Mexico, Canada, Italy, France, Germany, Belgium, Austria, Spain, Japan, Netherlands, Luxembourg, Singapore or the United Kingdom) you have to have Amazon Prime to have Twitch Prime.

If you're not in one of the countries listed above, you can sign up for Twitch Prime with a Prime Video subscription. Whichever way you play it, though, you have to have Amazon Prime something to get the free loot.

If you haven't yet linked your Amazon account and your Twitch account, you need to do that first. Head on over to the Twitch Prime homepage linked below, log in to Amazon, then log in to Twitch, and let the magic happen.

Link your Amazon account and Twitch Account

And if you don't yet have Amazon Prime, remember you can get a 30-day free trial.

How to get your Fortnite Twitch Prime loot

Fortnite Battle Royale

Now that you're all set up with Twitch Prime, the rest is a case of linking your Twitch account with an Epic Games account (which you will have if you're playing Fortnite anyway). Here's how to do it:

  1. In your web browser, visit this link.
  2. Click on the Have Twitch Prime? button.
  3. If you have an Epic Games account, click yes or signup if you don't yet have one.
    • Note that if you're playing on Xbox One, your Xbox Live login should suffice as you should have already linked this to an Epic account in the game.
  4. Log in with either your Xbox Live account (or PlayStation 4) or your PC-bound Epic Games login details.
  5. Log in to your Twitch account.

The two will now be linked, and the next time you go to play Fortnite the new stuff will be waiting in your inventory. It's important to point out that you can only claim the Twitch Prime Pack once, so if you're playing on both Xbox and PC, make sure you choose the one you play the most.

See you in Tilted Towers!

What's the latest?

Fortnite Battle Royale

The latest addition to the Twitch Prime Loot pack is the Instigator pickaxe. This is exclusive to the Battle Royale mode of Fortnite, and the good news is, you don't have to do anything to get it.

Well, so long as you followed the steps above!

Anyone who has already linked their accounts and claimed the first batch will automatically see the new pickaxe in their locker in game. Everyone else will get it as part of the full pack when they claim for the first time.

See at MicrosoftSee at Epic Games

Updated April 5, 2018: We've added details on the latest addition to the Twitch Prime Loot for Fortnite!

Viewing all 5861 articles
Browse latest View live


Latest Images