Quantcast
Channel: Help & How To
Viewing all 5861 articles
Browse latest View live

How to troubleshoot and fix common problems in Outlook

$
0
0

If the Outlook app is acting up, you can use this guide to troubleshoot and fix most issues.

The desktop version of Outlook is perhaps one of the most popular email client apps in the world. However, while it might be a well-made application with many great features to stay on top of your messages, tasks, and appointments, sooner or later it may stop working.

When you least expect it, the app may get stuck in the loading splash with the "Processing" message. It may stop responding, freeze, or break entirely as you try to open a file or send an important email.

Although there could be many reasons causing a problem, there are a number of general troubleshooting steps that you can follow to get the desktop Outlook app working again.

In this Windows 10 guide, we'll walk you through some troubleshooting steps to fix common problems with the desktop version of Outlook 2016.

How to fix 'Processing' message while opening Outlook

If Outlook gets stuck loading with the "Processing" message, close the app, and launch it in safe mode to try fixing this problem using the following steps:

  1. Use the Windows key + R keyboard shortcut to open the Run command.
  2. Type the following command and press Enter to start Outlook in safe mode:

    outlook.exe /safe

  3. Click the OK button.

  4. Close the Outlook (Safe Mode) app.

Once you've completed the steps, launch the app normally one more time, and Outlook should no longer get stuck with the "Processing" message.

How to install Windows 10 and Office updates

Although Windows 10 and Office can receive and install updates automatically, sometimes they may have some missing patches that could cause apps (such as Outlook) not to work correctly.

If Outlook refuses to work, or it's always freezing, you may want to check that your device has the latest updates installed.

Installing Windows updates

To make sure that Windows 10 is up-to-date, do the following:

  1. Open Settings.
  2. Click on Update & Security.
  3. Click on Windows Update.
  4. Click the Check for updates button.

Installing Office updates

To check for Office updates, do the following:

  1. Open Outlook.
  2. Click on File.
  3. Click on Office Account.
  4. Click the Update Options button located on the right-side.
  5. Click the Update Now option.

    Quick Tip: If you don't see the Update Now option, you may need to click Enable Updates first.

After completing the steps, you can close the "You're up to date!" dialog, or follow the on-screen directions to install new updates if available.

How to fix Outlook reinstalling Office

Sometime Outlook may stop responding or experience problems because of installation issues. Luckily, Office includes a repair utility to fix common problems with the suite of apps.

To repair the installation, close any running Office application, and do the following:

  1. Open Settings.
  2. Click on Apps.
  3. Click on Apps & features.
  4. Select the Office installation. (The name of the installation will be slightly different depending on the edition you have installed.)
  5. Click the Modify button.

  6. Select the repair option:
    • Quick repair: Resolves most issues using files already stored on your device to repair your version of Office.
    • Online repair (recommended): Resolves any issues with Office, but it requires an internet connection to download the necessary files to repair your applications.
  7. Click the Repair button.

  8. Click the Repair button again.

Once you've completed the steps, the repair tool will do a clean reinstallation of Office, and after the process, you should be able to use the Outlook 2016 app normally without issues.

How to fix Outlook data files

If after repairing the installation, you're still experiencing problems, then it could be something wrong with the Outlook data files.

Outlook 2016 uses two types of data files, including the Offline Outlook File (.ost) and the Outlook Data File (.pst), depending on the type of account you configured to store offline copies of your emails, contacts, calendars, and other items. If these files stop working for any reason, you can use the Office Inbox Repair Tool to scan and repair the files to get Outlook working again.

You can use this guide to repair the data files to fix problems with the Outlook app.

How to create a new Outlook profile

An Outlook profile contains a lot of settings that manage the behavior of the app. If you're experiencing issues, there's a chance that the profile might be damaged or a misconfiguration may be causing the problem.

To create a new profile, close Outlook, and do the following:

  1. Open Control Panel.
  2. Click on User Accounts.
  3. Click on Mail.

  4. Click the Show Profiles button.

  5. Click the Add button.

  6. Under "Profile name," enter a descriptive name for the profile.
  7. Click OK.

  8. Type the email address and password of your primary account previously configured on Outlook.
  9. Click Next.

  10. Continue with any additional on-screen directions as directed.
  11. Click Finish.

  12. In the "General" tab from "Show Profiles," select the Prompt for a profile to be used option.

  13. Click Apply.
  14. Click OK.
  15. Open Outlook.
  16. Use the "Profile Name" drop-down menu, and select the new profile.
  17. Click OK.

After completing the steps, it may take some time to load Outlook 2016 with the new profile, but after it's up and running, if you're no longer experiencing problems, then the issue was related to your old profile, and you should delete it.

Deleting a profile

To delete the old damaged profile, close Outlook, and do the following:

  1. Open Control Panel.
  2. Click on User Accounts.
  3. Click on Mail.

  4. Click the Show Profiles button.

  5. Select the old profile.
  6. Click Remove.

  7. Click Yes to confirm the deletion.
  8. Select the Always use this profile option.

  9. Click Apply.
  10. Click OK.

Wrapping things up

While using Outlook 2016, you may come across some issues that may require specific troubleshooting steps, the instructions on this guide will help anyone to resolve most problems — especially using the Office repair option.

More Windows 10 resources

For more helpful articles, coverage, and answers to common questions about Windows 10, visit the following resources:


How to use Xbox One copilot to link two controllers

$
0
0

Here's how to use two Xbox One controllers as one, using the console's "copilot" feature.

Copilot is a clever accessibility feature available for the Xbox One, offering the ability to route two controller inputs into a single controller. This opens the console to more flexible controller input methods – especially helping disabled gamers overcome potential struggles of a standard Xbox One controller. This also has its uses for younger gamers, with a parent able to help during challenging aspects of a game. These are the steps to enabling and using the feature with your Xbox One console.

How to use copilot for Xbox One

Before getting copilot set up on your Xbox One, you'll first need to have two controllers. Also ensure you're connected to Xbox Live with the latest automatic update installed, to guarantee the feature is accessible. To enable copilot, follow the below steps.

  1. Connect two controllers to your Xbox One.
  2. Open the Settings app on your console.
  3. Navigate to the Ease of Access tab.
  4. Choose the Controller tile.
  5. Select Copilot settings.
  6. Select Turn on copilot. Copilot will be enabled.

After completing the above steps, copilot is now active between your two controllers. Both controllers now input as a single player, with identical control privileges. There's no hierarchy between controllers either, meaning both controller's inputs are acknowledged simultaneously.

How to turn off copilot for Xbox One

Once finished with your copilot session, turning off copilot is only a few button presses away. This will revert the link between controllers and treat them as separate devices.

  1. Hold the Xbox button on one of your Xbox One controllers. A pop-up menu will appear.
  2. Select Turn off copilot. Copilot will be disabled.

To enable copilot again, simply follow the previous steps in this guide again.

Have you used copilot for Xbox One? Let us know your thoughts on the feature in the comments section.

See at Microsoft StoreSee at Amazon

How to save Oculus Rift apps in different locations on your PC

$
0
0

How to save Oculus Rift apps in different locations on your PC

Now 100x easier with Rift Core 2.0.

Rift Core 2.0, the ongoing major software overhaul for Oculus Rift, has received in an update (version 1.24) a feature that allows you to easily change library locations for the Rift app. Not only can you create as many new locations as you want, you can also move existing installation files. Let's take a look at how it all works.

See at Amazon

How to create a new library location

Use this method if you'd like to create a new place to save Rift experiences other than where you initially specified during install.

  1. Launch the Oculus app from the Start menu, taskbar, or desktop.
  2. Click Settings.
  3. Click General.

    Click Settings. Click General.

  4. Click Edit in the Library Locations section.
  5. Click Add Location.

    Click Edit. Click Add Location.

  6. Choose a new library location.
  7. Click Select Folder.

    Choose a new location. Click Select Folder.

How to set a library location as default

Here you can change the default library location for any new Rift experiences you choose to download.

  1. Launch the Oculus app from the Start menu, taskbar, or desktop.
  2. Click Settings.

    Launch the Oculus app. Click Settings.

  3. Click General.
  4. Click Edit in the Library Locations section.

    Click General. Click Edit.

  5. Click the More button next to a library location. It looks like three dots in a row.
  6. Click Make Default.

    Click the More button. Click Make Default.

How to remove a location from the list

This method does not delete the contents of the folder. It simply removes the folder and its contents from showing up in the Oculus app.

  1. Launch the Oculus app from the Start menu, taskbar, or desktop.
  2. Click Settings.

    Launch the Oculus app. Click Settings.

  3. Click General.
  4. Click Edit in the Library Locations section.

    Click General. Click Edit.

  5. Click the More button next to a library location. It looks like three dots in a row.
  6. Click Remove From List.

    Click the More button. Click Remove From List.

If you choose to add this folder to the list again at a later time, any previous installation files should be recognized by the app.

How to delete a library location

This method will completely delete the entire library folder and its contents from your PC.

  1. Launch the Oculus app from the Start menu, taskbar, or desktop.
  2. Click Settings.

    Launch the Oculus app. Click Settings.

  3. Click General.
  4. Click Edit in the Library Locations section.

    Click General. Click Edit.

  5. Click the More button next to a library location. It looks like three dots in a row.
  6. Click Delete Folder.

    Click the More button. Click Delete Folder.

How to move an installation to a new library

Already have a bunch of apps installed on your PC but want to move them elsewhere? Rift Core 2.0 has again made it super simple.

  1. Launch the Oculus app from the Start menu, taskbar, or desktop.
  2. Click Library.

    Launch the Oculus app. Click Library.

  3. Click the More button below the app you'd like to move. It looks like three dots in a row.
  4. Click Move.

    Click the More button. Click Move.

  5. Click a library location.
  6. Click Move.

    Click a library location. Click Move.

If a suitable location doesn't already exist, you can click Add Location instead of Move and create a new folder on the fly.

More resources

Looking for more to do with Oculus Rift? Have a look at these other articles!

Updated March 12, 2018: This guide has been refreshed to include all new steps for the Rift Core 2.0 update.

How to calibrate a monitor using Spyder5Pro and DisplayCAL

$
0
0

Spyder5Pro

Datacolor's software isn't the best, but luckily it's easy to use your Spyder5 calibrator with the open-source DisplayCAL software instead. Here's how.

The Spyder5 range of display calibrators are great little tools for fine-tuning monitors for a better visual experience, but the accompanying software from Datacolor isn't the best option out there. Luckily, a fine community of developers continues to work on an open-source calibration suite called DisplayCAL (powered by ArgyllCMS), and it works with the Spyder5 range of calibrators. Here I run you through how to remove the Datacolor software and driver, install DisplayCAL and the necessary files and then get started.

See at Amazon

How to remove Datacolor software

Spyder5

There's no need to have the driver and software from Datacolor installed as we'll be using open-source alternatives. If you haven't installed the official Spyder5 software, you can skip this section. Should you already have it all set up, you will need to remove the suite and driver.

  1. Hit Windows + Q to bring up the search bar.
  2. Type in "add remove".
  3. Select Add & Remove Programs.
  4. Scroll down and remove"Spyder5 software".

Unfortunately, removing the software alone won't get rid of everything. The driver for the calibrator will remain installed. To remove it as well, follow the following steps:

  1. Hit Windows + Q to bring up the search.
  2. Type in "device manager".
  3. Select Device Manager.
  4. Search for the Spyder5 device listing. (It should be located under Universal Series Bus Controllers.)
  5. Right-click it and select uninstall device.

Install DisplayCAL

DisplayCAL

Now's the time to prepare the system for calibration by installing DisplayCAL. You also need to fetch a driver for Spyder5 that works with DisplayCAL. (Don't plug the Spyder5 in just yet!)

  1. Download and install DisplayCAL. (Choose the standalone package.)
  2. Run through the wizard and complete the installation.
  3. Launch DisplayCAL.
  4. Allow the suite to download and install the Argyll CMS color engine.
  5. Go to Tools > Instrument.

    DisplayCAL

  6. Choose "Install Argyll CMS instrument drivers".
  7. Close down DisplayCAL and plug in the calibrator.

Fire up DisplayCAL, and you should now see the Spyder5 listed as an available instrument. Don't start calibrating as you need to fetch the correction data from the official Spyder5 software.

Quick configuration

DisplayCAL

  1. Download the Spyder5Express software. (Don't install it yet!)
  2. In DisplayCAL, go to Tools > Correction.

    DisplayCAL

  3. Choose "Import colorimeter corrections from other display profiling software."
  4. Select Spyder5.
  5. Hit "Select File" and locate the Spyder5 installer.

This process should complete without a hitch. With all the steps done, you're now ready to start the calibration process using Spyder5 and DisplayCAL.

See at Amazon

How to use Spotify with Cortana: Set up, command list, and more

$
0
0

Microsoft recently brought Cortana integration to Spotify, allowing you to search from within your own library, and from Spotify's sizable pool of millions of songs.

If you're interested in getting up and running with Spotify Music and Cortana, here's how.

Unfortunately, as is usually the case with Cortana, most of these features only work if her language is set to U.S. English. There's no word on whether Microsoft will ever begin taking Cortana in other markets more seriously. If you're outside of the U.S., I recommend picking up an Amazon Echo speaker instead for voice-enabled Spotify control.

Set up a Spotify account

Spotify is a free music streaming service that features millions of songs, all sorts of curated playlists, and dynamic radio stations based on your tastes. Additionally, Spotify has deep integration with Facebook and features other social systems, allowing you to follow friends to see what they're listening to (if you've all opted-in, of course).

Before you start, you need to set up a Spotify account right over here.

Join Spotify

Spotify Premium

You can also pick up Spotify Premium on Amazon starting at $30, or for $9.99 per month from Spotify itself. Premium allows you to skip and play tracks as you see fit, along with an ad-free experience and offline playback. If you're a heavy music listener, it's well worth it.

See at Amazon

Link Cortana and Spotify

You'll need to make sure Cortana is set up properly on your computer beforehand. Head over here for a full guide on how to set up Cortana on a Windows 10 PC.

How to set-up Cortana on a Windows 10 PC

You will also need to download Spotify onto your PC and sign in with your account. You can grab it from the Windows 10 Microsoft Store here.

Download Spotify from the Microsoft Store

Make sure Spotify is integrated with Cortana

Once you've signed into Spotify, you're now ready to connect Cortana and Spotify. To do this, follow these steps:

  1. Open Cortana by clicking on her icon in the taskbar.
  2. Next, select her Notebook icon on the left side.
  3. Select Music.

  4. Turn on Spotify with a left click.

Play Spotify music with Cortana

Now that you're set up, you can start issuing commands to Cortana. You can do this either via her "Hey, Cortana" voice command, or simply by typing your commands in the search box. Learn how to set up Cortana for voice activation over here.

Set up Cortana's voice recognition on Windows 10

After activating Cortana, you can have her perform the following actions by issuing these commands. Parentheses denote your query.

  • ... play (song name) on Spotify.
  • ... play (artist name) on Spotify.
  • ... play (album name) on Spotify.
  • ... play (mood type) music on Spotify.
  • ... play (genre) music on Spotify.
  • ... play my (playlist name) playlist on Spotify.
  • ... play the song with ("lyrical content") in the lyrics.
  • ... pause.
  • ... play.
  • ... skip track.
  • ... previous track.

That's a wrap!

That's pretty much everything you need to know about using Spotify with Cortana, but Spotify has various other features you can use to supercharge your music experience on Windows 10 in a Groove Music-less world. Hit the links below for details.

How to use Oculus Touch like a Vive Tracker

$
0
0

How to use Oculus Touch like a Vive Tracker

Golf clubs, baseball bats, rackets, guns, and lots of fun!

HTC's Vive Tracker promises to bring pretty much any real-life object (as long as it fits in your house) into VR. Attach the Tracker to a golf club or a baseball bat and do your best impression of an athlete, or attach it to a fake gun and get real tactical real fast.

To compete with the Vive Tracker, Oculus includes a mount with its Touch controllers. It's not nearly as exciting, but it sort of delivers the same experience (and it doesn't cost extra). Officially branded with a Rock Band VR logo, it's primarily intended to work with the plastic guitar accessories required to play the game. In our testing, it worked really well, and it got us thinking about what sort of other things we could track by attaching a Touch controller.

See Oculus Touch at AmazonSee Vive Tracker at Microsoft Store

Oculus Touch accessory guidelines

Oculus actually has an official Touch Accessory Guideline file available for download from its website. Contained within are some CAD files for the battery compartment, cover, and mount, and the documentation to go along with them.

While these guidelines seem to be intended for developers, there's nothing stopping anyone with a 3D printer from creating their own mounts to attach to a variety of items.

To what can you attach your Touch controllers?

Oculus Touch

If you're wondering just what, exactly, you can attach your Rift controllers to other than the Rock Band guitar, that's really up to you. As long as a mount can be attached to it, whether with temporary adhesive or plain old tape, tracking should work to some extent.

The Vive Tracker is shown being mounted on golf clubs, baseball bats, guns, and the wrists of special gloves, and, with a bit of ingenuity, you can likely achieve the same thing with your Touch controllers

VR Baseball immediately comes to mind. Normally, you'd hold one touch controller between both hands and swing away, but attaching it to a real bat just above the grip would work pretty well.

Golf club mod for Touch Credit to Reddit user davideliasirwin for this creation and image.

One fan of The Golf Club VR also came up with a golf club mod for a Touch controller. Reddit user davideliasirwin's creation involves a cut down golf club with a Touch controller attached where the shaft would normally be. Pretty cool!

As another example, YouTuber Greg Driver put together this video of his invention that involves a modified airsoft gun with Touch controller attached. There's not a lot of information as to how exactly all this was put together, but it has something to do with using the sound of the gun's trigger to register a shot. It's certainly fun to watch, and it will no doubt give a lot of you inspiration for your own creations.

3D printing recipes already available

3D printed gun stock Credit to Gurgeix from Thingiverse for this creation and image.

Avid first-person shooter fans have already taken it upon themselves to create 3D-printed models of gun stocks. One option, submitted to Thingiverse by user Gurgeix, has a butt and mounts for both controllers. In games like Onward, where aiming down your sights requires you to line up both controllers, this sort of stock is invaluable.

If you don't have a 3D printer and still want a cool stock to help with shooters, all is not lost. Reddit user Falandorn submitted a creation made out of PVC pipes and hose clamps that works the same way as a 3D-printed model.

PVC pipe stock Credit to Reddit user Falandorn for this creation and image.

How to avoid tracking issues

How to avoid tracking issues

When attaching your Touch controllers to real-world items, there are a couple guidelines to follow to ensure everything works properly. First, don't cover up the handguard/ring on the Touch controller; the sensors need to see it in order for it to be tracked.

Second, don't place the controller on a mirrored surface or on anything that has its own flashing lights. This will likely interfere with the sensors and you'll have an overall bad time.

Other than those guidelines, ensure the Touch controllers are securely fastened with some sort of temporary adhesive, and, if possible, also attach the wrist strap to the item.

See Oculus Touch at AmazonSee Vive Tracker at Microsoft Store

Your tracking adventures

Have you attached your Touch controller to any real-world items? Was it a success? What game did you play? Let us know in the comments section!

How to complete your first Sea of Thieves voyage

$
0
0

Here's how to start your first Sea of Thieves mission and make a name for yourself in the pirate world.

Sea of Thieves drops players straight into its tropical world with little guidance on what lies ahead. To climb the ranks and make a name for your pirate-self, you'll need to embark on "voyages"– the game's structured quests to hunt down coveted treasure. Here's how to get started with Sea of Thieves' voyages and bring back your haul of loot on Xbox One and Windows 10.

See at AmazonSee at Microsoft Store

1. Finding your first voyage

To get started on your Sea of Thieves adventure, you'll need to collect your first formal voyage. Obtainable from various vendors across the game's world, these provide specific objectives to complete for rewards. Vendors are based at "outposts," found on set islands across the game's map. Players always spawn in outposts after launching the game, while those at sea can find outposts through their ship's map.

When at an outpost, you'll need to find the representative of the "Gold Hoarders" - the faction offering your first Sea of Thieves quest. These vendors are situated in dark cylindrical tents with gold paint on their faces. To initiate a conversation and browse the Gold Hoarders' offerings, players with a controller can press X, while keyboard users can press F.

Browsing the vendor's stock, a voyage will be purchasable for zero gold. When hovering over this quest, press A on your controller, or left-click with your mouse to add it to your inventory. New pirates can start voyages for free, although most quests require you to part with hard-earned gold.

2. Starting your first voyage

After collecting a voyage, you'll need to initiate it before setting sail. Your crew should return to your ship's captain's table, where voyages can be proposed and voted on. This can be found on the rear lower deck of sloops and in the captain's room of galleons.

Walk up to the captain's table, pressing X on your controller or F on your keyboard once prompted. This will open your inventory of purchased voyages, with the option to propose one among allies. Fellow pirates can put voyages down on the table at the same time, too.

To kick off the journey, your crew must place votes among the available quests. Once a majority of players have voted for a voyage, black borders appear at the top and bottom of the screen, indicating the voted voyage is underway.

3. Using maps to find islands

It's now time to embark on your Sea of Thieves adventure. But before setting sail, you'll need to know where you're going and how to get there. To find your destination, reference the cryptic treasure map added to your inventory. Hold RB on a controller or E on a keyboard to open a radial menu and select the map. With the map in-hand, press RT on a controller or left-click on your mouse to view it in full.

To find the island's location, cross reference your handheld treasure map with your ship's map table. Found on the rear lower deck of sloops or on the middle deck of galleons, this provides greater context for surrounding islands in relation to your ship's current location. Find the island that matches the one on your treasure map, which should be within the islands neighboring your ship.

It's now time to travel the seas! Lower the sails, raise the anchor and get on the way. Use the compass to keep on course, while referencing the map table for a real-time indicator of your position. For more tips on getting the most out of your ship, don't forget to check out our beginner's guide to sailing in Sea of Thieves.

Sea of Thieves ships guide: Tips and tricks for sails, combat, repairs and more

4. Tracking down the treasure

After hitting land, you're closer to treasure than ever before – but you still need to know where to find it. Once on the island, raise your treasure map and look for the "X" that marks the spot.

Referencing the map and surveying your surroundings, figure out your location on the island. Using key landmarks, coastline shapes and your compass, find the location of the treasure.

Once above the treasure, switch to your shovel and begin digging. An audible "clunk" of hitting a chest will sound, unless you're off the mark. The game allows a few meters of leeway to account for minor inaccuracies, but try to keep as close to the mapped location. Keep digging until the chest is entirely surfaced.

5. The risky return

You've now got your first taste of pirate treasure but the journey's not over. To complete a voyage you need to return the chest to a Gold Hoarder at an outpost.

Hold X on a controller or F on a keyboard to carry the chest back to your ship. Carrying a chest, you'll move slowly and be defenseless, so get your crew protecting you from skeletons. Also be wary of other nearby players hoping to steal your booty.

Using your ship's map table, find the nearest outpost and make the return journey. At the outpost, find the Gold Hoarders vendor and redeem your chest. Gold will be provided to all crewmates in return for your efforts.

See at AmazonSee at Microsoft StoreBuy Xbox Game Pass

Your journey

Have any other tips for new pirates on their early adventures? Make sure to drop into the comments and share your findings.

How to get started with the Synology DS218+

$
0
0

Synology DS218+

Here's how you get started with the DS218+.

Setting up the DS218+ is an absolute breeze, which is why it fared well in our in-depth review and was awarded our Choice Award. Synology has done wonders to improve on the excellent DS216 series to create a Network Attached Storage (NAS) solution that is ideal for not only advanced users but also those who may be new to the network storage field.

See at Amazon

Installing hardware

Synology DS218+

Depending on how you configured the DS218+, you may not have to do anything aside from plugging the unit into an available outlet and hooking it up to a router. If you've received a diskless configuration, which means there aren't any pre-installed hard drives, you'll need to remove the two trays and install drives. Luckily, this is a simple process that requires no tools at all.

  1. Remove the front panel.
  2. Take the tray out of the unit by pressing down on the lever and pulling.

    Synology DS218+

  3. Remove the two side panels.
  4. Insert the hard drive into the tray.

    Synology DS218+

  5. Re-attach the two side panels to secure the drive.
  6. Slide the tray back into the unit.
  7. Re-attach the front panel.

The process of installing 2.5-inch SSDs and laptop drives is the same, except you'll need to screw them to the base of the tray.

Best hard drives for NAS

And you're done. That's all that is required to install the hard drive. Simply repeat the process for a second drive, should you have one at hand. The beauty of this NAS is you can always add a second drive at a later date, should you run low on storage and wish to run the system in RAID to create an immediate backup copy of everything.

After you have the DS218+ plugged into the outlet and router, with hard drives installed, it's time to get started with the software.

Setting up software

Synology DSM

After turning on the DiskStation and allowing the OS to boot up and check everything over (you should hear a beep once it's done), it's time to connect to the NAS and set everything up. This can be achieved by entering one of the following into your favorite web browser: find.synology.com or diskstation:5000

If neither works, you can download the Synology Assistant, which should automatically detect and list the DS218+. You can then quickly access it through your browser from here, which will present you with the initial setup wizard. (If, for some reason, you quit the wizard before you complete all the steps, simply log into the DiskStation Manager (DSM) with the username admin, and a blank password.)

  1. Click Set up.

    Synology DSM

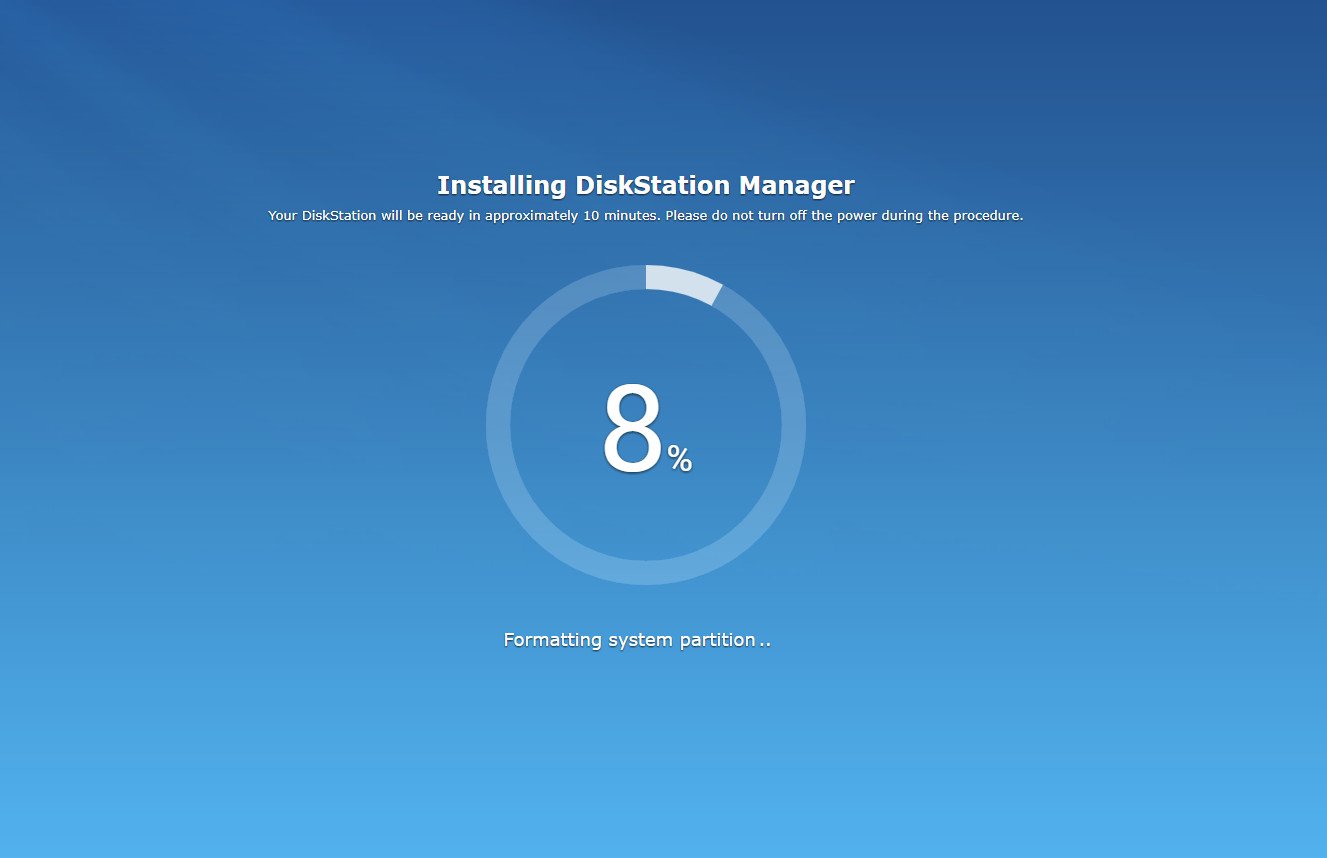
  2. Click Install Now. Wait for the installer to finish. The NAS will reboot; you must leave the page open through the whole process.

    Synology DSM

  3. Enter your setup details details:

    • Server name: Whatever you wish for the server to be called.
    • Username: Give yourself a username.
    • Password: Self-explanatory.
  4. Hit Next twice.

    Synology DSM

  5. Select how DSM will install updates.
  6. Leave the S.M.A.R.T and bad sector warnings enabled.
  7. Hit Next.

    Synology DSM

  8. Configure QuickConnect, which allows you to create a Synology account and connect to your NAS without messing with router settings (and when away from home).
  9. Copy down your new QuickConnect URL (and activate your Synology account if creating one).
  10. Hit Next.
  11. Hit Go to complete the wizard.

You'll now be on the main DSM OS view. This is where you can easily configure the NAS and install updates, packages, manage files, how everything is set up, and more. The DSM help manager will run you through a few tips to get you started. Should you require further assistance, simply open up the help manager and do some searching. Spend a good hour playing around with various options to get accustomed to the DSM interface.

Mapping for Windows

Synology DSM

In Windows, you can map the NAS location to a specific drive letter so it appears in Windows Explorer as an internal hard drive. Here's how:

  1. Open Explorer.
  2. Right-click on This PC.
  3. Click on Map network drive....
  4. Choose a drive letter.
  5. Hit Browse.
  6. Browse to the network location.
  7. Click Ok.
  8. Click Finish.

Now a virtual drive will appear in Explorer, allowing for more convenient access. This can also be achieved using Synology Assistant, which makes the whole process a little easier.

Helpful tips

Synology DS218+

  • The copy button can be pressed to quickly transfer files from an inserted USB drive to the NAS.
  • The eSATA port can be used to connect an external drive to the NAS.
  • It's easy to install an extra RAM module, should you need one using the spare slot to the right of the drives.
  • The QuickConnect will let you quickly access the NAS without needing to mess with your router.

Updated March 14, 2018: We rolled out some minor changes to this guide to offer a more complete walkthrough of getting started with Synology.


How to improve the HTC Vive Deluxe Audio Strap

$
0
0

How to improve the HTC Vive Deluxe Audio Strap

It's nice, but it's not perfect.

HTC's Deluxe Audio Strap (DAS) adds the built-in headphones to the HTC Vive VR headset, just like the Oculus Rift and the Samsung Odyssey. Not only is the DAS sporting adjustable headphones, it also has a different fastening system that involves plenty of padding and an adjustment dial instead of the default elastic straps. Still, some find that the new strap doesn't quite make the Vive as comfortable as it should be, especially during long play times, and there are some interesting mods popping up on the internet.

See at Amazon

Add a wedge beneath the top strap

Vive Deluxe Audio Strap unmodded

One of the biggest issues with the Vive DAS (and, for that matter, the Vive's original strap), is that the top strap pulls the headset into your forehead rather than just keeping it in the correct position on your face. This is mostly due to the fact that the strap attaches to the display at a right angle.

Reddit user djgrahamj posted a wedge solution in the Vive subreddit, and judging by the positive feedback, more than a few people have given it a shot. All it takes is some high density foam carved into a wedge shape and placed between your forehead and the top strap. This causes the headset to be held up rather than straight back into your forehead. djgramhamj was even kind enough to provide us of a mockup of their creation.

Graham's wedge mod Credit to Reddit user djgrahamj for idea and image.

Although the original wedge was created from an old child's toy, there are plenty of buying options on Amazon when it comes to the foam needed to get this done.

See at Amazon

Add a counterweight to the back

Rear of the DAS

If you'd rather not deal with carving a wedge out of foam, you can always add a counterweight to the back of the headset. Whereas the Vive's original strap had elastic on the back and would sag when weight was attached, the DAS has a hard plastic back that can easily accept a mod.

For those using a TPCast for wireless VR, there's a 3D print available on Thingiverse for an attachable battery holder. Just clip it onto the back part of the DAS, and you can mount the battery pack as a rear counterweight rather than just plain weight on the top of your head.

A rear mod thanks to Thingiverse user stu3d Credit to Thingiverse user stu3d for image and idea.

Don't have a TPCast? No worries. Just about anything with a bit of weight can be attached to the back of the headset to act as a counterweight. Even a tape measure has been spotted in the wild.

Try an alternative strap

This Miller Electric strap is a decent alternative.

Would you rather not shell out a hundred bucks for an official DAS? Feel like your standalone headphones offer a much better listening experience? Some Vive owners have taken it upon themselves to create something that resembles the DAS, using relatively cheap (about $30) replacement helmet headgear.

See at Amazon

It's fully adjustable thanks to three dials, and to attach it to your Vive, Thingiverse user nw15062 created a recipe for a bracket made specifically for this purpose.

Thanks to Thingiverse user nw15062 Credit to Thingiverse user nw15062 for this idea and image.

More resources

Need a hand getting your HTC Vive working again? Be sure to check out our troubleshooting guide.

Xbox One FreeSync and Variable Refresh Rates: Everything you need to know

$
0
0

AMD FreeSync support is coming to Xbox One – here's what it is and why you should care.

Microsoft is debuting an assortment of new display options for Xbox One with the Xbox Spring Update. Currently in testing to select members of the Xbox Insider Program, support for 1440p resolutions, Auto Low Latency Mode and Variable Refresh Rates via FreeSync has been added to the console.

Since the launch of the Xbox One X, upcoming support for FreeSync has been one of its most anticipated features. Smoothing out gameplay via specialist hardware, the feature further solidifies the console as one of the top-tier gaming devices on the market. Here's what you need to know about FreeSync and using it on your Xbox One.

See at Microsoft StoreSee at Amazon

Understanding the problem

When gaming on traditional displays, incoming frames are output on the fly, to ensure the most recent image is reflected on-screen. When the number of frames output by a device exceeds the refresh rate of the display, a new frame can be pushed during a screen draw, resulting in two images being displayed at a single time. Known as "screen tearing," this can ruin an otherwise faultless gaming experience.

Software-based counters to screen tearing have been used in the past, with the most common of these "Vertical Sync" (V-Sync). Forcing a system to output a consistent frame rate matching the monitor's refresh rate, this can eliminate screen tearing entirely. However, by holding back frames, V-Sync can be a cause for stuttering and lag. That's not ideal for action-packed gameplay.

What is FreeSync on Xbox One?

How FreeSync can eliminate screen tearing on your Xbox One, provided by AMD.

Variable Refresh Rates (VRR) is the next big technology expected to eliminate screen tearing, adapting the refresh rate of your display to that of outputted content. FreeSync is AMD's VRR technology, allowing FreeSync-compatible systems and monitors to communicate directly, scaling a display's refreshes to current outputted frames. This reduces screen tearing without bottlenecking performance, making for a smoother overall gaming experience.

Between AMD and its partners, an ecosystem of over 200 FreeSync-compatible displays is now available on the market. Leveraging an open standard and offering royalty-free licensing for manufacturers, the technology is seeing increased adoption over rival solutions such as NVIDIA's G-Sync. And with the Xbox One housing AMD chips under the hood, FreeSync is a perfect fit for the console family.

What you need for FreeSync on Xbox One

Support for FreeSync on Xbox One is limited to Xbox One X and Xbox One S variants of the console. Support for the technology is set to be added in the upcoming Xbox Spring Update, currently on track for a public release in the coming months. For now, testing is limited to members of the Xbox Insider Program enrolled in the Alpha preview ring.

Due to Xbox One hardware limitations, only select FreeSync displays will be compatible with the console too. To use FreeSync, an Xbox One must be connected to a display that supports FreeSync over HDMI, which is only offered by a subset of the current display range. VRR support should soon be more accessible with HDMI 2.1 but adoption of the standard is still scarce.

To get the most out of FreeSync, a display that supports the FreeSync 2 and HDR10 standards should be used. FreeSync 2 is the latest revision of the technology, delivering support for features like High Dynamic Range (HDR), while HDR10 is the only HDR standard supported by Xbox One. Without this, HDR images cannot be displayed on the console.

How to enable FreeSync for Xbox One

When connected to a FreeSync-compatible display, FreeSync support can be enabled through the console's settings. When the Xbox Spring Update is installed on your console, the option to enable the feature can be found in the Settings app. These are the steps to enabling FreeSync on Xbox One.

  1. Open the Settings app on Xbox One.
  2. Navigating to the Display & sound tab.
  3. Select the Video output tile.
  4. Select Video modes.
  5. Enable the Variable Refresh Rates checkbox.

Variable Refresh Rates over FreeSync is now enabled on your Xbox One.

Over to you

Have you used FreeSync on your Xbox One console? Do you plan to buy a compatible display? Drop into the comments section below with your thoughts on the technology.

See at Microsoft StoreSee at Amazon

Why you should opt-out of the Windows Insider Program after Spring Creators Update releases

$
0
0

You should remove your PC from the Windows Insider Program after the Spring Creators Update releases — here's why, and the steps to do it.

As Microsoft finalizes the Windows 10 Spring Creators Update (version 1803) (that name is not yet official, but it sure sounds right) for its official launch in spring 2018, now is a good time to consider opting out of the Windows Insider Program.

The program has been designed to allow developers and enthusiasts to test upcoming features and improvements to Windows 10. Although the most recent preview builds have introduced a lot of changes and have been getting more stable, as version 1803 gets finalized and Microsoft moves to the next big update, new builds usually don't include significant changes, and they can be buggy and unstable.

If you're not ready for that or want to enjoy the new version for a while, you can gracefully opt-out from the Insider Program without having to reinstall the OS or losing your settings, apps, and files. This is possible because at the end of a feature update development, both preview releases and public releases of Windows 10 are the same versions.

In this Windows 10 guide, we walk you through the steps to leave the Windows Insider Program without having to reinstall anything. Even if you forgot and end up installing a new build from a different version after the official release.

How to safely opt-out of the Windows Insider Program

Assuming that you're not using the Skip Ahead option, if you no longer want to participate in the program, do the following:

  1. Open Settings.
  2. Click on Update & Security.
  3. Click on Windows Insider Program.
  4. Click the Stop Insider Preview builds option.

  5. Select the Keep giving me builds until the next Windows release option.

  6. Click the Confirm button.
  7. Click the Restart Now button.

After completing these steps, previews will continue to download and install on your computer, but only until the new version of Windows 10 is finalized. Once the new feature update becomes available, your device will opt-out, and it'll continue to receive patches and security updates every month.

You can use these steps to opt-out at any time, as long as you do this before Microsoft releases a new preview build for the next version of Windows 10 (Redstone 5). If you keep your computer enrolled, and new builds become available, your computer will install them automatically, and you won't be able to use these instructions to stay in the stable version.

How to opt-out after installing a build from a different version

If you stayed enrolled in the program and a new build, part of the next development of Windows 10, installs on your computer, you can still opt-out without losing settings, apps, and files by going back to the previous version and then opting out of the program.

To roll back to the previous version of Windows 10 and remove your device from the Windows Insider Program, do the following:

  1. Open Settings.
  2. Click on Update & security.
  3. Click on Recovery.
  4. Under "Go back to the previous version of Windows 10," click the Get started button.

  5. Select a reason you're removing the current build and click the Next button.

  6. Click the No, thanks button.

  7. Click the Next button.

  8. Click the Next button again.

  9. Click the Go back to earlier build button.

  10. After rolling back, open Settings again.
  11. Click on Update & Security.
  12. Click the Stop Insider Preview Builds button.

  13. Select the Keep giving me builds until the next Windows release option.

  14. Click the Confirm button.
  15. Click the Restart Now button.

Once you complete these steps, your device will stop getting previews after the Windows 10 Spring Creators Update becomes available, and it'll continue to receive quality updates every month to fix bugs, improve performance, and patch any security vulnerabilities.

The only caveat is that you can only use the following instructions during the first 10 days since the first build for the next version was applied to your PC. This is because after the first 10 days, Windows 10 automatically removes the Windows.old folder that contains your previous installation files, and when this happens, the option to roll back disappears.

In the rare case that you don't see the option to go back to the previous version, the only way to opt-out of the program is to do a clean installation of Windows 10 with the latest update.

After a few builds, when Microsoft starts incorporating new features and previews are more stable, you can always enroll your device into the Windows Insider Program again.

Are you planning to opt-out and enjoy the new feature update for a while or are you staying enrolled? Let us know in the comments.

More Windows 10 resources

For more helpful articles, coverage, and answers to common questions about Windows 10, visit the following resources:

How to factory reset a Windows Mixed Reality headset

$
0
0

How to factory reset your Windows Mixed Reality headset

It's not as easy as a push of a button, but you can completely reset your Windows Mixed Reality headset. Here's how.

Windows Mixed Reality (WMR) is continuing to grow in popularity in the VR space, and headsets from the various manufacturers offer a satisfying experience that includes tracked motion controllers. Like with most VR systems, WMR has a few hiccups that you can try troubleshooting with our guide. If you still can't get your system working, you might want to try resetting your headset completely to begin the setup process all over again.

See at headsets at Microsoft Store

How to uninstall and reinstall Windows Mixed Reality

While there isn't a single button to press and hold down to reset your headset, reinstalling the WMR Portal app will effectively get you back to a point where your PC thinks you've never used WMR before. Before proceeding, ensure your WMR headset is disconnected from your PC and ensure the Portal app isn't running. Then follow these steps:

  1. Right-click the Start button.
  2. Click Settings.
  3. Click Mixed reality.

    Click Settings. Click Mixed reality.

  4. Click Uninstall.
  5. Click Uninstall.

    Click Uninstall. Click Uninstall.

How to unpair your Windows Mixed Reality controllers

To truly start from scratch, you should also unpair your WMR controllers. Here's how:

  1. Right-click the Start button.
  2. Click Settings.

    Right-click Start. Click Settings.

  3. Click Devices.
  4. Click Bluetooth & other devices.

    Click Devices. Click Bluetooth and other devices.

  5. Click the left controller.
  6. Click Remove device.

    Click the left controller. Click Remove device.

  7. Click Yes.
  8. Click the right controller.

    Click Yes. Click the right controller.

  9. Click Remove device.
  10. Click Yes.

    Click Remove device. Click Yes.

What about reinstalling?

Following the uninstallation of the WMR Portal app and unpairing of the motion controllers, all you have to do to get the setup process started again is to plug the headset into your PC. The necessary software will download and start, and you'll be able to run through the motion controller pairing process.

More resources

For much more information about WMR, be sure to check out our ultimate guide!

How controls work with Fortnite Battle Royale on iPhone

$
0
0

Curious how Fornite Battle Royale will play on the iPhone? Here's a list of all the controls to give you a sense of how to play!

Fortnight for Xbox One just got cross-play with iOS. Whether you're one of the lucky ones to have gotten an invite to Fornite Battle Royale already on your iPhone, or you're eagerly awaiting to receive that email from Epic Games, you may be wondering how to controls of such a massive game translate to the small screen of an iPhone.

If you're familiar with other iPhone FPS or TPS games, Fortnite uses a similar dual stick control system that a lot of game do. Here's a quick rundown of all the actions you need to know, so you can battle it out to be the last person standing!

Move around

In the bottom left corner of your screen, you'll see an on-screen joystick, and that's what you'll use to move your character around.

Just press your finger down and slide it around in whatever direction you want to go!

Crouch

Crouch lets your character hide behind cover and makes it harder for other players to see you.

Press the crouch button that's located near the top right of the screen.

Jump

Jumping allows you to move over obstacles and climbing structures, which can give you a higher vantage point.

Press the jump button located on the right side of your screen to jump.

Pick up items

To pick up ammo, guns, and building materials you just have to run over them; however, certain items like chests you need to open manually.

Just tap on the item you want to pick up or open.

Switch weapons and items

All the items you have at your disposal will appear in a row of icons at the bottom of your screen.

To use any of those items or weapons, just tap the item you want to use and your character will equip it.

Aim or look around

Of course, not all the enemies are going to pop out directly in front of you, so you'll need to aim.

To aim or look around your environment, drag your finger around the right side of the screen. You can do it from almost anywhere on the right side of the screen, but in the negative space between the buttons and your items (shown by the gold rectangle above) is a good place to keep your finger.

Attack, fire or use items

There are actually two ways to attack, fire, or use items in Fornite Battle Royale. You can tap anywhere on the screen, or tap the attack button on the left side of the screen.

Aim down sights

If you have a weapon with a scope, or just want to line up your shot better, you'll need to aim down your sights.

You can do this by hitting the aim button on the right side of the screen when you have a weapon equipped.

Reload weapon

No weapon can fire forever, you'll need to reload if you want to stay alive. Just hit the reload button above your items near the bottom of your screen to give your gun more bullets to shoot!

Access your backpack

If you want to take inventory of all the item you can carry you can do so by tapping the backpack button at the bottom of your screen.

Build menu

If you're looking to build a structure, you'll first need to access the building menu. You can do so by tapping the building button on the right-hand side of your inventory icons.

Build a structure

Once you're in the build menu you, you can build a structure. Tap the screen to switch between wooden, metal, and brick buildings and choose what type of structure you want to build.

Once you have selected the structure and moved it into the position you want, you just need to tap the screen to complete the building process!

No MFi Controller support

The controls for Fortnite Battle Royale aren't too clunky; however, I still think an MFI Controller would be a great addition to the user experience. I hope they add support in a future update!

Anything else you want to know?

Let me know in the comments below!

How to enable Fortnite Battle Royale parental controls on iPhone and iPad

$
0
0

Here's how to make sure you kids aren't overplaying Fortnite Battle Royale.

Fortnite Battle Royale is coming to iOS, and sign-ups for the beta have begun. And Fortnight for Xbox One just got cross-play with iOS.

Chances are your kids are gonna wanna play it for hours and hours and hours... and forever. It's incredibly popular, and it might be best to get ahead of the inevitable addiction. Here's how to enable the right parental restrictions so that you can set time limits and make sure your young'uns are gaming healthily.

How to disable the chat

Perhaps the most vitriolic part of any game with the feature is the chat. To be honest, I'm not sure why chat even exists in gaming anymore if I'm being perfectly honest. Players (especially those of the child persuasion) don't seem to take chat as an opportunity to interact anymore. It's merely a vehicle for racial slurs, political "views" they hear their parents say, bullying, and just all-around nonsense.

It's best to just disable it. There's no actual word yet on whether or not Fortnite for iOS will have chat, but Epic Games has said that the iOS game will play just like the other iterations, so it's fair to assume it'll be there. You'll likely be able to disable chat in the settings or simply swipe it away.

How to set time limits for Fortnite

With iOS, you can set time limits on any app in order to encourage healthy usage.

  1. Enable Guided Access in Settings.
  2. Launch the Fortnite Battle Royale app.
  3. Triple-click the Home button on your iPhone to launch Guided Access.
  4. Tap Options on the bottom left of your screen.
  5. Tap the switch next to Time Limit.
  6. Swipe the wheels to choose a time limit. You can do anything from a minute to 23 hours.

How to prevent your kids from making in-app purchases

This is a biggie. I've seen adults rack up thousands of dollars of in-app purchases on purpose, let alone kids doing it by accident (or on purpose, not understanding the repercussions). If your kids know your iPhone password, it's even worse. It's especially bad if they have their own iPhone, and it's your credit card on their Apple ID.

Just turn off in-app purchases altogether and don't show 'em how you did it!

How to turn on parental controls for in-app purchases on iPhone and iPad

Any other suggestions?

Do you already play Fortnite on another platform? Sound off in the comments below if you think parents should know anything else about the game!

How to convert your workspace to a standing desk for less than $100

$
0
0

How to convert your workspace to a standing desk for less than 00

Sitting is bad, m'kay?

Pretty much anyone who sits at a desk all day, hunched over a keyboard and mouse, knows how sore muscles and joints can get. There are plenty of studies floating around that confirm how awful sitting can be on the human body, and so a lot of people choose to stand while they work. It's not quite the same as running across the plains after a herd of deer, but it's better than being completely immobile. If you don't want to shell out a wad of cash on a brand new standing desk, there are some clever budget ways to convert your workspace.

DIY standing desk converter

IKEA Lack table

While pre-made options offer an adjustable height and a more mobile build, you can go even cheaper by building something yourself. Originally created by Colin Nederkoorn and Ryan Witt, this standing mod made up of IKEA parts only costs about $21. Some stuff from the original plan is no longer available, but we can still get a working configuration.

First, you'll want to grab the IKEA Lack table (about $10). This is meant to be a side table, but it's perfect for holding a monitor about 18 inches inches above your existing desk.

See at IKEA

IKEA Laiva

Next, a Laiva shelf and Valter brackets (altogether about $11) allow you to put everything together using wood screws. The brackets screw into the legs of the Lack table, and you have a spot for your keyboard and mouse that sits slightly lower than your monitor.

See at IKEA


Premade standing desk mods

Premade standing desk mods

Office suppliers understand that more and more people are waking up to the benefits of a standing desk, and many have begun creating desktop mods that raise your laptop or monitor, keyboard, and mouse to a height that's in line with you. Many converters cost hundreds of dollars, but there are a few that cost less than $100.

Executive Office Solutions adjustable laptop desk

Executive Office Solutions adjustable laptop desk

Those of you who like to use an external mouse with your laptop will likely want to check out this lightweight aluminum desk addition from Executive Office Solutions (about $40). It has an extra platform to the right of the main stand (sorry, Lefties) for your pointer, and you can adjust the height thanks to scissor-action legs.

As an added bonus, you can plug the desk into your PC via USB to power two fans, perfect for any laptops that have a hard time staying cool when under load.

See at Amazon

UPERGO standing desk converter

UPERGO standing desk converter

Rather than having a forward tilt and a separate platform for an external mouse, this converter from UPERGO (about $70) has a large flat surface to hold your laptop, monitor, keyboard, and mouse. The scissor-action legs allow it to fold down flat, and the aluminum base keeps it sturdy.

The converter can raise your workspace between 2.2 inches and 16.9 inches, and the wood top will match just about any place you put it.

See at Amazon

SONGMICS bamboo standing desk

SONGMICS bamboo standing desk

If an aluminum converter seems a bit too harsh to fit into your workspace, SONGMICS makes a bamboo option (about $100) that includes an adjustable monitor stand and keyboard and mouse deck.

Two legs with multiple slots in them allow you to configure the shelves how you want, adding up to about 18 inches of extra height. The entire thing weighs only about 12 pounds but can support up to about 41 pounds of your office devices and accessories.

See at Amazon

Ergodriven Spark

Ergodriven Spark

For those unsure of whether or not they want to take the standing desk plunge, the Spark from Ergodriven (about $25) provides you with a bundle of cardboard that you assemble into a desk converter. Cardboard might not seem like the best brace for your expensive laptop, but it's actually quite sturdy when assembled properly.

Choose from three sizes based on your physical height, and don't worry if standing isn't for you. The Spark can easily be broken down and recycled.

See at Amazon

More resources

We all sit sometimes, so why not make the best of it? Have a look at these roundups of the best office chairs on the market.


Sea of Thieves buyer's guide: Release date, editions, preorder bonuses and more

$
0
0

Everything you need to know about Sea of Thieves for Xbox One and Windows 10, including editions, preorder bonuses, collectibles, and more.

Sea of Thieves is sailing on the horizon, with less than a month remaining until the game's release. Microsoft's upcoming adventure game is showing promise as the ultimate pirate experience, sending players on adventures to uncover the most coveted loot. We've rounded up the top Sea of Thieves items available so far, ahead of its debut.

Sea of Thieves release date

Sea of Thieves is expected to launch for Xbox One and Windows 10 on March 20, 2018. Unlike many recent Microsoft Studios titles where a premium edition provides early access, there is only one edition of Sea of Thieves and it has a universal release date worldwide. The game will also offer its Xbox One X enhancements, including 4K resolution and High Dynamic Range (HDR) support, on launch day.

Sea of Thieves preorder bonuses

Games often see a range of store-specific preorder bonuses, although Microsoft is keeping it simple for Sea of Thieves. Players will receive a code for the "Black Dog Pack" from major retailers, including the Microsoft Store, Amazon, GameStop, and Best Buy. Once redeemed, your character will receive a range of cosmetic items, including a black jacket, hat, peg leg, boots and gloves. A matching cutlass, hurdy-gurdy, and concertina are also included.

Preorders from Best Buy will also receive a physical 3-inch metal coin branded with Sea of Thieves logos and icons, while stocks last.

Sea of Thieves (Physical disc)

Set sail onto the Sea of Thieves with the game's standard edition – currently the only way to experience the game on Xbox One. By purchasing this version, you'll be getting all content available at launch, aside from a few cosmetic bonuses.

The standard version of Sea of Thieves costs $59.99, with additional bonus content dependent on the retailer. This version should be stocked by all video game retailers worldwide.

Sea of Thieves (Digital)

A digital version of Sea of Thieves is also available for $59.99, sold as a pre-paid code to be redeemed via Xbox Live. Most retailers that stock codes will distribute them ahead of launch, to give players the chance to preorder and pre-load the title. Like digital copies purchased directly from the Microsoft Store, these copies of the game will unlock at 12:01 in your time zone.

Codes are valid for both Xbox One and Windows 10, with cross-platform purchasing, saves and multiplayer between the two platforms under the "Play Anywhere" program.

Xbox Game Pass

Although for many, Sea of Thieves will be purchased outright, Microsoft is also set to release the game on its Xbox Game Pass subscription service on March 20. As recently unveiled, future Microsoft Studios-published titles will hit the Netflix-style service and remain playable with an active subscription. Xbox Game Pass subscriptions also entitle players to an additional library of over 100 existing games on Xbox One. Xbox Game Pass subscriptions are priced at $9.99 digitally or $10.99 as gifts, making this a great way to save on your first trip to the seas.

Sea of Thieves Limited Edition Xbox One controller

Accompanying the launch of Sea of Thieves, this special edition controller is one of Xbox One's hottest accessories this year. With a nautical translucent purple casing etched in barnacles and a light copper rust, the controller looks freshly plucked from the depths. Other highlights include a gold trigger resembling a pirate's tooth, a glow in a dark skull symbol, and various other markings, fully capturing the pirate aesthetic. Buyers are also rewarded with the exclusive "Ferryman" clothing set in-game.

As a third-generation revision of the Xbox One controller, integrated Bluetooth support also makes for a perfect PC companion. The Sea of Thieves controller stock continues to rise and fall at $74.99, so make sure to check various retailers regularly to secure one for yourself.

Sea of Thieves Seagate 2TB Game Drive for Xbox One

Xbox One games continue to grow in size, especially when handling 4K upgrades on the Xbox One X. The Sea of Thieves special edition of the Seagate Game Drive adds an additional 2TB of external storage, tripling your capacity of standard Xbox One X consoles. Styled with a similar purple and cyan color combination, this is the great companion to the Sea of Thieves controller. Buyers of this drive will also receive a redeemable code for an exclusive in-game weapon, the "Midnight Blunderbuss."

The Sea of Thieves Seagate Game Drive is slated to hit store shelves on April 1, 2018, shortly after the game's launch. Preorders for the accessory are already live at some retailers, priced at $89.99.

Sea of Thieves Xbox One controller stand

If you're getting a Sea of Thieves controller, why not find a perfect place to store it? The Sea of Thieves limited edition controller stand from Controller Gear solves this, using a refreshed design officially licensed from Microsoft. Designed with materials identical to the Sea of Thieves controller, you won't find a better companion than this. A charging variant of this stand is also on the way to top up your charge while not sailing the seas.

The standard Sea of Thieves controller stand is set to release for $14.99, while the charging variant will cost $49.99. Both models are on track for an April 5 release, ahead of the game's launch.

Tales From The Sea of Thieves

"Tales From The Sea of Thieves" might serve as a perfect primer for the game, diving into its world from the perspective of three pirates. Exploring adventures on the seas, the book promises to expand on the game's towns and islands, while uncovering its mythical krakens and mermaids. Packed with illustrations and sketches from the Rare team, Tales From The Sea of Thieves should deliver for lovers of lore and art.

Tales from the Sea of Thieves is currently available for pre-order at Amazon for $26.96, ahead of its March 20 release.

See at Amazon

The Art of Sea of Thieves

Interested in the creative process behind Sea of Thieves? This might be the book for you. Featuring over 200 pages of concept art, sketches, and other behind-the-scenes content, The Art of Sea of Thieves is a visual trip through the game's development. Expanding on the design of its world, the book also houses exclusive commentary, and breakdowns from the developer's art team.

The Art of Sea of Thieves will be available on March 20 for $35.99 on Amazon, and various other book stores.

See at Amazon

Sea of Thieves gameplay tips for new players and budding pirates

$
0
0

Sea of Thieves has a habit of throwing you into the deep end and letting you figure out how to play. We're here to help — grab this rope.

Sea of Thieves is an open world pirate adventure game from Rare, known for classic titles like Banjo Kazooie and GoldenEye. It's been a few years since we've seen a big title from them, but they've brought their triple-A game to Sea of Thieves, which has an incredibly promising future.

Whether you're in the open beta or waiting on the full game, here are some essential tips and tricks for newbie pirates striking out on the seven seas for the first time, as well as some general information on how the gameplay loop works. Yarrghhh.

How to download and access the beta

1. Creating a character, choosing a ship and communication

First and foremost, your task is to choose a fearsome pirate from a randomly generated list of several options. The thinking behind the random generation is to get players into the game as quickly as possible, while attempting to keep each and every single pirate unique. Simply hit the randomize button to get more pirates until you find the one you like. In-game, you'll be able to customize things like hair styles, tattoos, and other accessories, but your face and body type will be fixed. Hitboxes are normalized too, so being a larger pirate won't impact your ability to avoid attacks (but it might impede your ability to hide).

When you first start out, you're offered the chance to jump into a game on a larger, four-player ship, or a smaller, two-player ship. You can even choose to captain the two-player ship by yourself, and it's totally doable, but only recommended for more experienced players.

Once you have selected a ship type, you have the opportunity to invite friends using the X button. Don't worry if you don't have a full crew, though, because Sea of Thieves will queue you up with a random stranger to fill up any empty slots in your entourage.

Sea of Thieves uses proximity voice chat as the primary method of communication, but you can also use text-based communication tools by pressing up on the D-pad, while using the right joystick to select a text response.

2. Before you set sail, grab some quests

Sea of Thieves revolves around questing, much like any other connected RPG, but here they work a little bit different. Sea of Thieves quests are called voyages and must be purchased from the game's various trade factions, who each have their own goals and interests. In the game, there are currently three quest types, and Rare is going to add many more in future updates after the game launches properly in March 2018.

The Gold Hoarders are all about treasure. They will pay handsomely for pirates willing to undertake dangerous missions to find buried chests. Quests are purchased using gold coins, but the first one is free.

The Merchant's Guild sends you on quests to find animals and other types of cargo. And the Order of Souls sends you to fight specially named pirates to bring back their enchanted skulls. Each faction has some free starting quests to get you going.

Once you have the voyage information, you travel to your ship and vote for the voyage on the captain's table. Each player can submit a voyage for review and voting. Once the voyage has been chosen, you will receive maps, riddles, and other clues pointing you to where the treasure is. There are no arrows or waypoints in Sea of Thieves; you have to navigate the seas old-school style. Once you have found the treasure, use your map table again to find an outpost, where you can exchange the goods for gold coins.

As you complete more quests for the various factions, they will offer more dangerous and complex quests, for better rewards.

How to complete your first Sea of Thieves voyage

3. How to sail

Sailing in Sea of Thieves appears complex at first but is actually quite intuitive once you get going. Ships are divided into multiple components, depending on size, and players can need to work together to pilot their ship across the ocean.

  • Sails have to be angled and deployed before you can move. Angling sails towards the wind will give you a speed boost, and depending on the length of your sails, you can either go faster or slower depending on the situation.
  • The anchor must also be raised, this can be sped up by multiple people working together. You can also drop the anchor at speed to perform a handbrake-style turn. This can really help in naval combat situations.
  • The larger ships are really slow to turn, while the smaller ones turn much faster, allowing them to dodge projectiles. Each helm has a central position, hinted at by controller vibration.
  • The larger ships are impacted by wind drag more dramatically than the smaller ships, that means a smaller ship will go faster sailing into the wind, but a larger ship will go faster sailing with the wind.
  • Use your map, compass and map table below deck to figure out your heading and direction. Most voyage maps and riddles tell you the names of the places you need to head to.

  • Your ship can, and will, get damaged. Collisions and cannon battles can severely screw up your ship, leaving gaping holes which flood your vessel with water. You can use buckets to quickly throw water overboard, and use planks (found in various barrels) to repair ship damage.

When you've reached your destination, your maps and riddles will offer clues as to where exactly you must dig.

Sea of Thieves ships guide: Tips and tricks for sails, combat, repairs and more

4. Progression

Sea of Thieves' early progression revolves around gold accrual. Rare has already stated that progress in Sea of Thieves will be cosmetic, focusing on upgrading your character's style, weapon skins, ship customization options, and more coming in the future.

There are a few shops around the "outposts" found in the game, which can be discovered on the map table. You can use these to purchase new equipment styles, which can then be equipped either back on your ship or using lockers, usually outside the shops.

Every time you hand in a treasure chest for the game's factions, you gain reputation ranks with their company, revealing new, increasingly perilous quests as you grow your personal pirate legend. Eventually, you will be granted access to new legendary quests, once you have ascended high enough.

5. General tips

Here are a few other tips you should know before setting sail on the seven seas.

  • If your ship sinks or you're lost overboard and can't get back to your ship for whatever reason, a mermaid will show up and offer quick passage back so you can get going again.
  • If you die, you end up on the ferry of the damned with other dead players. You can chat for a bit, but soon you'll be allowed passage back into the realm of the living.
  • In combat, you can block with the left trigger on Xbox, and do a charge attack with the right trigger. Enemies are typically easy to dispatch when alone, but in groups, they can be pretty deadly.

  • The water is full of sharks, but also, sometimes, treasure.
  • Play with your equipment! From the radial menus, you can try out musical instruments, drink grog, and even use a spyglass for viewing the horizon at range.
  • Sea of Thieves is full of Easter eggs inspired by stories and occurrences from within the game world. Keep an eye out!
  • Press down on the d-pad to access emotes.

And that's all for now, matey, yarghhh!

These are the basics you'll need to get started in Sea of Thieves'. While there are still various other mechanics, we don't want to spoil all the fun now do we. Who knows what else is lurking in the ocean depths?

Sea of Thieves launches on March 20th, 2018, for Xbox One, Windows 10, and Xbox Game Pass.

See at AmazonSee at Microsoft Store

How to back up Windows 10 to a Synology NAS

$
0
0

Synology NAS

Here's how you can back up Windows 10 with a NAS device and keep everything safe.

Backing up your Windows 10 installation regularly is a good practice. Here's how to do it with a Synology Network Attached Storage (NAS) device. We've covered backing up Windows 10 in the past, using discs and other removable media, but being able to do it automatically across the network to a NAS unit makes the whole process much more convenient.

To use a Synology NAS as a viable location to save system images, you first need to ensure you have it all connected correctly. In our comprehensive guide to configuring a Synology NAS with Windows, it takes but a few seconds to add the NAS as a virtual drive within File Explorer (look at "Mapping in Windows"). Once that's done, just follow these steps.

File History

Windows 10 File History

File History is a new tool in Windows 10 that doesn't necessarily back up everything, but instead it copies files and saves them to an external location. This way, should your main drives fail, Windows 10 self-destruct, or you happen to accidentally delete a file, you have access to versions. Here's how to use it:

  1. Hit Windows Key + Q to bring up the search.
  2. Type in "backup".
  3. Choose Backup settings.
  4. Select More options.
  5. Choose See advanced settings.
  6. Select Add network location.

    Windows 10 File History

  7. Choose a folder on the network drive. (It's a good idea to add a dedicated folder.)
  8. Choose Select folder.
  9. Hit OK.

You can now configure the File History feature by excluding specific folders and choosing how often files are copied across. This neat tool will allow you to access a full history of all files saved to protect against system failure. In order to access saved files, use Windows search and type in "File History."

Backup and Restore

Windows 10 Backup

File History may be enough for some, but doing this alone may not safeguard against other issues, which is where the traditional Backup and Restore tool comes into play. Here's how to use it:

  1. In the window for File History, select System image backup in the lower left.
  2. Choose set up back-up.
  3. Select Save on network.
  4. Hit Browse and choose a location on the NAS.
  5. Enter your username and password.
  6. Hit Next
  7. Choose whether or not you want Windows to handle everything.
  8. Hit Next.
  9. Confirm everything and choose Save settings and run backup.

Windows 10 should now start backing up to the Synology NAS. This area is where you can also apply backups to restore previous system states. If you'd rather use a third-party tool to handle backups, many have support for Synology NAS and other units. Regardless, it's best to back up everything on your PC.

Related resources

Sea of Thieves ships guide: Tips and tricks for sails, combat, repairs and more

$
0
0

Become a master of the oceans with these Sea of Thieves tips, covering sails, navigation, combat and more.

Sea of Thieves, Microsoft's upcoming pirate-themed adventure game is just around the corner for Xbox One and Windows 10. Embarking on deadly nautical adventures in search of coveted treasure, players can expect a complete pirate experience full of harsh seas, towering monsters and a helping of treasure.

During your travels, a fair share of time will be spent on your ship – the base of operations for any upcoming pirate. We've wrapped up a range of tips you should know, before setting out on your first ocean voyage.

New to Sea of Thieves? These beginner's tips are for you

See at Microsoft StoreSee at Amazon

Which ship should you choose?

Before setting sail on the Sea of Thieves, you'll need to choose your ship. As of launch, the game offers two ship variants, each with strengths and weaknesses to consider. While the number of players in your party is the main bearing on which ship you'll use, their differences should be recognized before starting your journey.

Galleons

Galleons are the pinnacle of the Sea of Thieves experience, requiring a larger team and strong communication to handle effectively. As the motherships of the game's fleet, these are recommended for parties of three to four players. With high potential speeds and eight cannons of firepower, these vessels can rule the seas with the right crew.

Carrying three large sails, galleons can reach unrivaled top speeds that outpace smaller sloops. However, without the strong wind behind them, their weight can leave them almost grinding to a halt. The large nature of the galleon also leads to other shortcomings, including an increased turn radius, an inability to venture into shallow waters and being an easy target to hit.

Sloops

Sloops are ideal for smaller crews of two, or even tackling the world's perils on your own. They may not pack the horsepower of galleons, but in the right hands, offer a nimble way to cut through under the radar.

Only one sail supports sloops, meaning that their highest potential speed falls behind galleons. But with a sleeker, lightweight frame, sloops can sail significantly faster against the wind than their full-sized counterparts. In general, sloops are better suited for outsmarting foes, rather than engaging directly in combat with their two cannons.

Moving your ship

Now that you've got a ship, you need to get around. We're talking sails and rudders and anchors, matey!

Sails and wind

One of the principal mechanics of Sea of Thieves is wind – and provided you know how to use it, you're on your way to becoming a pirate legend. The direction of the wind dynamically changes in Sea of Thieves and should be considered before leaving the docks. When on your ship, this can be identified by looking at the wind "flow" visually represented in the sky.

Wind direction and how sails are accordingly positioned directly regulates your boat's speed on the water. In response to the wind patterns, your sails should be angled so the gust blows directly behind them. This will allow for the most wind to be pushing your boat, in turn moving your boat at the maximum speed. Conversely, sailing directly into the wind will move your boat at the minimum speed. In some situations, it may be impossible to angle your sails perfectly, in which case preventing wind from hitting sails head-on is recommended.

Alongside angling, crews also need to consider sail length. This indicates how high or low your sails are dropped, with lower sails offering the largest surface area to catch the wind. While having your sails lowered completely is preferred in most cases, raising them helps in confined waters.

When sailing a galleon, sail length and angles can be adjusted via ropes on the left-hand and right-hand sides of the ship's top deck. Each of the three sails has its own ropes, which control positioning on an individual basis. On the other hand, sloops are easier to handle, with two ropes for angling and length of the single sail on the rear upper deck of the ship.

Steering your ship

Controlling the trajectory of your ship in Sea of Thieves takes place exclusively behind the wheel. While on the move, turning the wheel to the left will move your ship in the same direction, while turning to the right does the equivalent.

Across both ships, the captain's wheel can turn four complete rotations. When centered, the wheel's single gold spoke will face upwards, with sharp left or right turns achieved by completing a two full rotations until the gold spoke points upward once again. Upon completing a full rotation, the wheel will lock in place and can only be turned back the other way.

When steering, a discreet indicator is provided to indicate the direction your wheel is currently positioned in. A "clunk" sound is made when turning past the wheel's central position, reducing the confusion over the wheel's current orientation.

Using the anchor

Finally, before setting out on your adventures, you'll need to raise the anchor. When the anchor is down, your ship will be unable to move, regardless of sail positioning. Similarly, if the anchor is dropped while the ship is in motion, the ship will quickly drag to a standstill. Depending on various factors, including speed and steering, you may turn sharply if the anchor is dropped while turning at speed.

Although raising the anchor can take some time, having multiple crew members on the anchor simultaneously speeds up the raising process.

Navigating the seas

Once you're on the move, you'll want to plot your destination. The best tool for any journey is the map table, which can be used to calculate your position and find nearby islands. As the only way to see the whole world and your real-time location, most planning will take place at this table.

After deciding on a location, work out its direction in relation to your ship. Using your compass, align to the correct bearing and set off across the seas. Make sure to regularly check back at the map during the journey to ensure you're still on course. For easy future references, press "A" while viewing the table to set markers for your crew.

If on a galleon, the map bench can be found by descending to the middle deck. On sloops, the same bench is located at the rear of the ship on the lower deck, underneath the wheel.

Pushing into battle

On the search for treasure, you're bound to encounter other players. When this happens, you're going to want to have the tools for the job – and know how to use them.

When on a ship, your main offensive tool will be your onboard cannons. On galleons, four cannons can be found on each side, while one is available on each side of the trusty sloop. Using these cannons, you'll want to lay fire on hostiles and sink them to the depths.

To fire cannons, players must manually load cannonballs from their personal inventory. A stash of cannonballs can be found on every new ship, while additional ammunition can be found at outposts and islands. These can be loaded by pressing "Y," either while using a cannon, or standing nearby with the cannonball equipped.

Cannonballs are treated like projectiles, meaning you'll need to account for your speed, distance, and various other traits to land a shot. When aiming, try to hit hostile ships below the waterline, to ensure water quickly floods into the lower deck.

While it may seem wise to attack from within the safety of your own ship, also don't be hesitant to push enemy vessels on foot. Cannonballs might do a great job at delivering heavy damage, but entering enemy territory is a high-risk, high-reward way to sneak up on foes.

Keeping your ship afloat

If your ship begins to take damage, you'll need to perform repairs to prevent the vessel from sinking. Whether through combat or collisions, taking damage has the chance of leaving holes, where water can drain in. When damage appears, water will begin collecting on the bottom deck and rise over time.

Once water starts collecting, you'll need to find the source of the leak. When taking hits, the hole doesn't necessarily appear where the damage took place, meaning you may need to search for the water source. Depending on the severity of the damage, multiple holes may also appear from a single blow.

To prevent water from draining in through holes, players will need to repair them using wooden planks. Wooden planks can be found in barrels on your ship, located on the middle deck of on both ships. By walking up to the hole and holding RT, your pirate will board it up and stop further water from entering.

Once the water level has stopped rising on your ship, switch to your bucket to remove any collected water. Scoop up and throw water overboard to deplete the level and continue on your journey.

Over to you

Do you have any tips to share with new pirates in Sea of Thieves? Make sure to take to the comment section and share your boating tactics.

See at Microsoft StoreSee at Amazon

How to replace the main Windows boot drive in your PC

$
0
0

960 Evo

Whether you had a failure or just want to upgrade to something better, replacing the drive Windows 10 is installed on isn't as daunting as you might think.

Things break and slow down over time in PCs. Likewise, every year newer, faster, stronger parts come to market. That doesn't just apply to desktop PCs, either, and even in today's world of slim, light Ultrabooks, there are still parts that can be replaced.

Consider the case of your main Windows boot drive. It's integral to using your PC, and if it fails you're in a predicament. Whether this is why you need to replace it or you just want something better, the process is the same. And it's fairly straightforward.

A replacement drive

960 Evo

If you have a PC that supports Non-Volatile Memory Express (NVMe) drives, our recommendation goes to the Samsung 960 Evo. It's not Samsung's absolute fastest consumer drive, but the price difference (around $60 on the 500GB models) to the 960 Pro, coupled with a not-massive performance gap, gets it the nod.

It's available in 250GB, 500GB and 1TB sizes, starting at a very reasonable $125 for the 250GB version.

See at Amazon

Of course, not all PCs will be able to accept these super-fast drives. If your current PC is only using a mechanical hard-disk drive (HDD) and it's here that your Windows install lives, it's a great time to make the upgrade to a solid-state drive (SSD). A 2.5-inch drive will fit in place of any 3.5-inch HDD (though you may need an adapter) and it's much faster. The Samsung 860 Evo is a great choice at $150 for 500GB.

WD Blue

If you're looking for a great m.2 SSD that isn't NVMe, a 500GB Western Digital Blue is a great option at $130.

If you have multiple drives in your PC, you can get away with a smaller boot drive, but I wouldn't recommend anything smaller than 250GB. If it's your only drive, get the biggest you can afford. But always go SSD if you can for your Windows boot drive. You won't regret it.

More: How to use the BIOS or UEFI to check if your boot drive has failed

Removing the old drive and installing the new one

Samsung SSD

The exact process here will vary depending on what sort of PC you're using. A desktop tower will be very different than a laptop, for example, which will be different than a small-form-factor PC. The basic steps are mostly the same, but the location of the drives will be different, and what you have to remove from your PC to get to the drive will also vary.

It's a good idea to have a basic toolkit handy and a magnetic tray if you have one because the screws in a PC really are tiny.

The guide linked below is specific to an HP Omen laptop, but it shows you step by step how you'll be removing and installing the different types of drive you're likely to be dealing with.

How to upgrade the HP Omen 15

Reinstalling Windows 10

Windows 10

Perhaps the most daunting part of this process is reinstalling Windows 10, but it's still not that bad. The important thing is that you can get hold of an image for the OS, and the easiest way to do this is to download it using a PC. If your main drive failed and you don't have another PC, however silly it sounds, ask someone for help. All you need is a PC and an internet connection.

The process involves downloading the image file from Microsoft and creating a USB drive that you can use to boot your PC and install the OS. The easiest way to do this is to use the Microsoft Media Creation Tool, linked in the guide below.

How to install Windows 10 from USB

BIOS

To boot your PC from the USB stick, open up your BIOS or UEFI when you first turn it on (a press of something like F2 or F12 may be how to access it) and set your boot priority to USB drive as number one, then your new main drive as number two. It's a good idea to remember to change it back, though, once you've installed Windows, otherwise if you leave a USB drive connected to your PC and it'll try to boot from this. As soon as your Windows install is complete, remove the USB stick, too, or it might just reboot into the installer.

Installing Windows from the USB drive is very straightforward and the on-screen prompts will walk you through every stage. You don't have to worry about license codes anymore if you already had Windows installed, they will be automatically attached.

For more on doing a clean install of Windows 10 check out the guide below.

Ultimate Guide: How to do a clean installation of Windows 10

That's all there is to it. If you have any other tips or tricks be sure to share them in the comments.

Viewing all 5861 articles
Browse latest View live


Latest Images