Quantcast
Channel: Help & How To
Viewing all 5861 articles
Browse latest View live

Oculus Touch troubleshooting guide


How to stop users from uninstalling apps from Windows 10's Start menu

$
0
0

Windows 10 lets you block users from uninstalling apps from the Start menu. Here's how.

Windows 10 includes an improved Start menu that combines the best of the classic menu on Windows 7 with elements of the Start screen from Windows 8.1. In addition, it features a new number of improvements, including the ability to uninstall apps without the need to open Settings.

Although removing apps with a simple right-click can be convenient, if you're sharing your computer with other people, using your own or guest account, you may not want others to easily or accidentally uninstall apps from the Start menu. In those cases, you can use the Local Group Policy Editor or Registry to prevent this from happening on Windows 10.

In this Windows 10 guide, we'll walk you through the steps to prevent users from uninstalling apps from the Start menu.

How to prevent users from uninstalling apps from Start using Group Policy

If you're running Windows 10 Pro, Enterprise, or Education, you can use the Local Group Policy to block users from removing apps from the Start menu.

  1. Use the Windows key + R keyboard shortcut to open the Run command.
  2. Type gpedit.msc and click OK to open the Local Group Policy Editor.
  3. Browse the following path:

    User Configuration > Administrative Template > Start Menu and Taskbar

  4. Double-click the Prevent users from uninstalling applications from Start policy.

  5. Select the Enabled option.

  6. Click Apply.
  7. Click OK.

Once you complete the steps, if users right-click an app on the Start menu the "uninstall" option will not be available. However, you'll still be able to remove apps using the Settings app.

If you change your mind, at any time, you can use the same steps to revert the changes, but on step No. 5 make sure to select the Not Configured option.

How to prevent users from uninstalling apps from Start using Registry

If you're running Windows 10 Home, you won't have access to the Local Group Policy Editor, but you can still enforce this option by modifying the Registry.

Important: This is a friendly reminder to let you know that editing the registry is risky, and it can cause irreversible damage to your installation if you don't do it correctly. It's recommended to make a full backup of your computer before proceeding.

  1. Use the Windows key + R keyboard shortcut to open the Run command.
  2. Type regedit, and click OK to open the registry.
  3. Browse the following path:

    HKEY_CURRENT_USER\Software\Policies\Microsoft\Windows

  4. Right-click the Windows (folder) key, select New, and click on Key.
  5. Name the key Explorer and press Enter.

  6. Inside the newly created key, right-click and select New, and click on DWORD (32-bit) Value.

  7. Name the key NoUninstallFromStart and press Enter.
  8. Double-click the newly created DWORD key and make sure to change its value from 0 to 1.

  9. Click OK.

After completing the steps, simply close the Registry, and you should no longer see the "uninstall" option in the context menu when right-clicking an app from the Start menu. In the case you want to remove an app, you'll need to use the Settings app.

If you want to revert the changes, follow the steps mentioned above, but on step No. 8 make sure to change the DWORD value from 1 to 0.

More Windows 10 resources

For more help articles, coverage, and answers to common questions about Windows 10, visit the following resources:

How to format a new hard drive on Windows 10

$
0
0

You should never use a hard drive without formatting it first, and in this guide, we show you how to do it.

If you just got a new hard drive, which you're planning to use on Windows 10, it's important to format it before begin storing files. You want to do this to make sure the drive is completely clean, free of malware or malicious code. It also helps to ensure the drive is in working condition.

It could also happen that you're trying to set up a used hard drive that was configured for a different OS and using formatting, you can correctly set up the drive for Windows 10.

When you format a hard drive (e.g., HDD or SSD), you're essentially deleting any information stored on the drive and set up a file system (e.g., NTFS and FAT32) that the OS understands to read and write data to the drive.

Windows 10 offers a number of ways to format a hard drive, but you'll find that Disk Management is perhaps the better choice for most users. This is because it's a more advanced tool that can help set up a drive properly, even when it doesn't show up in File Explorer.

In this Windows 10 guide, we'll walk you through the steps to properly format a new hard drive on your computer.

How to format an existing partition using Disk Management

If you're dealing with a hard drive with a partition already configured, then use these steps to format an existing partition:

  1. Use the Windows key + X keyboard shortcut to open the Power User menu and select Disk Management.
  2. Right-click the drive you want and click Format.

  3. Type a descriptive name.
  4. Select a file system from the drop-down menu. In the case of Windows 10, it's recommended to use the NTFS file system.
  5. On "Allocation unit size," leave the Default option.
  6. Clear the Perform a quick format option.
  7. Unless necessary, you don't need to check the Enable file and folder compression option.

  8. Click OK.
  9. Click OK on the warning message.

Once the formatting process completes, you can then begin to store files on the hard drive.

How to create and format a new partition using Disk Management

It could also happen that you're trying to set up a hard drive that doesn't have a partition, in which case, you may have to initialize and partition before you can format it.

Usually, you'll know if the drive doesn't have a partition when it does not appear in File Explorer, and Disk Management will list it with unallocated space.

You can follow these steps to set up and format a hard drive without a partition, using Disk Management:

  1. Use the Windows key + X keyboard shortcut to open the Power User menu and select Disk Management.
  2. Right-click the drive marked as "Unknown" and "Not Initialized," and select Initialize Disk.

  3. Select one of the partition styles:

    • MBR (Master Boot Record) for a hard drive smaller than 2TB in size.
    • GPT (GUID Partition Table) for a hard drive larger than 2TB in size.

  4. Once the drive is initialized, right-click the Unallocated space, and select New Simple Volume.

  5. Click Next.
  6. Choose the volume size or leave the default size if you're planning to use the entire hard drive to store files.
  7. Click Next.

  8. Select a drive letter from the drop-down menu.
  9. Click Next.

  10. Select a file system from the drop-down menu. In the case of Windows 10, it's recommended to use the NTFS file system.
  11. On "Allocation unit size," leave the Default option.
  12. Type a descriptive name.
  13. Clear the Perform a quick format option.
  14. Unless necessary, you don't need to check the Enable file and folder compression option.
  15. Click Next.

  16. Click Finish.

Once you completed the steps, Windows 10 will set up a new partition and properly format the hard drive.

In this guide, we opted to clear the "Perform a quick format" option, and for a good reason. While performing a quick format wipes the drive faster, it doesn't check if the drive is damaged. On the other hand, when clearing the quick option, a full format will be performed instead, which not only wipes the drive clean, but it'll also check for bad sectors. It's an option that will take more time, but it's a good practice to make sure the hard drive is in working condition.

If you're having trouble using Disk Management to format a hard drive, because of data corruption or other severe issues, you can use the DiskPart command-line tool to fix the problem.

More Windows 10 resources

For more help articles, coverage, and answers to common questions about Windows 10 visit the following resources:

How to play Oculus Rift games on the HTC Vive

$
0
0

How to play Oculus Rift games on the HTC Vive

How do I get Rift games working on my Vive?

PC gamers have long been proud of their peacefulness (other than a few mild dust-ups with the console armies). There hasn't been a war between PC gamers in years!

Keeping with the trend of sharing and caring, LibreVR created Revive, software that lets HTC Vive owners play Oculus Rift games. Why can't Rift games by default be played on Vive? We'll get into that.

Let's take a look at how Revive works, a little history about Oculus games, and finally a list of all the Rift games that work with Vive.

Read more at VR Heads!

How to solve the pesky "not designed to run on your OS" Visual C++ error

$
0
0

MFC File Error

Should you encounter an issue with some software or games where a specific file error shows up with "this is not designed to run on your OS," we're going to look at a few things you can try out to fix it.

The issue I had was with mfc140u.dll, which is part of Microsoft's Visual C++ redistribution suite, the 2015 version in my case. The GOG Galaxy client can sometimes stumble with this issue, which has caused gamers to take to online forums to try and get some assistance.

I browsed around and worked with a few people to see if we could come across a fix since everything we tried up until that point failed to solve our problem. Here's what we came up with.

MFC Error

Re-install VC

The first step we need to take is to re-install the Visual C++ redistribution suite that may have been packaged with the game or software you're attempting to run. This may be causing the issue, but luckily Microsoft has made it easy to fetch and install a fresh version.

  1. Download the VC redis that matches the error you're encountering (in our case it was mfc140u.dll, but other .dll file errors may be associated with older versions).
  2. Run the install executable.
  3. Choose "repair".
  4. Reboot.

If that fixed the issue then you should be good to go. If not, or if this error occurred again after a few more launches, try a full re-install:

  1. Re-run the downloaded executable.
  2. Choose "Uninstall".
  3. Reboot.
  4. Close down your anti-virus software.
  5. Run the executable again.
  6. Follow the wizard and complete the process.

If the above still doesn't work, try uninstalling the redis package and the software/game you're attempting to run. Then reboot your system and re-install the redis package, followed by the software/title.

Cleansing the registry

When attempting to re-install VC on my machine, I would be met with a different error, which related to the installer not being able to locate some files. Deleting a registry entry or two before re-installing VC is what appeared to not only solve this new issue, but also the error prompt I was trying hard to address as well.

This may work for you if all other options fail. I uninstalled Microsoft Visual C++ 2015 before carrying out these following steps, which will remove Visual C++ 2015 registry keys from your machine. You should always take extra care when dealing with the Windows registry, as deleting the wrong thing can negatively impact system stability.

  1. Hit Windows Key + R.
  2. Type in "regedit".
  3. Hit OK.
  4. Navigate to "HKEY_LOCAL_MACHINE\SOFTWARE\Classes\Installer\Products".

    MSVC

  5. Manually choose each listing within this folder until you come across any with "Microsoft Visual C++ 20XX" under "ProductName".
  6. For these entries you find, right-click on each one.
  7. Choose "Export".
  8. Once again right-click the listing.
  9. This time, choose "Delete".

Reboot your PC and run the Visual C++ executable.

Contact Microsoft

If you're still stumped and have exhausted all other avenues, it's time to contact the Microsoft Community. Head to the official forum and see if someone can lend a hand.

Everything you need to know about Verizon's Unlimited plan

$
0
0

A complete breakdown of Verizon's new Unlimited plan and everything else you can get when you sign up for service.

In the United States, there are a lot of companies that can get you and your phone online, but most people use one of the four biggest: AT&T, Sprint, T-Mobile and Verizon Wireless. Choosing between them can be difficult, especially if you want to use a Windows phone. Verizon, for example, only lists one Windows phone for sale online these days. Your first priority should be what service works best in the places you spend your time. It's not worth saving $10 a month if the service is bad. Once you have that sorted, you can look at what each company has to offer and the prices they charge for it.

More: Which unlimited plan should you buy?

Let's take a look at Verizon to see what they can give you and what it will cost.

Note: The details of this plan are current as of February 20, 2017.

Verizon Unlimited plan details

  • Unlimited talk, text, and data
  • Unlimited HD streaming video (see Verizon's Video Optimization Deployment page)
  • 10GB high-speed mobile hotspot
  • Add a tablet with unlimited data for $20 per month
  • Add a connected device for $5 per month
  • Unlimited calling and texting to and from Canada and Mexico

Verizon's definition of Unlimited Data means that after you use 22 GB in a single month, your service can be slowed down if you're in a congested area. You'll hear the word throttled used here but you need to know that it's only a temporary deprioritization of your data connection when you're in a busy area. It may not happen at all depending on how many other customers are using the same towers.

Verizon gives you all the details and fine print on their website, though you might have to dig around to find them.

Verizon links you to all of the fine print right from your cart when you sign up for the unlimited plan. In that fine print you'll see how Verizon takes steps to protect their network. Data services, both on-device and through tethering can not be used for illegal activities, anything that violates trade or economic sanctions, any type of server, email auto-responders or bots and sending malware. They also let you know that they can and will be monitoring your usage to make sure you comply. All service providers have the same restrictions, but Verizon takes the time to present them so well we wanted to give them a shout out.

Additional lines can be added to a Verizon Unlimited plan. Every line has the same benefits outlined above and requires an equipment purchase. Here is a pricing breakdown.

  • One line of service is $80
  • Two lines of service is $140
  • Three lines of service is $162
  • Four lines of service is $180

Verizon Unlimited plan add-ons

Verizon's Unlimited plan lets you call and text to Canada and Mexico, and lets you call and text from Canada and Mexico back to the states. If 50 percent or more of your usage over any 60-day period is from Canada or Mexico Verizon can cut you off. So be careful if you live on the border!

If you need other international services, Verizon has you covered.

  • The free International Messaging add-on let's you send text messages to over 200 countries and multimedia messages to over 100 countries
  • The Unlimited Together - North America add-on gives you discounted calling rates to over 230 locations for $5 per month
  • The Unlimited Together - world add-on gives you discounted calling rates to over 180 locations for $15 per month
  • A daily Travel Pass gives you unlimited data and calling when you're in one of over 100 countries for $10 per day
  • A monthly Travel Pass gives you discounted calling and messaging rates as well as a data alotment based on your needs (prices vary, see Verizon's International Travel page)
  • Cruise ship rates are $2.99 per minute for voice calls and $0.50 per message sent / $0.05 per message received for texting.

Verizon also has a program that gives you a prepaid card of up to $650 in value for a trade in if you switch from another network. The details are on the Switch to Verizon page of their website. They also have a referral program and a rewards program that can put money back in your pockets.

They also offer a wide range of their own services for Android and iOS devices, including their own RCS messaging app, a personal cloud and an excellent account management app. You can find those on their respective app stores.

See at Verizon

How to save a Microsoft Word doc as a PDF or other file format

$
0
0

How do I save a Microsoft Word document as a PDF or plain text file?

You use Microsoft Word for your various word-processing needs. It's simple and easy-to-use, and it simply gets the job done in most cases. But what if someone else requests a file in a different format, such as PDF? What if you need the info in your Word doc to appear in plain text, without any font or paragraph styles?

Microsoft Word 2016 for Windows has a basic feature that lets you save documents in several different, but common, file formats. Here's how to use it.

See on Microsoft Store

How to save a Microsoft Word doc as a PDF

  1. Click the File tab in the top-left corner of your Word screen.

  2. Click Export in the blue vertical menu that runs along the left side of your screen.

  3. With the Create XPS/PDF Document option selected, click the corresponding box on the right side of your screen. (It looks like a document icon wearing a seatbelt.)

  4. A new box labeled Publish as PDF or XPS appears, and you should use it to navigate to the location on your PC where you want to save the new PDF.
  5. Click Publish to create and save your PDF.

    • You may see a How do you want to open this file? pop-up box. By default, Windows will use the Edge browser but you can choose from other compatible browser apps installed on your PC, as well.
    • If you want to continue using the same app to open PDFs in the future, check the Always use this app to open .pdf files option.

If the file format you want isn't available in Microsoft's default option, you can also dig a bit deeper for additional file format options.

How to save a Microsoft Word doc in different file formats

  1. Follow Steps No. 1 and No. 2 above.
  2. Highlight the Change File Type option on the left side of the screen.

  3. You'll see a number of different present options for new file formats, including OpenDocument Text, Word 97-2003 Document, Plain Text and Rich Text Format.
    • If you want to use one of the default options, choose and click it accordingly and then hit the Save As box at the bottom of the screen.
    • Next, navigate to the location on your PC where you want to save the new file and click Save.
  4. If you want to save your Word doc in a format that's not available in Word's preset defaults, complete Steps No. 1 and No. 2 above, and then choose Save as Another File Type

  5. Click the Save As box at the bottom of the screen.
  6. In the next box, navigate to the location on your PC where you want to save the new file.
  7. Open the drop-down menu next to Save as type to see a few additional options, such as Word XML Document, Strict Open XML document, and Web Page, Filtered.

  8. Choose the format you want and click Save.

Word 2016 for Windows lets you easily convert your documents into more than a dozen different formats, using the process detailed here.

For more Word help and how-to articles, read:

How to find out which app is using your webcam on Windows

$
0
0

How to see which apps are using your webcam

My webcam is on, but nobody's home — how do I identify the app that's using it?

If you've already experienced the unease of seeing your webcam light come on when you aren't using it, you might be one of the countless people who covers the little camera with a piece of a sticky note or sticky tack. Some malicious programs that hijack your webcam can disable the LED that lets you know when it's turned on.

Less fear mongering and more solutions, you say? OK. First, if you see your webcam light is on and you don't know why, cover it up. Now that it's covered, let's take a look at how to find out which app is controlling your webcam and how to regain your privacy.

How to download Process Explorer

Microsoft has a neat little tool that is sort of like a task manager working on a deeper level. It allows you to search by device, to see which process is using it. Microsoft explains it well:

Process Explorer shows you information about which handles and DLLs processes have opened or loaded.

Here's how to download Process Explorer.

  1. Launch your browser from the Start menu, desktop or taskbar.
  2. Navigate to the Microsoft Process Explorer download page.

    Launch your browser. Navigate to the website.

  3. Click Download Process Explorer.
  4. Click Save.

    Click Download Process Explorer. Click Save.

  5. Launch File Explorer from your Start menu, taskbar or desktop.
  6. Click Downloads.

    Launch File Explorer. Click Downloads.

  7. Right-click Process Explorer.
  8. Click Extract All.

    Right-click ProcessExplorer. Click Extract All.

  9. Click Extract.
  10. Right-click the application. (Use the x64 suffix if you're using a 64-bit version of Windows.)

    Click Extract. Right-click the application.

  11. Click Run as Administrator.
  12. Click Run.

    Click Run as Administrator. Click Run.

  13. Click Agree.
  14. Click the Minimize button in the top-right corner of the window.

    Click Agree. Click the Minimize button.

How to find your webcam's name

Now that you have Process Explorer open and running, you need to find the name of your webcam in order to check up on it. Here's how to do it using Device Manager.

  1. Right-click the Start button.
  2. Click Device Manager.

    Right-click the Start button. Click Device Manager.

  3. Click the dropdown arrow next to Imaging Devices.
  4. Right-click the camera.

    Click the dropdown arrow. Right-click the camera.

  5. Click Properties.
  6. Click the Details tab near the top of the window.

    Click Properties. Click the Details tab.

  7. Click the dropdown arrow beneath Property.
  8. Click Physical Device Object Name. (You might have to scroll down a bit to find it.)

    Click the dropdown arrow. Click Physical Device Object Name.

  9. Right-click the name in the Value field.
  10. Click Copy.

    Right-click the name in the Value field. Click Copy.

How to see which app is using your webcam

Process Explorer should be running and minimized, and you should have the device name of your webcam copied to your clipboard. Here's how to put everything together and see which app is using your webcam.

  1. Click Process Explorer in your taskbar.
  2. Click Find near the top of the window.

    Click Process Explorer in your taskbar. Click Find.

  3. Click Find Handle or DLL… (You can alternatively just hit Ctrl + F on your keyboard.)
  4. Right-click the Handle or DLL substring field.

    Click Find Handle or DLL. Right-click the field.

  5. Click Paste.
  6. Click Search. A list of processes using your webcam should appear. If you don't see anything, try searching again and ensure that you're running Process Explorer as Administrator.

    Click Paste. Click Search.

  7. Scroll through the Process list in the main Process Explorer window until you find the offending process.
  8. Right-click the unrecognized process.
  9. Click Properties. In this case, only Chrome is using my webcam. If you don't recognize a process using your webcam, you probably want to kill it.

    Right-click the process. Click Properties.

  10. Click Kill Process.
  11. Click OK.

    Click Kill Process. Click OK.

How to run a Windows Defender malware scan

If you had a weird, unrecognized program using your webcam, it's possible that your PC is infected. In this case, it's a good idea to run a scan with Windows Defender.

  1. Launch Windows Defender from your Start menu, desktop or taskbar.
  2. Click Full.
  3. Click Scan now.

    Click Full. Click Scan now.

Windows Defender will now start a scan of your computer. Anyone who wants a second opinion should check out our roundups of the best overall antivirus software and the best free antivirus alternatives:

The best antivirus software of 2017.

The best free antivirus alternatives to Windows Defender.


How to stop people from changing your Windows 10 desktop wallpaper

$
0
0

Does someone keep changing your desktop background on Windows 10? Here's how to stop them and lock down some specific wallpaper.

There could be many good reasons you may want to prevent users from changing the desktop background on Windows 10. Perhaps you work for a company that wants devices (or guest computers) only to display a custom wallpaper with a company logo. Or at home, if you share your computer with other people, you may want to see a particular desktop background, but someone keeps changing it.

Windows 10 offers a few ways to keep users from changing the desktop background on a computer, including using Group Policy and modifying the Registry.

In this Windows 10 guide, we'll walk you through the steps to restrict users from changing the current desktop background using the Local Group Policy Editor and Registry.

How to prevent users from changing wallpaper using Group Policy

You can keep users from changing the current desktop background in multiple ways, but the quickest method is to use the Local Group Policy Editor, as long as you're running Windows 10 Pro, Enterprise, or Education.

There are two ways to accomplish this task: You can enforce a default desktop wallpaper, or you can prevent users from changing the desktop background settings.

Prevent users from changing desktop background

Before you begin, make sure to set an image as a default on the desktop using the Settings app or right-clicking an image and selecting Set as desktop background.

Then use the Local Group Policy Editor with the following steps to restrict users from changing the desktop background:

  1. Use the Windows key + R keyboard shortcut to open the Run command.
  2. Type gpedit.msc and click OK to open the Local Group Policy Editor.
  3. Browse the following path:

    User Configuration > Administrative Templates > Control Panel > Personalization

  4. Double-click the Prevent changing desktop background policy.

  5. Select the Enabled option.

  6. Click Apply.
  7. Click OK.

Once you complete these steps, you don't need to restart your computer. The settings will apply immediately. You can double-check by going to Settings > Personalization > Background, where you'll notice that options aren't available, and you'll also see a message that reads "Some settings are managed by your organization".

Enforce a default desktop background

Alternatively, you can use the Local Group Policy to enforce a desktop background, which will also prevent users from changing the image using the following steps:

  1. Use the Windows key + R keyboard shortcut to open the Run command.
  2. Type regedit, and click OK to open the registry.
  3. Browse the following path:

    User Configuration > Administrative Templates > Desktop > Desktop

  4. Double-click the Desktop Wallpaper policy.

  5. Select the Enabled option.
  6. Under "Options," type the path for the image you want to set as a default background and select the style.

  7. Click Apply.
  8. Click OK.

Once you complete these steps, you'll need to restart your computer to see the changes.

Using this method, you won't see a "Some settings are managed by your organization" message in the Personalization settings, and users won't be able to change the current desktop wallpaper.

These instructions will even prevent wallpapers for syncing when you use a Microsoft account and settings syncing is enabled. The color accent will continue to sync, but you can prevent this from happening. Just go to Settings > Accounts > Sync your settings and turn off the Theme toggle switch.

If you change your mind, you can always revert the changes by following the same steps, but on step No. 4 make sure to select the Not Configured options for the Desktop Wallpaper and Prevent changing desktop background policies.

How to prevent users from changing wallpaper using Registry

If you're running Windows 10 Home, you won't have access to the Local Group Policy Editor, but you can still prevent users from changing the desktop background by modifying the Registry.

Important: This is a friendly reminder to let you know that editing the registry is risky, and it can cause irreversible damage to your installation if you don't do it correctly. We recommend making a full backup of your computer before proceeding.

In the same way as with the Local Group Policy Editor, there are two ways to accomplish this task, you can enforce a default desktop wallpaper, or you can prevent users from changing the desktop background settings.

Prevent users from changing desktop background

Before you begin, make sure to set an image as default on the desktop using the Settings app or right-clicking an image and selecting Set as desktop background.

Then if you're running Windows 10 Home, or you simply prefer to use the Registry to make changes to the OS, use the following steps to restrict users from setting a new wallpaper:

  1. Use the Windows key + R keyboard shortcut to open the Run command.
  2. Type regedit, and click OK to open the registry.
  3. Browse the following path:

    HKEY_CURRENT_USER\Software\Microsoft\Windows\CurrentVersion\Policies

  4. Right-click the Policies (folder) key, select New, and click on Key.

  5. Name the key ActiveDesktop and press Enter.
  6. Right-click on the right side, select New, and click on DWORD (32-bit) Value.

  7. Name the new DWORD NoChangingWallPaper and press Enter.
  8. Double-click the newly created DWORD and change its value from 0 to 1.

  9. Click OK.

After completing the steps, users will no longer be able to set a new image as a background using the Settings app and the right-click "Set as desktop background" will not work.

Enforcing a default desktop background

Alternatively, you can modify the Registry to enforce a specific desktop background, which prevents users from changing the image.

  1. Use the Windows key + R keyboard shortcut to open the Run command.
  2. Type regedit, and click OK to open the registry.
  3. Browse the following path:

    HKEY_CURRENT_USER\Software\Microsoft\Windows\CurrentVersion\Policies

  4. Right-click the Policies (folder) key, select New, and then click on Key.

  5. Name the key System and press Enter.
  6. Right-click on the right side, select New, and click on String Value.

  7. Name the string Wallpaper and press Enter.
  8. Double-click the newly created String Value and set the path for the default wallpaper you want to use: For example, C:\defaultwall.jpg.

  9. Click OK.
  10. Right-click on the right side, select New, and then click on String Value.
  11. Name the string WallpaperStyle and press Enter.
  12. Double-click the newly created string and change its value to set your wallpaper style. You can use one of the following options:

    • 0 - Centered
    • 1 - Tiled
    • 2 - Stretched
    • 3 - Fit
    • 4 - Fill
  13. Click OK.

Once you complete the steps, you'll need to restart your computer to see the new default wallpaper.

Using these steps will also prevent wallpapers from syncing using a Microsoft account, in the case that you sync your settings. The color accent will continue to sync, but you can go to Settings > Accounts > Sync your settings and turn off the Theme toggle switch to prevent that from happening.

You can always revert the changes by right-clicking and deleting the ActiveDesktop and System (folder) keys in the Registry.

More Windows 10 resources

For more help articles, coverage, and answers to common questions about Windows 10, visit the following resources:

How to fix Windows 10 'network resource unavailable' errors

$
0
0

Windows Installer Network Error

If you're installing software on Windows 10, you could encounter an issue with network resources being unavailable for access. Here's how to fix the problem.

When you install and remove software on Windows there are a number of processes that take place, and most of them are not shown in the GUI. Unfortunately, due to the complexity of the OS and underlying software, things can sometimes go wrong. Should you be installing some software and see an unexpected error that states, "The feature you are trying to use is on a network resource that is unavailable," you'll usually need to close down the wizard, because the install or uninstall process is unable to progress past that stage.

Searching around Microsoft's online resources brings up a few potential fixes. We'll go through them in this guide to get you back on track.

Check Windows Installer

First, you should check that the Windows Installer service is actually running. Here's how to make sure everything is working:

  1. Hit Windows Key + R.
  2. Type in "services.msc".
  3. Hit OK.

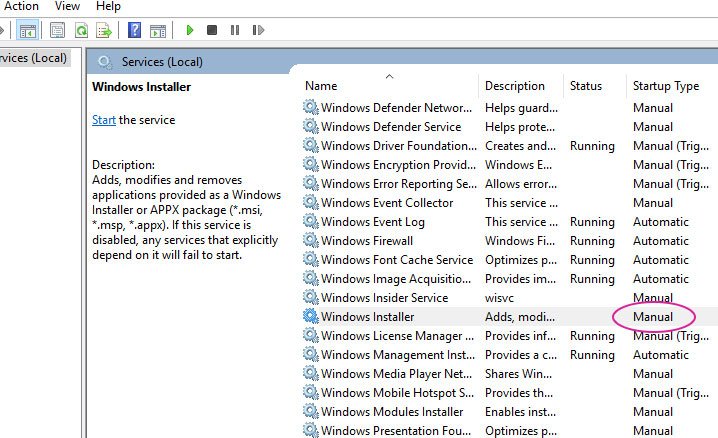
    Windows Installer

  4. Check if "Windows Installer" is enabled.
  5. If disabled, double-click the listing.
  6. Change Startup type to "Automatic" or "Manual".

If the Windows Installer service is already enabled (set to automatic or manual) and working fine, or you activated it manually and things still aren't going well in the software installer, you'll need to move onto another possible fix.

Run Troubleshooter

Windows Installer Troubleshooter

The Windows Installer troubleshooter suite will automatically check and attempt to fix any detected issues that may be preventing you from adding or removing software.

Download the Windows Installer Troubleshooter

Here's a list of the things this tool can fix:

  • Corrupted registry keys on 64-bit OSes.
  • Corrupted registry keys that control the update data.
  • Problems that prevent new programs from being installed.
  • Problems that prevent existing programs from being completely uninstalled or updated.
  • Problems that block you from uninstalling a program through Add or Remove Programs (or Programs and Features) in Control Panel.

Simply run the downloaded executable and let the tool do its thing. Hopefully, this should pick up on what's going wrong. If it finds nothing to fix, you'll need to move onto the final step which involves making edits to the registry.

Edit the Registry

This may work for you if all other options fail, but it should be a last resort. You should always take extra care when dealing with the Windows Registry, because deleting the wrong thing can negatively impact system stability.

  1. Hit Windows Key + R.
  2. Type in "regedit".
  3. Hit OK.
  4. Navigate to "HKEY_LOCAL_MACHINE\SOFTWARE\Classes\Installer\Products".

    MSVC

  5. Manually select each listing within this folder until you come across any with the software name under "ProductName".
  6. For any of these entries you find, right-click on each one.
  7. Choose "Export".
  8. Once again right-click the listing.
  9. This time, choose "Delete".

Finally, you should reboot your PC and then re-run the installer executable.

More Windows 10 resources

For more help articles, coverage, and answers to common questions about Windows 10, visit the following resources:

What you need to know about monitor refresh rates

$
0
0

PC monitor

Amongst all the jargon associated with PC monitors, you'll find the term "refresh rate." But what exactly does it mean, and should it influence a display purchase?

You're shopping for a new PC monitor, and you're presented with a wall of numbers, letters and general gibberish. Well ... it's gibberish if you don't understand it. Here we're focusing on refresh rate, and more specifically, what it means and what you should be looking for when buying a new monitor.

What exactly is monitor refresh rate?

Refresh rate

A definition provided by Encarta Dictionaries (via Bing):

The number of times per second that an image displayed on a screen needs to be regenerated to prevent flicker when viewed by the human eye.

The refresh rate of your monitor refers to how many times per second the screen refreshes the image on it. It's measured in hertz (Hz), and the higher the number the more times per second your monitor refreshes.

Depending on the monitor and graphics setup you have, refresh rate may be something you can alter. There's the overclocking method, but more simply, with some modern monitors you have adjustable refresh rates you can alter yourself using Windows 10.

To do this you simply right click on the desktop, select display settings, then advanced display settings and finally display adapter properties. You'll then see the image above, with a drop-down box that contains different values if your monitor supports variable refresh rates.

What you should look for when buying a monitor

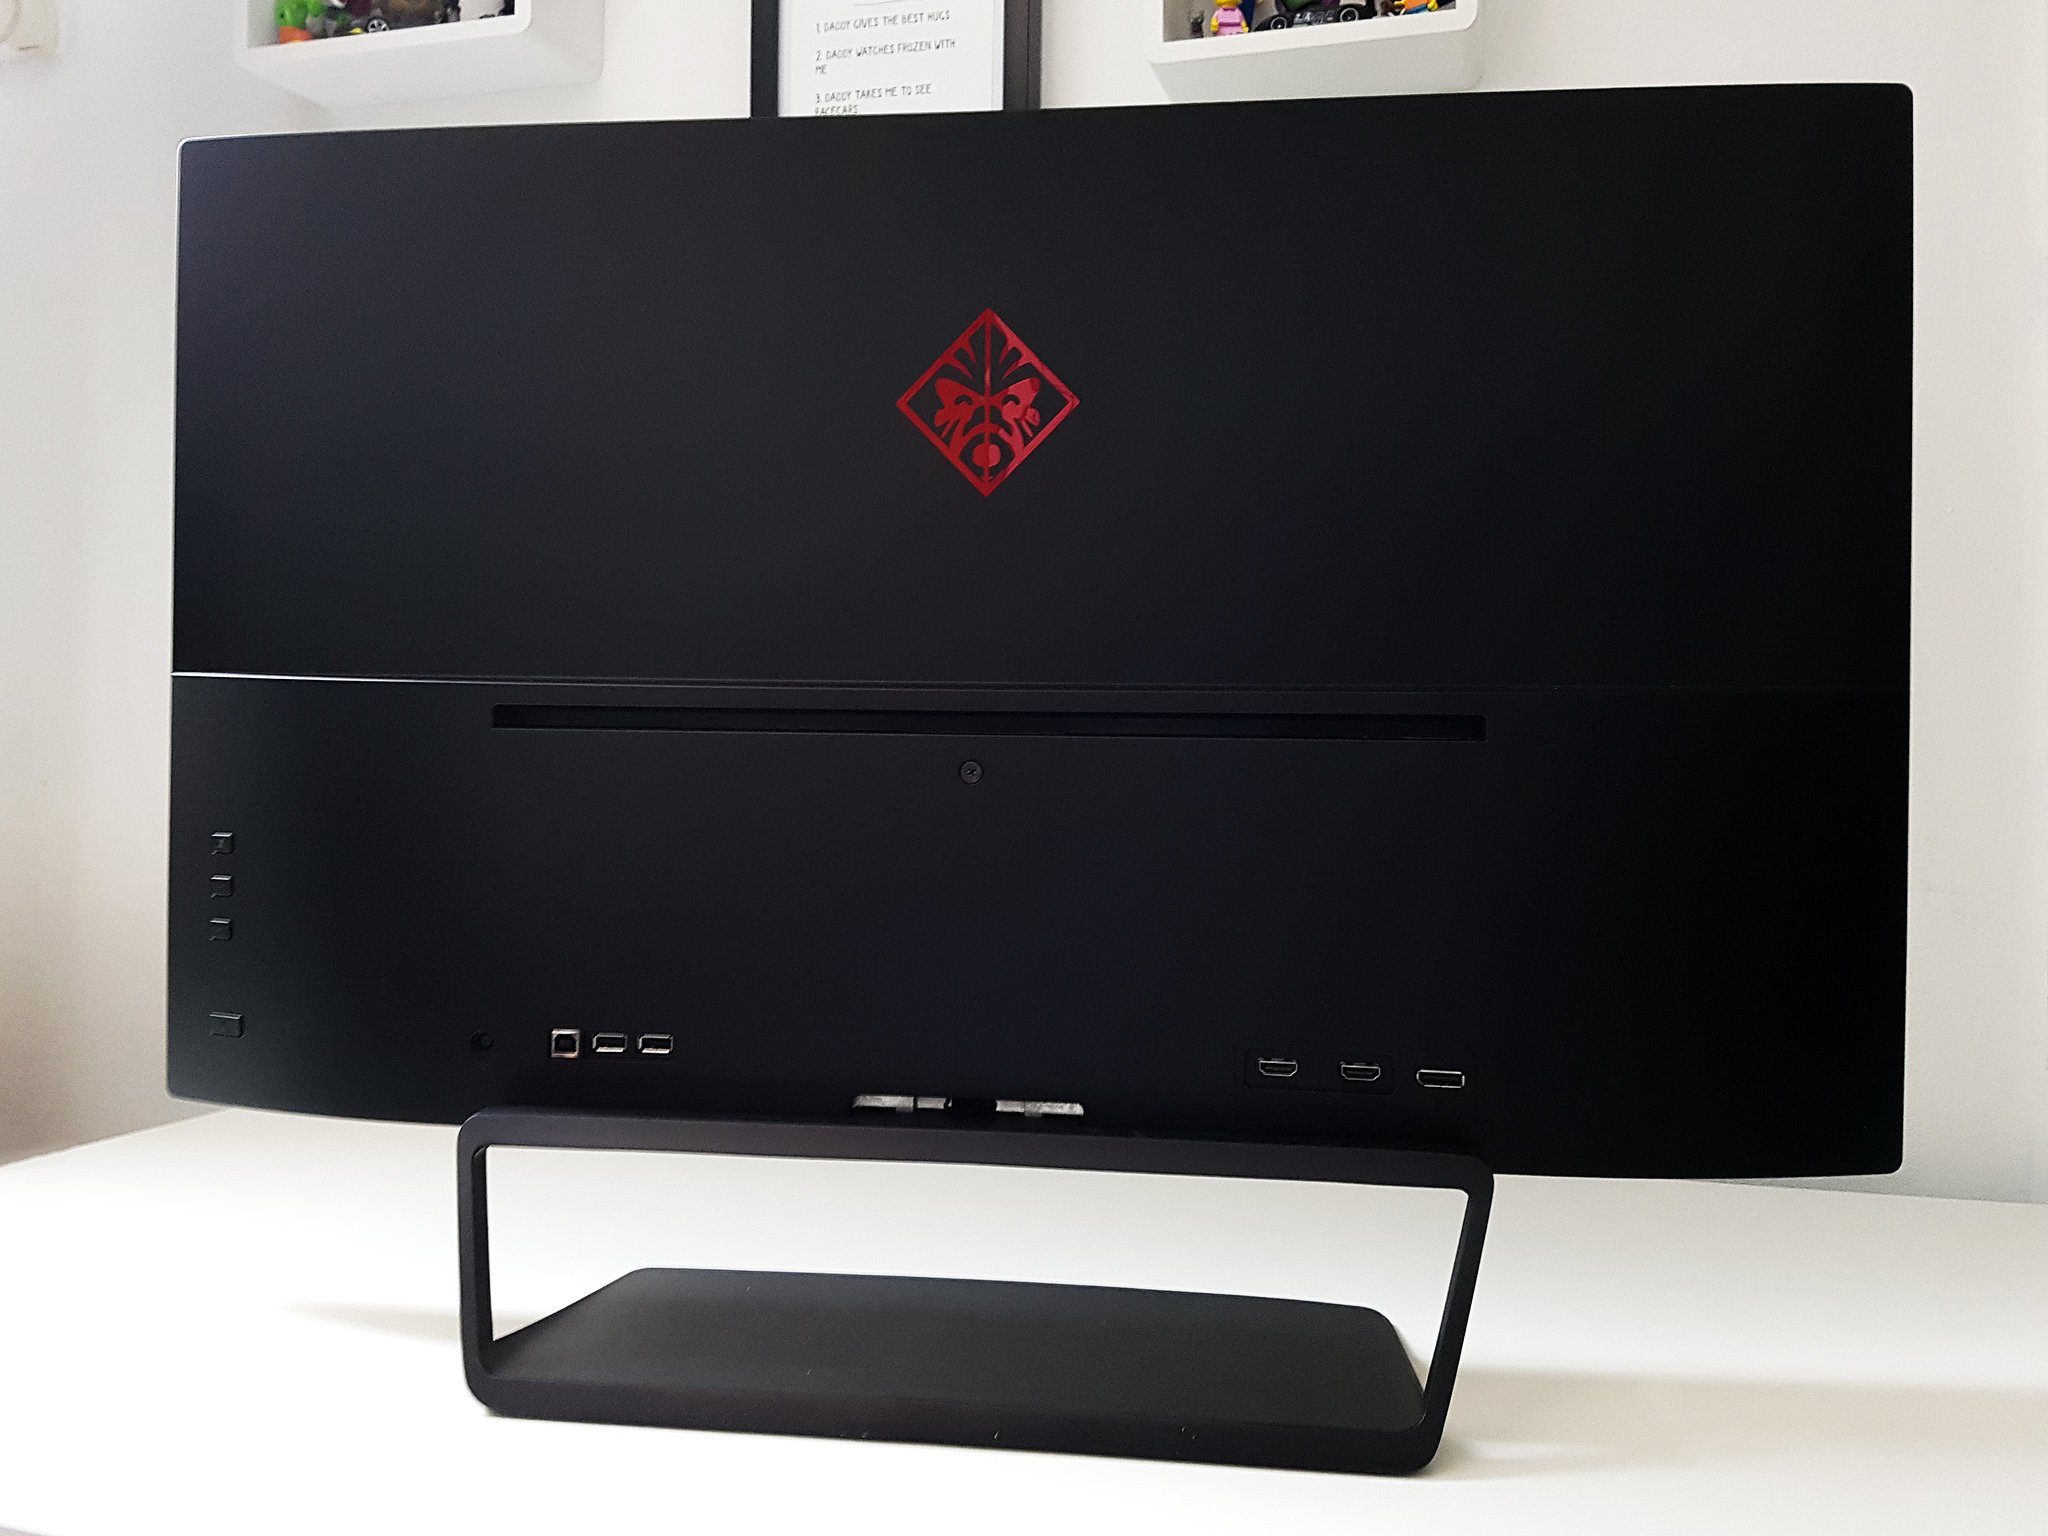
HP Omen 32

Generally speaking, 60Hz is the minimum for a good quality, solid experience from a monitor. If you're a gamer then the higher the refresh rate, the better. Refresh rates now go up to a whopping 240Hz. For gamers, it's important to have a fast refresh rate to keep things sharp and reaction times high. Speedier frame rates in games make them super smooth.

Even for non-gamers, going below 60Hz will start to hurt your overall PC experience. If you went down to say, 30Hz, that's only 30 redraws a second, which isn't going to look great. The good news is that even without spending a lot of money, 60Hz is common enough nowadays that you should be able to find one.

As you increase the resolution of your panel, however, you'll generally decrease the refresh rate. You won't find a 4K monitor with a 240Hz refresh rate right now, for example, but you will find one at 60Hz. That's something to balance, particularly if you're a gamer. You have to make a sacrifice somewhere.

If you were wondering what the jargon is about, this story hopefully helps. If you're a PC gamer, then a 144Hz monitor will be a great shout. A console gamer or an average PC user will get by just fine with 60Hz for now. However, if you're on the bleeding edge and like things faster than fast, 240Hz is calling your name.

How to change 'smart' quotes to 'straight' quotes in Microsoft Word, Outlook and PowerPoint

$
0
0

How do I change "smart," or "curly," quotes to "straight" quotes in Microsoft Word, Outlook or PowerPoint?

For some reason, Microsoft doesn't seem to like plain old traditional "straight" quotes, or quotes without any curves or contours. Instead, it apparently prefers the more stylized, curved "smart" quotes.

The problem? Smart quotes don't seem all that intelligent when they mess up the formatting in certain files or on web pages. So it can be a good idea to change the default smart-quote setting in Microsoft Office apps to the straight versions. Thankfully, Microsoft makes that fairly simple in Word, Outlook and PowerPoint — at least once you learn the proper processes.

See on Microsoft Store

Note: These steps are specific to the apps in Microsoft Office 2016 for Windows.

How to change smart or curly quotes to straight quotes in Microsoft Word

  1. Click the File tab in the top-left corner of the Word screen.

  2. Click Options at the very bottom of the vertical list of choices along the left side of the display.

  3. In the Word Options box that appears, click the Proofing tab.
  4. Click the AutoCorrect Options box.

  5. Click the AutoFormat tab.
  6. Under the Replace section heading, uncheck the box next to "Straight quotes" with "smart quotes".

  7. Click the AutoFormat As You Type tab.
  8. Under the Replace as you type section, uncheck the box next to "Straight quotes" with "smart quotes".

  9. Click OK.
  10. Click OK again on the Word Options box to save all changes

How to change smart or curly quotes to straight quotes in Microsoft Outlook

  1. Click the File tab in the top-left corner of the Outlook screen.

  2. Click Options at the bottom of the vertical list of choices along the left side of the display.

  3. In the Outlook Options box that appears, click the Mail tab.
  4. Click Spelling and AutoCorrect.

  5. In the Editor Options box, make sure the Proofing tab is selected (it is by default) and click AutoCorrect Options.

  6. Click the AutoFormat tab.
  7. Under the Replace heading, uncheck the box next to "Straight quotes" with "smart quotes."

  8. Click the AutoFormat As You Type tab.
  9. Under the Replace as you type section, uncheck the box next to "Straight quotes" with "smart quotes."

  10. Click OK.

  11. Finally, click OK one more time on the Editor Options box to confirm your changes.

How to change smart or curly quotes to straight quotes in Microsoft PowerPoint

  1. Click the File tab in the top-left corner of the PowerPoint screen.

  2. Click Options at the bottom of the vertical list of choices along the left side of the display.

  3. In the PowerPoint Options box that appears, click the Proofing tab.
  4. Click AutoCorrect Options….

  5. Select the AutoFormat As You Type tab.
  6. Under the Replace as you type section, uncheck the box next to "Straight quotes" with "smart quotes".

  7. Click OK.
  8. Finally, click OK one more time on the PowerPoint Options box to confirm the changes.

If you ever want to re-enable smart quotes in the future, in Word, Outlook or PowerPoint, just repeat these steps and then re-check the appropriate boxes for "Straight quotes" with "smart quotes".

For more Office 365 help, how-tos and tutorials, visit our Office 101 page:

Microsoft Office 101: Help, how-tos and tutorials

Rapidly level up in Sniper Elite 4 with this easy XP trick

$
0
0

Sniper Elite 4

Sniper Elite 4 is the latest and greatest in Rebellion's long-running series of World War II sniper simulations.

This entry has a strong multiplayer component, with experience and player level shared across campaign, competitive, and co-op multiplayer modes. Player level unlocks not only multiplayer characters but also skills for use in every mode. Wouldn't it be nice to jump ahead a few levels to get more stuff? You bet, and we're here to help.

See on the Xbox Store

Sniper Elite 4 XP primer

Player level in Sniper Elite 4 is based on total experience earned. You earn varying amounts of experience depending on how you kill enemies. Accomplishing Challenges, earning Medals, and completing level objectives all provide substantial experience point (XP) rewards, as well. The level objective rewards are particularly exploitable, which is how this trick works.

It works in several levels, but we'll just explain how to do it in Mission 1: San Celini Island. Missions are replayable, so don't worry if you already completed this one.

Setting up the XP trick

Sniper Elite 4 Mission 1 map villa

  1. Select Mission 1 in Single Player (don't try this in co-op mode).
  2. You can either play through the mission as normal or head directly to our destination. Either way, the goal is to reach General Schmidt's villa at the northernmost point on the map.
  3. Once you reach the villa, clear out all enemies except for General Schmidt, the officer who resides there.
  4. Kill Schmidt in any way you'd like, but Mission 1 has an optional Challenge for killing all five officers with tripwire mines.
  5. When Schmidt dies, don't search his corpse yet!
  6. Stand on top of Schmidt's body.
  7. Save your game, preferably in the first save slot.

Performing the Sniper Elite 4 XP trick

Sniper Elite 4 Easy XP Trick

Now the fun begins.

  1. Search Schmidt's Corpse. This will recover a letter from the fallen general, completing one of your primary objectives. The reward for completing it is 2,000 XP.
  2. Press the Start/Menu button to open the letter and then immediately close it.
  3. Prepare to load the save game you created during the setup phase.
  4. Wait until the autosave completes. A red spinning icon at the top-right corner of the screen indicates that an autosave is in progress.
  5. Once the autosave has finished, immediately load your save.
  6. Repeat the process.

Sniper Elite 4 Easy XP Trick

As long as the autosave completes, you'll gain 2,000 XP every time you pick up the letter from Schmidt's body. The whole process takes roughly twenty seconds, so you can use this trick to about earn 6,000 XP per minute.

You can level up super quickly this way. At 440,000 XP, you'll hit level 30 and unlock a multiplayer character: Lieutenant Karl Fairburne, as well as two useful new skills for all modes. Level 50, the maximum level, will take a lot longer to reach at 1,800,000 XP. I wouldn't recommend relying solely on the XP trick to get there.

Sniper Elite 4 Easy XP Trick

Sniper Elite 4 is the best sniping game available, with improved traversal moves that allow players to climb and take position more easily; enhanced enemy AI; and a brand new skill and weapon upgrades system. Read our full review for more details. Shooter and sniping fans need to play this game!

See on the Xbox Store

Windows 10 build 15046 (and earlier) for PC: Everything you need to know

$
0
0

Are you still wondering what's been going on with the Windows 10 Creators Update previews in February? Here we dive into the new features and improvements for the most recent builds.

Microsoft is now rolling out Windows 10 build 15046 for PCs enrolled in the Fast ring starting yesterday. This release is a minor update, but it includes a few new features and improvements, including "Pick up where you left off" in Cortana, and the ability to block non-Store apps on Windows 10.

Also, during the month of February, the company made available Windows 10 build 15042, 15031, and 15025, which are also small updates, but they all bring something to the OS, including system improvements, changes on Microsoft Edge, new settings options, and more.

In this guide, we'll have a close look at what's been going on in the past four Windows 10 Insider preview builds for the Creators Update.

Windows 10 Creators Update recent additions

Cortana & Action Center

On Windows 10 build 15046, after much testing, you'll see Cortana in the Taskbar dressing its final color. However, users won't see any difference as it's simply back to its original color due to feedback from the community.

Perhaps the most exciting addition is the ability to pick up where you left off across devices using Cortana. On build 15046, you can start working on a file or an app, or you can start reading an article online using Microsoft Edge on your tablet, and you can resume your work on another computer by simply opening Cortana, and clicking the activity under "Pick up where you left off."

Cortana only shows your top three activities, but you can click the See more link to see today and last week activities you can resume. In previous builds, this new feature only showed web site links in the Action Center.

Settings

The Settings app also adds a few new changes, including a new icon for Gaming that aligns with the rest of the icons. The "Mixed Reality" section is no longer available; Night Light gets a few tweaks, you can now block non-Store apps on Windows 10, and much more.

Display

On Settings > System > Display, the Night Light feature have received a few tweaks with build 15025 and build 15042.

In the Night Light feature that reduces the blue light on your monitor, the range has been extended, and you can set the color temperature up to 1200K, which is very red, and the on/off animation now takes 2 minutes.

Apps & features

On Settings > Apps the Apps & features page is getting a new option the let you control the type of apps that can be installed on your computer.

Starting with build 15042, you can choose to install only apps from the Windows Store, which helps to keep your device protected and running at peak performance.

You can also select the option to be warned before installing an app that isn't from the Store, but you can still install apps from anywhere. In some cases, when a warning pops up, you'll see a link to get the similar app in the Store if available.

Finally, you have the option to install any app you want from anywhere without warning. These choices are optional, which means that default behavior is to allow apps from anywhere.

Accounts

On Settings > Accounts, the Sign-in options page includes Dynamic Lock, which is a new security feature that lets you link your phone to lock your device when you step away.

For the feature to work, you must first pair your phone to your PC using Bluetooth and then turn on the "Allow Windows to detect when you're away and automatically lock the device" toggle switch in the Sign-in options page. Once the Dynamic Lock is enabled, when your phone isn't near your computer, Windows 10 will wait 30 seconds, and it'll turn off the screen and lock your computer.

Dynamic Lock appeared in previous builds, but Microsoft made it official in build 15031.

Gaming

On Settings > Gaming, all the sections have their corresponding icons. You'll also find that the Game bar settings page has been updated to make easier to create shortcuts to open Game bar, take screenshots, and more.

Easy of Access

On Settings > Easy of Access, in the Narrator page, you can download and install Braille support on Windows 10.

After the components have been installed, you'll find a new Braille section, where you can turn on/off the feature, add a new braille display, change language and table type.

Windows Update

On Settings > Update & security, the Windows Update page doesn't include significant improvements over previous builds, but now you'll get a new experience changing the Active Hours settings.

Inside Advanced options, you can still pause an update for up to 35 days, but the ability to configure the update branch and skip driver updates have been removed.

Windows Defender

On Settings > Windows Defender, starting with Windows 10 build 15042, you'll no longer find the settings to control Windows Defender Antivirus. Instead, you'll find a button to change the antivirus settings using Windows Defender Security Center.

System

Under the hood, Microsoft is also introducing "compact overlay" with build 15031, which is a new mode that allows developers to add a picture-in-picture experience for Windows Store apps.

This new feature is meant to help you to continue to do other things, such as having a Skype call or watching a video while you're working on a document or checking your emails, for example.

Image source: Microsoft

Currently, only Movies & TV has the feature, but Skype Preview and other apps will get an update to support the option soon.

On Windows 10 build 15031, Microsoft also introduced a new share icon that is easier to identify. Apps with sharing capabilities that use the glyph font in Segoe MDL2 assets should get this new icon automatically.

Windows Defender Security Center

The Windows 10 Creators Update also introduces the "Windows Defender Security Center," which is the new hub not only to manage the default anti-malware protection, but to control your device security, performance, and more.

Starting with Windows 10 build 15046, you'll find a new App & browser control section, which allows you to configure the SmartScreen to protect your computer from malicious apps and sites, and web content within Windows Store apps.

And you can change all the available options in the settings page for the Windows Defender Security Center.

Alongside with these new improvements, the Windows Defender Antivirus icons in the notification area have been updated to make it easier to identify your protection status. Clicking the icon now opens the Windows Defender Security Center, instead of the old dashboard.

Microsoft Edge

On Windows 10 build 15046, Microsoft Edge jumps to version 40.15046, and while it doesn't introduce new features in the latest update, we can see a few improvements included with build 15042.

In previous Insider preview builds, the web browser introduced the ability to block Flash content by default to improve security, performance, and battery life. Starting with build 15042, Edge now shows a dialog that makes it clear that Flash content has been blocked.

If you want to unblock the content, just click the puzzle icon in the address bar and allow Flash once or every time you go back to the same website.

Microsoft Edge also can read e-books you purchase from the Store or saved locally on your computer. In the latest preview, there are a few changes, including a new book icon in the tab bar when reading locally saved epub books on your PC.

Switching pages while using the read aloud feature, the reader will now jump to the new location. And read aloud settings will be preserved when reopening books.

Last but not least, there is also a new button to open the Hub section.

Other improvements

Based on feedback, on Windows 10 build 15046, Microsoft is also improving the Windows 10 translation for non-English languages. You will see some of these changes in the updated out-of-box-experience, on newer settings, and throughout the OS.

Windows 10 build 15031 introduces a new update for the out-of-box experience that detects and skips Cortana if no audio output is detected.

Finally, using a Precision touchpad, on build 15031 and later, Windows 10 improves gesture recognition for three-finger swipes.

Wrapping things up

Although the new features and improvements released during the month of February are not particularly significant changes, they are welcome additions that make the Windows 10 Creators Update a little more complete.

Overall these are solid previews, but it's still not recommended to install any of these releases on your primary machine, as there are still bugs and things not working correctly. For example, for some reason, Microsoft Edge keeps launching by itself on my installation, and it took me a few tries to get connected using Cortana.

Remember that Microsoft has already locked all the features planned for the new desktop version of Windows 10. This means that any follow-up build we receive will only include new changes and bug fixes, as the company is currently focused on making the Creators Update stable for the expected April rollout.

More Windows 10 resources

For more help articles, coverage, and answers to common questions about Windows 10 visit the following resources:

How to share an internet connection using a wireless hotspot on Windows 10

$
0
0

When you need to share an internet connection with other devices, use this guide to quickly create a wireless hotspot on Windows 10.

On Windows 10, it's possible to share an internet connection with other devices by turning your computer into a wireless hotspot without extra software or advanced commands.

The feature is called "mobile hotspot" and can come in handy in a number of situations, but typically you'll find it useful when you only have a wired connection, and you must get others connected to the internet. Or you're meeting with other people at a coffee shop that doesn't offer free Wi-Fi, in which case, you can share your cellular data to get everyone connected.

A Wi-Fi hotspot is nothing new on Windows 10— the feature's been available for a number of years, but you had to use command-lines to configure Hosted Network. Windows 10 now makes it super easy to quickly create a hotspot using the Settings app.

In this Windows 10 guide, we'll walk you through the steps to share an internet connection using the mobile hotspot feature included in the OS.

How to use mobile hotspot on Windows 10

Windows 10 allows you to share an Ethernet, Wi-Fi, or cellular data using mobile hotspot, but your computer must have at least one wireless adapter to make it all work.

To create a wireless hotspot on Windows 10, do the following:

  1. Open Settings.
  2. Click on Network & Internet.
  3. Click on Mobile hotspot.
  4. Under "Share my Internet connection from" drop-down menu, select the network adapter connected to the internet that you want to share.
  5. Click the Edit button.

  6. Type a descriptive name for the shared connection that others will use to identify the network.
  7. Type a new password that other users will use to connect to the hotspot.
  8. Click the Save button.

  9. Turn on the Share my Internet connection with other devices toggle switch.

Once you have completed the steps, up to 8 devices can connect to the internet using the hotspot, and there are not complex configurations, users can simply connect as they would normally do to access to a Wi-Fi network.

Quick Tip: After configuring mobile hotspot, you can quickly turn the feature on or off using the Network flyout in the taskbar.

If you don't want to keep mobile hotspot enabled at all times, it's also possible to turn on the remote option that appears before enabling the feature. However, for this feature to work, devices must be paired using Bluetooth.

More Windows 10 resources

For more help articles, coverage, and answers to common questions about Windows 10, visit the following resources:


How to get all of Riptide GP Renegade's 'Easter eggs'

$
0
0

Riptide GP Renegade Easter Egg Guide

Riptide GP: Renegade is the latest in Vector Unit's series of arcade-style water racing games. Not only does it feature lengthy career and multiplayer modes, it also has nine collectible "Easter eggs" to find throughout the game. This guide details the locations of all the Easter eggs, complete with screenshots.

If you're an Xbox One or Windows 10 gamer, you're in luck. Riptide GP: Renegade is an Xbox Play Anywhere title with cross-platform multiplayer and cross-buy support. Buy the game on either platform and you have access to both versions, with progress transferring seamlessly between them.

See on the Windows Store

Easter egg hunt

Riptide GP Renegade Easter Egg Guide

This guide applies to all versions of Riptide GP: Renegade, not only the Xbox One and Windows 10 versions.

Riptide GP: Renegade features nine tracks in total. Each of these tracks has one hidden Easter egg collectible to find. They look just like giant Easter eggs, and you need to drive through them to collect and break them. When you hit one, a cute bird head appears on screen. Collect all nine eggs and you'll receive the Easter Bunny Achievement or Trophy.

Easter eggs can be collected in any mode, even multiplayer. The best way to go after them is via standard Race events in Career mode, because you can choose events on the track you want to target. After collecting an egg, you can choose to exit the race, and you'll still keep the egg. To check your progress towards collecting all the eggs, simply choose the Stats option from the main menu and scroll down to the Easter egg section at the bottom.

Next up, the egg locations!

Alpha Station

Riptide GP Renegade Easter Egg Locations

About halfway into the track, you'll drop down into a large warehouse with rockets and aircraft all around it. There are ramps on the right and left sides of the warehouse, and a large raised platform in the center.

Riptide GP Renegade Easter Egg Locations

Instead of taking the side ramps as you'd normally do, head under the raised platform (it has openings on the front left and right sides). The egg lies at the back center of the platform, behind a series of pillars and pipes. You can go for it during either lap of the race.

Downtown Rush

Riptide GP Renegade Easter Egg Locations

This track consists of three basic phases. During the second phase, you go through a flooded subway. From there, you'll drop down into an area filled with ruined buildings, homeless people and debris. The place has seen better days.

Riptide GP Renegade Easter Egg Locations

Immediately after dropping down into the ruined city, you'll approach a building with turn signs directing you to the right. Instead of turning. Use the debris in front of the building as a ramp. Jump into the hole in the building and you'll find the egg at the end of the hole.

Firewatch

Riptide GP Renegade Easter Egg Locations

This track features a series of drops towards the beginning. After the third drop, you'll land in a wide open area with an exit on the right. This is just before the first flaming tree falls over.

Riptide GP Renegade Easter Egg Locations

Instead of leaving the area, look for a small stone ramp just left of the exit pathway. The egg floats just past the ramp. To get it, you'll need to boost and take the ramp at a high speed. You might not initially have a fast enough craft to get it. I returned to series 2.2 late in the game with a fully upgraded Striker vehicle and easily got it.

Fountain Park

Riptide GP Renegade Easter Egg Locations

At the very end of this one-lap track, you'll break through the windows of a museum, smash through some objects, head past a holographic globe, and reach the finish line. The egg sits inside of a case on the left-hand side, just beyond the windows and before the globe.

Riptide GP Renegade Easter Egg Locations

When you see the museum building approaching, slow down. Take the ramp that leads into the museum windows from the left-hand side. Hold the break/reverse button so that you can steer a bit across the floor of the museum. You'll break through a statue and hopefully smash the egg in its case.

Grindhouse

Riptide GP Renegade Easter Egg Locations

Near the start of this race, you'll see a series of raised platforms jutting out from the center of the track. On the second lap, the first platform opens to reveal a ramp. When the third lap comes around, a ramp opens up at the end of that first platform.

Riptide GP Renegade Easter Egg Locations

At the start of the third lap, take the first ramp in the center and jump to the second platform. If you drop off the second platform very slowly, you can pick the egg up on the way down. Should you miss it on the way down, just turn around and grab it right after the drop.

The Ruins

Riptide GP Renegade Easter Egg Locations

Early in this track, you'll have to make a few hard-right turns. The second of two similar turns in a row comes right after the track's second ramp. You'll know the one because it has a big rock in front of a derelict building that looks like a dead end.

Riptide GP Renegade Easter Egg Locations

When you reach this turn, don't turn right. Instead, slow down and head past the left side of the rock. You'll see an opening in the building.

Riptide GP Renegade Easter Egg Locations

Just after the opening, you'll find the egg on the left. You can get it during either lap, and you'll also want to use the shortcut to reduce your times.

Sky Mine

Riptide GP Renegade Easter Egg Locations

Just before the end of this one-lap track, you'll drop down into an area in which a mining laser creates a whirlpool in the water. Normally you'd want to avoid getting too close to the laser, as the screen turns a bright white when you approach it. The egg is hiding just behind the laser and slightly underwater.

Riptide GP Renegade Easter Egg Locations

Approach the laser from the right-hand side and steer towards the egg. If you miss it, you can swing around and try again. If you don't press the button that resets your position on the track, you'll be able to try as many times as it takes.

Tropico

Riptide GP Renegade Easter Egg Locations

Halfway through this course, you'll go through a tunnel and come out in a huge drainage tunnel. There's a shortcut right at the start of the tunnel: a hole in the fence on the left. More importantly, the egg floats above the fence during the final straight section of the tunnel, just before the pipe opens up at the very end.

Riptide GP Renegade Easter Egg Locations

As you approach the turn that leads to the final straight section in question, boost and angle your Hydrojet forward and upward at approximately a 140-degree angle. If you reach the proper height and maintain it long enough, you should fall and hit the egg about halfway between the corner and the wider section of the pipe.

This is the hardest egg to get, but it can be done on either lap. Good luck!

Unicorn Base

Riptide GP Renegade Easter Egg Locations

Early on this track, just after the section with the radar dishes, you can drive through for the "Spy Master Achievement." You'll enter a wide area with a couple of red warships on the left and some oil platforms on the right.

Riptide GP Renegade Easter Egg Locations

The egg is floating above the left-most red ship. Gaining enough height to reach it can be tricky. Instead of using the striped ramp of the ship, approach from the red right side. If you angle it correctly, you'll grab the egg. You can go for it during either lap of the race.

Go fast, get wet

Riptide GP: Renegade is a futuristic arcade racer in which teams of racers compete in Hydrojet races while avoiding the cops. The console versions feature a lengthy Career Mode, six-player split-screen, and eight-player online races. Check out our full review for more details.

Remember, Riptide GP: Renegade is an Xbox Play Anywhere title. If you buy it on Xbox One or Windows 10, you get both versions with your purchase. Ready to race?

See on the Windows Store

How to hide your IP address (and why you should)

$
0
0

How to hide your IP address

What is an IP address? And why should you hide it?

When you head out into public, to a coffee shop to meet friends or a convenience store for some supplies, you don't usually have your phone number or home address pasted to the back of your jacket. However, when you browse the internet, that's sort of what happens, except with your internet protocol (IP) address. Nothing would usually come of wearing your address prominently on your jacket, but that one time something did happen you'd wish you'd taken a precautionary step. In the case of an IP address, that step is hiding it from the public.

What is an IP address?

The internet is a big place. That big place is filled with websites and connected computers that access and host them. To keep track of the computers on the internet, each one that's connected is assigned an IP address. It's sort of like how you differentiate homes on a street by their numbers, except here the numbers are longer.

Network settings

There are two main types of IP address: IPv4 and IPv6. The former was introduced back in the '80s but is still used for most internet traffic today. Due to its 32-bit format, there are only about 4 billion possible addresses available. An IPv4 address usually looks something like this: 168.90.0.255

IPv6 addresses were introduced as an answer to the waning number of available IPv4 addresses. They use a 128-bit address, which provides an enormous number of possible options — more than will be needed for a long, long time. An IPv6 address usually looks something like this: 2001:0db8:0000:0042:0000:8a2e:0370:7334

Instead of having to type specific IP addresses into a web browser, something called a Domain Name System (DNS) exists which translates URLs into IPs. For example, when you launch a web browser and type a URL (such as www.windowscentral.com), the DNS recognizes it, finds the IP address of the site, and sends it back to be displayed on your screen.

Since most of the IP address stuff is taken care of automatically when you connect to the internet, why should you care?

Why hide or mask your IP address?

Have you ever seen advertisements on the sides of your browser that tell you there's something going on in your city? Those aren't a coincidence — and there probably aren't actually any singles looking to mingle.

Your IP address can be used against you for those annoying ads, and it can also be used for more malicious purposes. Just like someone can track you down when they know your home address, they can also track you down (in a virtual sense) when they know your IP address.

The Libyans!

Hiding your IP address can be a defensive tactic, but it can also be an offensive tactic. Is there a geo-restricted website or video you really want to watch? Hiding your IP will trick the other party into thinking you're located somewhere you aren't — somewhere that can get past the geo-restriction.

These are a couple of basic reasons you might want to hide or mask your IP. There are plenty more reasons not listed here that we won't get into (make sure you stay on the legal side of things no matter what you do), and there are a few ways you can make sure your actual IP address is not discovered.

Hide your IP address with a proxy

Windows 10 proxy settings

Using a proxy server is probably the easiest way to hide your IP address, especially if you only need to hide it temporarily.

The proxy server acts sort of like a mask when you're browsing the web. You send a request out, and the proxy intercepts and fulfills the request under its own IP. Interested parties can still see the traffic between your computer and the proxy, so they are best used when dealing with non-sensitive data.

There are a number of free proxies available, but they are generally not very trustworthy. If you decide to use a free proxy, make sure you don't transmit any personal information, and consider using a proxy checker, like the one created by haschek solutions. Furthermore, a great article on Wired talks about how proxy servers are becoming increasingly unsafe.

See Proxy Checker at haschek solutions

While free proxy servers are easy to find, easy to set up, and they will effectively hide your IP, a much better alternative is to use a paid, trusted proxy server. These generally come bundled with a Virtual Private Network (VPN), so in that case, it's good to know the differences between the two services.

See the difference between a proxy and a VPN

Hide your IP address with a VPN

A VPN works sort of like a proxy in that it changes your IP address, but it also offers protection for all internet traffic leaving your computer. When information leaves, it is routed to the VPN server where it is then sent out with a different IP — usually one that is used by enough people to make you hard to track.

Plenty of servers to connect to.

Unlike a proxy, where there is weak or no encryption between your PC and the server, a VPN sets up a sort of encrypted tunnel between your device. By the time your request hits the open internet, it's using a different IP address and is generally one of many requests.

The only problem with VPNs is that they're usually pricey, especially for the good ones. Your itch to watch a geo-restricted video on YouTube might not warrant the subscription price. Nevertheless, in an age of waning privacy and rampant spying, it's never a bad idea to use a VPN.

See our choice for the best VPNs available

Wrapping up

There are definitely other options for hiding your IP — like The Onion Router (Tor) — but those require and deserve an article of their own to explain their intricacies and legalities. If you've already used Tor in the past, you likely understand how it can be used perfectly well for legal purposes. But it can also be easily used for illegal purposes.

Not everyone needs to hide their IP address, and the majority of internet users go about their business without worrying. If you're a bit more security- or privacy-minded, hiding your IP address might be a welcome step. In that case, make smart decisions on which service you use — whether a proxy or VPN or both — and trust your instinct. If you see no ratings and a low, low price for a VPN, you probably want to look elsewhere. Free proxy IP you found on some forum? Probably not the best idea.

Happy interneting, everyone.

How to ensure the best VR performance from your PC

$
0
0

PC Performance

How do I get the best performance out of my computer?

Low frames per second (FPS) while PC gaming is your worst enemy — but in VR it can also be literally sickening. What better reason to give your old hardware some care and keep it performing up-to-snuff for another few months?

Choppy graphics, lagging audio, slow load times all contribute to a bad time, and right now the budget doesn't allow for new hardware. Starting with some easier tips and moving onto some more complicated stuff, here's how to eke the most performance out of your existing hardware.

Read more at VR Heads

How to manage Windows Store authorized-device limits

$
0
0

If you're no longer able to download digital content from the Windows Store, you probably reached your device limit. Here's how to resolve the issue.

Windows 10 includes a new improved experience for getting and managing apps, games, music, shows and movies from the Windows Store. However, along with these new refinements, Microsoft introduced a stricter device limit than the one in Windows 8.1.

Basically, "device limit" refer to the total number of devices (desktop computers, laptops, tablets and phones) that you can use to access apps, games, and other digital content you download or purchase with a Microsoft account from the Store.

Windows Store device limit

Depending on the content or service, Microsoft has different licensing rules, and there are four separate lists you need to control:

  • Apps and games: On apps and games you download for free or purchase from the Store, you're limited to 10 devices, which is a significantly smaller number than the 81 device limit on Windows 8.1.
  • Music: The rules are even more restricted with music. If you have a Groove Music Pass (Xbox Music Pass), then you're limited to only four devices. However, music purchased from the Store can be authorized on up to five personal devices.
  • Movies & TV: Similar to the music rules, for TV shows and movies you acquire from the Store you're limited to four devices for video playback.
  • Books: This is a new list, and the limits won't be clear until the feature become available with the Windows 10 Creators Update.

While these limitations may seem strict, it'll likely take some time before you run into limitation problems. However, when you do reach your device limit, you'll get a warning, and you won't be able to install apps on a new device.

Fortunately, there's an easy fix. You only need to keep the list of devices associated with your Microsoft account within the defined limits.

In this Windows 10 guide, we'll walk you through the steps to manage your devices, to avoid hitting the limit on your Microsoft account, and remove those you no longer use.

How to remove devices from your Microsoft account

If you want to install apps and games from the Store on another Windows 10 device, use these steps to remove a device from your Microsoft account:

  1. Sign-in to your Microsoft account on the web.
  2. Click on the Devices section.
  3. Under "Your devices" you'll see all the devices you signed in with using a Microsoft account or registered for warranty. Scroll down and click the Manage your download devices link.

  4. On "Manage your download devices," under Apps and games, click the Remove link next to the device you want to remove.

  5. Check the I'm ready to remove this device: [device-name] option.
  6. Click the Remove button to confirm.

  7. Click the Close button to go back to the list.

Once you complete these steps, you may need to repeat the instructions to remove additional devices, until you don't get the error message when you try to install apps or games from the Windows Store on a new computer.

It's recommended that you only remove devices you don't need, because you won't be able to work with apps and games from the Windows Store on computers that are not authorized.

If you're using a Groove Music Pass subscription, or you're dealing with device limit problems while watching TV shows and movies, you can use the same steps mentioned above to remove devices from the corresponding lists.

However, unlike the "Apps and games" list, where you can remove as many devices as you want at any time, you can only remove one device from the other lists every 30 days.

More Windows 10 resources

For more help articles, coverage, and answers to common questions about Windows 10, visit the following resources:

What is an alternative mobile carrier?

$
0
0

Alternative mobile carriers are often cheaper and just as reliable as the networks they rely on.

Alternative carriers abound around the world and are becoming an increasingly reliable source of low-cost connectivity in the U.S. Also known as an MVNO, or Mobile Virtual Network Operator, these alternative operators are often no-frills and cost less than the incumbent networks on which they operate.

Advertisement

What is an alternative mobile operator?

The idea behind an MVNO is simple: instead of spending the billions of dollars building an entirely new nationwide network, companies enter into deals with the incumbent providers in a particular country — in the U.S., that's T-Mobile, AT&T, Verizon, and Sprint — to resell access to their networks. These often come in the form of contracts, where the smaller companies will buy space on the network — voice, messaging and, of course, data — at a heavily discounted, bulk rate, and sell it to you, the customer, for a profit.

This benefits everyone in the equation: the incumbent gets a bunch of money upfront to invest back into its business, or give to shareholders in the form of dividends; the alternate provider gets to sell access to the network at a lower cost to the incumbent while still making a profit; and you, the user, gets to purchase access to a high-quality, fast and reliable network at prices lower than those incumbents.

Such a market only works when there is robust competition in the wireless market, which increasingly exists in the U.S. and is extremely common across Europe, where the market was built with alternative providers in mind.

So what's the big deal?

Alternative providers don't often have the financial resources to build their own networks, which is why they purchase wholesale access from the companies that do, like the ones mentioned above. But because these smaller companies don't have the overhead of maintaining a network — the virtual in the term MVNO — they have more flexibility to provide service at lower costs. For people looking just to connect to a network without all the frills and fringe benefits that come with a contract, these are great options.

Because these smaller companies don't have the overhead of maintaining a network, they have more flexibility to provide service at lower costs.

The other thing is that MVNOs are usually aimed at single account holders — most eschew the share or family plan model of the larger incumbents — or specific demographics that may not be hit directly by the Big Four. In other words, alternative carriers are exactly that: meant to capture the customers remaining in the margins, or those looking to pay bottom dollar to avoid the often-superfluous frills — T-Mobile Tuesdays come to mind — that are, many times, built into the cost of the plans of the incumbents.

Advertisement

Some alternative carriers, such as Cricket Wireless and Boost Mobile, are owned by the Big Four themselves — AT&T and Sprint, respectively — which allows the major incumbents to get ahead of any customers who want to leave by offering them a simplified, often discounted alternative that keeps them in the network.

More than one network

But many alternative carriers don't only use one network. Ting, for instance, uses both T-Mobile and Sprint, deciding between the two dynamically depending on the coverage.

Instead of spending the billions of dollars building an entirely new nationwide network, companies enter into deals with the incumbent providers in a particular country.

That's another advantage of these virtual operators: They can negotiate great deals with a number of carriers, and thanks to the beauty of the SIM card, give customers the best option wherever they are.

Fewer phones

Finally, one thing to keep in mind about alternative networks is that the companies often don't offer the latest and greatest smartphones. In fact, they often don't sell phones at all. That's because they don't want the hassle, and the overhead, of having to stock expensive devices they may not use. That's where unlocked phones come in.

Advertisement

If you're savvy enough to buy a phone that you know will connect to the network of a particular carrier, you can save big money over the same two-year period a phone is usually paid off when on a big carrier.

Your turn

Are you subscribed to an alternative carrier? If so, which one, and why? We're really curious, so let us know in the comments.

Viewing all 5861 articles
Browse latest View live


Latest Images