Quantcast
Channel: Help & How To
Viewing all 5861 articles
Browse latest View live

What are the advantages of using an alternative carrier?

$
0
0

Using an alternative to the big four wireless providers is a great idea for many of us, and here are some reasons why.

When we talk about phone companies, most of us automatically think of the big four here in the U.S.: AT&T, Sprint, T-Mobile, and Verizon. But they're not the only choices when it comes to who you get your service from, and the popularity of alternative carriers is on the rise.

It's not difficult to understand why. Having a carrier that uses the same nationwide networks that the big guys do without some of the baggage that comes along with those big guys is an attractive position for a lot of people. There is a lot to talk, good and bad, in any discussion about finding the right carrier and whether or not a smaller alternative option is best for you. The advantages for you are especially important to consider.

Advertisement

You can save a lot of money

Depending on how you use your phone (as always) you can save a nice chunk of money every month. Different companies use different ways to price out your data. Some will let you buy several months worth of data at significantly less compared to a monthly payment. Others let you buy an amount of data and use it until it's gone, and others charge a flat fee and bill or credit you based on how much data you use in a month.

Not everyone needs an unlimited data plan.

The thing they all have in common is that you're not paying for data you didn't use. Combined with cheaper prices per block of data this can mean a smaller bill if you don't use a lot of data. Alternative carriers are not for people who need unlimited data, but not everyone needs unlimited data.

Take Mint SIM for example. The company doesn't sell unlimited packages, but it uses T-Mobile's network to offer ultra-cheap 4G LTE data — as low as $2 per GB — in bundles of 2GB, 5GB and 10GB. And by bundling service into multiple months, you pay less when averaged out over a 12-month period.

Advertisement

This is the biggest reason people choose to move away from the big players in the industry and try something different. If you look at where you use your data and how much you use, you could be one of those people.

You might get a better coverage map

An alternative carrier doesn't own the cell towers and infrastructure it uses to provide service. They lease it at a set price from the bigger carriers and resell service to you and me. Sometimes they lease from more than one carrier and can provide service in all the places from both.

No carrier is good everywhere, but unless you're in a very rural part of the country you'll have at least one company with good service. A company that can offer service using two coverage maps has an advantage for anyone who spends time where they are covered by at least one.

Not all carriers do this, so be sure to do your homework when you choose. Two notable examples are Net10 and Red Pocket, which lease service from all four major carriers.

No-frills service

You're paying for calls, texts, and data. That's all you're going to get.

Advertisement

There's no denying that some of the perks phone carriers offer are nice. Unlimited texting to Canada and Mexico is a good example. But some folks just don't need anything extra.

By not having extra services, the price can be cheaper. If you don't need anything more than basic service and 4G data, an alternative carrier could be great for you.

No credit checks

Times can be tough, and less-than-great credit can make getting a post-paid account with the big four carriers difficult. And a credit check leaves a record on you that can adversely affect something like a car loan or mortgage.

If you don't want to go through a credit check for any reason, you might choose an alternative carrier that doesn't require one. Most don't, and you simply pay up front for what you use.

Bring your own phone

As long as it's compatible with the network you choose, you can bring your existing phone and use it without any problems.

You can also buy any unlocked phone that works with the network from anywhere you like. This gives you a lot of choices.

Best of all, you can change phones at any time. If you like the phone you have now, you can use it until you like something else better. With the cost of the service being completely separate from the cost of your phone any decisions are yours to make.


While they aren't for everyone, you can see there are some really compelling reasons to give an alternative carrier a try, even if they don't have the brand-power of the bigger ones.


Resident Evil 7 speedrun guide: How to beat the game in under four hours

$
0
0

Resident Evil 7 speedrun guide: How to beat the game in under four hours

We've already provided numerous guides for Resident Evil 7: Biohazard, Capcom's amazing first-person horror game. Our Achievement Guide provides some general tips on how to complete the game in under four hours (which unlocks the amazing Circular Saw weapon), but we really want you to be prepared for your speedrun. Hence this full speedrun walkthrough, with all the strategies you'll need to beat the game as fast as possible!

As a special bonus for Xbox gamers, Resident Evil 7 also happens to be an Xbox Play Anywhere title. If you buy the game digitally from the Windows Store, you get access to both the Xbox One and Windows 10 versions, with full cross-save support.

See on the Windows Store

Goals and Achievements

The primary goal of this walkthrough is to help players complete Resident Evil 7 on Easy difficulty in less than four hours. You should have completed the game at least once (unlocking the Albert 01-R pistol and the Secrets of Defense) before following this guide.

Successfully beating the game in less than four hours will unlock the 'Just Get me Outta Here' Achievement/Trophy and the Circular Saw weapon for use in subsequent playthroughs. That weapon, in turn, makes surviving Madhouse difficulty much easier.

As recommended in our Achievement Guide, you can also pursue two optional Achievements during this speedrun:

Resource Manager

Complete the game without opening the Item Box more than 3 times.

There are three times in which you must access Item Boxes: Testing Area (before and after the Party Room), and the Swamp safe room immediately after the Wrecked Ship. In this walkthrough, we won't use Item Boxes at any other time.

Walk it Off

Complete the game using only 3 First Aid Meds or less.

You must avoid healing via herbs or First Aid Meds. Steroids, which increase your health capacity and refill health, are allowed. There are four Steroids in the game, but we'll only go after three of them.

If you struggle with combining the time pressure of the speedrun and avoiding healing, I suggest doing a separate run for this Achievement (I did it during my first playthrough instead of the speedrun).

How time works in Resident Evil 7

Resident Evil 7

Before we begin, it's important to understand what adds to your time during a playthrough and what doesn't.

  • Most cinematics are unskippable and add to your time. The only skippable cinematics are the one that plays after the old videotape sequence on the Wrecked Ship and the ending movies.
  • Time passes while using menus, checking the map, and saving the game.
  • Retrying after death adds time too, so consider reloading a manual save if you die.
  • Time does not pass while the game is paused, so pause whenever you're looking at this walkthrough or thinking about what to do.

With those tips and guidelines out of the way, let's begin!

Outside the Guest House

The introduction movie can't be skipped, alas!

  1. As soon as Ethan exits the car, sprint down the path towards the house.
  2. Turn left in front of the house.
  3. Ignore the van and run through the gate.
  4. At the fork with the crows on the right, go left and crouch under gate.
  5. Hop down the ledge before the fire (ignoring Mia's purse) and enter the Guest House.

The Guest House

Resident Evil 7

  1. Head down the hall, through the kitchen, and turn right into the next hall.
  2. Go past the staircase and turn into the second door on the right, the Living Room.
  3. Approach the fireplace, crouch, and pull the handle inside.
  4. Enter the passage that opens to the right and climb down the ladder.
  5. While navigating through the water, hug the wall to the right to avoid the floating body.
  6. When you reach the cell where Mia is kept, turn left (east) and grab the Bolt Cutters.
  7. Use the Bolt Cutters to enter Mia's cell.
  8. Interact with Mia to wake her up.
  9. Follow Mia as she slowly leads you to the Storage Room. Once there, she should sit down on the couch.
  10. Enter the nearby Storeroom, examine the doll on the shelf, and Mia will be abducted.
  11. Take the newly opened passage that leads upstairs.
  12. Enter the Bathroom (take the First Aid Med if you're not on a No-Healing run), and then check the locked door at the end of the hallway. You should start hearing banging sounds.
  13. Head back to the staircase you came from. After a few steps, you'll be attacked. Press the attack button to Resist when prompted.
  14. After the first Mia encounter, move around the hallway again until Mia stands up and throws you through the wall.
  15. Pick up the Axe from the floor and use it to defeat her.
  16. When the phone in the hallway rings, take the call.
  17. Retrieve the Axe and then go through the newly opened door in the hallway.
  18. Go back through the Kitchen and use the Bolt Cutters to open the cabinet and get the Fuse.
  19. Return to the Living Room and use the Fuse in the panel beside the door.
  20. Take the stairs to the second floor safe room and press the button to lower the staircase to the third floor.
  21. On the third floor, you can optionally enter the room on the right to get the Handgun and a couple of consumables. This room is skippable.
  22. Enter the Attic at the end of the hall.
  23. Start climbing the ladder, and then immediately back away from it.
  24. Boss fight! Defeat Mia using either the Axe or Handgun. If using the Axe, get behind her and hack away.
  25. Wander around until Jack automatically catches you, initiating a cinematic.

Time: 20-25 minutes

Main House: Introduction through Garage boss fight

Resident Evil 7

  1. As soon as you can move around, exit to the hallway.
  2. Take a right around the corner (towards the Main Hall), and you should see Jack lean over on the corner table.
  3. The Hatch Key you need is on that corner table. Either lead Jack away, dodging his attacks, or simply grab the key.
  4. Once you have the key, run straight to the Kitchen.
  5. From the Kitchen, run into the Pantry and use the key to open the hatch.
  6. Take the underground passage to the Laundry Room , optionally grabbing the Antique Coin from the lawn mower along the way.
  7. Unlock the door to the hallway and then answer the phone.
  8. Save the game! If you're not avoiding Item Boxes, grab the Albert 01-R and any other items you've unlocked. Otherwise, avoid the Item Box like the plague.
  9. Head back to the Dining Area, collect the ammo from the drawer in the corner, and kill time until you hear the Deputy outside.
  10. Meet the Deputy at the window to get the Knife.
  11. Use the Knife to open the Garage door.
  12. Boss battle! Immediately head right and grab the Car Keys from the worktable.
  13. Get in the car and run over Jack repeatedly.
  14. After Jack wrecks the car, get out and check these locations for items: table in the corner, box, and locker.
  15. Jack will approach on foot. Allow him to grab you right away.
  16. Grab the Deputy's Pistol if you haven't already, and then head up the ladder.
  17. Examine the frame, unscrew the nut on the back, and take the Ox Statuette.
  18. Push the shelf out of the way and return to the hallway.
  19. Use the Ox Statuette to open the door to the Main Hall.

Main House: Wooden Statue, Shadow plinth puzzle, and monitoring room

Resident Evil 7

  1. Take the Antique Coin from the drawer in the northwest corner (optional).
  2. Take the western stairs to the second floor.
  3. Go down the hall to the Bathroom.
  4. Pick up the consumables and then drain the tub to find the Wooden Statue.
  5. When you try to exit, Jack will attack. Hide behind the tub, run around him, and run back to the Main Hall.
  6. In the southeast corner of the Main Hall, use the Wooden Statue to solve the shadow plinth puzzle.
  7. Take the secret passage to the Drawing Room. Collect any items you see there.
  8. From the Drawing Room, take the western door and then enter the Monitoring Room.
  9. Run past the Molded all the way to the northern safe room. Save your game!
  10. Exit and take the nearby stairs down to the Processing Area.

Processing Area: Dissection Room Key, Morgue boss fight, and Scorpion Key

Resident Evil 7

  1. When you get down the stairs, take the left path towards the Incinerator Room.
  2. Run past the Molded who attacks along the way.
  3. The Incinerator Room is the first door on the right. Enter and close the door behind you.
  4. Inside, a Molded will attack. You can solve the puzzle and get the key here without getting hit by either Molded, but it's safest to at least kill the first one.
  5. Open the oven with the handprint on it and then the one on the far right (the third and sixth from the left).
  6. Now open the first oven from the left and immediately step back. A Spiked-Arm Molded will emerge.
  7. Lead the enemy towards the back corner of the room, away from the oven.
  8. Once the Molded has followed you, grab the Dissection Room Key from the oven, and escape out the door.
  9. Take the southern door that leads towards the Boiler Room.
  10. Inside the room right before the Boiler Room, one Molded will attack from in front and another from behind. Run past both of them and into the Boiler Room.
  11. Dash through the Boiler Room, heading straight to the door on the northwest side via the northern path. You'll have to run by one Molded, but this can be done safely if you're fast and careful.
  12. Quickly open the door using the Dissection Room Key and escape!
  13. Follow the path towards the Morgue.
  14. Inside the Morgue, ignore the door to the Dissection Room on the right. Just grab at the Red Dog Head and initiate the boss fight.
  15. Boss fight! If you can afford the bullets, shoot Jack in the head with your pistol repeatedly during the first phase of the battle. Shoot or knife him when he bends over. Damaging Jack speeds up the start of the second phase of the fight. Otherwise, you can probably spare a few minutes of dodging him without ruining your chances at the speedrun Achievement.
  16. As soon as Jack opens the cage to get his new weapon, grab the chainsaw.
  17. Don't bother moving around the arena. Just attack repeatedly and block Jack's attacks when you see them. Step around behind him when he says, 'That's it!' and charges.
  18. After the fight ends, use the chainsaw to open the door to the fence.
  19. Backtrack the way you came, ending up in the hallway that leads to the Boiler Room.
  20. Take the western path and opening the corrugated room divider.
  21. Grab the Scorpion Key , ignoring the crates and other items in the room. You can grab the Processing Area Map if you really need it, but doing so might set off a Molded ambush from the ceiling.
  22. Exit via the door to the north and head back upstairs , dodging the Molded if one spawns in the hallway.

Main House: Dog's Heads and Broken Shotgun

Resident Evil 7

  1. For safety's sake, stop by the northern safe room and save. Skip saving if you're confident enough.
  2. Head down the hall to the western door and unlock it with the Scorpion Key. Enter the Main Hall.
  3. Grab the Pendulum from the grandfather clock.
  4. Take the western stairs back up to the second floor.
  5. Enter the Recreation Room.
  6. Inside, open the book on the left to find the Blue Dog Head. Collect consumables, ignore the Mia videotape , and optionally, grab the Antique Coin near the basket.
  7. Open the door to Grandma's Room using the Scorpion Key. Go inside.
  8. Grab the Broken Shotgun and the consumable on the bed.
  9. Return to the second floor hallway.
  10. Head west past the Bathroom and drop down the broken bannister to the first floor.
  11. Head back through the Dining Area to the Living Room.
  12. Use the Pendulum on the grandfather clock to get the White Dog's Head.
  13. Optional: If you wanted the M37 Shotgun instead of the M21 Shotgun, now would be the time to get it from the Soldier Statue in the Main Hall. However, I recommend repairing the M21 instead.
  14. Back in the Main Hall, use the Dog's Heads on the northern door and step outside into the Yard.

The Yard: Repair Kit and Trailer

  1. If you're repairing the Broken Shotgun, step off the porch and remove the metal panel blocking the path to the Repair Kit. Go under the house, get the kit, and use it on the Broken Shotgun to make the M21 Shotgun. See our Broken Weapons and Repair Kit guide for more detailed instructions.
  2. Head north and enter the Trailer safe room.
  3. Answer the phone and save your game.
  4. Optional: If you have three Antique Coins, you can buy the Steroids now. Otherwise, wait until completing the Old House.
  5. Exit and go northeast to the Old House.

The Old House: Shadow plinth puzzle, Crank, Crow Key, First Marguerite fight

Resident Evil 7

  1. Take the eastern door to the Living Room.
  2. Crouch and stick to the southern side of the Living Room to avoid the first bug nest.
  3. Staying couched, blast the nest blocking the path to the Cellar at point-blank range with your Shotgun. You're likely to get hit a little, but time is of the essence.
  4. Take the passage east to the Cellar and grab the Stone Statuette. Don't interact with Mia; just move on!
  5. Back in the Living Room, try to return to the Entrance via the same path you came from. Marguerite will block the door.
  6. Go north to the Dining Room, through the western hallway (grabbing the Old House map), and to the Gallery (the shadow plinth room) on the west.
  7. Solve the shadow plinth puzzle in the Gallery.
  8. Optional: Head northwest to the safe room (ignoring the Burner part along the way). Grab the Backpack and save.
  9. Back in the Gallery, take the secret passage to the western side of the house.
  10. Go south and turn the corner to find the underground passage.
  11. In the underground passage, grab the Crank. On the way back out, hurry past the insect or kill it with your knife.
  12. Just outside of the passage, use the Crank to raise the bridge to the Entrance.
  13. Head northeast to the backdoor. If you encounter Marguerite, just run past her (possibly taking minor damage).
  14. Outside, run straight up to the northern bug nest and destroy it with close-range shotgun blasts.
  15. Use the Crank to raise the bridge to the Outhouse. Ignore any insects attacking you, as they should stop after a moment.
  16. Inside the Outhouse, open the chest and take the Crow Key.
  17. Return to the house. If you see Marguerite, take the path that she isn't blocking and make your way to the Crow Key door on the west side of the house.
  18. Marguerite will appear at the door and throw you into a pit.
  19. Look up and shoot Marguerite twice with the shotgun. Don't give her a chance to throw insects. A few more shots from the pistol should cause her to fall into the pit.
  20. As soon as Marguerite falls, climb the ladder to escape.
  21. Use the Crow Key to open the door and enter the Altar room.
  22. Open the case and read the Serum Documentationfile.
  23. Answer the phone.
  24. Proceed up the stairs to the north and check the drawer in the room with the doll for ammo.
  25. In the next room to the east, interact with the door that is locked by the scale.
  26. Head back downstairs and you should see Marguerite in the pit.
  27. Jump down into the pit and follow her.
  28. When you emerge aboveground, head straight up the nearby stairs and into the Greenhouse.

Greenhouse boss battle

Resident Evil 7

  1. Upon entering the Greenhouse, drop down the hole in the first room.
  2. If you're not on a no-healing run, approach the case with bugs on it. Kill them and take the ammo inside.
  3. Turn the corner and go up the stairs that lead towards the wall that Marguerite bursts out of. As soon as you touch the top step, turn around and back way. Do this fast enough and you'll avoid her attack.
  4. If you dodged Marguerite's initial attack, you should be able to get four headshots in with the shotgun.
  5. Explore the second floor and then the first, looking for ammo.
  6. Whenever Marguerite appears, use the shotgun to shoot her in the belly or head. Use up all of your shotgun ammo, and then switch to the pistol of necessary.
  7. With any luck, you'll kill her before you take too much damage.
  8. Take the Lantern from Marguerite's body.
  9. Open the gate to the southeast, grab the ammo in the drawer, and exit the Greenhouse.

Old House: D-Series Arm and escape

Resident Evil 7

  1. Drop into the manhole next to the Greenhouse stairs (the one you climbed out of before) and return to the Old House.
  2. Return to the second floor and use the Lantern to balance the scale by the door that leads east.
  3. Head through the Kids Room Contaminated Room, hallway, and finally to the Detention Room , which has a child's bed in it.
  4. In the Detention Room, crouch, then crawl through the hidden passage in the wall behind the bed.
  5. Take the D-Series Arm from the corpse and start to head back towards the first floor.
  6. When you step out of the Detention Room, shoot and kill the Molded waiting on the other side of the door.
  7. Run past all remaining Molded on your way to the first floor. Ignore the phone in the Altar Room.
  8. Exit the Old House from the front door.
  9. Head outside to the Trailer in the Yard.

Trailer: Save and ignore phone call

  1. Enter the Trailer and save your game.
  2. When the phone rings, don't answer it.
  3. Leave and return to the Main House.

Main House: Processing Area, Red keycard, and Blue Keycard

Resident Evil 7

  1. From the Main Hall, take the Scorpion door to the east.
  2. Stop and save in the northeast safe room if you like.
  3. Head downstairs to the Processing Area.
  4. Run all the way to the Dissection Room above the Morgue.
  5. Check the neck of the deputy for the Snake Key.
  6. Run to the northern door in the Morgue Area, past a Molded, and use the Snake Key to exit.
  7. Exit the Processing Area, dodging any Molded that attack along the way.
  8. Save in the northeast safe room.
  9. In the Main Hall, run past the Molded, and use the Snake Key to enter the Master Bedroom on the east side of the second floor.
  10. From the Master Bedroom, enter the Storage Room to the south and grab the Backpack.
  11. Back in the Master Bedroom, set the clock on the nightstand to 10:15 to open the passage to the Workshop.
  12. In the Workshop, pick up the Red Keycard from the table.
  13. Escape the Processing Area again, running past any Molded on the prowl.
  14. Save again! Saving is good for you.
  15. Back in the Main Hall, quickly run past the Molded and get to the west side of the second floor.
  16. Use the Snake Key to enter the Kids Room.
  17. Examine the lamp and push the button to lower the ladder to the Attic. Grab the consumables by the ladder if you need them.
  18. In the Attic, complete the Judgment shadow plinth puzzle to get the Blue Keycard.
  19. If you have plenty of time, grab the Toy Axe from the shelf behind the wardrobe (near the ladder) so that you can use it when you get back to the Yard. Otherwise, skip it.
  20. Head back downstairs, ignore the phone , and exit to the Yard.

Yard: Shadow plinth puzzle (optional) and head to Testing Area

  1. If you got the Toy Axe, step off the western porch stairs and head southwest to the hidden shadow plinth puzzle. Solv the puzzle to get a Stabilizer.
  2. Dash to the Trailer and enter it to get rid of the Molded in the Yard. Save your game.
  3. Back in the Yard, go to the western gate and use the Red and Blue Keycards to enter. This is a point of no return, so hopefully you didn't forget anything.

Testing Area: Keypad attempts, Steroids, Fat Molded fight

Resident Evil 7

  1. In the first room of the Testing Area, interact with the television.
  2. Take the corridor to the room with a box and some shelves. Watch out for two trip-mines in this room.
  3. The next room has several more trip-mines. Shoot or avoid them and continue to the next hallway and downstairs.
  4. When you reach the room on the left with the keypad on the door, carefully shoot the tripwire bomb before entering. Another bomb is hidden up on the wall to the right.
  5. Interact with the keypad. As soon as you're given the option, enter one of the codes Lucas gives you (such as 0621) and then back away from the door while the boobytrap swings down.
  6. Enter another code , such as 0514.
  7. Take the side door that opens to the hallway. Head through the room at the corner and back into the hallway. The box just outside of the corner room is safe to open.
  8. Duck under the tripwire just before the corner that leads to the barn.
  9. Right beyond that tripwire at the corner, there's a small room with four explosives in it. You can skip this room I you're in a hurry, but it's worth clearing out the bombs in order to get the precious Steroids from the base of the locker. Don't open the crate in the locker, as it's boobytrapped.
  10. Sprint through the barn, past three Molded, and up the stairs to the second floor.
  11. Enter the safe room at the top of the stairs and save.
  12. Drop down to the northeast area where the Fat Molded fight will soon occur.
  13. Take the stairs up and grab the Battery from the barrel. All of the crates except for the one on the desk upstairs are safe to open.
  14. Back downstairs, use the Battery on the console.
  15. Fat Molded battle! When the elevator opens, aim at the Fat Molded from up close and immediately dodge his bile by stepping just behind the elevator wall. Then shoot him repeatedly in the head with your pistol. Ten continuous headshots or so should destroy him without allowing for a counterattack.
  16. After killing the Fat Molded, stand aside to avoid taking damage from the explosion.
  17. Take the elevator up and head into the Rest Area (the room with the burnt corpse).
  18. Read the file taped to the corpse.
  19. Just north of the Rest Area, push the button to lower the stairs.
  20. After taking the stairs back to the first floor, step into the room with the keypad and Item Box.
  21. Put all of your items into the Item Box. This is the first of three times you must use an Item Box to progress in the game.
  22. Enter 1408 on the keypad and head into the Party Room area.

The Party Room: Puzzle, D-Series Head, and restoring inventory

Resident Evil 7

  1. Take the candle from the dummy.
  2. Go through the door on the left and then the door on the right to reach the room with a cake in it.
  3. Look at the cake to receive instructions from Lucas.
  4. Turn on the stove relight the candle.
  5. Turn right and use the candle to burn the rope holding a door shut. Enter the balloon room.
  6. Inside the balloon room, enter the word LOSER on the lock.
  7. Enter and take the Valve Handle.
  8. Back in the birthday cake room, find pipe near a door and attach the Valve Handle to it. Turn off the sprinkler.
  9. Use the stove to light the candle once more.
  10. Put the candle on the cake.
  11. Pull the boards off the hole in the wall.
  12. Grab the bomb from the floor, place it in the wall hole , and step around the corner to avoid the explosion.
  13. Pick up the D-Series Head and the Testing Area Map in the Monitoring Room.
  14. Use the Item Box to withdraw your pistol, shotgun, knife, Crank, D-Series Arm, and ammo.
  15. Save and then exit to the Boat House.

Boat House: Safe room, boss fight, and curing Mia

Resident Evil 7

  1. Use the Crank on the first winch. Pick up the nearby item (if needed) before crossing the bridge.
  2. Check the shack to the northeast and the crate by the second winch for ammo.
  3. Apply the Crank to the second winch.
  4. Run west to the main Boat House. You should have to dodge two Molded near the entrance, one of which is a crawler.
  5. In the Boat House safe room, grab all ammunition and save your game.
  6. Head upstairs and interact with Zoey for a cinematic.
  7. Boss fight! Drop into the water and blast Jack's lowest eye with your shotgun until he stumbles. Shoot the next eye, then run and grab ammo from the corner of the room. Keep firing at his eyes from close range with the shotgun, which should stun him nearly continuously. Switch to the pistol if he climbs to the upper level, then back to shotgun when he comes down again. Never go back to the upper level.
  8. After defeating Jack, wait at the door. You'll have to inject him with the serum when he grabs you one last time.
  9. When asked to choose between Mia and Zoey, cure Mia.

Wrecked Ship: Fuse and Old Videotape

Resident Evil 7

  1. Examine Ethan's body.
  2. Go to the room with a hatch in the floor and drop down it. Take the passageway.
  3. On the next floor, head up the stairs and then climb the ladder.
  4. Drop into the water, climb the next ladder, and continue up the stairs to Wrecked Ship 1F.
  5. Enter the Laundry Room, the large room just east of the staircase in the center.
  6. Head to the fuse box on the southern wall of the room. Dodge the Molded and grab the Fuse.
  7. Exit from the eastern door and head northwest to the fuse box near the door leading to the western staircase.
  8. Use the Fuse on the fuse box and enter the stairwell.
  9. Take the staircase to the third floor.
  10. Enter the Security Room and play the Old Videotape.

Old Videotape

Resident Evil 7

  1. Exit the safe room and head east to the Dining Room.
  2. Crawl through the southeastern passage and look at the black vomit.
  3. Return to the hall and then head southeast through the Bunk Room, dodging the Molded inside and exiting from the southern door.
  4. Enter the elevator and kill the Molded who drops into it.
  5. Emerge on floor S2 and run through the hallway, dodging the Molded and grabbing the ammo at the end.
  6. Run past the Molded that drops down outside of the Engine Room, grab the Remote Bombs from the wall, and escape through the eastern doors to the No. 1 Engine Room.
  7. In the No. 1 Engine Room, dodge the Molded at the top of the staircase and proceed west to the Cargo Bay.
  8. Enter the Cargo Bay and collect the Corrosives.
  9. Directly south of the Cargo Bay, use the Corrosives to open the No. 2 Engine Bay and go inside.
  10. Circle clockwise around the room and reach the door you came through just as Evie closes it.
  11. Run back to the elevator, shooting or detonating the Molded in the No. 1 Engine Room and in the hallway outside of the elevator.
  12. Call the elevator and head to the third floor.
  13. Climb out of the elevator and head northeast through the Bunk Room.
  14. Return to the Dining Room and go west through it to the Break Room.
  15. Climb through the hole near the ceiling to the hallway.
  16. Take the stairs up to the third floor.
  17. Head through the Security Room and meet Alan.
  18. Enter the Control Room and exitthrough the northern door **. Do not use the computer!**
  19. Skip the movie that plays when you run into Evie. Yes, this one can be skipped!

Wrecked Ship: Repair the elevator, save Ethan, leave

Resident Evil 7

  1. Head to the elevator and open it.
  2. Inside, climb the ladder and drop down to Ship 4F.
  3. Go southeast to the Captain's Cabin.
  4. Grab the Lug Wrench from the desk and head out to the elevator.
  5. Drop down the elevator and use the Lug Wrench on the hatch.
  6. Climb down to the first floor and save**** your game in the Maintenance Room to the southwest.
  7. Grab the Fuse from the box by the northwest stairwell.
  8. Return to the elevator and climb up to the second floor.
  9. Enter the Guest Room in the southwest and get the Corrosive from the floor.
  10. Take the northwestern stairwell up to the third floor.
  11. Head through the Control Room and use the Corrosive on the northern door. If you're fast enough, you can avoid damage from the Molded that spawns while you open it.
  12. Follow the path into the Sick Bay. A Fat molded spawns when you enter.
  13. Grab the Power Cable from the machine on the western wall and run past the Fat Molded back to the hall. He's so slow!
  14. Return to the elevator , dodging the Molded in the Control Room.
  15. Drop down the hatch and use the Fuse and Power Cable on the elevator wall panel.
  16. Take the elevator to floor S2.
  17. Dodge a couple of Molded, including a crawler, on your way to the No. 1 Engine Room.
  18. In the No. 1 Engine Room, run past the Molded and Fat Molded. You don't have to fight them!
  19. Enter the No. 2 Engine Room and look at Ethan.
  20. After the cinematic, leave the ship and enter the Swamp.

Swamp

  1. Follow the path to the safe room.
  2. Collect the items in the building, including the Backpack and Machine Gun.
  3. Use the item box for the final time, equipping the grenade launcher, shotgun, handgun, knife, and ammo.
  4. Save your game.
  5. Run south to the elevator and push the button to call it, dodging Molded until you enter.
  6. Head down to the Salt Mine.

Salt Mine

Resident Evil 7

  1. Run past all Molded on your way to the four-way intersection.
  2. At the intersection, grab the Remote Bombs and then head west.
  3. Push the minecart through the southern wall.
  4. Run past the wall you just destroyed , dodging the Molded who approaches from the left.
  5. In the room with the staircase, shoot the tripwire bomb before climbing the stairs.
  6. Shoot the explosive on the crate at the top of the stairs too.
  7. Go through the Cultivation Room into the Storage Space.
  8. Open the case and use Eveline's Tissue Samples on it.
  9. Take the E-Necrotoxin produced by the case.
  10. Grab the Steroids from behind the bathtubs.
  11. Exit to the south and proceed east.
  12. Run past as many Molded as possible , only shooting enemies that block thin pathways.
  13. In the room with the two Fat Molded, hit them with a single Remote Bomb when they spawn and then climb up the ladder.
  14. Escape through the thin hole in the wall and reach the final safe room. Save!
  15. Push the boarded wall down and enter the Guest House for the last time.

Guest House

Resident Evil 7

  1. Explore the first floor until you see Evie and threaten her with the E-Necrotoxin.
  2. Go upstairs to the Attic and confront Evie.
  3. Walk towards Evie until you reach and inject her with the E-Necrotoxin.
  4. Attack the monster's face with all your strongest weapons, including Remote Bombs.
  5. Once she leaves the house, shoot her with your pistol.
  6. Grab the Albert 01-R when it becomes available and unload shots into the boss's face.
  7. Skip the ending movies and/or credits if you're in a hurry.
  8. That's it! This whole playthrough should have taken under three hours. The 'Just Get me Outta Here' Achievement/Trophy is yours!

More guides to surviving the horror

Resident Evil 7: Biohazard is a game that fans of horror games won't want to miss. And because it's an Xbox Play Anywhere title, Windows 10 gamers won't have to miss out either.

For more help, check out our Achievement Guide, Files Guide, Antique Coins Guide, and Mr. Everywhere Statues Guide. You also don't want to miss our full review!

See on the Windows Store

How to install apps on a separate drive on Windows 10

$
0
0

When your PC has limited storage space, or you simply want to keep things separate, use this guide to install or move apps to a different drive on Windows 10.

It doesn't matter if it's a Windows Store or traditional desktop (Win32) app, they all end up installed (by default) on your primary computer's hard drive. Although this makes sense in most cases, there are many reasons you may want to install apps on a separate drive.

It could happen that you have a low-end device, such as a tablet or laptop, that came with a very limited local storage and you're running out of space. If you need to run demanding applications, you may want to install them on a faster hard drive to improve performance. Or it could be that you just want to keep your apps separate from the Windows 10 installation drive.

Whatever the reason it might be, Windows 10 includes a number of ways to help you install apps on an external hard drive or SD card storage, whether you're dealing with Windows Store or Win32 apps.

In this Windows 10 guide, we'll walk you through the steps to install traditional desktop and Store apps into a separate drive, and you'll also get the steps to move already installed apps to another location that being for speed or to save space on your primary drive.

How to install Windows Store apps on a separate drive

When your computer is running out of space, you want to use a faster drive, or you just want to keep apps in a separate location, do the following:

  1. Open Settings.
  2. Click on System.
  3. Click on Storage.
  4. Under "Save locations," and on "New apps will save to," select the new drive location.

Once you completed the steps, new apps you download from the Windows Store will now install automatically in the new location.

Moving Windows Store apps to another drive

If you already have Windows Store apps installed on your PC, and you don't want every app from the Store to install in a different location, you can move apps to a separate drive using the following steps:

  1. Open Settings.
  2. Click on System.
  3. Click on Apps & features.
  4. Select the app you want.
  5. Click the Move button.
  6. Select the destination drive from the drop-down menu.
  7. Click the Move button to relocate the app.

The process may take a few seconds depending on the size of the app you're trying to move. Although Settings lists both Store and desktop apps, you can only move apps from the Windows Store to a different drive.

Alternatively, you can always uninstall the app, use the instructions to change the save location, and reinstall the app in question from the Store.

How to install desktop apps on a separate drive

It's also possible to install traditional desktop (Win32) applications into a separate drive.

The process may vary per application, but almost always, you'll find an option to install the app on a separate hard drive.

For example, installing Apple's iTunes on Windows 10, after initializing the setup, in the installation options screen, there is a "Destination Folder" section with a Change button that allows you to choose a separate drive to store the installation.

It's a pretty straightforward process, but then you'll come across desktop applications that make it a bit unclear where to find this option.

In the case of Firefox, when you launch the setup, you need to click the Options button, and under "Destination Folder," click the Browse button to select a secondary drive to store your installation files.

Unlike Windows Store apps, you can't move traditional desktop (Win32) apps to another drive, but you can, alternatively, uninstall the app, and reinstall it changing the Destination Folder option during the setup.

Wrapping things up

It should be noted that you can't just remove the drive and move it to another computer hoping that apps will run. It doesn't work that way. If you configure a secondary hard drive to install applications, that storage is pretty much tied to the device you used to install the app.

For traditional desktop applications, this will be a manual process. You may be able to find Registry hacks, but it's not recommended as it can cause an unknown number of errors.

While there are many good reasons to install apps on a separate drive, you must consider that adding more drives also adds more points of failures to your device.

More Windows 10 resources

For more help articles, coverage, and answers to common questions about Windows 10, visit the following resources:

How to change your Twitch username

$
0
0

Twitch

At long last, the world's largest streaming platform is letting its members change their usernames. Here's how to change your name on Twitch.

This is probably the most requested feature ever on Twitch, and frankly, it took way too long to turn up. Getting a new username used to mean getting a whole new account, which for some would be disastrous.

But today, you're now able to switch usernames. If you're not happy with being hawtgamer5647 any longer and want something a little better, here's how to change your Twitch username.

  1. Login to Twitch.
  2. Go to Your account settings.
  3. Next to username, you'll see an Edit button, which you should click.

    Twitch username

  4. Enter your new username.

    Twitch username

  5. If that username is available you'll see a green check mark.
  6. Click Update.
  7. Enter your Twitch password to verify, and you're good to go.

Your username and channel URL will update immediately. Your followers and subscribers won't change as they would if you had to create a new account; they'll just see your new name instead.

You can't change your name whenever you feel like it, though. Once you've changed your username, you can't do it again for another 60 days. But finally, Twitch delivered. Go forth and change thy name!

Here's a breakdown of common SteamVR error codes

$
0
0

Encountering SteamVR issues? Here's where to get started!

If you've encountered any issues while using SteamVR, you'll know just how hard it can be to find a solution to your problem. With support for multiple headsets and a range of complex features, fixing any issues can be hugely daunting.

Luckily, error codes are one of the easiest ways to diagnose a problem. If you're having issues, here's a breakdown of some common SteamVR error codes.

Read more at VRHeads

How to connect to Hotspot 2.0 Wi-Fi networks on Windows 10

$
0
0

In this guide, we explain the new "Hotspot 2.0" Wi-Fi standard and its benefits, and show you how to connect to the networks using Windows 10.

Hotspot 2.0 (HS2) is a new networking standard designed to make the process of connecting to public wireless hotspots easier and more secure with seamless authentication and encryption between your device and access points.

Also known as "Passpoint," or "Next Generation Hotspot," this new approach is based on the IEEE 802.11u standard, and it improves the way you currently discover and connect to network hotspots.

If you're in places such as airports, coffee shops or hotels, you'll see a lot of Wi-Fi networks, and it's not always easy to recognize which ones are safe and which are fake, with malicious users trying to pry into your internet activities.

Hotspot 2.0 networks use WPA2-Enterprise for authentication and encryption between clients and access points. In addition, you don't have to look through multiple networks anymore trying to find out which ones you can connect to with your credentials. Windows 10 automatically discovers and connects to the correct Hotspot 2.0 network on your behalf.

How to tell if your PC supports Hotspot 2.0

Hotspot 2.0 is relatively new, and it's available on Windows 10 devices with compatible hardware.

You can quickly check to see if your device supports Hotspot 2.0, using the following steps:

  1. Open Start.
  2. Search for Command Prompt and click the result.
  3. Type the following command and press Enter:

    netsh wlan show wirelesscapabilities

If the command output shows that your PC supports ANQP Service Information Discovery, you can connect to Hotspot 2.0 networks.

How to enable Hotspot 2.0 networks

Once you know your device works with the new standard, you can use the following steps to turn on the feature so that it lists the providers when you're trying to connect after selecting a Hotspot 2.0 network.

  1. Open Settings.
  2. Click on Network & Internet.
  3. Click on Wi-Fi.
  4. Under the "Hotspot 2.0 networks", turn on the Let me use Online Sign-Up to get connected toggle switch.

When the option is enabled, Hotspot 2.0 networks appear in your list of Wi-Fi networks when they're available.

How to connect to Hotspot 2.0 networks

The connection process is very simple. You just click the network from the list and hit the Connect button. You'll then get a sign-in prompt to connect to your provider. This is a one-time sign-in process, and after entering your credentials, your device will connect online automatically when a Hotspot 2.0 network is available.

It's also possible for providers to offer profiles to make the process even easier to connect to a Hotspot 2.0 network. For example, Boingo is a mobile wireless provider that allows you to download and install a profile using your web browser to connect automatically to a number of airport hotspots using affiliated networks.

Quick Tip: Once you download a profile, you must disconnect from your current Wi-Fi network and reconnect for the new profile to work.

Perhaps the most interesting aspect of Hotspot 2.0 networks is that providers can partner to allow customers to quickly and securely connect online through different providers.

For example, if you're on the go while subscribed to provider "A", which partners with providers "B" and "C" to offer Hotspot 2.0, but provider "A" is not available at your current location, you can connect online using provider "B" or "C" automatically without extra steps, just like roaming on your phone.

Wrapping things up

We're still in the early days of Hotspot 2.0, which means that not every network you try to connect to in places such as airports, hotels and coffee shops will offer this technology. However, as internet providers continue to adopt it, you're going to start seeing more places offer Hotspot 2.0. Once you set it up, you'll never need to go through the process of finding a network or signing in again to securely connect online.

The technology is not only available on Windows 10 but also on Apple's macOS, starting with version 10.9, and iOS 7, as well as Google Android 6.0 and later.

More Windows 10 resources

For more help articles, coverage, and answers to common questions about Windows 10, visit the following resources:

How to use NTFS compression on Windows 10

$
0
0

You can use NTFS compression to save storage space on your Windows 10 PC, and in this guide we'll show you how.

NTFS file system on Windows 10 includes a compression feature, which allows you to shrink files to save space with the advantage to keep accessing your files as you would normally do without compression, and without the need to decompress files using extra software.

However, there is a caveat, using compression can impact system performance. When you're actively accessing compressed files, NTFS needs to decompress and compress those files again as you finish using them, which is a process that requires more processor and hard drive resources.

Although this feature can impact performance, there are still a number of good reasons to use it. Typically, you would use compression to set up a drive to store data that you almost never use. In those times when you need to optimize your storage space. Or to store files that you use frequently, but they don't impact system performance significantly, such as documents and pictures.

If you need to save space on your device, on Windows 10, you can enable compression in two different ways. You can compress individual files and folders or an entire drive.

In this Windows 10 guide, we'll walk you through the steps to use compression to save storage space on your computer.

How to compress files using NTFS file compression

The easiest way to use NTFS compression to make files smaller is to compress them individually. This is a good solution that you can use when your device only has one drive, or there is a secondary drive, but you want to compress files you rarely use while keeping those you use frequently uncompress to reduce the system performance impact.

Another advantage of NTFS file compression is that you don't need to go through the process of zipping and unzipping every time you need a file, as everything is handled automatically and on the fly.

To compress files and folders using NTFS, do the following:

  1. Open File Explorer.
  2. Navigate to the location you want to store the compress files.
  3. Click the New folder button on the "Home" tab.
  4. Type a descriptive name for the folder and press Enter.
  5. Right-click the folder and select Properties.

  6. Click the Advanced button.

  7. Under "Compress or Encrypt attributes," check the Compress content to save disk space option.

  8. Click OK.
  9. Click Apply.
  10. On "Confirm Attribute Changes," make sure to select the Apply changes to this folder, subfolders and files option.

  11. Click OK again.

Once you completed the steps, you can add new files and folders, and they will compress automatically.

Alternatively, you can compress a single file by accessing the file properties, clicking Advanced, and enabling compression.

Previously, you could identify which files and folders were compressed because they were marked with blue font, but on Windows 10, you'll now notice two arrows pointing to each other icon in the top-right corner to indicate the content is compressed.

Quick Tip: If you want to see how much space you're saving, just right-click a file or folder, and select Properties. Size is the actual size of the item without compression, and Size on disk is the size of the item after compression.

How to compress files using NTFS drive compression

You can not only compress individual files and folders using NTFS, but it's also possible to set compression to an entire hard drive.

This option works identically to file compression, which means that once enabled, you'll still be able to access files as you would normally do on any drive because the compression and decompression process happens almost instantly.

To compress an entire drive on Windows 10 using NTFS, do the following:

  1. Open File Explorer.
  2. Click on This PC.
  3. Right-click the hard drive you want to compress and click Properties.

  4. Check the Compress this drive to save disk space option.

  5. Click Apply.
  6. On "Confirm Attribute Changes," make sure to select the Apply changes to drive [drive letter]:\, subfolders and files option.

  7. Click OK.
  8. Click OK again.

The drive doesn't necessarily have to be empty. You can compress a drive with content already in it. However, you should notice that the OS will have to compress the files and folders too, which can take a long time deepening on data stored in the drive.

When to use NTFS compression and when you shouldn't

You should use compression for storage only. Usually, it's safe to use NTFS compression when you have a computer with a reasonably fast processor and hard drive, such as a Solid-State Drive. In contrast, if you have a low-end tablet or laptop, or if you have a very old PC, you should skip this feature and consider to get a larger drive instead.

Getting a larger external hard drive will many times make more sense than using compression, as more capacity means more room to store files without having to go through the compression and decompression process that can impact system performance.

And yes, you can enable compression on USB flash drives and SD cards, but using a hard drive is your best choice.

The amount of storage space you can save will always vary, and it'll depend on many factors. NTFS compression has been designed to be lightweight and fast, which means that a lot of times the compression ratio is likely to be less than using other compression mechanisms found in third-party tools.

You can store content like zip folders and mp3 music files inside of a folder using NTFS compression, but they're already compressed, as such don't expect them to get any smaller.

It should be noted that compressed files need to be decompressed before copying over the network, which means NTFS compression does not save network bandwidth. If you want to save bandwidth, you should consider using zip.

It's also possible to compress the hard drive where Windows 10 is installed, but it's highly not recommended. Using compression on the system drive can significantly impact performance and cause many problems.

If you're looking to compress the system drive, you should look into Compact OS, which is a compression mechanism to reduce the footprint of Windows 10 freeing up space in your primary hard drive.

While we're focusing this guide on Windows 10, you can also use the same steps to use NTFS compression on Windows 8.1, Windows 7, and earlier versions of the OS.

More Windows 10 resources

For more help articles, coverage, and answers to common questions about Windows 10, visit the following resources:

Switching from Mac to a Windows PC: 10 tips to ease your tech transition

$
0
0

Thanks to an impressive array of quality PC hardware options, and some less-than-inspiring product launches and updates from Apple, now is a great time to make the switch from Mac to Windows.

Microsoft versus Apple. PC versus Mac. Windows versus OS X, errr, macOS. Surface Pro versus iPad. Zune versus iPod. (OK, that last one might be a bit off ... but you get the point.)

It's a technology battle that's been waging for decades, with constant ebbs and flows based on the market and user priorities. During the past few years, the momentum started to once again shift back toward Microsoft and the Windows PC. That has a lot to do with some uninspired updates from Apple (we're looking at you, new MacBook Pro with Touch Bar) and lackluster product launches (iPad Pro, anybody?), as well as some solid hardware options from Microsoft partners, including Dell and HP. (We're particularly smitten with the XPS 15 and HP Spectre x360 15.)

In other words, Windows is cool again.

Whatever your reason for taking the PC plunge and switching from a Mac computer to Windows, the transition isn't always an easy one. You likely have your work cut out for you — at least at first. At Windows Central, we love our PCs, and we're sure you'll ultimately be thrilled with the decision to ditch that Mac and move to the wonderful world of Windows. But you can ease the transition with just a little preparation. These 10 tips are a great place to start.

Switching from Mac to Windows

1. Embrace your Microsoft account

First things first, you're going to need to create a Microsoft account. A Microsoft account is required to log in to your PC, and it will help you personalize your device, not unlike how Apple ID works on Mac — but you don't need to save a credit card, as you do with an Apple ID.

If you already setup your PC, you probably already created an account. But did you know your Microsoft account gives you access to a bunch of additional Microsoft services, including Skype, OneDrive, Xbox Live, the Windows Store and MSN services? If you already use any of these Microsoft services, or have in the past, you likely already have a Microsoft account. For example, if you use Skype, you can use your Skype credentials to log in to your Microsoft account.

It's a good idea to spend some time poking around these services to determine which ones are valuable to you. They're free, after all.

2. Go cold turkey and quit that Mac completely

This tip is easier said than done, but it's also perhaps the most important advice on this list. Chances are you still have your old Mac, and when you come across some "challenge" with your new PC, you might be tempted to try to circumvent it and just pop back onto the old Apple computer to get the job done. That's a terrible idea.

The quicker you resolve any issues, or figure out how to get past some sticking point on PC that's different than on a Mac, the faster you'll get up to speed with Windows.

We suggest going completely, 100 percent cold turkey with your new PC ASAP. Hide your Mac under your bed or in a closet if you must. You already made your decision to switch, right? The most effective way to transition from Mac to PC is to dive right in wholeheartedly. Trust us, you'll be glad you did.

In the meantime, if you're still trying to figure out which PC you want to get, go ahead and install Windows 10 on your Mac— make that MacBook Pro truly Pro.

3. Ease into the Windows ecosystem

Yes, you should go cold turkey and only use your new PC after you first make your switch. However, you should not try to do too much, too soon. That's a recipe for disaster, and Windows and Mac are different enough that if you try to master your new PC in the first 24 hours, you may quickly become overwhelmed.

You'll need some apps and services immediately, whether they're for work or play, productivity or entertainment. However, some of the other stuff, the fun-but-not-necessarily-essential software, can wait.

Which leads us to our next tip ...

4. Identify essential apps and find replacements if necessary

Everybody has a few apps (or more) that they just can't live without. If you're a recovering Mac user, iTunes may still have its hooks in you. Maybe your organization uses Outlook or Slack for communication, and you can't work without one or both of those apps. Perhaps it's your Twitter client of choice.

Whatever the app, it's a good idea to be proactive and make a quick list of the software that you absolutely need. As long as you have access to those services, a speedy transition from Mac to Windows will be possible, even if it's at times a little painful.

If your essential apps are paid or premium apps, you may need to dig up your software licenses. Most large developers make it fairly simple to log in to their sites and access active license info and software keys. For example, if you're an Adobe Photoshop Creative Cloud subscriber, you may be able to simply log in to your Adobe account and download your apps, depending on your subscription type. Smaller developers usually at least email your licensing information when you purchase an app. So searching for the app names or related keywords in your inbox can also help dig up relevant product keys and other details.

Hopefully all of your essential Mac apps are also available for PC, but you're bound to find at least a couple that aren't. We know, it's frustrating to find that an app you depend on isn't available on your new platform. But the Windows 10 ecosystem is packed with awesome apps, and with just a little effort, we're confident you'll find a worthy alternative.

Lots of people have switched from Mac to PC in recent years, so if there's a particular app that you're missing, you're probably not the first person to have experienced the problem. A good Google search could quickly turn up suitable alternatives, sometimes at more affordable prices — or even free. For example, if you used to use the Mailplane Gmail app for Mac and were disappointed to find that it's not available for Windows, a Google search for "Windows alternatives to Mailplane Gmail app" turns up comparable options, some free.

You may even find a few new favorite apps.

5. Take advantage of Windows' unique strengths

Windows PCs offer many things that Macs simply don't, or can't. After you decide to embrace Windows, it would be foolish not take advantage of those strengths.

Today's Windows PCs, for example, often offer significantly more bang for your buck than Apple's computer, which are consistently pricey. Dell's awesome XPS 15 starts at more than $550 less than Apple's 15" MacBook Pro with Touch Bar, with comparable specs, for example. Oh, and the XPS 15 has a touch screen ... and, you know, functional ports. (ZING.)

The Windows world is all about choice and customization. The Apple world ... isn't.

Shopping for a new PC can be much more rewarding than shopping for a Mac, most of which are more or less preconfigured by Apple. And customizing a PC you already purchased is an entirely different experience than making a Mac your own.

Today's Windows machines are often easy to repair. Mac computers? Nope. (Apple purposefully makes it frustratingly difficult to repair the new MacBook Pro.)

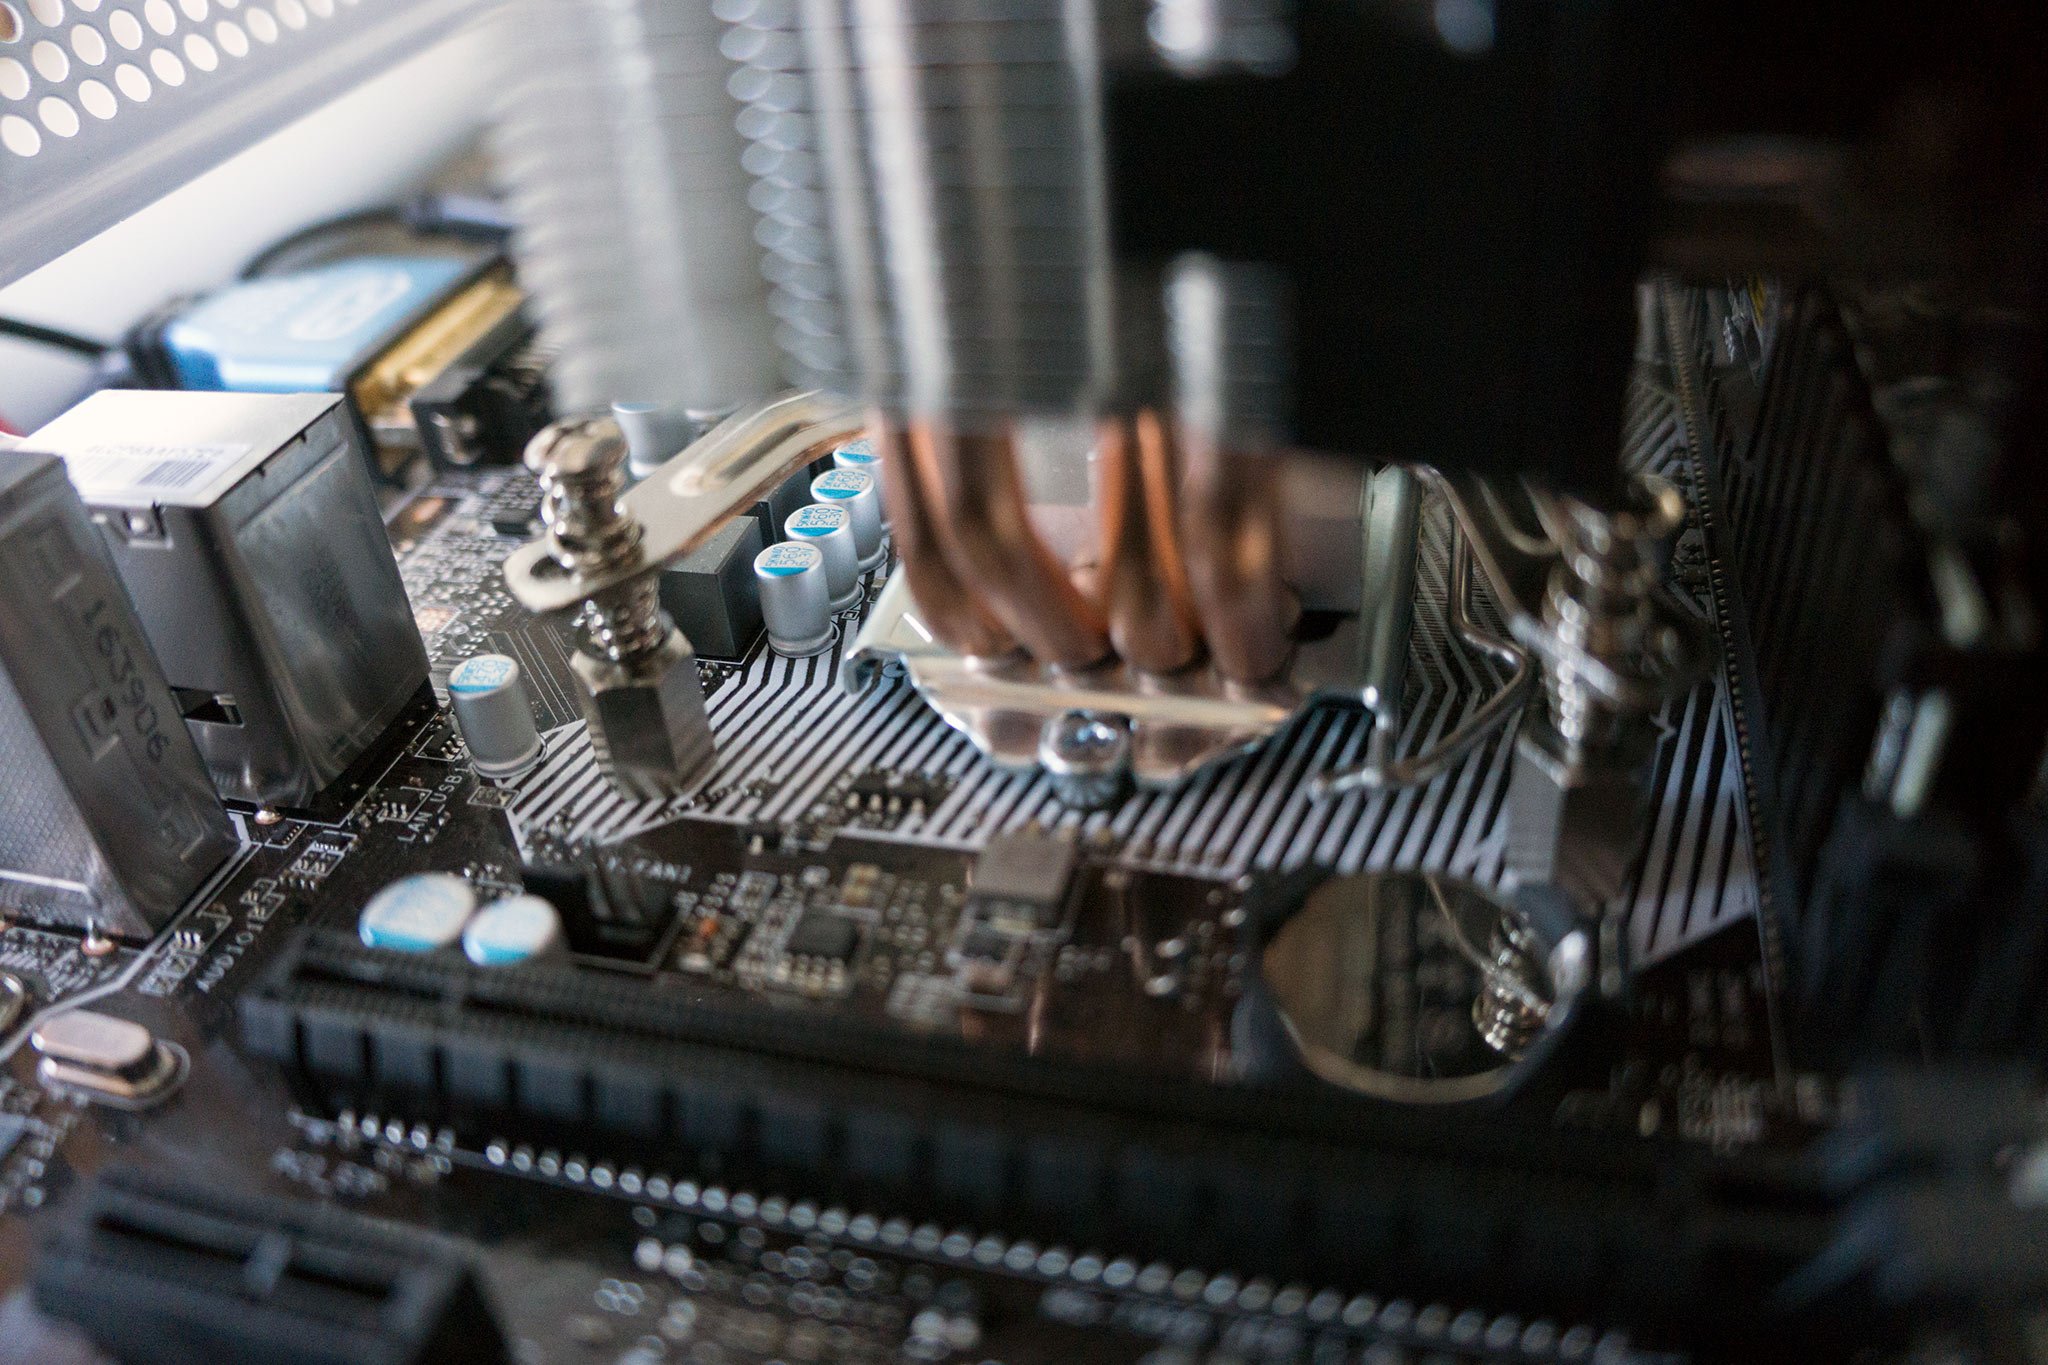
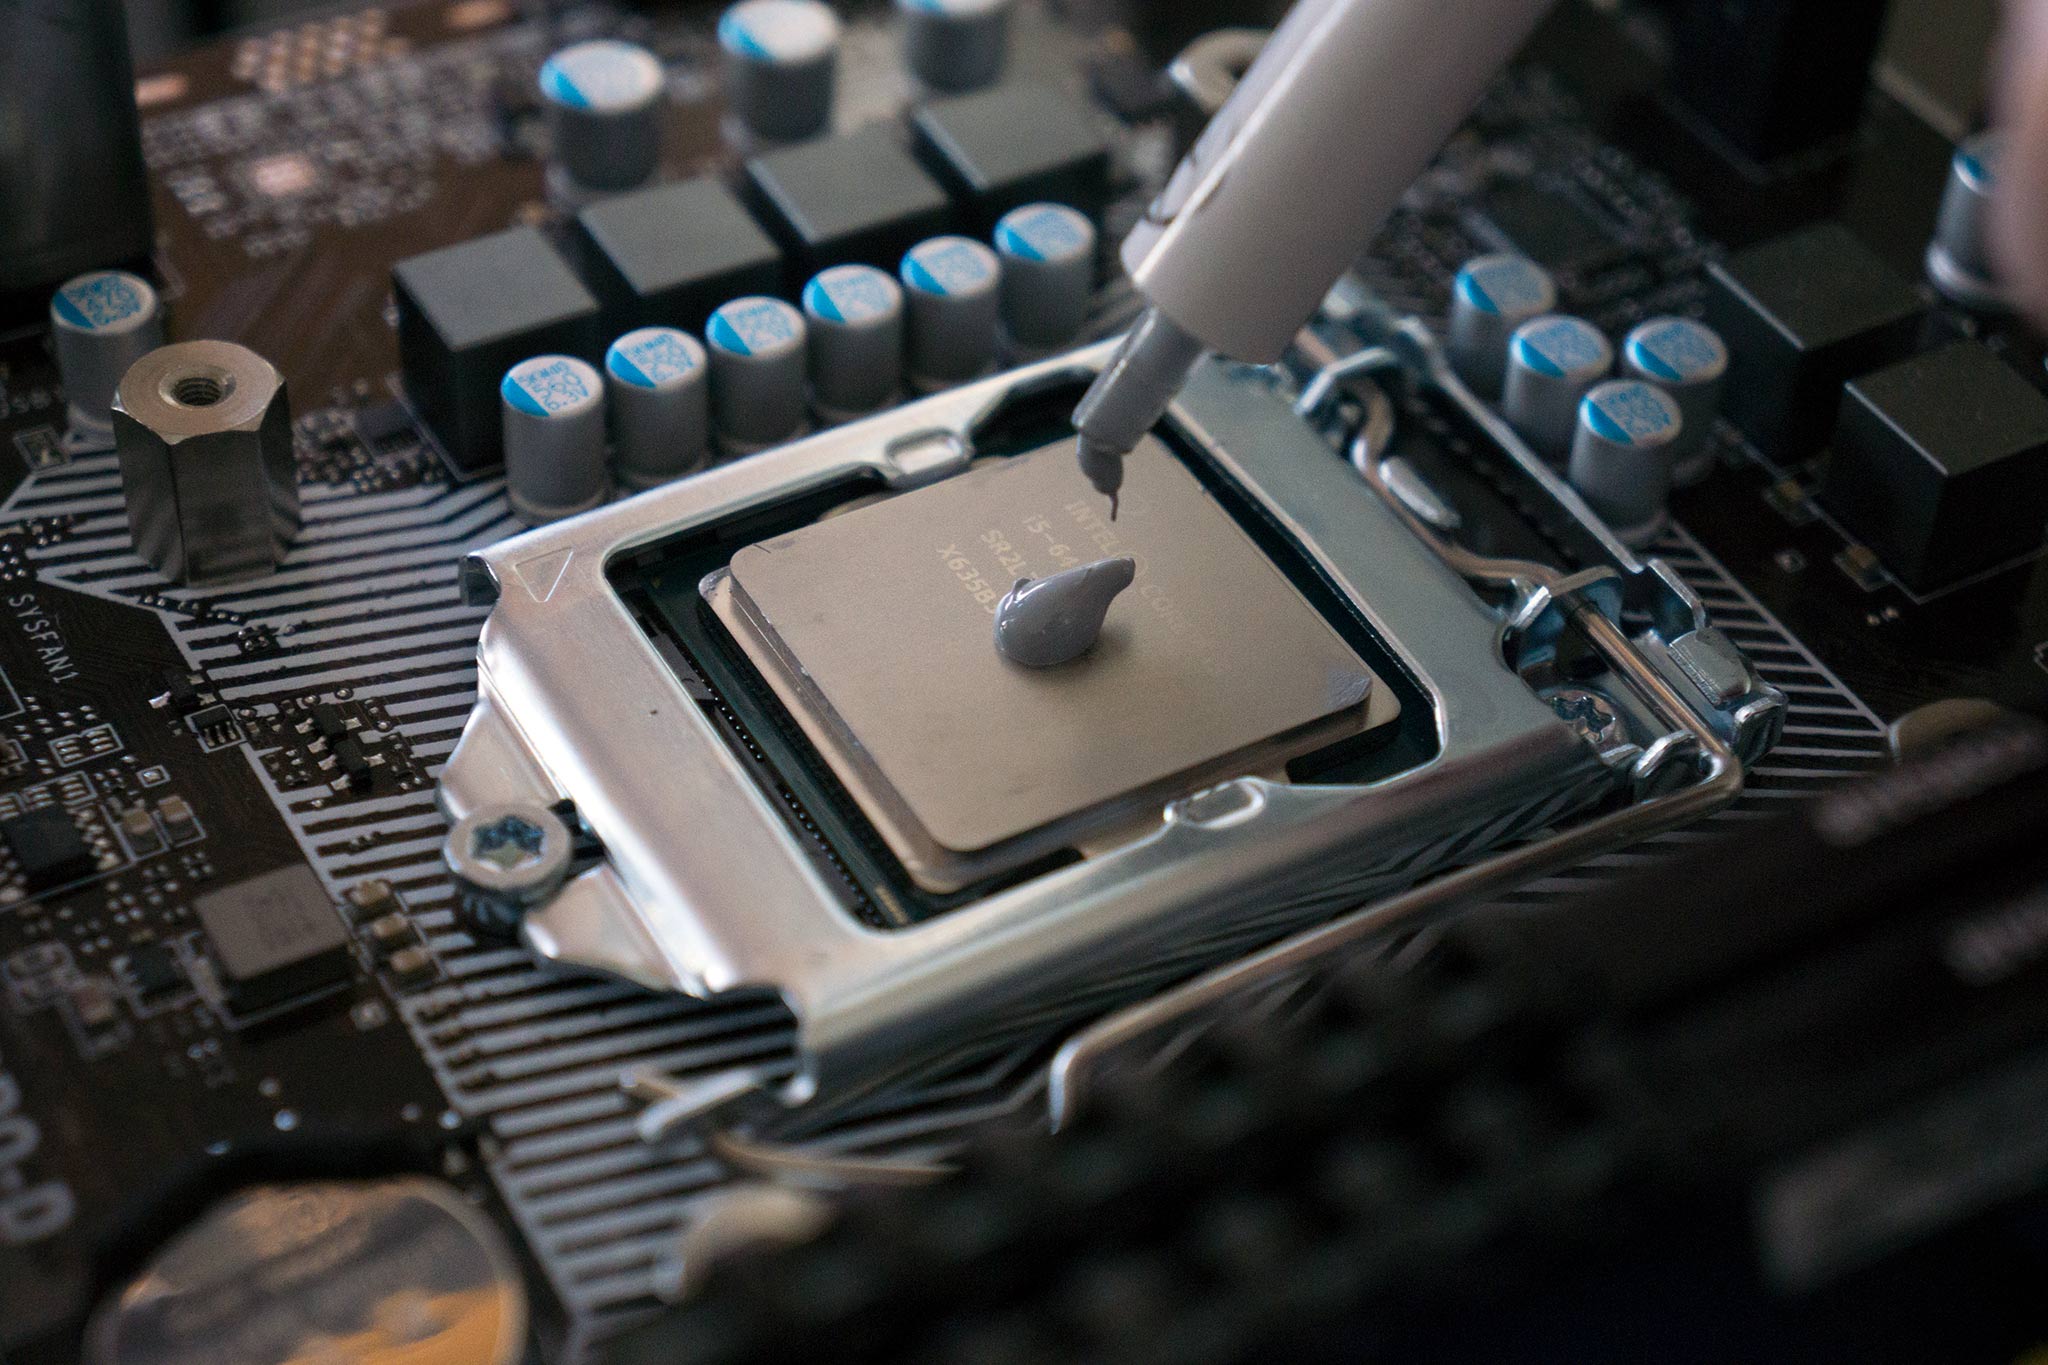
If you're past the shopping stage and already bought a specific PC, you can still take advantage of the ecosystem by upgrading some components or adding some worthy accessories, such as a docking station that's made specifically for your PC. For folks who like to build their own PCs, or even just easily upgrade RAM or replace a worn-down battery, Windows PCs come out on top every time.

6. Resistance to Windows software updates is futile

One big difference between Mac and Windows is how PCs handle software updates from Microsoft. By default, Windows 10 automatically installs software updates when they're available. For new Windows converts, this process can be ... annoying. It sometimes takes a while to install updates, so you might have to wait while they install, which is less than ideal.

Of course, it's a good idea to make sure your PC is always up to date, to protect yourself against the latest security threats and ensure you have all the newest features. So Windows 10 auto updates aren't all bad. But they do take some getting used to.

In general, don't be surprised if Windows decides to install a software update at an inopportune moment. Just embrace it ... and try not to lose your cool.

The good news is that if you're using Windows 10 Pro or higher, you can take back some control and prevent the OS from downloading and installing updates automatically:

How to stop Windows 10 auto updates

7. Learn to love your Windows keyboard shortcuts

Both Windows and macOS are packed with valuable keyboard shortcuts that let you perform a variety of tasks quickly with just a couple of coordinated key strokes. Unfortunately, though similar in some cases, each OS uses different keyboard shortcuts. So even if you know your Mac shortcuts inside and out, you're going to have to learn a whole new set of keyboard shortcuts for Windows.

One of the main differences between Windows and Mac keyboard shortcuts is the fact that the many Mac shortcuts use that OS's "Command" key. No such key exists on Windows, and many Windows shortcuts instead are based on some combination of keys and the "Windows" key, which is marked with a Windows logo. (In some cases, the "Ctrl" key on Windows is used in place of macOS's Command button.)

It can all be a lot to process at first, but it's worth taking the time to learn those shortcuts. And you're in luck: We recently created a guide to Windows shortcuts that's easy to navigate — and even easier to bookmark for future reference.

8. Get to know your Windows antivirus software — and use it

Windows, by virtue of the sheer number of PCs out there, is a target for viruses. As such, you have to proactively protect your PC in a way that's just not necessary on a Mac. That's not to say Macs are bulletproof when it comes to online threats, but protecting a PC is a very different proposition than protecting a Mac.

Microsoft includes two native apps in Windows 10 that are designed to help you protect your computer from viruses and malware: Windows Defender and Windows Firewall. For the average user, these apps are probably enough.

Windows Defender is enabled by default when you first start using Windows 10. But if you want to turn it on our off, go to Start menu > Settings> Updates & Security> choose Windows Defender and turn Real-time protection on or off.

Windows Firewall should also be turned on by default. However, you can turn it on or off by hitting the Start menu > scroll to Windows System> Control Panel> System and Security> Windows Firewall> select Turn Windows Firewall on or off> enter your password if prompted. (Note: It's not a good idea to disable Windows Firewall unless you plan to use another firewall.)

Or course, Microsoft's native apps aren't your only options. Many alternative and free options also exist:

9. Stop by your local Microsoft Store

If you live in a major U.S city or metropolitan area, there is likely a Microsoft retail store near you. (You can find your nearest location using Microsoft's store locator.) Not unlike Apple Stores, Microsoft Stores are brightly-lit, open spaces packed with tech toys and retail reps who are eager to answer your every question.

We highly recommend stopping by, talking up the reps, asking any questions you may have, playing an Xbox game or two on their bigass TVs, and just poking around in general. You won't find a huge selection of components or accessories, but all of Microsoft's own latest and greatest hardware will be on display, along with some of the most popular machines from Microsoft's leading hardware partners. Many of the PCs in our definitive 2017 laptop buyer's guide are available in Microsoft stores, for example. So even if you already purchased a new PC, you can go check out and tinker with the other toys.

Microsoft stores are a great place to familiarize yourself with the ecosystem. But beware: You might want to leave your credit card at home — it's very easy to drop a bunch of cash on stuff you probably don't need. Even if you want it so hard.

10. Bookmark Windows Central and visit us often!

Nobody loves Windows like Windows Central loves Windows.

As you make your way into the world of Windows, you're likely going to need additional guidance, whether it's news on the latest hardware or insights on upcoming OS updates. We cover just about everything Windows and Microsoft, so do yourself a favor and bookmark us. Go ahead. You won't regret it.


Hopefully these tips help point you in the right direction and ease your tech transition. If you need additional Windows advice in the future, you know where to find us.

You might also consider visiting the following Windows 10 resources:


How to disable your laptop's webcam and microphone on Windows 10

$
0
0

How to disable your laptop's webcam and microphone

How do I stop my webcam and microphone from working?

Most laptops today come with a built-in webcam — some with a standard camera used for Skype and other web-conferencing, some with IR cameras for Windows Hello facial recognition. And pretty much all laptops also come with a built-in microphone to be used in conjunction with the camera.

If you're someone who never uses their camera or microphone on their laptop, you might be wondering how to disable them. Why? Some malware can take control of the hardware and let it work even when you aren't using it. Even if you're just concerned with your ever-eroding privacy, these steps will show you how to disable the built-in webcam and microphone on your Windows 10 laptop.

Scan your computer for malware

If you think your computer might be infected with malware, scan it before doing anything else. Even if you have your webcam and microphone disabled, you don't know exactly what the virus is targeting.

Windows Defender comes standard on Windows 10 PCs, so that's a great place to start. If you want an alternative antivirus solution, you can keep things free, or you can check out one of the available paid options.

See the best free alternatives to Windows Defender

See the best antivirus software of 2017

Check which apps are using your webcam

Check which apps are using your webcam

If you run into a scenario where you notice your webcam's LED is on but you're not using any apps, it's good to know how to check which apps are using your webcam. All you need to do is download Process Explorer, find your webcam's device name, and search for it. To get you through the process, we created a complete guide.

Complete guide to checking which apps are using your webcam

Disable your webcam and microphone through Device Manager

Disabling your webcam and microphone using the Device Manager is the quickest way to do things, but it isn't entirely secure — advanced malware that targets your devices can turn them back on without your consent. Nevertheless, it's not a bad idea to know how to disable your webcam and microphone through Device Manager.

How to disable your webcam

The process of disabling your webcam through Device Manager involves a small number of steps.

  1. Right-click the Start button.
  2. Click Device Manager.

    Right-click the Start button. Click Device Manager.

  3. Click the dropdown arrow next to Imaging devices.
  4. Right-click Integrated Camera— note that this could change depending on the hardware in your laptop.

    Click the arrow next to Imaging devices. Right-click Integrated Camera.

  5. Click Disable.
  6. Click Yes.

    Click Disable. Click Yes.

If you'd like to enable your webcam, just run through the steps again, but this time click Enable instead of Disable.

How to disable your microphone

Disabling the microphone in your PC follows almost the same steps as disabling your camera.

  1. Right-click the Start button.
  2. Click Device Manager.

    Right-click the Start button. Click Device Manager.

  3. Click the dropdown arrow next to Audio inputs and outputs.
  4. Right-click Internal Microphone— this label can change depending on the hardware you have in your PC.

    Click the arrow next to Audio inputs and outputs. Right-click Internal Microphone.

  5. Click Disable.
  6. Click Yes.

    Click Disable. Click Yes.

To enable your microphone, just follow the same steps, but click Enable instead of Disable.

Disable your webcam and microphone through the BIOS

Microphone and camera options in a ThinkPad's BIOS

To take things one step further, some laptops allow you to disable the webcam and microphone on the system level from the BIOS. The steps to do so will differ between machines, but you generally want to disrupt the boot process by hitting a corresponding Function key, then search through the BIOS for your camera and microphone.

In this case, on a Lenovo ThinkPad, the integrated camera and microphone options are located in the I/O Port Access section of the Security tab. After disabling both options, you can save and exit the BIOS and your PC will cycle again through the boot process until Windows starts.

Remember, the BIOS in your PC might be quite a bit different, but the end result is the same. If you head into your Device Manager after disabling the camera and microphone in the BIOS, they will not show up.

Camera and microphone no longer appear in the Device Manager

To enable your devices again through the BIOS, repeat the same steps as you took to disable them, but change their property to Enabled.

Cover your webcam

Webcam on the Spectre x360 15t

When it comes to disabling cameras, some people will go so far as to open up their PC and disconnect the webcam's cable. While this is an extreme option for anyone who can get into their laptop or AiO PC — especially without voiding the warranty — a better physical solution is to just cover the webcam.

Many people use sticky notes or electrical tape as a cheap and immediately-available cover, but other people prefer something a bit more professional. In those cases, you'll want to check out a cheap little accessory that slips over your webcam and has a slide for when you actually do want to use it.

This webcam cover keeps you private without looking tacky

Privacy?

Keep in mind that only the only way to guarantee the camera or microphone is disabled is to do so physically, either by removing it entirely or just disconnecting the internal cables. Odds are you won't have to personally go that far — yet — but remember that for the future.

Have you ever been victim to malware that took control of your webcam or microphone? What were the circumstances, and what did you do to fix the problem?

How to assign permanent letters to drives in Windows

$
0
0

You can manually assign permanent drive letters in Windows 10. This guide shows you how.

When you connect a new drive (a USB flash drive, optical drive, SD card or another type of storage devices) to your computer, Windows 10 automatically assigns a drive letter to identify the device and make it accessible. However, if you use multiple drives, you'll probably notice a new letter whenever you reconnect the same drive, which can be frustrating.

Fortunately, you can manually assign a permanent letter to any drive you connect using Windows 10 (excluding the C drive, of course). That's not only to stop the OS from assigning different letters. Windows 10 could also try to set a letter that's already in use, and you'll need to resolve the conflict. Or perhaps you simply want to assign drive letters in a way that makes more sense to you.

Whatever the reason, Windows 10 offers a few ways to manually assign permanent drive letters, as long as you connect the drive to the same computer and the letter is available.

In this Windows 10 guide, we'll walk you through the steps to permanently assign drive letters to peripherals, such as USB storage devices, disk drives, using Disk Management and the Command Prompt.

How to assign a drive letter using Disk Management

On Windows 10, you can manage drive letters without third-party tools using Disk Management.

To assign a new drive letter, do the following:

  1. Use the Windows key + X keyboard shortcut to open the Power User menu.
  2. Select Disk Management.
  3. Right-click the drive on the list and select Change Drive Letter and Paths.

  4. Click the Change button.

  5. Use the drop-down menu and select the drive letter you want to use.

Once you complete these steps, every time you connect the same drive to the same computer, Windows 10 will automatically set the same letter. However, if you take your external drive to another computer, it'll likely get a different drive letter.

In the rare case, you run out of letters and you need to access a different drive, you can use the steps mentioned above, but on step No. 4, click the Remove button and then connect the new drive.

How to assign a drive letter using Command Prompt

Although Disk Management provides a user-friendly interface to manage drive letters, you can also assign drive letters using the DiskPart command-line tool in Command Prompt.

To assign a drive letter using Command Prompt, do the following:

  1. Open Start.
  2. Search for Command Prompt, right-click the result, and select Run as Administrator.
  3. Type the following command to start DiskPart and press Enter:

    diskpart

  4. Type the following command to list all the volumes on your computer and press Enter:

    list volume

  5. Type the following command to select the volume to change the letter and press Enter:

    select volume 3

    • In the command, remember to change 3 for the number of the volume you want to change.
  6. Type the following command to assign a new drive letter. In this case, you'll assign the letter Z. Then press Enter:

    assign letter=Z

    • In the command remember to change 3 for the number of the volume you want to change.

After you had complete the steps, every time you connect the drive to the same computer, it should receive the same drive letter you assigned using DiskPart. However, if you take the drive to another device, the OS will likely assign it a different letter.

If you must remove the drive letter, you can follow the same steps, but on step No. 6, you'll need to run the remove letter=Z command.

Wrapping things up

While you can manually assign a permanent letter to drives you connect to your computer, the move won't stop Windows 10 from randomly assigning the same letter to another drive when the first drive is not plugged in.

However, you can reduce the chances of getting the same letter, or running into conflicts, by using letters in backwards order. For example, instead of using D, E or F, it might be better to use Z, Y or X when assigning a new letter to a drive.

This guide is focused on Windows 10, but the same steps will work for Windows 8.1, Windows 7 and previous versions.

More Windows 10 resources

For more help articles, coverage, and answers to common questions about Windows 10, visit the following resources:

This is why you're seeing 'system thread exception not handled' after the Oculus update

$
0
0

Don't panic, and maybe don't completely re-install Windows.

Oculus Rift

A small group of users have noticed a big problem when trying to use their Oculus Rift after the 1.12 system update from Oculus. When you go to run setup and pair your Touch controllers, or when you try to jump into a game to play if you're already set up, the PC flashes the Blue Screen of Death and you're faced with "SYSTEM THREAD EXCEPTION NOT HANDLED" on the screen.

For most people, this is a surprisingly easy fix. Here's what we've found so far!

Read more at VR Heads!

How to install an Intel CPU

$
0
0

Intel CPU

Installing a new Intel processor is an important step in any PC build or upgrade. Get it wrong and you could cost yourself hundreds of dollars. Here's the right way to install a new Intel CPU and avoid costly issues.

Insert and play

First thing's first, you're going to need to have your motherboard at hand with ample access. If it's inside a PC case or packaging, we recommend you extract it and place it on an anti-static surface or atop its box. The same goes for your shiny new Intel processor, but pay extra attention to avoiding contact with the metal contacts.

  1. Unclip the metal retention bracket on the motherboard.
  2. Remove the plastic protective cover.
  3. Line up the guiding notch on the CPU with the one on the socket.
  4. Insert the chip without using any force.
  5. Secure the CPU by clipping down the retention bracket.

The bracket will keep the CPU from falling out when the motherboard is installed inside a PC case. The next stage is to install a cooler to take heat away from the component.

Intel's cooler

Intel CPU

Depending on where you buy the Intel processor, you may also receive a stock cooler. This is more than enough to keep the CPU cool under load without overclocking. Should you wish to play around with voltages and core speeds, you will need to invest in a more powerful aftermarket solution. An added bonus of Intel's cooler is that thermal paste is pre-applied for installation.

  1. Place the heatsink-fan combo on top of the CPU.
  2. Push down on each of the four locking pins in an X formation (top-left, bottom-right, top-right, bottom-left).
  3. Secure the pins by turning them towards the CPU following the small arrows.
  4. Plug the fan into the CPU_FAN header on the motherboard.

Aftermarket cooler

Intel CPU

Custom coolers from various OEMs require more attention to their bundled instructions. They will likely include a bracket that needs to be installed on the rear of the motherboard, followed by screwing in a heatsink atop of the CPU. Just remember to add thermal paste to the CPU before installation and remove any protective seals from the copper base of the heatsink.

Buy the latest 7th-gen Intel CPUs

Hard drive imaging vs. cloning: What's the difference?

$
0
0

Hard drive imaging vs. cloning: What's the difference?

Should I clone or image my hard drive?

Solid-state drives (SSD) are becoming all the rage thanks to the significant speed upgrade they deliver over standard hard-disk drives (HDD). Not only are SSDs faster, they're also more reliable because they don't have moving parts inside.

If you're swapping out a secondary drive, or one that doesn't contain your OS, you can technically just drag and drop the files you want to keep over to the new drive. But what about when you want to move your entire OS and your apps and your files to a new drive? That's where cloning and imaging come in. Let's take a look at what exactly each process involves, and why you might want to use each technique.

What is hard drive imaging?

Before you perform either process on your PC, it's good to know exactly what imaging and cloning are. They both involve creating a backup of your hard drive, but there are significant differences that make them suitable for different situations.

Imaging a hard drive is like creating a compressed file of your OS — all of the files needed to run Windows, plus anything you have saved on your hard drive, will be contained within the image, which is usually saved as an ISO file.

What is hard drive imaging?

Because of their compressed nature, multiple images can live on a single hard drive as long as there is space enough on the drive. This allows for multiple full, incremental, and differential backups to better keep your data safe.

What's the difference between these types of image backups? A full image takes everything on the drive and is required to restore your system. Differential backups keep a record of any changes made since the full image was created, so restoring a system requires the full image and the latest differential image.

Incremental images record any changes made since the last incremental image, so, in the case of a restoration, you need the full image and every incremental image created thereafter. Incremental images are sometimes preferred because they can be created quickly depending on how many changes have been made, whereas differential images can become quite large depending on how much time has gone by since a full image was created.

There are a few ways you can recover your computer using a drive image. If your Windows 10 PC suffers from a blue screen error and can't boot properly, you'll be confronted with a menu with an option to restore from a system image. In that case, you can choose your image (usually saved on an external drive) and restore your PC. Also, if you create a recovery environment on a separate USB stick or external hard drive, you can restore an image on a PC that doesn't have Windows 10 installed at all.

There doesn't need to be a complete failure, though, to benefit from an image backup. If you find that your computer has been infected with malware, for example, having a healthy image to restore to can make things quite easy when it comes to removing the virus.

What is hard drive cloning?

Since imaging a drive can seemingly keep tidy records of your files and can be used to put Windows on a new drive, where does cloning come in?

Unlike drive imaging, in which you create a compressed version of a drive that can be restored later, cloning creates an exact replica — boot records, files, settings and themes — that can be used immediately as a primary drive. This cloned drive can be kept as a backup, or you can reverse clone from it to a new, blank drive.

Cloning using Macrium Reflect

For example, you can clone your PC's hard drive to an external drive, swap out the PC's internal drive for a new one, then boot from the external drive and reverse clone your OS and files back onto the new drive in your PC. If this seems a bit confusing, we wrote a guide on this process that lays everything out for you to digest:

How to clone your PC's hard drive

Because cloning creates an exact copy — no compression — of a hard drive, you can only clone to a hard drive once. You can, of course, overwrite the clone on the hard drive in the case that you need the external drive for other storage.

The examples above outline cloning using an external drive as an intermediary, but what about cloning directly? That's where a hard-drive enclosure comes is. These enclosures provide an environment similar to what is found inside a PC. That means you can connect hard drives meant for internal use through a USB port on your PC.

SSD and enclosure

If you're swapping out your hard drive for something bigger and faster and don't want to deal with an intermediary external drive, you can grab an inexpensive enclosure, pop your new drive into it, clone directly onto it, and install it in your PC. Because of the nature of cloning, the newly installed drive should boot just as though nothing had been changed, and you'll find Windows exactly as you left it.

Conclusion and more resources

To recap, imaging a drive is best suited for keeping backups of your OS and files — you can store multiple images on a single drive and you can schedule incremental and differential backups — but it can also be used when upgrading the hard drive in your PC.

Cloning a drive is more suited for times when you're upgrading your hard drive — with an external enclosure, it's basically just a one-step process — but it can also be used in a backup situation. If your hard drive crashes and you have a recently cloned version laying around, you can simply pop it into your PC and act like nothing happened.

If you're still seeking additional related resources, we've got you covered:

What is an SSD and why you might want one

Best solid-state drives

Best external hard drives

How to clone your hard drive

How to upgrade the SSD in your Dell XPS 13

How to upgrade the SSD in your Dell XPS 15

How to upgrade the SSD in your Razer Blade

How (and when) to use Microsoft Word footnotes and endnotes

$
0
0

How do I insert a footnote or endnote into a Word document? And how do I know when to use a footnote or endnote?

Whether you're writing a report that needs references to other sources, doing research for the next great Hemingway-esque novel, or just creating a printed list to organize and navigate your ridiculous collection of vintage hats — with references to where you purchased them, as well as outfit pairing suggestions — Microsoft Word 2016 for Windows has a number of "reference" features that make it easy to insert footnotes and endnotes quickly.

How to add a footnote in Microsoft Word

Before getting into the tutorial, a definition of "footnote" could be useful, to help explain when and where you want to use them. Here's a definition, from Dictionary.com:

  • An explanatory or documenting note or comment at the bottom of a page, referring to a specific part of the text on the page.
  • A minor or tangential comment or event added or subordinated to a main statement or more important event.

Here's how to add a footnote in Word 2016 for Windows:

  1. Navigate to the location in your document where you want to add a footnote.
  2. Click the References tab at the top of your Word display. (It's the seventh tab in from the left.)

  3. Click the tiny box in the bottom-right corner of the Footnotes tab, to customize your footnote settings. (The box looks like an arrow pointed down and to the right at a 45-degree angle.)

    • In the Location box, make sure the circle next to Footnotes is filled in, and the in the corresponding drop-down menu, choose whether you want your footnotes to appear at the Bottom of page or Below text.

    • In the Footnote layout section, click to open the drop-down menu next to Columns and choose the number of columns you'd like to use for footnotes. If you choose 3 columns your footnotes automatically break into three evenly-spaced columns, and subsequent footnotes stack on top of each other, in the three-column format.
    • The Format section lets you change the footnote numbering scheme from digits to letters; use custom marks for numbering; and customize the way you otherwise organize footnotes.
    • After you choose all the footnote settings you want, click the Apply button to save the changes.
  4. When you're ready to insert your first footnote, again make sure your cursor is in the proper position on the page, and in the Footnotes box, within the References tab, hit Insert Footnote.

  5. A new footnote appears either at the bottom of your page or directly below your text, based on your settings, and you can begin typing your footnote immediately. Click anywhere else on the page to "save" the footnote.
    • You can edit existing footnotes at any time by navigating to them and then clicking within the text.
  6. When you're ready to create an additional footnote on the same page, repeat the steps above. Subsequent footnotes appear below previous footnotes at the bottom of the page, or directly below the corresponding text, based on your settings.

How to add an endnote in Microsoft Word

What exactly is an "endnote," and when should you use one? From Dictionary.com:

a note, as of explanation, emendation, or the like, added at the end of an article, chapter, etc.

So while footnotes are used to provide quick, as-you-go information throughout a document, and endnote should be used to provide pertinent information at the finish, or "end," of a document, to provide some sort of context or conclusion, not unlike a form of written punctuation.

Here's how to add endnotes in Word 2016:

  1. Click the References tab at the top of your Word display. (It's the seventh tab in from the left.)
  2. Click the tiny box in the bottom-right corner of the Footnotes tab, to customize your endnote settings. (The box looks like an arrow pointed down and to the right at a 45-degree angle.)

    • In the Location box, make sure the circle next to Endnotes is filled in.

    • The Format section lets you change the endnote numbering scheme from digits to letters, use custom marks for numbering, and customize the way you organize endnotes.
    • After you choose all the endnotes settings you want, click the Apply button to save the changes.

  3. When you're ready to insert an endnote, again make sure your cursor is in the proper position on the page, and in the Footnotes box, within the References tab, hit the Insert Endnote button.

  4. You can add multiple endnotes, and place them throughout your documents, but they'll all appear on the final page at the end of your text. This is unlike footnotes, which appear on the same pages to which you add them.

More Microsoft Word and Office tutorials

For more Microsoft Word help, how-tos and tutorials, read:

Or check out our full Office 101 page:

How to save money on Xbox Live Gold

$
0
0

You don't have to pay full price for your Xbox Live Gold subscription. Here are a few tips to saving some cash!

If you pay for Xbox Live Gold to use on your Xbox One, you may well be spending too much. The service is basically a necessity to get the most from your console, but if you just sign up and give Microsoft your money you're probably not getting the best deal.

The good news is that deals on Xbox Live Gold subscriptions are fairly common, you just need to know where to look. Here, we've rounded up some tips on where to look to save some money.

Thrifter.com

Thrifter

Thrifter is a new addition to the Mobile Nations family, dedicated 100% to curating the best deals around to help you save money.

Be sure to keep an eye on the site at Thrifter.com and follow along on the usual social media channels. If there's a deal to be had on Xbox Live Gold, Thrifter will make sure you know about it.

Follow Thrifter on Twitter

Like Thrifter on Facebook

CDKeys

CDKeys

CDKeys is a reputable source of discount codes for both PC and Xbox gamers, and cheaper vouchers for Xbox credit and Live Gold subscriptions can often be found here.

The page to keep an eye on is linked below. You'll probably have to act fast when deals appear, as they're pretty popular!

Xbox Live codes on CDKeys

eBay

eBay

The site that sells everything is also a great place to find discounted codes for Xbox Live Gold. For example, this current deal will see you save $9 on a 12-month subscription over buying direct from Microsoft.

Find Xbox Live Gold deals on eBay

G2A

G2A

G2A is a service in a similar vein to CDKeys, in that you can usually find great prices on codes for games, DLC and more.

One big difference is that G2A allows its members to sell codes to others, and so long as you make use of the G2A Shield buyer protection, you're covered if you get a code that doesn't work.

Find Xbox Live deals at G2A


Those are just some of the great places you can use to save yourself money on an Xbox Live Gold subscription. If you've got your own gem to share that usually helps you save money, be sure to drop it into the comments below.


What is an SSD and why would I want one?

$
0
0

Guide to solid-state drives

What is a solid-state drive and how does it work?

Update March 13, 2017: We've refreshed this article with some new resources and more information on swapping out your old drive with a new solid-state drive.

Many Windows PC users wade into the solid-state drive (SSD) market without the knowledge needed to make an informed buying choice. We take a look at solid-state drives and what's inside them to help prepare you for your next storage device.

What is a solid-state drive?

When you get down to a base level, an SSD is just some memory chips on a circuit board. It has an In/Out interface, usually in the form of SATA or PCIe, that feeds power and transfers data.

Unlike traditional hard-disk drives (HDD), there is no actuator arm that has to move across a spinning magnetic platter to read or write data. In fact, there are no moving parts at all. Most SSDs instead use NAND flash memory, which is relatively stable and will last for years.

Why use a solid-state drive?

New SSD ready to go into an XPS 13

There are a number of reasons why you might want to opt for an SSD in place of a standard HDD.

Laptops can take a beating while they travel with you — having a storage device that isn't disrupted by bumps is a huge boon. HDDs with their moving parts can be damaged if they're spinning when the drop or impact happens. SSDs are far less likely to be affected by impacts.

Mobility is a huge part of laptops; SSDs are both smaller and lighter than HDDs. This saves space to include other hardware in the laptop and reduces weight and thickness. SSDs also require less power, so your laptop battery should last longer.

Most people who've been using Windows for years know how long boot times can be when using an HDD. Differences in speed loading apps on your PC might be minimal — you probably won't notice if Office apps load in two seconds rather than four — but using an SSD to boot Windows 10 will significantly cut time spent twiddling your thumbs.

On top of all these perks, SSDs also have a way lower failure rate than HDDs. If you're backing up important data, it's never a bad idea to save it on an SSD.

Choosing the right type of memory

There are three types of memory that you should look out for when buying an SSD:

  • Single-level cell (SLC): These cells can each hold one bit of data — either a 1 or a 0. There are thus only two possible values that can be read from each cell.

    For this reason, SLC memory is the fastest and most precise when it comes to writing, takes the least amount of power, and will last the longest.

    The trade-off is that it is also the most expensive. SLC solid-state drives are typically used in an enterprise scenario because of their price but are available to everyone.

  • Multi-level cell (MLC): These cells can each hold two bits of data per cell — a 1 and a 0. Because it can hold both bits, there are four possible values: 00, 11, 01, and 10.

    MLC memory can thus have a larger amount of storage without physical size increasing, are available for a cheaper price, but have slower and less precise write speeds. They also use more power and wear out about 10 times faster than SLC memory because of the increased power use.

    Keep in mind we're not talking about longevity in months or years — we're talking about decades. By the time most SSDs wear out they'll likely be long-outdated by whatever storage technology comes next. MLC solid-state drives are your standard drives found in most high-end devices today.

  • Triple-level cell (TLC): These cells can each hold three bits of data per cell, and are available in big storage sizes at a decent price. The tradeoff is a slower read and write speed and less precision, as well as reduced longevity thanks to increased power consumption.

Understanding NAND memory chips

NAND chips are visible beneath the sticker. There are three on the visible side.

Negative-AND (NAND) memory chips are what house your SLC, MLC, or TLC memory cells. When SSDs first emerged on the market, most cheap models had about five NAND chips in them, while expensive models had up to 10 NAND chips.

Now current technology allows for way more NAND chips and way more storage. Vertical NAND (V-NAND), a relatively new approach, stacks cells on top of each other — cells retain the same performance because they're not all cramped together, and you can have large storage sizes without large physical sizes. For example, a single 48-layer V-NAND chip can hold 32GB, so in a 4TB SSD, you would have 125 separate NAND chips.

All NAND memory has something called error-correcting code (ECC) built in. This is designed to fix any errors that occur as data is written and read on your SSD; your cells will continue working properly, and the overall health of your SSD will be maintained.

Choosing the right connection

M.2 SSD

When it comes to in/out interfaces — what you connect the SSD to your motherboard with — there are a few common options to choose from.

  • SATA III: Serial ATA (SATA) III technology came about back in 2009 and is still used today in many SSDs. Read and write speeds on an SSD connected with SATA III will hit about 600MB per second. SATA was fine for HDDs but limits many SSDs.

  • PCIe: Peripheral Component Interconnect Express (PCIe) solid-state drives bypass SATA connections and plug right into a PCIe lane in your motherboard. While PCIe solid-state drives are much more expensive, they also transfer data much faster — write speeds can surpass 1GB per second.

  • M.2: Most common in laptops and all-in-one PCs, M.2 SSDs are physically smaller without sacrificing storage space. They are available in both SATA III and PCIe variants, depending on which your device supports.

  • NVMe: Non-Volatile Memory Express (NVMe) technology is relatively new — it was designed specifically for SSDs and the problems they faced using SATA connections. NVMe is designed to maximize the amount or requests sent to an SSD, as well as making it possible to receive requests from multiple processor cores at a time.

    What does this mean for you? Real results will show up in enterprise-sized servers, but you might notice your PC is suddenly able to load apps instantaneously. NVMe solid-state drives come in either PCIe or M.2 formats to fit both desktops and laptops.

Choosing a solid-state drive

Now that you've read through the guide, you can go about choosing an appropriate solid-state drive for your desktop or laptop.

The sweet spot for most people is probably an MLC solid-state drive with a SATA III connection in their desktop, while most people will enjoy the same in their laptop, albeit with an M.2 connection.

If you'd like an idea of where to start, we've put together a great SSD buyer's guide to get you on your way.

See the best SSD available now

Upgrading to a solid-state drive

Cloning a drive with Macrium

If you have a solid-state drive in-hand and are ready to swap it out in place of your old hard drive, you're probably wondering where to start.

Good news: you don't have to start over fresh. Using a tool like Macrium Reflect or Acronis True Image— there are plenty of other options out there — you can clone your old hard drive over to your new solid-state drive. Once you swap out the drives, everything will be just as you left it, but you'll be enjoying the speed and reliability of the SSD.

The process of cloning your hard drive might seem a bit daunting for anyone who hasn't done it before, but we created an in-depth guide to get your through safely.

Complete guide to cloning your hard drive with Macrium Reflect

We've also created specific guides on upgrading to an SSD in the Dell XPS 13, XPS 15, and the Razer Blade.

How to tell which files are eating up your PC storage

$
0
0

WinDirStat

Advanced Solid State Drives (SSDs) with high capacity remain out of reach for consumers on tight budgets, so filling up available space on PC hard drives remains a common fear for many folks.

When looking at installed drives in Windows Explorer, it's difficult to judge just what is taking up occupied space. Luckily, there are a few handy tools that can help you clear out space. Here's a look at some of them.

In order to get your PC prepped and ready for analysis, it's a good idea to run your favorite cleaning tool to clear out stored cache and other temporary or unrequired files that are taking up valuable space. Our chosen cleaning suite is CCleaner. Even if you're planning to use another analyzer, we recommend you use a tool like CCleaner to get rid of temporary files and other junk.

CCleaner

CCleaner

As noted already, CCleaner is our favorite when it comes to clearing crap from a PC, sorting out a bloated registry, seeing what startup services are set to run, and analyzing what's taking up all the space on our drives. Not only is the free app great for keeping a PC (laptop, desktop or tablet) free from clutter, it also has other neat features, including:

  • Registry cleaner.
  • Uninstall programs.
  • Alter startup services.
  • Browser plug-ins.
  • Duplicate finder.
  • Drive wiper.
  • System restore.

But that's not all. The software can also achieve help you achieve the goal of this guide with your hard drive. Go to Tools > Disk Analyzer to get started.

CCleaner

This feature enables you to scan all connected (and detected) hard drives for analysis. Filters can be used by selecting a specific category to see which video files are taking up the most space. All files on the drive are listed in order of size, with various options like multi-select deletion, and the ability to launch Windows Explorer and then go straight to that file.

CCleaner is not only brilliant because it's a free solution (a paid upgrade is available), but it also works wonders. It's not quite as advanced as other dedicated tools but as an overall "crap cleaner," the suite can be relied upon to keep every drive connected to your PC clean. It's also really fast and the intuitive interface makes all of the features easy to access.

An added bonus is CCleaner can be used as a portable app.

Download CCleaner

WinDirStat

WinDirStat

WinDirStat is another great tool that's available for free. Unlike CCleaner, the team behind this solution hasn't added more features than you require to get this simple job done. Simply fire up the app (which can also be used as a portable tool) and select which drives you wish to scan. WinDirStat will then take its time to carry out its analysis, so feel free to grab a hot beverage and relax.

What makes WinDirStat special is how the suite creates an interactive map of your drives. Clicking on a section of this map hones in on which file is being represented, allowing for easy filtering to see the files that are taking up the most space. Unfortunately, it can be rather confusing at first and isn't incredibly intuitive. In fact, we'd like to see the graphical representation of data better organized.

It's also not portable, but it can be unofficially downloaded in portable format from the PortableApps community.

Download WinDirStat

SpaceSniffer

SpaceSniffer

Should you wish to use another free disk analyzer, SpaceSniffer is a great alternative to CCleaner and WinDirStat. If you're having a hard time with WinDirStat's graphical mapping, SpaceSniffer's implementation can be easier to read, thanks to clear labeling and utilized hierarchy. Multiple drives are displayed using a window-per-mount location. This keeps it simple when managing more than one storage device.

While performing essentially identical to WinDirStat, a downside of using this tool is the lack of a traditional file tree and extension view. Lastly, SpaceSniffer is available as a portable version for easy plug-and-scan, but be sure to remember to run the app as administrator to allow access to various locations on your drives.

Download SpaceSniffer

Other options

Here are some additional software solutions you can try if the above aren't quite what you're searching for:

How to install Windows 10 IoT Core on Raspberry Pi 3

$
0
0

Raspberry Pi 3

Getting Windows 10 IoT Core to run on the Raspberry Pi is easy. Here's what you need to know.

It's not Windows 10 as we know it from PCs, tablets or phones, but Windows 10 IoT Core is another branch of Microsoft's ubiquitous OS designed to be run on low-power devices.

One such device is the Raspberry Pi 3, the super-cheap little computer that has taken the world by storm. Embraced by coders and makers the world over, it's a perfect piece of equipment to use in a Windows 10 IoT project.

Here's how to install Windows 10 IoT Core on the Raspberry Pi 3.

What is Windows 10 IoT Core?

Microsoft's official description:

Windows 10 IoT Core is a version of Windows 10 that is optimized for smaller devices with or without a display, and that runs on the Raspberry Pi 2 and 3, Arrow DragonBoard 410c & MinnowBoard MAX. Windows 10 IoT Core utilizes the rich, extensible Universal Windows Platform (UWP) API for building great solutions.

Essentially it lets you use Windows technologies to build connected devices based on low-cost computing solutions such as the Raspberry Pi.

Microsoft showcased some examples of projects constructed using Windows 10 IoT Core.

What you need

Raspberry Pi 3

To get up and running you need a few bits and pieces:

At this point, the HDMI cable is only to plug the Raspberry Pi into a display so you can make sure your install worked. Some Raspberry Pi starter kits include everything you need, but the list above covers the power, display, and something to install Windows 10 IoT Core on.

How to install Windows 10 IoT on the Raspberry Pi 3

Raspberry Pi 3

For the first part, you don't need the Raspberry Pi at all, just the microSD card in its adapter and your PC. A prerequisite is that you're running Windows 10 version 10.0.10240 or higher.

  1. Go to the Windows 10 developer center.
  2. Click Get Windows 10 IoT Core Dashboard to download the necessary application.

    Windows 10 IoT on Raspberry Pi

  3. Install the application and open it.
  4. Select set up a new device from the sidebar.
  5. Select the options as shown in the image below. Make sure you select the correct drive for your microSD card and give your device a name and admin password.

    Windows 10 IoT on Raspberry Pi

  6. Select the WiFi network connection you want your Raspberry Pi to connect to, if required. Only networks your PC connects to will be shown.
  7. Click download and install.

The application will now download the necessary files from Microsoft and flash them to your microSD card. It'll take a little while, but the dashboard will show you the progress.

Windows 10 IoT on Raspberry Pi

Once the image has been installed to the microSD card, it's time to eject it from your PC and go over to the Raspberry Pi. First connect up the microUSB cable and power supply, HDMI cable and USB WiFi adapter or Ethernet cable. Connect the HDMI cable to your chosen display, insert the microSD card into the Raspberry Pi and power it up.

Setting up

Windows 10 IoT Core

Unlike "proper" Windows 10, there's not much of a setup process here. You'll be asked to choose a language and enter your WiFi password to connect to the web. That's about it. It'll take a couple of minutes, but when booted up you'll see the Windows 10 IoT Core splash screen.

It's deliberately light and you don't have access to much. The Windows 10 part is designed to disappear, as once you deploy an app to your Raspberry Pi, it becomes that app. There's no flipping in and out of Windows and launching apps like you would on a PC.

When booted, you can go back to the dashboard application on your PC, and you'll see your Raspberry Pi listed as one of your devices.

Windows 10 IoT Core

To get a feel for how things operate you can deploy a selection of sample applications to your Raspberry Pi to see how Windows disappears, and all you're left with is the application designed to run on the IoT Core. These include the classic Hello World, an Internet Radio app and something to network connect a 3D printer.

Developing is much more complex, but at least if you're interested in this new branch of Windows 10, it's easy and cheap to get up and running. To go further you'll need to download Visual Studio and start building code. Microsoft has a whole bundle of resources at your disposal, however, to help you get the most from your Windows 10 IoT Core experience.

Have you built anything neat using Windows 10 IoT Core? Tell us all about it in the comments.

6 easy and effective ways to back up your PC

$
0
0

6 great ways to back up your PC's data

How do I back up the data on my PC?

Living in a digital world is a convenience we take for granted, but what happens when you lose the catalog of files you've so carefully built? Your photos are no longer kept in albums, and your music no longer sits on a shelf. Nevermind the sentimental stuff — recovering a PC from a virus or a complete drive failure can be a real pain if you haven't taken precautionary steps.

While dragging and dropping files onto a hard drive is enough for some people, others need a more thorough backup, one that keeps everything organized and updated or that includes your OS. It's good practice to back up to two separate places; for example, cloud storage and an external drive. This protects you from many threats, including fires or floods that will do a number on your local storage.

Ready to safeguard your data and make your life a lot easier when your hard drive fails or is infected? Here are six great ways to back up the data on your PC.

Back up files to OneDrive

OneDrive

Anyone with a Microsoft account automatically gets 5GB of OneDrive cloud storage for free, and thanks to integration with File Explorer on your PC, it's easy to move and sync files between online and PC storage.

This method is suitable for users who like to pick and choose which files are backed up and when they're backed up. Keep in mind that internet access must remain constant for a sync to happen. In the event that you make changes to synced files while you're offline, a sync will occur when you're back in range of internet.

If 5GB of storage isn't enough space, you can grab an Office 365 bundle that comes with 1TB of OneDrive storage plus all the Office apps you love. Only want the storage? You can grab 50GB for about $2 a month.

See OneDrive plans at Microsoft

How to sync your files using OneDrive

Create a clone of your hard drive

Hard drive cloning with Macrium

Creating a clone of your hard drive is similar to imaging your drive, but there are some significant differences. A cloned drive is an exact replica — no compression — of the original drive that can be used to boot a PC. For example, if you clone your internal hard drive to a USB external drive, you can plug it in, choose to boot from USB through BIOS, and run Windows from the external drive.

Cloned drives, especially when cloning directly to another internal drive, are great when performing a hard drive upgrade, but they also make suitable backups.

The only downsides are that cloning takes longer than imaging, and you can only hold one clone on a drive, so any changes you make on your primary drive after cloning will not be reflected in the event of a failure.

How to clone your hard drive with Macrium Reflect

See the best internal solid-state drives

Create an image of your hard drive

Imaging a hard drive involves creating a compressed version of everything saved on the drive — OS, settings and files — that can be used to restore your PC in the event of a failure. Unlike cloning, which takes up an entire drive and can't be easily updated with changes you make to your primary drive, imaging lets you save multiple full images on a drive (as long as space is available) and also allows for incremental and differential backups.

Incremental images keep track of all changes made since the last incremental image, but to restore your PC you need the full image plus all incremental images. Differential images keep track of all changes made since the last full image was created, so you only need the full image and the latest differential image to restore a PC.

In the event of a failure, an image can be restored using a recovery environment, whether it's one built into Windows or one you create on a separate USB drive. To create images, third-party software such as Macrium Reflect or Acronis True Image can be used, or you can take advantage of the imaging system built right into Windows 10.

How to create an image backup using Windows 10

See the best external hard drives

Use a dedicated backup service

Using an online backup service, such as IDrive or CrashPlan, will usually cost you more in the long run than, say, an external hard drive, but these services also give you peace of mind when it comes to fires, floods or other circumstances where your backups could be completely destroyed.

These services usually have an app that is installed on your PC; it scans for files that should be protected (such as system files and important documents), encrypts them, and then sends them off to the cloud for safekeeping. You can usually also create images of your system for safekeeping in the event of a complete failure.

Many online backup companies will actually mail you a hard drive with your encrypted data on it in the event of a hard drive failure, but you can also access and sync files when online — some even feature File Explorer integration. If you're worried about outside circumstances ruining your PC's backups, it might be a good idea to have a look at an online backup service.

Create a backup with Windows File History

File History backs up to an external drive

In almost the same location as Windows 10's image backup system, you'll also find something called File History. It is one of the easiest ways to create backups of your files and documents — you can back up to a secondary internal drive or you can back up to an external drive.

There are plenty of configuration option to tweak, so you can have backups occur as frequently or as infrequently as you'd like. As long as a secondary hard drive is connected, backups will occur automatically. File Backup doesn't include your OS — for that, you should create an image or a clone — but you can pick and choose which folders and files you want to back up. If it's a simple process you're looking for, Windows 10's File History should be one of your first choices when it comes to backups.

See the best external hard drives

Build a NAS system

NAS

Network Attached Storage (NAS) is a group of drives (you can also find single-drive NAS) that is connected via a network. Any users on the network can technically access the NAS, and for this reason they are perfect for backing up multiple computers at once or for anyone who also wants to create a media server in their home.

Depending on the NAS you go with, say a RAID 5 setup, you can create a system that will retain your backed-up files even in the event of a drive failure in your PC and in the NAS. Going with this method is sort of like creating your own cloud storage in your home, yet it will usually be much cheaper in the long run. Although NAS systems are getting easier to use, they're probably best suited for people with a few years of PC experience.

Everything you need to know about building your own NAS

Choosing the right NAS

Do you currently use one of these methods to back up your data? Do you take advantage of a couple of different methods to keep everything safe? Let us know in the comments.

How to recall a sent email message in Outlook

$
0
0

Microsoft lets you recall, or 'unsend,' email messages sent using Outlook 2016 for Windows — if you meet a very specific set of requirements.

We've all been there. You had a bad day… maybe a bad week (or year). You couldn't take it anymore. Maybe you had one too many bottles of... soda and then fired off a nasty message to your boss or to a customer. Maybe you just forgot to include an important attachment or didn't run a spell check, and your message was riddled with elementary-school grammar errors.

Whatever the reason, you need to recall an email message you sent using Outlook. Unfortunately, unlike some other common mail clients that make it very simple to quickly "unsend" or "undo" sent email messages, such as Gmail, the process is a bit more complicated in Outlook. However, it's not impossible to recall a sent email using Outlook, at least not if you fit can check the following boxes:

  • You use Outlook 2016 for Windows. (There is currently no message recall feature available in Outlook for Mac.)
  • Your Outlook mail account is connected to a Microsoft Exchange Server.
  • The message you want to recall was sent to someone in your organization who is also using Outlook and is also connected to Exchange.
  • The recipient has not read the message you want to recall.

In other words, not everyone who uses Outlook for email can recall sent messages. If you fit all of the above requirements, here's how to unsend a message.

How to recall an Outlook email message

  1. In Outlook's Home tab, click Sent Items in the vertical column along the program's left side.

  2. Click to open the message you want to recall. (You must actually open the message to recall it. Highlighting the message isn't enough.)
  3. The sent message will open in Outlook's Message tab. From there, navigate to the Move section of that tab and click Actions.

  4. Click Recall this message.

    • The following popup box provides two options: Delete unread copies of this message and Delete unread copies and replace with new message.
    • You can also check the box for Tell me if recall succeeds or fails for each recipient if you want details on the success or failure of your recall attempt.
  5. If you only want to delete the sent message and don't wish to send a replacement, fill in the circle next to Delete unread copies of this message and hit OK.

  6. If you want to both recall the sent message and send another replacement message, fill in the circle next to Delete unread copies and replace with new message and hit OK.

    • A new message window appears containing the text from the message you want to recall and resend. You should make any desired changes to the email body and then hit Send.

Note: This system isn't flawless and depending on the recipient's specific Outlook settings, and whether or not they read the original message or the replacement message first, your recall may not always be successful. But it's worth a try, right?

Some mail clients, such as Gmail, don't necessarily support Outlook's recall message, but you can still use the feature to send requests. Honestly, that might be even more insulting…

For more Outlook and Office 365 how-tos and tutorials, read:

Viewing all 5861 articles
Browse latest View live


Latest Images