Quantcast
Channel: Help & How To
Viewing all 5861 articles
Browse latest View live

How to disconnect Skype from Messaging in Windows 10 and Windows 10 Mobile

$
0
0

Starting with the November update for Windows 10 and Windows 10 Mobile users can have a unified messaging experience with SMS and Skype. Well, almost. Texting is still only available through Cortana on the PC, and there is still a 'classic' Skype app for those who need a fully-featured app.

Conceptually, a unified messaging service with Skype and texting is fantastic. In reality, we are still in the early days of the awkward merger. As a result, some users have experienced battery drainage on mobile, while others simply do not like experience. Others still are getting multiple notifications.

Today, this short tutorial will show you how to disconnect your Skype account easily from Messaging.

Disable Skype experience from Messaging

  1. Tap the Messaging tile on your phone or open the app through the search are on the PC. 2: Tap the ellipsis ('…') near the bottom right corner to bring up the menu and choose Skype settings

  2. Below your profile information you should see text that says Sign out. Tap it and choose the Sign out button.

That's it. Your Messaging app on your phone is now just a traditional SMS/MMS app. The Skype video app is now disabled. On the PC side since there is no SMS functionality the Messaging app is now basically just idle with no functions.

Re-enable

If you find you miss Skype functionality with Messaging just retrace the steps above but select Skype setup from the ellipsis menu in Messaging. The app then walks you through linking your account back to the app and re-enable Skype video too.

Set default Skype app

If you are someone who uses both Messaging + Skype and the full-fledged Skype app on PC or mobile, you want to make one of them default. This ability helps you to receive only one set of notifications on that device while retaining the ability to use either one at any time.

Here is how to make that happen.

Make Messaging default for Skype

  1. Tap the Messaging tile on your phone or open the app through the search area on the PC.
  2. Tap the ellipsis ('…') near the bottom right corner to bring up the menu and choose Skype settings

  3. Under settings, you will want to scroll to the bottom and hit the Make this my Skype default button under the Set Skype default header. This action should auto-enable Instant Message and Incoming Notifications under the Notifications subheader.

This action also disables the Skype's apps notifications and all calls, and messages will now go through Messaging and Skype Video.

To do the opposite and have the full Skype app as default, just follow these steps:

Make full Skype app default on Mobile

  1. Launch your Skype app from your Start screen or Apps list
  2. Tap the ellipsis ('…') near the bottom right corner to bring up the menu and choose settings

  3. Under settings hit the Make this my Skype default button as the top under the Set Skype default header. This action should auto-enable Skype message notifications and Skye call notifications under the Notifications subheader.

Wrapping up

The unified Skype and Messaging service should be improving over the next few months for both PC and Mobile. We have had about 75% success rate in using it, but also crashes on group conversations, missed notifications and other oddities that make it not ready for primetime for some users.

At least now you know how to enable easily or disable the feature at any time and better manage both apps until things get ironed out.


Tweak your tunes with the graphical sound equalizer in the Lumia 950 & 950 XL

$
0
0

Equalizer

The Lumia 950 and Lumia 950 XL offer a built-in sound equalizer with 14 presets. If that's not enough, you can use the custom setting to satisfy your needs. The equalizer page isn't very obvious to find unless you've used a Lumia device before. We'll show you how to find it and what you can do with it.

  1. Go to Settings > Extras
  2. Tap Equalizer
  3. Select a preset from the drop-down list.

Lumia 950 Equalizer

You can use the presets to help make things sound a little better. The best thing to do is to select each preset with the music on, close your eyes, and listen. Keep the preset that sounds better to your ears. I prefer to use the Bass Boost preset.

If you have more time, you can play around with the custom setting. You can drag individual frequencies up or down. There's currently only one slot available for a custom setting.

This might not be obvious, too, but the equalizer settings for the speakers and headphones are different. Plug in your favorite headset and the equalizer settings page automatically change from speakers to headphones.

Which equalizer preset do you normally use on your Lumia 950 or 950 XL? Let us know in the comments!

Buy the Microsoft Lumia 950 Unlocked for $550

Buy the Microsoft Lumia 950 XL

News

Want all the latest news on these phones? Hit these topic pages for all that we got.

Support and help forums

Need to chat about the Lumia 950 and Lumia 950 XL? Jump into our forums and ask others what they think or get help and advice on your new phone!

How to remotely access your PC through your Windows 10 Mobile phone and Continuum

$
0
0

Here's an alternative way you can access your computer remotely while in Continuum for phones, as we wait for Microsoft to deliver its Remote Desktop universal app.

Continuum for Windows 10 Mobile is an amazing feature that allows to transform your phone into a PC-like experience. However, you're limited to use only universal apps. As such you can't use apps designed for the previous version of the operating system while using Continuum, and of course, you can't install Photoshop, Chrome, or other traditional desktop apps that you might need to get the work done either.

Logically for many users, a suitable workaround to this limitation would be using a remote desktop app to get access to their main computer and applications. Unfortunately, at this time, there isn't a universal app you can use with Continuum to remotely access a computer.

Currently, Microsoft has a Remote Desktop app, but it only works on the desktop of the operating system and Windows 10 Mobile, but it hasn't been updated for quite some time, as such you cannot use the app with Continuum.

Although, the company has recently announced that a universal version for Remote Desktop is in the works with a Technical Preview releasing very soon, you're still stuck accessing only universal apps using Continuum. Today, we'll be looking at an alternative solution you can use to access your PC remotely that it's compatible with Continuum for phones.

Seeing that there aren't universal remote desktop apps you can install on Windows 10 Mobile with support for Continuum, the only solution left is to find a solution that uses the web browser. Immediately, you would think that the popular TightVNC tool would do the trick, but this and similar solutions require the use of Java or another plugin, something you cannot use in the mobile version of Microsoft Edge.

Fortunately, there are remote desktop solutions, such as Thinfinity Remote Desktop, that use HTML5, instead of Java or another sort of plugins to remotely connect to your computer using your web browser, which makes it a perfect solution to access your computer remotely while using Continuum.

Keep in mind that while this is a paid software, Cybele offers a free license of the Thinfinity Remote Desktop tool for personal use.

Download Thinfinity Remote Desktop tool

Accessing your computer remotely through Continuum for phones

  1. Once you downloaded the tool to the computer, proceed with the installation, which is pretty straightforward, simply double-click the executable, and go through your typical, next, next, next.

  2. After the installation, launch Thinfinity Remote Desktop on your computer, go to the General tab and make sure Screen Sharing is enabled.

  3. On Communications, you can leave all the default settings, but make note that you'll be using HTTPS and not HTTP and the default port number.

  4. On Security, decide what type of authentication you want to use, and leave all the other settings as defaults.

  5. After everything is configured, setup Continuum on your phone, and open Microsoft Edge on the big screen.

  6. On the web browser type http:// follow by your computer's IP address and the port you assigned, and hit Enter. For example, https://192.168.2.200:8081.

    When you get to the web page with a security certificate warning, click the "Continue to this webpage (not recommended)" link.

  7. Then you'll get to the Thinfinity Remote Desktop portal. Now, here's the tricky part, you can't establish an RDP session, so you cannot use the "Remote desktop" option, but you can use screen sharing feature. Select the Screen sharing option, click Connect.

  8. After you enter your login credentials, you will be controlling your computer, as you see in the screenshot below.

Extra

If you're having trouble connecting, it could be caused by your firewall, as such you need to make sure to let this application through by adding a new rule. In case, you're using the Windows Firewall, open Control Panel and go to Windows Firewall > Allowed apps, click Allow another app, search for the Thinfinity.RemoteDesktop.Workstation.exe, and allow it through the network.

If you want to access your computer outside your local network, using an internet connection, you also need to setup port forwarding on your router for the computer you're trying to access. (Refer to your router's manufacturer support website for more information.)

That's all folks!

How to take a screenshot of your monitor when using Continuum on the Lumia 950 or 950 XL

$
0
0

Lumia 950 Display Dock

Taking a screenshot of an external monitor while using Continuum doesn't work how you might think. We all know how to take a screenshot with the Lumia 950 or 950 XL, right? You press the volume up and power buttons at the same time. It's a different action if you want to take a screenshot of the bigger monitor. We'll show you how.

  1. On your keyboard, press the Windows key +PrintScr

This only works if your keyboard actually has the PrintScr button. I tried it on the Ozone Strike Pro gaming keyboard and can confirm that it works. I couldn't do it with the Microsoft Universal Foldable Keyboard because it doesn't have the keyboard button. I tried several combinations and had no luck. Let me know if you figure it out.

The screenshots are saved in your phone's photo collection. You can also access them in the screenshots folder.

Buy the Microsoft Lumia 950 Unlocked for $550

Buy the Microsoft Lumia 950 XL

News

Want all the latest news on these phones? Hit these topic pages for all that we got.

Support and help forums

Need to chat about the Lumia 950 and Lumia 950 XL? Jump into our forums and ask others what they think or get help and advice on your new phone!

How to enable the activity reminder in Microsoft Band 2 and get your butt moving

$
0
0

Microsoft Band Activity Reminder

The Microsoft Band 2 received an update last week that enabled music controls, improvements in the Exercise tile, and the addition of Activity Reminder. With the update, the Microsoft Band 2 can now remind you when to get up and move if you've been still for too long. We'll show you how to enable it on your Band.

  1. Go to settings on the Microsoft Band 2 (gear tile)
  2. Tap the snail icon
  3. Turn on/off the Activity reminder
  4. Swipe left and select the duration for inactive minutes. You can select from 30 minutes to 120 minutes.
  5. Swipe left and select the range of time you want to be reminded. By default, you can get reminders between 8 AM and 7 PM.
  6. Swipe left and choose whether you want to get reminders during weekends, weekdays, or everyday.

That's it! This feature reminds us of the third-party app Walk Reminder that was released for the original Microsoft Band. We're glad to see that Microsoft has made it a built-in feature on the new Band.

What are your Activity Reminder settings for the Microsoft Band 2? Let us know in the comments!

Microsoft Band help, tips and tricks

Buy the Microsoft Band 2

How to disable Action Center in Windows 10

$
0
0

If you don't feel that Action Center is a must-have feature in Windows 10, in this new guide, we show you how easy is to disable it.

Starting with the release of Windows 8, Microsoft introduced a new system notification feature to allow the operating system and apps to notify users of certain events. To make the notifications a complete feature in Windows 10 the software giant introduced the Action Center, which you can use to view and manage missed notifications.

While, the Action Center is a welcome addition to the operating system, it might not be a feature for every user. Perhaps, you don't like or simply don't use the feature very often. Fortunately, there are a few ways in which you can disable Action Center in Windows 10. As such, in this new guide, we'll show you have easy is to disable the feature using the Registry Editor or using the Local Group Policy Editor.

Disabling Action Center using the Registry Editor

Important: Before you make any changes to the operating system, it's critical to note that modifying the Windows Registry can be problematic as changes can cause irreversible problems to your system when you don't know what you are doing. As such, it's always recommended that you make a full backup of your computer or, at least, you create a System Restore Point before proceeding with this guide. You have been warned!

After you have taken the necessary measures to protect your system, you can follow the steps below to disable Action Center.

  1. Go to the Start menu, do a search for regedit, and hit Enter to launch the Registry Editor as an administrator.
  2. Navigate the following path: HKEY_CURRENT_USER\SOFTWARE\Policies\Microsoft\Windows\Explorer.
  3. If you don't find the Explorer key under Windows, you need to create it. Right-click on the Windows key, select New, then Key, and name the new entry Explorer.

  4. Inside Explorer, right-click on the right side, select New, and click on DWORD (32-bit). Then name the key: DisableNotificationCenter.

  5. Double-click the new key and change the value to from 0 to 1.

  6. Restart your computer and you should no longer see the Action Center or its icon in the system tray.

Disabling Action Center using Local Group Policy Editor

If you don't feel adventures modifying the Windows Registry, you can always opt to perform the same task using the Local Group Policy Editor. However, remember that the Local Group Policy Editor is available in Windows 10 Pro, if you're running Windows 10 Home, your only option is to modify the Windows Registry as shown above.

  1. Go to Start, do a search for edit group policy, and hit Enter to launch the Local Group Policy Editor.
  2. Under Local Computer Policy, expand User Configuration, and navigate through Administrative Templates, and click on Start Menu and Taskbar.

  3. Find and double-click Remove Notifications and Actions Center.
  4. Now, select the Enabled option, click Apply and OK.

  5. Reboot your computer and you should no longer see the Action Center or its icons in the system tray.

Keep in mind that this action will disable the Action Center, but you will still see toast notifications. If you want to disable toast notifications, then go to the Settings app > System > Notifications & actions, and turn off the notifications you don't want to see anymore.

That's all there is to it.

Do you use Action Center in Windows 10 regularly? Let us know in the comments below.

More Resources

If you want to see more how-to for Windows 10, make sure you check the following resources too:

Microsoft uses your usage data to personalize ads; here's how to opt out

$
0
0

Though Windows 10 can't block ads on its own, in this guide we show you how easy is to opt-out from receiving personalized advertisements in your browser, Microsoft account, and Windows apps.

Similar to its predecessor, Windows 10 includes many ways to monetize the operating system. One of these methods is advertisements. Microsoft's tracking cookies (which are installed on your computer when you visit Microsoft websites) track your browsing in Microsoft Edge or your browser of choice. Microsoft logs data on searches you perform on your computer, such as searches using Cortana, and usage in certain apps. In short, you're being watched by default.

Microsoft then uses the aggregate data from your activities to customize your online experience and deliver ads that are more tailored to your liking across Microsoft's websites and apps.

It's understandable if you look at this approach and have privacy concerns; not everybody is entirely comfortable with the idea of any corporation, even Microsoft, targeting ads at individuals, especially when pulling from non-browser data sources.

While Microsoft does not offer an option to disable ads entirely in Windows 10 (that, in short, would break the internet), they do provide a number of settings to control how advertisements are delivered to your Windows 10 experience.

Before you can manage ads in Windows 10, you need to understand the different ways you can personalize your ad experience. In Windows 10, tailored ads are delivered in three different ways: personalized ads through the web browser; your Microsoft account whenever you use your account for Windows, a mobile device, Xbox, other devices, and through Windows apps.

Controlling your ad experience

Although, Microsoft has different ways to deliver targeted advertising, almost everything can be managed from a single place: your online Microsoft account.

If you want to stop participating on personalized ads, you can do the following:

  1. To get started, open your web browser and head over to http://choice.microsoft.com/en-us/opt-out.

    Note: Make sure you're signed in with your primary Microsoft account. If you're not, click the Sign out link, and sign back in with your main account that you use in Windows 10.
  2. On the Microsoft web page, you can read more information on the company's approach on advertisements. On the right site of the page, you'll find two sections to opt-out from targeted ads. Here, just turn OFF the option to stop getting personalized ads in your browser, and whenever you use your Microsoft account.

Opting out from targeted ads on Windows apps

If you want to stop personalized ads from appearing on apps in your device, you need to follow the steps below on each device.

On Windows 10

  1. Use the Windows + I keyboard shortcut to open the Settings app.
  2. Navigate to Privacy, and on General turn Off the Let apps use my advertising ID for experiences across apps.

    Note: Keep in mind this process will reset your advertising ID.

On Windows 10 Mobile

On the mobile version of Windows 10 the process is very similar:

  1. Go to Settings.
  2. Scroll and tap on Privacy, and then tap on Advertising ID.
  3. To complete the process turn Off the Let apps use my advertising ID for experiences across apps option.

That's all there is to it. Now you should be able to use Windows 10 and navigate the web without getting targeted ads from Microsoft.

What do you think about the Microsoft approach on ads in its operating system? Tell us what you think in the comments below.

More resources

If you want to read more about Windows 10, make sure you check these resources:

Windows 10 on Windows Central – All you need to know

Windows 10 help, tips, and tricks

How to install Intel beta graphics drivers for Microsoft Surface and Surface Book

$
0
0

If you like living on the edge, you can be a Windows Insider to get early builds of Windows 10. If you want to push it even further, you can install beta (or non-Microsoft approved) drivers from Intel for their graphics chipset.

Although installing beta drivers is not recommended for non-power users, the new 6th-generation Intel Skylake processors are still quite buggy. If your new computer's giving you fits that updates to Windows 10 haven't fixed, you might want to consider installing the beta drivers to nix any severe bugs like screen flickering or Blue Screen of Deaths (BSODs).

For those running a Microsoft Surface, however, there is a caveat: you cannot just execute the installer and update your drivers. Microsoft signs off on their display drivers so that only approved ones get pushed to users. (Other manufacturers may do the same).

You can still install the drivers, but there you have to do it manually. Here is how to do just that.

  1. Download Intel beta drivers in ZIP format not EXE

    You can find the latest direct from Intel at Download.intel.com.

    For most users, including those on Surface you want the 64-bit drivers e.g. win64_1540144352.zip.

  2. Extract the contents of the ZIP file to a new folder. You can delete this folder later. Usually, your Desktop is a good place for extraction.

  3. Right-click on the Start menu and choose Device Manager

  4. Navigate to Display Adapters and double-click to reveal nested options.

    If you are using a Surface Book with discrete graphics you will see Nvidia in addition to Intel(R) HD Graphics 5xx.

    Double-click the Intel(R) HD Graphics 5xx area to open up the tabs.

  5. Choose the Driver tab and select Update Driver…

  6. Select Browse my computer for driver software

  7. Select Let me pick from a list of device drivers on my computer

  8. Select Have Disk... button in lower right-hand area

  9. Navigate to folder where you extracted the Intel beta drivers.

    You must go into the Graphics folder and choose the igdlh64 file.

  10. On the Install From Disk window choose OK

  11. Select Next

  12. The Update Driver Software window should now appear showing installation progress. Your display may flicker as the old driver is removed and the new driver added. This is normal. Once completed you can verify the driver's new date and version number under the Driver tab.

After the installation, you do not need to restart the computer. However, you may still want to. If you had set a custom text display size, it might have been reset to the default.

If you wish to undo the driver installation at any time, just retrace the above steps but instead of Update Driver… choose Roll Back Driver or Uninstall in the worst case.

That's it! Remember, companies like Microsoft eventually do approve of these Intel drivers after weeks of testing. They will eventually roll out their own approved and signed versions through Windows Update proper. What is outlined here is just a way to get an early look at what is likely coming, but there could be other unintended consequences so as always heed caution.

More Resources

If you want to see more how-to for Windows 10, make sure you check the following resources:

Microsoft Surface help, tips, and tricks

Windows 10 on Windows Central – All you need to know

Windows 10 help, tips, and tricks

Windows 10: Help and discussion forum at Windows Central


Just got a new Xbox One? Here are the top tips you need to know to unlock its full power!

$
0
0

Get to know your Xbox One in 10 easy steps

New Xbox One owners will find the console's basic functions easy to access, but unlocking the full power of the Xbox One can be a little more complex.

Beyond gaming, the Xbox One can augment your TV with voice commands, it can act as a media center, you can use it to create and edit clips from your favorite games, and there are tons of great apps available.

Since the New Xbox One Experience update, the console can now run Universal Windows 10 apps natively, opening up a casual PC-like experience not far removed from Continuum on Windows Mobile. Microsoft has worked tirelessly to turn the Xbox One's public perception around, and the future is going to be full-steam ahead with great games and great features.

Still, first you'll need to get yourself set up. So here's some of the most important things you should do first after opening that glossy box.

Make sure your Xbox Gamertag and Microsoft Account are set up properly

Our first tip might seem a little basic, but Microsoft hasn't always made it clear that your Xbox Gamertag is bound to a Microsoft Account. I've seen this issue occur with friends and family who didn't realize they could use the same email address attached to their Xbox 360 Gamertag to sign in to their Windows Phones or Windows PCs.

It's important to ensure that you have just one Microsoft Account across Xbox and Windows, particularly as these systems become more and more integrated.

  • New users are prompted to create a "Gamertag", this is your identity on Xbox Live. You can only change this once for free, so pick a good one!
  • When you connect your Xbox One to the internet for the first time, it'll ask you to sign in with your Microsoft Account.
  • If you're an existing Xbox 360 user, you can sign in using the same email attached to that console.
  • If you don't know what email is set up for use with your Xbox 360, you can find out by turning on your 360, accessing settings via the guide menu, then selecting account management. Your email address will be listed under "Windows Live ID" (the old name for Microsoft Accounts).
  • If you don't have access to your Xbox 360, you might need to contact Xbox Live's support, or start afresh.
  • If you haven't created a Gamertag yet, but use a connected Windows 10 PC or Windows Phone, you can sign in using this account. If not, you'll be asked to create a new Microsoft Account.
  • You can open a Microsoft Account online using this link. You can use an existing email address from another provider as the username, or create a new one via Microsoft.

Note: If you're like one of my friends who got stuck with a separate account for his Xbox 360 and his Windows Phone, but want to enjoy the integrated services on offer for having a single unified account -- you'll need to consult this lengthy guide to moving your Gamertag to a different Microsoft account.

Once your account is set up and integrated, you're ready to go!

Set up an Xbox Live Gold subscription

The Xbox One can be used offline, but many apps, services and features will require an online connection. By default, a new Xbox One user is signed up to a free Silver subscription, but by setting up a Gold subscription, you'll be able to access a ton of extra benefits.

  • You need Xbox Live Gold to access multiplayer games; this pays for frequent Xbox feature updates, support staff, and future development.
  • You can still use apps like YouTube and Netflix without Xbox Live Gold.
  • Xbox Live Gold members enjoy exclusive discounts, often up to 75% off. Xbox Live members are also treated to 4 free games per month, two Xbox One games and two backwards compatible Xbox 360 titles.
  • If you already have Xbox Live Gold on your Xbox 360, it carries across to your Xbox One as well.
  • Xbox Live Gold is console-bound, in addition to account-bound, meaning that friends and family who use your Xbox also enjoy the benefits without setting up their own subscriptions.
  • You can sign up to Xbox Live Gold here using the Microsoft Account attached to your Gamertag.
  • You can also subscribe to Xbox Live via time cards sold by Amazon.com and other retailers. These Xbox Live cards are often a little cheaper.
  • If you purchase a digital code for Xbox Live Gold from an external retailer, you can redeem the code online here, after signing in with your Microsoft Account.
  • You can also redeem the code on your Xbox One by navigating to the store, hitting "Browse all games", and then by selecting "redeem code".

Buy 12 Months of Xbox Live Gold on Amazon.com ($59.60)

Buy 3 Months of Xbox Live Gold on Amazon.com ($20.75)

Configure your network for open NAT

This step won't be necessary for the majority, but if you're having trouble connecting to your home network you might need to make some tweaks. Most domestic networking setups support the Xbox One out of the box, but here's a couple of tips to improve your experience if you have some networking knowledge.

  • Under Settings and then Network, if your NAT type says "strict" or "moderate", you might want to consider the following steps to change it to "open". Having an open NAT type can improve your connectivity to games and other users — particularly when it comes to gaming and voice communication with friends.
  • To do so, you'll need to open the following ports on your router: Port 88 (UDP) / Port 3074 (UDP and TCP) / Port 53 (UDP and TCP) / Port 80 (TCP) / Port 500 (UDP) / Port 3544 (UDP) / Port 4500 (UDP).
  • You can also enable your router's UPNP setting to further improve connectivity to Xbox Live.

Note: Sometimes, simply opening the ports isn't enough, you might have to set up your Xbox One with a static IP address to ensure that the ports remain open for that particular device. PortForwards.com has specific guides on configuring the open ports for your specific model of router, so feel free to consult them for more info.

Set up the Xbox app for PCs and mobile devices

Windows 10 comes with the Xbox app pre-installed, but there are also apps available for Windows 8.1, iOS and Android for use with your Xbox One.

  • You can find the Xbox app preinstalled on Windows 10 simply by typing "Xbox" into the Start Menu (or Cortana). The Windows 10 app gives you access to the store, your friends lists, Xbox to PC remote streaming, and much more. The app is also preinstalled on Windows 10 Mobile, with though with fewer features.
  • If you're on iOS, Android or Windows 8.1, you'll need to download the Xbox One Smartglass app. It comes with a lot of the features found in the Xbox app for Windows 10 devices, but the Windows 10 app is the flagship version, updated the most frequently.
  • Both SmartGlass and the Windows 10 Xbox app are useful for use as a TV or controller remote.

Download the apps for Windows Phone 8.1, iOS and Android below:

Create an Avatar and GamerPic

Gaming is often a social experience, and the team at Microsoft gave us Xbox Avatars to help us feel visually represented on Xbox Live. Avatars are 3D cartoon characters you can customize and display on your Xbox Live profile. You can purchase props, licensed clothes and gaming accessories for your Avatar to stand out from the crowd, and then use your Avatar to pose for a unique profile picture.

Create and upload game clips and screenshots

You can create your own gaming memories using the Xbox One's GameDVR and UPLOAD Studio apps. These apps come preinstalled on your Xbox, and provide robust storage and editing tools.

  • You can access your clips by going to the Game DVR app in your apps list, or by saying "Xbox, go to Game DVR" to Kinect.
  • If you have Kinect, simply say "Xbox, take a screenshot" or "Xbox, record that" to create captures.
  • If you want to use the controller, double tap the home button while you're running a game to bring up the new guide. Sadly, this method seems to pause some games, making screenshotting difficult.

  • Press Y to save a screenshot, press X to record the last 30 seconds of gameplay.
  • Note: This even works while playing an Xbox 360 game via backwards compatibility.

If you want to capture more of the Xbox One's 5-minute video recording buffer, you'll need to take slightly different steps:

  • Open the new guide again by double tapping the home button, then navigate down to the "Snap" menu at the bottom.
  • Select to snap the Game DVR app. You can do this with Kinect by saying "Xbox, snap Game DVR".
  • From the Game DVR, you can set it to begin recording a new clip (which you can end manually again by snapping the app), capture the last 5 minutes of DVR recording, or use it as a shortcut for accessing all your captures.

Set up your Xbox One to stream media from your PC and mobile devices

You can use the Xbox One to stream content from your devices. On Windows 10 and Windows 10 Mobile, this is achieved simply by selecting the casting button seen in Windows 10 video apps, then selecting the Xbox One mapped to the same network. To access media content on a PC or server from your Xbox One requires a few settings tweaks in Windows.

  1. First, you need to open the Media Player app, accessed via the Games and Apps section at the bottom of the main dashboard.
  2. From here you can browse PC folders set up to share content over your home network.

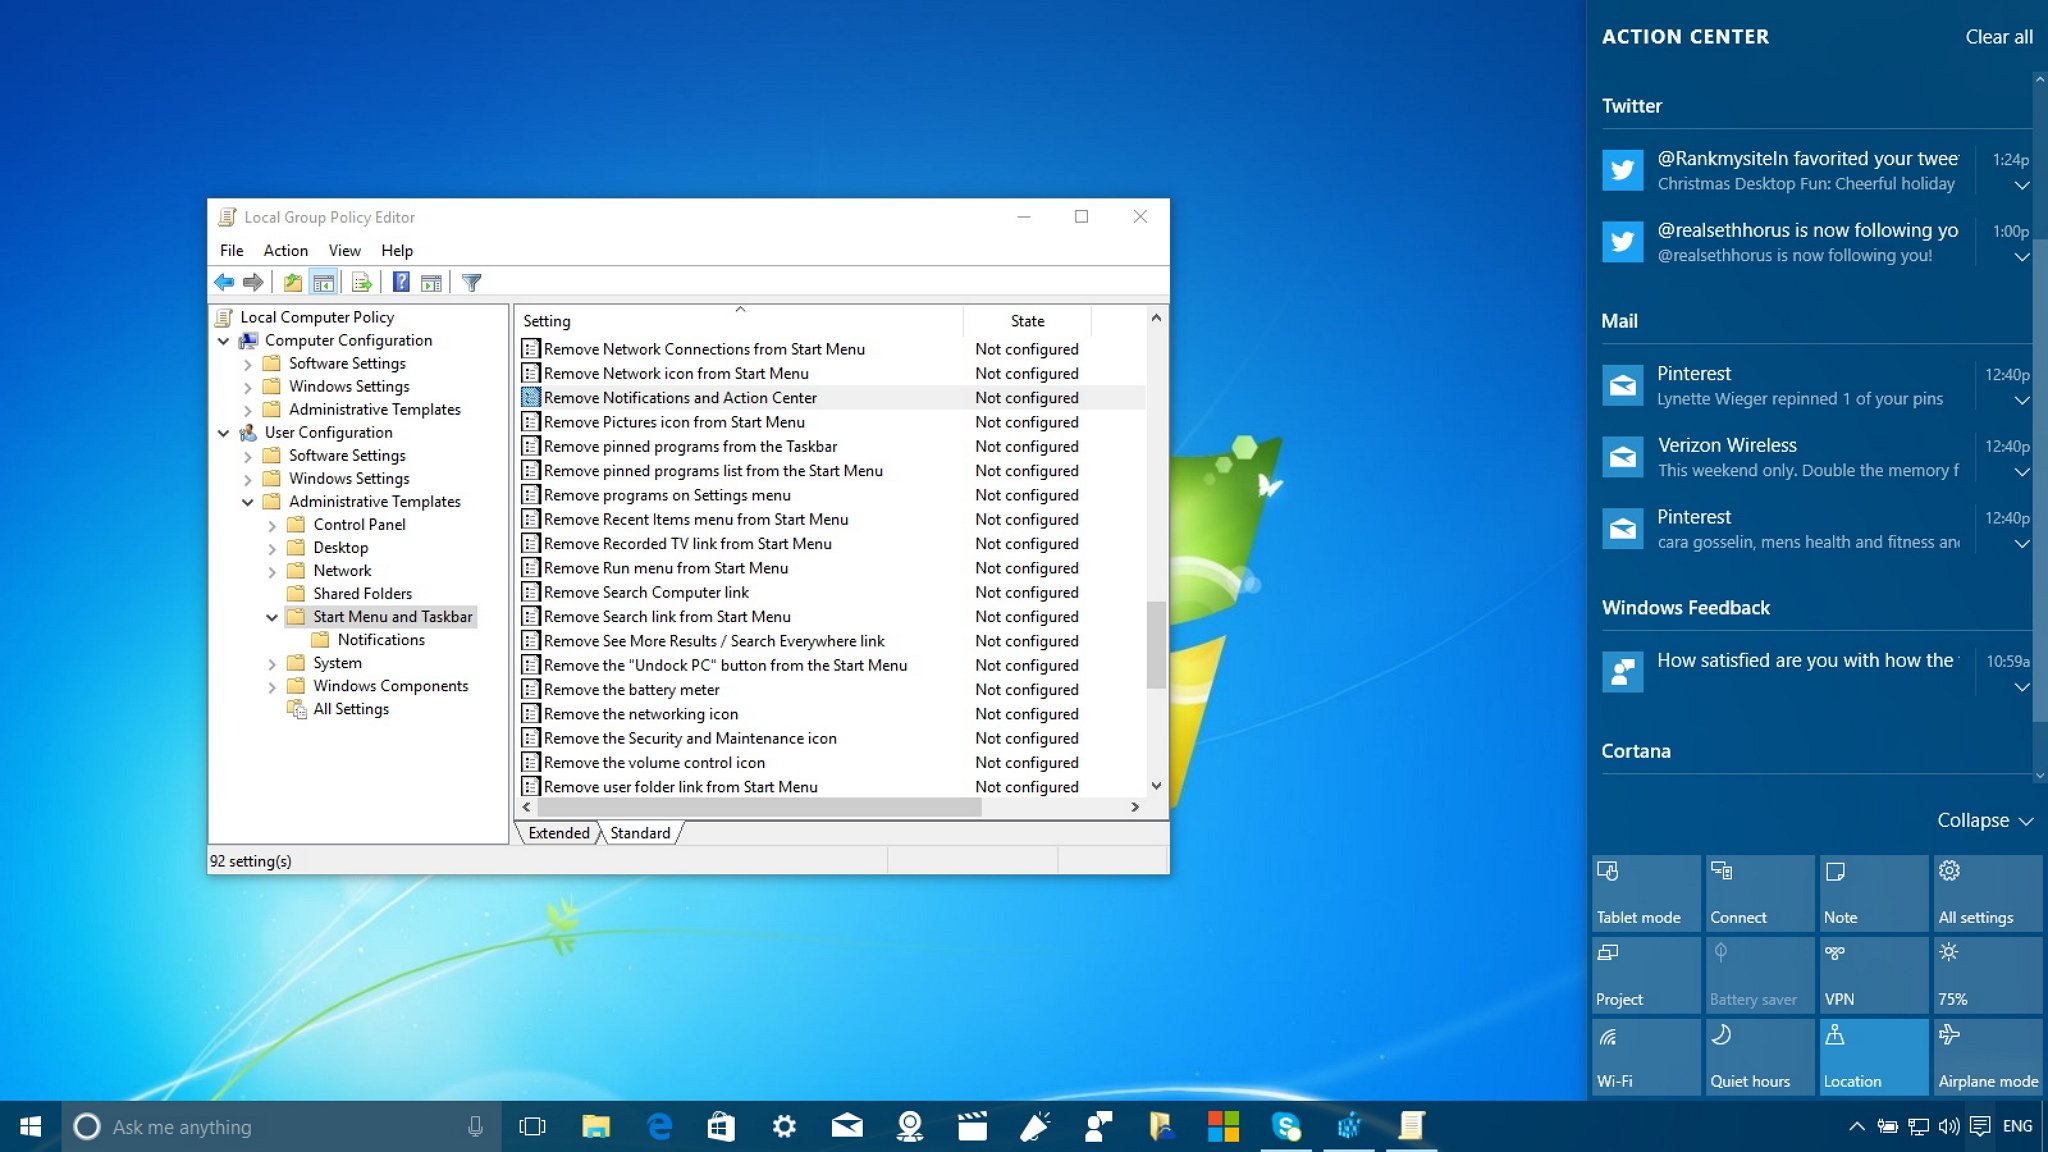
  1. To set up a PC for media sharing, type "Media Streaming Options" into your Windows Start Menu.
  2. Find your Xbox One in the list, then tick to allow access.

  1. From here you can customize which Windows libraries you want to share, such as Documents, Pictures, Music and Videos.
  2. When you're done, hit next and follow the extra steps to create a Windows HomeGroup. Your folders should now be accessible via the Xbox One media player app.

Note: Apps like TubeCast and MyTube for Windows 10 and Windows Phone allow you to load YouTube videos directly to your Xbox One, avoiding the clunky keyboard of the native YouTube app. Be sure to try it out!

Calibrate Kinect

Kinect may no longer be bundled with the Xbox One, but if you're planning on using your Xbox to augment your TV experience, you might want to invest. Kinect allows you to channel hop with voice commands like "Xbox, go to Sky Sports", and switch between apps, TV and games in an instant.

  1. Head to the Xbox settings via the Xbox Guide Menu, from here navigate to "Kinect & Devices", and then "Kinect".
  2. Select "Kinect does not hear me", or "I have moved Kinect" to calibrate the Kinect for positioning and voice commands.
  3. Be sure to turn up your speakers when calibrating Kinect, ideally your Kinect should be in a fixed location for the best experience. If you move it, you'll have to calibrate it again.

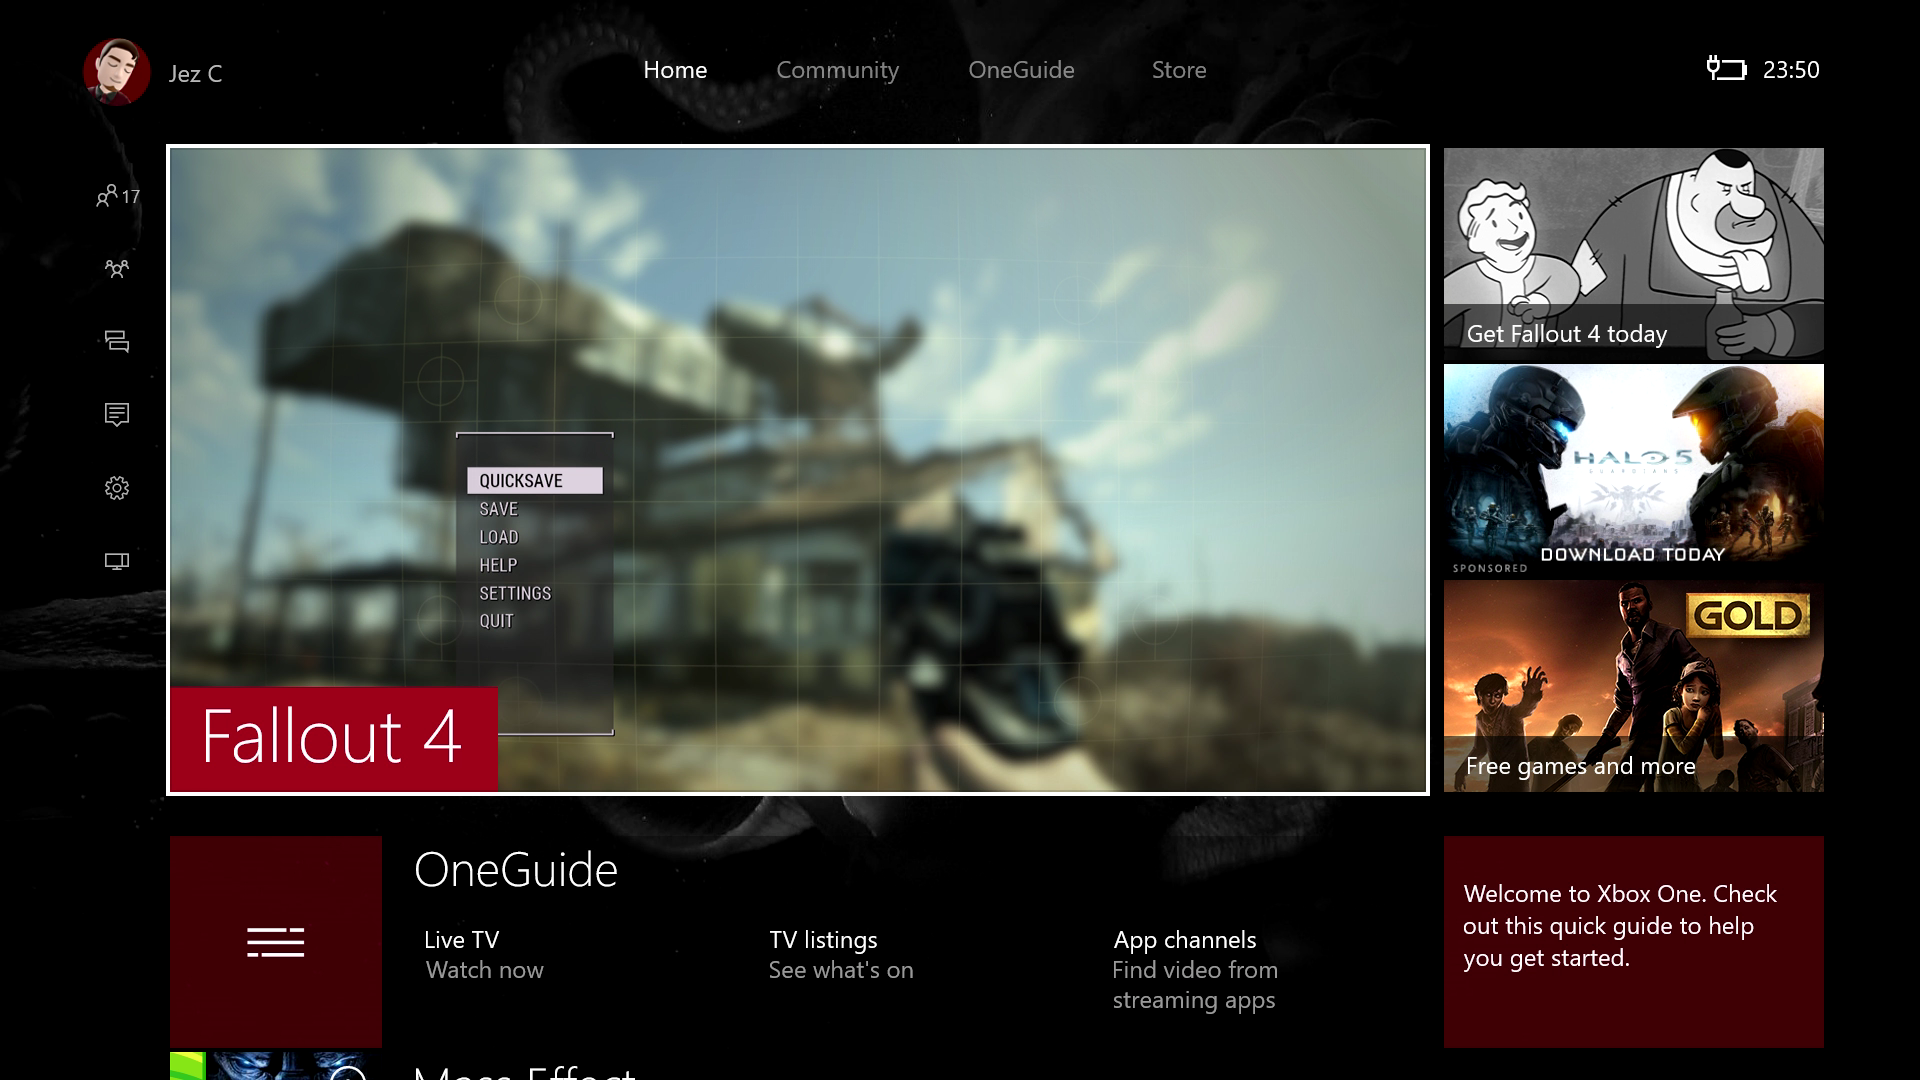
Set up your TV and OneGuide for use on Xbox One

Where are the games?

On Xbox One, games need to be installed either from physical Blu-ray discs or digital downloads from the store. Modern games tend to be quite large when it comes to their file sizes, so investing in an external USB-powered drive might be something to consider.

  • When you put a disc into the Xbox One, it'll show up beneath the main window on the dashboard home screen. Clicking on the disc will begin the installation.
  • Once installed, the game will appear under your games list. You can access the games library from the bottom of the dashboard home screen.
  • To purchase digital versions of games, navigate to the store across the top of the dashboard, and hit "browse all games" to look through the categories on offer. You can also find this store in the Windows 10 Xbox app, or on Xbox.com.
  • Downloaded games will install to your disk storage in the same way.

Note: Some games will enjoy improved load times if installed to an external USB 3.0 HDD/SSD with speeds faster than the Xbox One's internal 5400 RPM SATA II HDD, as USB 3.0 can exceed the data transfer of the Xbox One's comparatively slow SATA HDD.

Here are some other Windows Central Xbox Help guides!

If you have any specific Xbox One questions, either drop them in the comments below, post a message in our Xbox Forums or send a tweet to @MSFTY and I'll do my best to help!

How to save Windows Spotlight lockscreen images so you can use them as wallpapers

$
0
0

Windows 10 brings a unique feature to the table with Windows Spotlight. The option lets you set your lockscreen on your PC or tablet to auto-rotate through a preselected group of photos picked by Microsoft. At the top of the right-hand corner, you can give a thumbs up or down if you liked it like Pandora. If you gave it thumbs down, off it goes. A thumbs up, however, will produce similar images on the next run.

You can read our tutorial on how to get it working if you are new to Windows 10: 'How to enable Windows spotlight in Windows 10 to keep your lock screen awesome'

Those images produced by Spotlight tend to be awe-inspiring, which means you may want to save them on occasion for later use including on your phone (where, unfortunately, Spotlight has yet to arrive). Today, we'll show you how to do just that!

How to save Spotlight images

As you can probably figure, Spotlight images are cached on your local PC and hidden in a particular folder. They're given awful names like '8d71495e43fa1c6887a8840aa45…' but that is a different battle. Here is how to find them, copy them and save them for later use.

  1. Hold down your Windows key plus R [Win + R] to launch the Run dialog prompt

  2. Enter in the following command and then hit OK. Your best bet is to copy and paste:

    %localappdata%\Packages\Microsoft.Windows.ContentDeliveryManager_cw5n1h2txyewy\LocalState\Assets

  3. A folder will be opened in File Explorer with non-specific file names.

  4. Copy and paste the files into a new folder preferably something under This PC > Pictures > Spotlight as a permanent location (or under OneDrive so you can have them everywhere).

    Note: You will see a warning prompt when you go to copy the files, simply hit OK to the warning.

  5. You need to rename all the files with the JPG extension. You could do this one by one or in a batch command – here is how to do the latter:

    Hit Shift + Right-click with your mouse in the directory where you copied the images. Choose Open command window here and type in (or copy and paste)

    Ren *.* *.jpg

    This action will rename all the files with a JPG extension.

    Note: Some of the files are cached junk and won't be actual images from Spotlight.

  6. Filter and clean up

    Some of the images won't be images at all so delete all the files you do not want (use Ctrl + Left-click on the mouse to multi-select files).

    Bonus: Some of the images will also be vertical. For the vertical images, you may want to copy and paste them into a different folder as you can use them for your smartphone's Start or Lock screen.

That's it! You may notice that you only have so many images available as it depends on how many Spotlight images were produced on your PC. You may want to re-run this tutorial every couple of weeks (or on different PCs if you have them) to recoup even more photos.

Via: Winaero

How to get Cortana to search with Google instead of Bing on Windows 10

$
0
0

Cortana's an impressive virtual assistant, but when it doesn't know an answer it turns to Bing. We know you might not be a Bing fan, so here's how to get Cortana in Windows 10 to consult Google instead.

Strategically located in the Taskbar next to the Start button, Cortana can help you with virtually anything you need. Whenever you need assistance, Cortana can provide instant answers to common questions, help you to send or reply text messages from your PC through your Windows 10 Mobile handset or Android phone (using the Cortana app), track packages, manage your calendar, find files and folders in your computer or the cloud, and a lot more.

However, when Cortana can't provide an answer to a query, by default, it opens the Microsoft Edge browser and performs a Bing search instead. While Bing search results are good, many users would prefer using Google as their default engine for web searches.

Unfortunately, the nature of Bing being the engine running Cortana, it doesn't allow Microsoft to offer a setting to change which search engine to use to perform web searches. However, if you're a Chrome web browser user that also happens to like Google search results, you can use an extension to make it all happen.

The workaround involves using Chrome as your default web browser and installing a simple extension.

Getting Google Chrome web browser

If you haven't done it already, you'll need download and install Chrome on your computer.

  1. Head over the Chrome home page and click the Download Chrome button.

  2. If you check the Set Google Chrome as my default browser option, you can skip the "Setting Chrome as your default web browser" steps, and you can continue with extension installation instructions after you complete installing Chrome. Now click Accept and Install to download the installation file (ChromeSetup.exe).

  3. Go to your download folder (typically C:\Users\YourUserName\Downloads) and double-click ChromeSetup.exe to complete the installation of Chrome. When Chrome is ready to use, you will see the "Installation complete" message.

Setting Chrome as your default web browser

Making Chrome your default browser is very straightforward, just follow the steps below:

  1. Use the Windows Key + I keyboard shortcut to open the Settings app.
  2. Navigate to System > Default apps.
  3. Under Web browser, click the current default web browser, and choose Google Chrome from the list.

Forcing Cortana to use Google instead of Bing for search

The last thing you need to do is to install and configure the Chrometana extension. To do this follow the steps below:

  1. Visit the Chrome Web Store to download Chrometana using this link.
  2. Next, click the Add to Chrome blue button in the top-right corner of the extension main page.

  3. A popup message will now appear requiring you to confirm extension installation, just click Add extension to complete the install.

  4. Now, you will be redirected to the extension's settings page. Here, select Google to change the engine that provides search results when using Cortana.

Now you should be able to ask Cortana anything, and if it can't provide a straight answer, the assistant should now open Chrome and offer a Google search result instead of using Bing.

It's worth pointing out that Chrometana doesn't actually change any of Cortana's settings in Windows 10. Instead, when the web query gets passed to Chrome, Chrometana grabs the Bing query and converts it into a Google search query.

Also, other Cortana features, such as instant answers, package and fly tracking, news, weather, and various other functionalities will continue to be handled by Bing.

Finally, while Chrometana works in combination with Chrome, you don't need to have the browser running all the time, as the extension will continue to run in the background even though Google's web browser is not open.

Do you think Cortana should include an option to let users decide how web searches are handled in Windows 10? Tell us what you think in the comments below.

More resources

Don't forget that you can check the following resources to learn about Windows 10:

How to rename your Windows 10 Mobile handset

$
0
0

Making your Windows 10 Mobile handset more personal should start with a proper device name, and in today's guide, we'll show you how easy is to rename your smartphone. Although this feature has been available on Windows Phone for awhile, new users may t not be aware it even exists.

If you have been part of the Windows Insider Program or you're a proud owner of a brand new Lumia phone, you probably already went through the initial setup and had been using many of the new features Windows 10 Mobile has to offer. What you probably didn't notice is that through the initial setup, you've never been prompted to enter a custom device name for your phone.

It seems that on an effort to simplify the initial configuration setup, similar to Windows 10 for desktop, Windows 10 Mobile doesn't prompt users to specify a name for their phone. Instead, it only uses a generic "Windows phone" name, which is not very personalized.

Furthermore, there are also various reasons why you may want to consider changing your phone's name. For example, by using a more accurate name it can help you to identify your phone quickly when connected to a Wi-Fi network. Or when you're trying to pair it with your Windows 10 PC using Bluetooth connectivity, or when you're managing your devices in your Microsoft Account.

In today's beginner guide, we'll show you two different ways that you can use to rename your Windows 10 Mobile phone to virtually anything you like:

Method one: Rename your phone using the Settings app

In this first method, we'll be looking into the steps to rename your Windows 10 Mobile handset using the Settings app:

  1. While in the Start screen, swipe left to bring All apps, then search for and open the Settings app, and tap on System.

  2. Scroll down and tap on About.

  3. Similar to the Windows 10 desktop version of Settings, the About page shows various pieces of information about your phone and it also it allows you to change the device name. Now simply tap Edit name under "Device name".

  4. Enter the new device name and tap Save.

Method two: Rename your phone using File Explorer

Alternatively, you can also change the name of your phone by connecting the device to your Windows PC and using File Explorer.

  1. Using a USB data transfer cable connect your Windows 10 Mobile handset to your computer, and let the operating system detect the device.
  2. Go to the Start menu, search for and open File Explorer.
  3. From the left pane, go to This PC, and your handset should now appear under Devices and drives. If the default settings are still in place, the device name should read "Windows phone." Right-click the device, and select Rename.

  4. After you have entered the new device name, press Enter to commit the change.

  5. Finally, you can verify that the name has changed by disconnecting and reconnecting the handset in your computer, and double-checking the name in File Explorer. You can also sign into your phone, open the Settings app, and go to System > About, and the new name should appear under Device name.

Quick Tip: The name should be less than 33 characters and it should not contain special characters, such as < > ; : " * + = \ | ? ,.

More resources

For more tips and tricks, and the best coverage on Windows 10 Mobile, you can visit the following resources:

How to stop your Windows 10 Mobile phone's location from being tracked through Wi-Fi

$
0
0

Shopping malls, stadiums, and other venues can track your movements when your phone connects to their Wi-Fi networks. As such in this guide, we'll show you a Windows 10 Mobile feature to prevent this from happening.

Microsoft is including many new features in Windows 10 Mobile, and it's also enhancing various aspects of security. One of this changes is happening on Wi-Fi networks.

In previous versions of the mobile operating system, even though your phone was reasonably protected, some places such as shopping malls, supermarkets, and public places could easily track your movements whenever your phone was nearby or connected to their Wi-Fi networks. That is something that many people who take security very seriously can consider a privacy concern.

This tracking happens because whenever your phone is not connected to a Wi-Fi network, it will continue to send out requests to try to connect to any available wireless network that is located near you. These signal-requests include your device unique hardware identifier, which we know as a MAC address.

In a similar fashion, once your phone is connected to a Wi-Fi network, you phone unique hardware (MAC) address also gets logged into the network. Then this piece of information can sometimes be used by third-parties to track your movements when you're in the area. Large venues often have multiple wireless routers, and as you pass from one to another, they can track your location as you move.

To enhance your privacy, on supported phones like the Lumia 950 and Lumia 950 XL, Windows 10 Mobile offers a feature called Random hardware addresses. As the name implies, it is a feature that randomly generates hardware addresses to make it harder for third-parties to track your phone location when it's nearby or connected to a Wi-Fi network.

This feature is not enabled by default on supported phones. As such, if you want to enhance further your Wi-Fi security when you roam throughout different wireless networks, in this guide for beginners, we'll show you the steps to enable Random hardware addresses feature in Windows 10 Mobile.

Quick Tip: Keep in mind that this feature only works effectively on new connections.

Enabling Random hardware addresses for all Wi-Fi networks

  1. While in the Start screen, swipe left to bring All apps, then search for and open the Settings app, and tap on Network & wireless.

  2. Next, tap on Wi-Fi.

  3. Scroll down and tap the Manage button.

  4. On Manage, make sure to toggle the Use random hardware addresses pill switch to the On position to enable the feature.

Enabling Random hardware addresses only on particular Wi-Fi networks

Also, you can control this feature globally, as shown in the steps above, or you can enable "Random hardware addresses" on specific networks, as you can see in the steps below:

  1. While on Network & wireless in the Settings app, tap on Wi-Fi.

  2. Tap on the network you're connected on, scroll down, and select one of the three options: On, Off, or Change daily.

  3. Once you have chosen your option, go back to Wi-Fi, tap and hold the wireless network you're connected to, tap Delete.

  4. Now you need to reconnect your phone to the wireless network for the new settings to take effect. From the Available Wi-Fi networks list in the Wi-Fi settings, tap the name of the network you deleted, and enter the corresponding password to connect and complete the process.

This feature not only generates random MAC addresses, but it will also hide your device name while connected to a Wi-Fi network by using the random hardware address as the name.

It's also important to note that even though this is a good feature to add an extra layer of security to your phone, you may find different scenarios where you may not want to use this feature. For example, on your home network where it's not necessary and at you work, as IT administrators need to be able to track devices to keep the network secure and in compliance with the company's policies.

More resources

If you want more tips and tricks, and you want to stay informed on everything around Windows 10 Mobile, you can visit the following resources:

How to find your phone number in Windows 10 Mobile

$
0
0

It's just a matter of time until you forget you own phone number, and in today's guide, we will refresh your memory by walking you through the steps to find your number in Windows 10 Mobile.

More than ever we're using our smartphones just like we use our computers, more than we use them actually to make phone calls. It's all about apps and services to the point that at those moments where we need it the most, we can forget something so simple as our own phone number. As such, for those times where you simply forgot, you are switching from a different mobile platform, or you are just jumping to the new version of the mobile operating system from Windows Phone 8.1. Another frequent situation? When going to a foreign country and using a pre-paid SIM card.

In today's beginners guide, we will show you three very easy methods you can use to find your phone number in your Windows 10 Mobile phone.

Method One: Find your phone number through the Phone settings

  1. While in the Start screen, swipe left to bring All apps, then search for and open the Settings app, and tap on System.

  2. Next, tap on Phone.

  3. Finally, your number should be listed under My phone number.

Method Two: Find your phone number through the About settings

Another method that you can use to locate your phone number is by visiting the About page in the Settings app:

  1. While in the Start screen, swipe left to bring All apps, then search for and open the Settings app, and tap on System.

  2. Next, tap on About.

  3. Tap the More info button, and your mobile number should be listed in the MDN field.


    Note that in this section you can also find a lot of other valuable information, such as the current version and build number of Windows 10 Mobile, firmware version, screen resolution, and a lot more.

Method Three: Find your phone number through the Network & wireless settings

There is also a third option to find your phone number includes visiting the Network & wireless page in the Settings app:

  1. While in the Start screen, swipe left to bring All apps, then search for and open the Settings app, and tap on Network & wireless.

  2. Next, tap on Cellular & SIM.

  3. Scroll down tap on SIM settings.

  4. You will now see your number under SIM info.

That's all folks. With these three methods, you will able to find quickly and easily your phone number in Windows 10 Mobile.

More resources

For more tips and tricks, and the latest news on Windows 10 Mobile, you can visit the following resources:

Windows 10 Mobile users can now grab new phone firmware after updated Insider app

$
0
0

Yesterday, Microsoft sent out a mandatory update for the Insider app and at the time we speculated that it was in preparation for some Windows 10 Mobile Redstone releases.

As it turns out, it is more than that as the app now lets users un-enroll from the Insider program but all puts them back onto the production track for updates. This change is a rather big deal as previously users would have to hard-reset to get back into production mode.

Here is what it means, especially for those on the Lumia 950 or Lumia 950 XL as those phones have new firmware.

Windows Insider 1.3.233.2 Changes

With yesterday's update for the Insider app the changelog has now been refreshed too. Here is what is new with emphasis on the third bullet point:

  • Show Windows OS version instead of Phone build version in about screen
  • Fix a possible provisioning deadlock issue
  • Leave program will now attempt to provision the phone back to official production builds. When official builds catch up, the phone will receive compatible official updates again
  • Several smaller bugfixes

You are an Insider but not getting new Lumia 950 or Lumia 950 XL firmware?

One of the odd bugs of being an Insider was you could have a Lumia 950 XL and be on the latest OS version e.g. 10586.63, but not get the latest firmware that was released. To get the firmware, you would have to either hard-reset the device so that it would wipe the Insider track from the phone or use the Windows Device Recovery Tool (WDRT) to flash the firmware.

Needless to say, this could take around two hours. This time scale applies if you use the restore function on your phone to put it back to normal after you take all the updates and then re-enrolled in the Insider program. (Having said that, sometimes doing a hard reset also fixes a lot of update issues, so it's not always a bad thing).

With yesterday's update, you only have to remove yourself from the program using the app (directions below) and the phone is now put on production. This action means the phone will act like you hard reset it. Using Windows Update under Settings should let you install the new firmware with no interference (assuming it is there; the Lumia 950 on AT&T still has not had the firmware approved, for instance; but when it does, you can then use this guide to get it too).

As always, taking the new firmware or any OS updates does not wipe the phone. All your information, settings, and files will remain intact.

For now, this only applies to the Lumia 950 and Lumia 950 XL as other Lumias do not have new firmware available. Long term, this can affect other devices should new firmware be released by Microsoft.

How to stop getting Insider builds for Windows Phone

  1. Launch the Windows Insider app

    From your Start menu launch the Windows Insider App. If you need to re-install it just use this link for the Store.

  2. Disenroll

    From the ellipsis menu near the bottom open the menu and choose Leave the program

  3. Sign in

    To confirm your account, you need to sign in again

  4. Leave Program

    On the Leave program screen select Continue to confirm

You are now disenrolled in the Windows Insider Programs for phones. You will not get any more OS updates through the Insider service, but your phone can now grab any official updates through production releases e.g. new firmware.

If you wish to change your mind at any point, just launch the Windows Insider App and re-enroll through the initial steps. This step applies after you grab the new firmware as re-enrolling in the Insider program will never remove the new firmware.

New firmware update for Lumia 950/950 XL: 01078.00027.15506.020xx

As a refresher, this is what the latest firmware for the Lumia 950 and Lumia 950 XL brings. Many user reports confirm better battery life and, more importantly, less heating of the phone due to background processes:

  • Stability and performance improvements.
  • Improvements for SD memory card support.
  • Improvements for automatic display brightness settings.
  • Fix for a camera problem that was causing noisy images in low-light conditions for some users.
  • Fix for a 4K video problem that was causing stripes to show up while playing back recorded videos for some users.

Conclusion

This course correction by Microsoft is one that should have been there early on when the Insider program began. Granted, the disconnect between firmware and OS updates was not so discernable a few months ago before the Lumia 950 and Lumia 950 XL even existed, making the "issue" more theoretical. Now that we have those phones and Insiders stuck with old firmware the reality of the disconnect is, well, disconcerting.

With yesterday's update, Microsoft made switching between Windows 10 Mobile for Insiders and Windows 10 Mobile production much easier with no more hard resets. This change in how the program works also means that Microsoft does not need to put the firmware on the servers for Insiders, however, they are reportedly still exploring that option too.

At least for now, Microsoft has saved users a lot of work by negating the need for a hard reset just to get any official updates.

For more information, you can head into our forums where users are sharing their experiences.

Source: Windows Central Forums; Thanks, Shaun S., and Bryant F., for the tips!


How to enable device encryption on a phone with Windows 10 Mobile

$
0
0

Preventing unauthorized access to your personal data on your mobile device should always be a top priority.

Windows 10 Mobile includes some security features, such as "Find My Phone" to quickly locate your phone in case it's lost or stolen, and Windows Hello to securely unlock your phone with your eyes using an Iris scanner. It also brings an extra layer of security that allows you to use BitLocker technology to encrypt the operating system and your files and folders that are stored locally on the phone.

In Windows 10 Mobile, the feature is called Device encryption, and it helps to make local device data unreadable for anyone who attempts to access it without authorization. The primary reason Microsoft is adding this feature is to protect your confidential data if your device is lost or stolen. Using the encryption feature only the person with the right encryption key (your password) can make files and folders readable.

Enabling Device encryption in Windows 10 Mobile

Device encryption is an option that comes disable by default, but you can easily enable the feature using the following steps:

  1. While in the Start screen, swipe left to bring All apps, then search for and open the Settings app, and tap on System.

  2. Next, tap on Device encryption.

  3. Finally, make sure to slide the Device encryption pill switch to the On position to enable the feature.

Important Note: A password PIN must be in place to enable the feature if your mobile device doesn't have one when trying to enable Device encryption, you will be automatically redirected to the Sign-in options settings page to create a PIN. Then you would just tap the Add button, under the PIN section, and follow the on-screen wizard to create a new PIN. After the PIN password is created, you can go back to Device encryption settings to verify that the feature has been enabled.

While the feature should work as expected, Windows Phone 8.1 used to display an "encrypted" label in the phone storage settings, and Windows 10 Mobile doesn't provide such visual confirmation in the storage settings. The only way to verify your device is being encrypted is by making sure the "Device encryption" is turned on in the Settings app.

It's important to point out that while encryption is enabled on your mobile device, the operating system and your data stored in the local storage will be encrypted, but device encryption will not encrypt data that you stored on an SD card. As such, it's highly recommended that you not save sensitive data on a removable storage, as anyone could easily remove the storage and have unrestricted access to that data from any computer.

Furthermore, you need to be careful when to choose to enable this feature, as it's possible that encrypting your device may cause some issues, such as problems with emails not synchronizing with your phone.

Are you using device encryption in your Windows 10 Mobile? Let us know in the comments below.

More resources

For more Windows 10 Mobile tips and tricks, and the latest news, you can visit the following resources:

Stop your Windows 7 or 8.1 PC from forcing Windows 10 on you with GWX Control Panel

$
0
0

If you're comfortable running Windows 7 or Windows 8.1, then you probably want to stop the "Get Windows 10" nags. Here's how to make them go away.

There is no doubt that Microsoft eagerly wants you to upgrade your Windows 7 or Windows 8.1 machine to Windows 10. With the goal of reaching 1 billion devices running the new operating system within the first two to three years, the company began its campaign to push Windows 10 to the masses using its "Get Windows 10" app before the OS had even launched.

Initially, the prompts on older Windows machines weren't very intrusive, but over time, Microsoft has updated its "Get Windows 10" (GWX) app to be more aggressive trying to convince you to upgrade your computer to Windows 10. As such, if you're not yet on board with the Windows 10 train, you probably want to stop those nagging alerts.

Thankfully, we also have a free tool called GWX Control Panel to help you control Microsoft's approach to upgrading to Windows 10.

GWX Control Panel offers some options to help control your Windows 10 upgrade. For example, it can help you remove the "Get Windows 10" icon that sits in the notification area, and you can prevent Windows Update from downloading and installing the new operating system. It can also detect and remove the installation files if they have already been downloaded on your computer. You can activate a monitor to alert you on future Windows 10-related settings changes, and optionally, it can delete some program files that are known to cause your computer to upgrade to Windows 10.

Protecting your system from the Windows 10 upgrade

In the steps below, we'll walk you through the process to prevent the upgrade to Windows 10 from Windows 7 or Windows 8.1 while putting a stop to the "Get Windows 10" app.

Warning: Before proceeding it's important to note that while GWX Control Panel has worked for many users, it's a third-party tool that is offered "AS IS" without warranty. As such, it's always recommended that you perform a full back of your computer before modifying anything in case you need a way to recover. Download and use the software at your own risk.

  1. Visit the Ultimate Outsider web page and click GWX Control Panel link to download the tool. (Also note that site offers a stand-alone version of the tool if you don't feel comfortable installing the third-party software.)
  2. Once the download completes, double-click the GWXControlPanelSetup.exe, and follow the on-screen instructions to complete the installation

  3. Right-click the GWX Control Panel icon sitting on the Desktop and select Run as Administrator, read carefully, accept the End User License Agreement, and click Continue to install the tool.

  4. You will now be presented with the tool. You will see that GWX Control Panel shows various pieces of useful information, including whether or not the Windows 10 installation files are already downloaded on your system, if your PC is currently set to allow the Windows 10 upgrade, and status of the "Get Windows 10" app, among other pieces of information. Then GWX Control Panel offers many different options to combat the upgrade, including:

    • Delete "Get Windows 10" app: Removes the "Get Windows 10" icon from the Taskbar in the notification area.
    • Delete Windows 10 Download Folders: Deletes any downloaded Windows 10 installation files to free-up space.
    • Prevent Automatic Windows 10 upgrades: Changes your system settings to block Windows 10 upgrades.
    • Delete Windows 10 Programs: Removes the program files that will get your computer ready for Windows 10.
    • Enable Monitor Mode: Installs a monitor process that will alert you if any settings modifications are made to your system regarding Windows 10.
    • Delete Windows 10 Programs: This is perhaps the only option you cannot undo using the free tool. If you are sure that you want to delete all Windows 10-related programs and settings, make sure to understand that you will have to download manually the Windows 10 installation files using the Media Creation Tool to do the upgrade.

    As you can see, you can configure various settings for this tool, but you only need to click and enable the Delete "Get Windows 10" app and Prevent Automatic Windows 10 upgrades to stop the annoying GWX app and protect your computer from automatically upgrading to Windows 10.

It's important to point out that once you set the new configuration settings on your Windows 7 or Windows 8.1 machine, you will need to close and reopen GWX Control Panel to revert any of the changes.

In the tool, you will also notice the Clear Windows Update Cache option. This option is there to help you in case there are still some Windows Update issues after using the "Prevent Windows 10 Upgrades" feature. You can click the button to get more information about the feature and to proceed to clear the Windows Update cache.

While Microsoft has made available more information on how to opt-out the Windows 10 free upgrade, GWX Control Panel has been designed to be a simple tool that anyone can use. Furthermore, non-technical users can benefit from this tool as they can easily control the Windows 10 upgrade without having to modify manually Group Policy settings or any entry in the Windows Registry, which can go catastrophically wrong if you don't make changes correctly.

Also, GWX Control Panel allows you to revert (almost) any change you apply to your computer. This ability means that if you don't want to upgrade to Windows 10 today, in the future, when you feel the operating system is good enough, you can undo the changes and proceed to upgrade your PC. Finally, if you come across any issues using this tool, you can refer to the GWX Control Panel troubleshooting guide at the official site.

Keep in mind that we're not saying you shouldn't install the new operating system. Microsoft has done a tremendous work with Windows 10 by making it more secure than Windows 7, addressing users complaints with Windows 8.x, and adding many new features and changes. However, many users may have their own valid reasons to skip the upgrade, and they should have an easy way to stay in their current version.

What are your thoughts on Microsoft's marketing methods to push Windows 10 to the masses? Let us know what you think in the comments below.

More resources

For more tips and tricks on Windows 10, and get the latest news, you can visit the following resources:

How to create or join a guild in Neverwinter, the free to play Dungeons and Dragons MMO

$
0
0

How to create or join a guild in Neverwinter, the free to play Dungeons and Dragons MMO

Neverwinter is a free to play Massively Multiplayer Online Role-Playing Game (MMORPG) for Xbox One and Steam from Perfect World Entertainment. Since launching in June 2015, the Xbox One version has received numerous free expansions to date (with more on the way). One of the most exciting additions from these expansions is guilds.

By joining a guild, Neverwinter players will gain access to a vast Stronghold area, new quests, items, and Achievements. Read our guide to learn about the benefits of joining a guild, how to create a guild of your own, and most importantly – how to join the Windows Central guild!

Note: This guide applies to both the Xbox One and Steam versions of the game, but Windows Central only has a guild on Xbox One.

Requirements to join or create a guild

How to create or join a guild in Neverwinter

The ability to create or join a guild is restricted to players of level 15 or higher. Before reaching level 15, you won't be able to form a guild or accept an invite to one. The good news is that reaching level 15 doesn't take all that long. After all, with a max level of 70, 15 is just a drop in the bucket.

After starting a fresh character, you should be able to reach the level requirement within six hours or so. You needn't go out of your way to advance faster, either. Just accept and complete every story- and side-quest you come across, and you'll fly through the levels in no time.

Creating a guild requires a bit more effort than just leveling up your adventurer. It takes five players of level 15 or higher to gather in a single group. Once you have such a team gathered, everyone needs to switch to the same Instance. The group leader must then visit the Guild Registrar in Protector's Enclave (the starting city) and ask to start the guild. The Registrar is located right next to Sergeant Knox, one of the main quest-givers.

Guild benefits

How to create or join a guild in Neverwinter

The primary benefit to Neverwinter guilds is that players gain access to an entirely new area: the guild Stronghold. To reach your Stronghold after joining a guild, head to any fast travel/world map location and you'll be able to select it from the destination list.

Your Stronghold is a massive multilevel castle filled with NPCs to interact with. The Steward and his team will assign quests to guild members and perform other useful functions. These include Stronghold team quests, daily quests, and hourly quests for the members of your guild.

Besides teaming up on quests, your main goal as a guild member should be expanding the Stronghold. The guild can build a number of structures that produce resources and provide other benefits like permanent stat boosts, but these structures don't come free. Everyone needs to donate resources like money, gems, and treasures to the Guild Coffer – managed by a friendly Mimic towards the rear of the Stronghold.

How to create or join a guild in Neverwinter

Once the guild acquires enough resources, officers can purchase upgrades and new structures that will benefit everyone. The guild can also purchase guild bank space with Astral Diamonds, a currency earned by completing specific types of quests.

The 'Strongholds' expansion also has four Achievements, three of which can only be earned by guild members. These Achievements are the rarest in the game, so you'll want to join a guild as soon as possible.

For more information, see the Guilds and Strongholds articles at the Neverwinter Wiki.

Join the Windows Central guild

How to create or join a guild in Neverwinter

Are you looking for a guild to share your Neverwinter adventures with on Xbox One? You're in luck. By popular demand, Windows Central now has a guild. We'd love to recruit readers and other players who actively play the game and will contribute to our Stronghold's coffers.

To join, first make sure your character is level 15 or higher and is not currently in another guild. Then message EastX on Xbox Live with your CharacterName@Gamertag. For instance, my primary character name is EastX, so that's EastX@EastX. Feel free to comment here too, but don't forget to send that message.

How to create or join a guild in Neverwinter

Neverwinter is a vast free-to-play MMORPG that can be fully enjoyed whether or not you spend real money. The game will become even larger once the free 'Underdark' expansion/update arrives on February 9th. We'll have a full review by then, plus another weekend stream and premium item giveaway sometime that month.

If you haven't started Neverwinter yet, now's a great time to try it. Be sure to keep leveling up so you can team up and conquer with your fellow Windows Central readers. We'll see you in the game!

Get Neverwinter from Xbox.com (Free with In-app Purchases)

How to manually stop the Windows 10 upgrade prompts on your Windows 7 or 8 PC

$
0
0

Windows 7 or 8.1 still nagging you to upgrade to Windows 10? Here's how to kill the "Get Windows 10" app and make it leave you alone.

If you've been running Windows 7 or Windows 8.1 on your computer, you're probably familiar with the "Get Windows 10" (GWX) app, which is constantly trying — sometimes aggressively — to lure you to upgrade to Windows 10. While this marketing campaign initially only included non-business computers, Microsoft has already announced its plans to continue expanding the operating system using the GWX app to small businesses and organizations.

Along with the new announcement, the software giant is finally offering officially documented instructions for IT administrators to stop qualifying computers running Windows 7 or Windows 8.1 from installing Windows 10 and getting rid of the unpleasant notifications.

Microsoft is aiming the instructions for business computers joined to a domain network running Windows 7 Pro and Windows 8.1 Pro, but the steps will also work for devices that aren't joined to a domain, including the home versions of the operating system.

Previously, we described the steps to stop the "Get Windows 10" nags and prevent your computer from installing Windows 10 using the GWX Control Panel tool. But if installing a third-party software isn't your approach, and you are comfortable modifying the Windows Registry and Group Policy settings, you will want to use the following guide:

Disabling the GWX app and stop the Windows 10 upgrade

Warning: Before jumping into this guide, it's important to note that modifying the Windows Registry can be a dangerous game that can cause irreversible damage to your system if you don't do it correctly. It's highly recommended to make a full backup of your system before proceeding.

You have been warned!

If you're running Windows 7 Pro or Windows 8.1 Pro, you can stop the upgrade offer to Windows 10 and disable the "Get Windows 10" app following the steps below:

Prerequisites

To block the upgrade to Windows 10 through Windows Update, you'll need to have installed update KB3065987 in Windows 7 or KB3065988 in Windows 8.1 to make available the new Group Policy Object to perform the task.

You can download the updates using the links below:

Once you've downloaded the update for your current version of Windows, double-click the package to begin the installation, on the dialog box prompt click Yes to complete the install, and restart your computer.

Blocking the Windows 10 upgrade offer using Group Policy

After installing the required update follow these steps:

  1. Use the Windows Key + R keyboard shortcut to open the Run command, type gpedit.msc, and press Enter to open the Local Group Policy Editor.

  2. Browse the path Computer Configuration > Administrative Templates > Windows Components > Windows Update.
  3. In Windows Update, find and double-click the Turn off the upgrade to the latest version of Windows through Windows Update option.

  4. Click Enable, then Apply and finally click OK.

Blocking the Windows 10 upgrade offer using the Registry Editor

If you're running a home version of the operating system, the Local Group Policy Editor won't be available to you, in which case you need to stop the Windows 10 upgrade using the registry.

  1. Use the Windows Key + R keyboard shortcut to open the Run command, type regedit, and press Enter to open the Registry Editor.

  2. Carefully browse the following path: HKEY_LOCAL_MACHINE\SOFTWARE\Policies\Microsoft\Windows\WindowsUpdate.
  3. On the right side, right-click, select New, create a new DWORD key and name it DisableOSUpgrade.

  4. Double-click the DisableOSUpgrade key and change the value from 0 to 1.

Quick Tip: If you don't see the WindowsUpdate key when browsing the path, right-click the Windows key, select New, then Key, and name the new key WindowsUpdate.

Disabling the "Get Windows 10" nags

There is no Group Policy setting to disable the "Get Windows 10" app. As such, you will need to modify the Windows Registry in both the professional and home version of Windows 7 and Windows 8.1.

  1. Use the Windows Key + R keyboard shortcut to open the Run command, type regedit, and press Enter to open the Registry Editor.

  2. Carefully browse the following path: HKEY_LOCAL_MACHINE\SOFTWARE\Policies\Microsoft\Windows\Gwx.
  3. On the right side, right-click, select New, create a new DWORD key and name it DisableGwx.

  4. Double-click the DisableGwx key and change the value from 0 to 1.

Quick Tip: If you don't see the Gwx key when browsing the path, right-click the Windows key, select New, then Key, and name the new key Gwx.

Once you have completed these instructions, the last thing left to do is to restart your computer. After a reboot, you should no longer see the GWX app in the notification area, and Windows 10 will no longer try to install on your computer.

Remember that through this process, you no longer have to remove the update KB3035583 that is known to prepare your computer for Windows 10. Microsoft says that your system will remain excluded until the changes are removed, which you can do with the steps shown below.

Reverting changes to get the Windows 10 upgrade

If later on you change your mind and feel that you're ready for Windows 10, you can undo the changes to re-enable the Windows 10 offer through Windows Update and the "Get Windows 10" app.

On Windows 7 Pro and Windows 8.1 Pro use the following steps to re-enable the upgrade offer:

  1. Use the Windows Key + R keyboard shortcut to open the Run command, type gpedit.msc, and press Enter to open the Local Group Policy Editor.

  2. Browse the path Computer Configuration > Administrative Templates > Windows Components > Windows Update.
  3. Find and double-click the Turn off the upgrade to the latest version of Windows through Windows Update option.

  4. Select the Not Configured option, click Apply and then click OK. This actions should also delete the WindowsUpdate and DisableOSUpgrade keys from the Registry.

If you're in Windows 7 Home or Windows 8.1 Home, you will have to manually and carefully delete the changes in the Registry.

  1. Use the Windows Key + R keyboard shortcut to open the Run command, type regedit, and press Enter to open the Registry Editor.

  2. Carefully browse the following path: HKEY_LOCAL_MACHINE\SOFTWARE\Policies\Microsoft\Windows.
  3. Right-click the WindowsUpdate key, select Delete, and click Yes to confirm the deletion.

For all editions of Windows 7 and Windows 8.1, you will need to re-enable the "Get Windows 10" app by deleting the keys you have previously created.

  1. While in the Windows Registry carefully browse the following path: HKEY_LOCAL_MACHINE\SOFTWARE\Policies\Microsoft\Windows.
  2. Right-click the GWX key, select Delete, and click Yes to confirm the deletion.

Finally, restart your computer to complete the process. Once done, your computer should be able to receive the free Windows 10 upgrade.

It's important to point out that Microsoft is only making available Windows 10 as a free upgrade within the first year of its official release. This limitation means that you only have until July 29, 2016, to upgrade your qualifying Windows 7 SP1 or Windows 8.1 with Update computer to Windows 10.

More resources

For more tips and tricks on Windows 10, and get the latest news, you can visit the following resources:

How to connect Microsoft Health and Microsoft Band to Cortana for your daily summary

$
0
0

Microsoft Health and Band up to Cortana

Microsoft has made using the Microsoft Band or Band 2 a little easier by integrating it with Cortana's daily summary. Now, instead of launching the Microsoft Health app you can see your step and calorie goals and current counts within Cortana on all your Windows 10 devices including PCs and tablets.

The feature was first discovered in back in early December when we first reported it, but now the feature has gone wide to all users.

Like many of Cortana's features, there was some A/B testing going on, and not everyone saw the linkage option when we first reported the story (including Windows Central). Reader of the site Eric reminded us today about the feature as it finally showed up for him. Likewise, we forgot about the option as well and low and behold we had the ability now too.

For all we know, it has been there for weeks, which is why we figured we would remind you of the option.

Here is how to link your accounts to Cortana.

  1. Open Cortana on your PC or Windows Phone (not available on iOS or Android)
  2. Tap the hamburger button in the upper left corner
  3. Open Notebook
  4. Choose Connected Accounts
  5. Select Microsoft Health if available

You will then proceed to login to your Microsoft Health account and be briefed on the privacy permissions. Once successful, re-launching Cortana should procure your Step and Calorie goals/results achieved for the day (assuming you synchronized your Band recently).

For those on an iPhone or Android device using Cortana and a Microsoft Band, you cannot set up the Connected Accounts on your phone directly as far as we can tell. You can, however, set it up on a Windows 10 PC and once associated the feature will appear on your iPhone or Android smartphone as well.

So far, Microsoft has five options for Connected Accounts under Cortana, including:

While a useful feature Microsoft so far does not have a way to alert users when new options become available. Presumably, more account options will come online in 2016.

Are you using any of these features in Cortana? Let us know in comments.

For more Microsoft Band and Band 2 tips and tricks, check out our main help page:

Microsoft Band help, tips and tricks at Windows Central

Thanks, Eric C., for the reminder

Viewing all 5861 articles
Browse latest View live


Latest Images