Quantcast
Channel: Help & How To
Viewing all 5861 articles
Browse latest View live

How to make your Windows 10 computer boot quicker with 'Fast Startup'

$
0
0

If your computer is booting slow, then you may not have "Fast Startup" configured in Windows 10. Here are the steps to make your PC boot up quickly.

It's not just about the speed of the processor, memory, and the use of a fast Solid-State Drive on your computer that makes Windows 10 a snappy operating system. Windows 10 also relies on features and different techniques to work fast and provide quick boot times.

Fast Startup is one of the features initially made available with Windows 8.x, that combines techniques in hibernation and in the shutdown process to enable the operating system to reduce the boot time significantly.

The feature comes enabled by default on new installations. However, if you have been wondering why you're experiencing slow boot times in your Windows 10 PC. The reason could be that you have upgraded from Windows 8.1, and Fast Startup was previously turned off, or the operating system just didn't enable it during installation. Now to make your computer boot fast again, we'll show you in this Windows 10 guide the steps to enable Fast Startup on your computer.

Enabling Fast Startup in Windows 10

Follow the steps below to enable (or disable) Fast Startup in your computer running Windows 10:

  1. Right-click the Start button and select Power Options.

  2. From the left pane, click the Require a password on wakeup to access the System Settings of Power Options.

  3. Click the Change settings that are currently unavailable link to modify the Shutdown settings.

    Note: If you see the Turn on fast startup (recommended) option is unchecked under Shutdown settings, then the feature is not enabled in your computer.

  4. To enable Fast Startup, check the Turn on fast startup (recommended) option, and click the Save changes button to commit the changes.

Making available the Fast Startup feature

As you can see in the screenshot below, there is a chance that after following the above steps, you will find out that the Fast Startup option is not available to you, which also indicates that the feature is not enabled on your computer.

The reason is likely to be that hibernation is disabled in your Windows 10 computer, but you can enable this feature using the steps below:

  1. Right-click the Start button and select Command Prompt (Admin).

  2. Type the following command: powercfg /hibernate on and press Enter. This command will enable the hibernate feature in your computer, which is an important component of fast startup.

  3. Now you should be able to see the Turn on fast startup (recommended) option in the Shutdown settings.

That's all there is to it folks.

Although, Fast Startup is a great feature to make Windows 10 boot significantly faster than Windows 7, it's important to note that fast is not always a good thing depending on your system configuration and sometimes you may want to keep it turned off.

For example, Fast Startup could be the root of boot issues. It's also not recommended to enable the feature on systems with very limited hard drive space, as it may not work correctly. And if you create a data partition on a dual-boot setup running Windows 10 (or Windows 8.1), data that you try to save using another version of Windows or from another platform won't save to the partition. This setup could cause data loss as Fast Startup will try to protect the file structure of your primary system from being changed.

More resources

For more tips and tricks on Windows 10, and get the latest news, you can visit the following resources:


Use Windows Defender Offline to remove tough viruses from your Windows 10 PC

$
0
0

When your Windows 10 PC gets a hard-to-remove virus, you can use Windows Defender Offline to get rid of it once and for all.

It's happened to you, or to somebody you know. An annoying and dangerous virus or bit of malware has wormed its way onto your computer, and it is wreaking havoc. When these type of malicious codes install themselves on your computer, they can rapidly take control of your PC and cause irreversible damage.

Even if you have an up-to-date antivirus running on your computer, sometimes these threats are very hard to find and remove, often masquerading as part of the operating system. For this reason, Microsoft offers Windows Defender Offline, which is a version of its antivirus that you can run from a USB drive to help you remove malicious code that is infecting Windows 10.

In this Windows 10 guide, we'll walk you through the process of downloading and creating a bootable USB drive with the stand-alone version of Microsoft's free antivirus app, and we'll show you how to use it to clean up your computer from malicious and unwanted programs.

Making a bootable version of Windows Defender Offline

Before proceeding with this guide, you will need external media, preferably a USB flash drive with at least 1GB of capacity, but you can also use a CD/DVD, or you can create an ISO image. This process will wipe and reformat the drive, so make sure you back up any content on if you want to keep to another location.

Quick Tip: You will need to download the correct version of Windows Defender Offline for the computer you wish to scan. If you don't know which version of Windows 10 is running on your PC, you can easily check by using the Windows Key + I keyboard shortcut to open the Settings app, go to System > About, and you will find the version of Windows 10 under "System type".

  1. Download the Windows Defender Offline installer:
  2. Once the download completes, double-click the mssstool32.exe or mssstool64.exe depending on your version.
  3. The Windows Defender Offline Tool wizard will open, and then click Next to continue.

  4. After accepting the license agreement, select the type of bootable media you want to create. For this guide, we'll choose the On a USB flash drive that is not password protected option, and click Next.

  5. If you have more than one USB storage device connected to your computer, you'll be given a drop-down menu to select the drive you want to use. Pick the drive you want to use and click Next.

  6. Click Next to confirm that the wizard will reformat the USB flash drive.

  7. Now the necessary files will download, and the wizard will complete creating the Windows Defender Offline bootable media. Then simply click Finish to close the wizard.

Booting your Windows 10 PC using Windows Defender Offline

Before you can use the USB flash drive to perform a scan, you have to make sure your computer is configured to boot from removable media. Typically, this requires hitting the one of the keyboard's function keys (F1, F2, F3, F10, or F12), ESC, or the Delete key during boot to access the BIOS and change the boot order.

If you have a computer using a UEFI BIOS, the steps are a little different. In this case, in Windows 10, you'll need to go to Settings > Update & recovery > Recovery under Advanced startup, click Restart now. Then in the boot menu, click Troubleshoot > Advanced Options > UEFI Firmware Settings > Restart. Your computer will then boot into its BIOS, where you can then change the boot order.

Note that instructions will vary depending on your computer manufacturer. Always check your PC manufacturer's support website for details.

Finally, connect the USB flash drive on the infected computer and restart. Then Windows Defender Offline will start automatically performing a full scan of any virus, rootkit, or a piece of bad software that can be recognized using the latest definition update, just like it would happen when you're running Windows.

Once the scan completes, close the program, remove the USB flash drive, and your computer will automatically reboot.

While you can create Windows Defender Offline media at any time, it's recommended that you do this at the time you need to clean an infected computer, this way you will have the latest definition update.

It's important to note that Windows Defender Offline not only works with Windows 10, but you can also use this version of the antivirus on the previous version of the operating system.

Futher reading

For more tips and tricks on Windows 10, and get the latest news, you can visit the following resources:

Use Windows Hello to unlock OneDrive in Windows 10 Mobile

$
0
0

Did you know you can unlock the OneDrive app for Windows 10 Mobile with just your eyes?

The OneDrive app has Windows Hello built in and if you are on a Lumia 950 or Lumia 950 XL, you can set the app to unlock just by using the built-in iris scanner. The process to set it up is simple:

  1. Open OneDrive for Windows 10 Mobile
  2. Hit the menu button ('☰') in the upper left-hand corner
  3. Choose Settings
  4. Select Additional device sign-in
  5. Under Additional device sign-in choose On

The app uses the Windows Hello system setup under device sign-in.

Assuming you have already enabled Windows Hello there is nothing left to do. The next time you open OneDrive on your Lumia 950 or Lumia 950 XL you will first need to scan your iris to view any system files.

You do still need to hit Ok after the scan, but developer Rudy Huyn (who heads the Dropbox app) has noted before that a forthcoming OS update should soon remove that extra step.

Evidently, Microsoft enabled this at some point in the past updates this feature was enabled, but we glossed over it. Hopefully, with Microsoft's blog post on how developers can integrate Windows Hello into their apps we'll see even more apps in 2016 leverage this very cool two-factor authentication system.

Thanks, Krystian G., for the tip!

How to use hibernation on your Windows 10 PC to improve stand-by battery life

$
0
0

If you want to improve your computer's battery life, then you should be using the power-saving hibernation state in Windows 10.

Hibernation has been around for years on Windows machines. It's the process of saving the content currently in memory to the hard drive to allow your PC to shut down completely, saving battery without losing your current session. At any time, you can turn your PC on to resume from hibernation and continue working where you left off. This feature is one of the power-saving states in the operating system that conserves the most power and extends battery life significantly longer than the Sleep option.

While you can use hibernation at any time, you will see the benefit when using the feature for those times you won't be using your computer for an extended period. For example, when your laptop or tablet is running out of battery, or when using a Surface Book or Surface Pro 4, as both devices still having battery drain issues. Using hibernation can help to improve battery life.

While Windows PCs typically come with hibernation automatically enabled on new installations, the default settings may not be optimal to save the most power. In this Windows 10 guide, we'll show you the steps to verify the power-saving feature is enabled and supported on your system. We'll demonstrate how to add the "Hibernate" option to the Power menu on Start, and you'll also learn the process to customize when your computer should go into hibernation automatically.

Enabling hibernation in Windows 10

You can use the steps below to check and enable hibernation in your Windows 10 PC.

  1. Hold down the Windows key + X to open the Power User menu.
  2. From the list select Command Prompt (Admin) to open the Command Prompt as an administrator.

  3. Type the following command: powercfg /availablesleepstates, and hit Enter. If Hibernate appears under "The following sleep states are available on this system", then the feature is enabled.

  4. If you don't see "Hibernate" on the list of power features enabled on your computer, then type the following command: powercfg /hibernate on and hit Enter.

Keep in mind that "hibernate" won't be available depending on your hardware configuration. Some reasons include:

  • Current video card driver doesn't support the power state, in which case you'll need to update your video adapter driver.
  • The power-saving options are supported by your computer, but they aren't enabled in the BIOS. (Note that instructions to access the BIOS will vary depending on your PC manufacturer. Always check your computer manufacturer's support website for details.)
  • In some cases, hibernation won't be available if "hybrid sleep" is enabled on your computer.
  • Your computer hardware is not compatible with the power-saving options.

Adding the "Hibernate" option in the Power menu

Similar to previous versions, Windows 10 doesn't include the "Hibernate" option in the Power menu, which allows you to put your computer into the power-saving mode on demand. You can add the option using the following steps:

  1. Hold down the Windows key + X to open the Power User menu.
  2. Select the Power Options from the menu.

  3. From the left pane, click the Require a password on wakeup option to access the System Settings of Power Options.

  4. Click the Change settings that are currently unavailable link to modify the Shutdown settings.

  5. Check the Hibernate option, and click the Save changes button to commit the changes.

  6. Go to the Start menu, select the Power menu, and you should now see the "Hibernate" option. (The option will also appear throughout all the Power menus available in the operating system.)

Quick Tip: If you don't see the "Hibernate" option under the Shutdown settings, this is another way to tell that hibernation is disabled or isn't supported on your computer.

Additionally, in the System Settings page, you can also configure to hibernate your PC immediately when closing the lid or when pressing the power button to save the most battery — either when your device is running on battery or when it's plugged into an electrical outlet.

Under When I press the power button and When I close the lid settings, click the drop-down menu, and change the option from Sleep to Hibernate for "On battery" and "Plugged in".

Setting custom timers to hibernate your computer automatically

If you want to save power as much as possible to expand your laptop or tablet battery life, you can also manually configure when your device should hibernate automatically. You can do this by using the following steps:

  1. Hold down the Windows key + X to open the Power User menu.
  2. Select the Power Options from the menu.

  3. Click Change plan settings in your current power plan.

  4. Click the Change advanced power settings option.

  5. On the list of available options, expand Sleep, and then Hibernate after. Depending whether it's a mobile device or not, you will see two options: On battery and Plugged in, change the value (in minutes) to the time you want your device to go automatically to hibernate.

  6. Finally, click Apply and OK to finish saving the settings.

In Windows 10, similar to previous versions, the hibernation feature offers a reliable method to conserve power. It's also a method that takes more time to process a shutdown and resume than the sleep option. If you're looking to save battery life while being able to return quickly, perhaps the sleep option is what you need to use. However, keep in mind that if your computer loses all power during sleep mode (battery drains), you will lose all your unsaved work.

Which power state do you usually use on your computer? Tell us in the comments below.

More resources

For more tips and tricks on Windows 10, and get the latest news, you can visit the following resources:

Make the Dell Inspiron 15 7559 faster with an SSD and RAM upgrade

$
0
0

Dell Inspiron 15 7559

We recently reviewed the Dell Inspiron 15 7559 and thought it was a solid gaming laptop starting at just $799. Its biggest problem was the slow loading times because of a slow physical hard drive. But Dell designed this computer to be easily upgrade, and we're going to show you how to add an SSD and upgrade the RAM for improved performance!

The base model of the Dell Inspiron 15 7559 includes some decent specifications:

  • 15.6-inch FHD (1920 x 1080) Anti-Glare LED-Backlit Display
  • 6th Generation Intel Core i5-6300HQ Quad Core 2.3 GHz (6M Cache, up to 3.2 GHz)
  • 8GB Single Channel DDR3L 1600MHz (8GBx1)
  • 1TB 5400 rpm Hybrid Hard Drive
  • NVIDIA GeForce GTX 960M 4GB GDDR5
  • 74 WHr, 6-Cell Battery (Integrated)
  • Wi-Fi 802.11ac + Bluetooth 4.0, Dual Band 2.4 & 5 GHz

We'll upgrade by doubling the RAM to 16GB and transferring the system files to a faster 250GB SSD drive. We need two parts:

If you want to spend more money, you can get the 500GB SSD option from Samsung for about $168. Since we're just putting the system files there, the 250GB option is more than enough.

First make sure the laptop is off. Next, remove the bottom panel with a screwdriver for just one screw.

Dell Inspiron 15 7559

It doesn't matter which part you install first. For the RAM, insert the edge with the circuit board contacts at an angle and then push down on the other side. It should click into place. You'll know you are inserting it the right way when there's nothing blocking the notches. We're adding 8GB of RAM on top of the 8GB we already had, for a total of 16GB.

For the Samsung M.2 SSD, insert it an angle and then lock it down with the screw.

Dell Inspiron 15 7559

Dell Inspiron 15 7559

That's it for the hardware. Put the cover back on and power up the laptop. You'll see a message that the amount of system memory has changed. Click Continue. You can confirm the RAM installation by typing "About your PC" in the taskbar. It opens the settings with information about your system. Installed RAM should now say 16GB instead of 8GB.

Dell Inspiron 15 7559

The next step is to move your system files to the new SSD. Fortunately, it's a lot easier than you think. You'll need to install the Samsung Data Migration Software (keep in mind this software only works with Samsung SSD products). Confirm the source and target disks, and then click Start. The cloning process takes a few minutes, and then you'll restart the computer when it's done.

Samsung Data Migration

The Dell Inspiron 15 7559 will boot off the new SSD drive. You'll notice a difference in performance at this point: boot-up is faster and apps open more quickly. Don't get too excited yet. The next step is to format the old drive. Start typing "Disk" in the taskbar and select "Create and format hard disk partitions."

Right-click on Disk 1 and click Online. Next, right-click on the D: drive and select Format. Name it whatever you want and hit OK. You should now have two drives. The classic C: drive is the new SSD where Windows is installed, and a D: drive where you can store your other files.

Disk Management

Make sure to go to Settings > System > Storage and change the default save locations to the D: drive. For example, new apps, documents, music, pictures, and videos can now all go to the D: drive instead of the default C: drive.

That's it! These upgrades cost just $125 in total and took about an hour from start to finish (most of that spent on the transferring files and formatting drives side of things), and will make the Dell Inspiron 15 7559 run noticeably faster. For example, it previously took 50 seconds to open Adobe Photoshop CC. It now takes about 10 seconds. If you're looking for numbers, check out the results for GeekBench 3 and CrystalDiskMark below:

At $799, the Dell Inspiron 15 7559 is a solid gaming laptop. For an additional $125 for SSD and RAM upgrades, it becomes significantly better. Upgrading the Inspiron 15 doesn't take long and you're not required to reformat the computer, either. If you have the laptop, don't wait; Go upgrade right away.

Have you recently upgraded your PC? Let us know how it went in the comments!

Where to buy Dell Inspiron 15 7559

How to manage wireless networks using Command Prompt in Windows 10

$
0
0

When you need to manage your wireless network connections, using the Settings app or Control Panel may not be enough, and this is when the Netsh command-line utility in Windows comes in handy.

In Windows 10, you can manage various aspects of your wireless network connections using the Settings app and Control Panel. However, sometimes you may need to perform more advanced tasks. For example, find the network security key from different Wi-Fi profiles stored on your computer, show comprehensive wireless network profiles information, or generate details reports to troubleshoot connectivity. Those are tasks that you won't be able to perform through the basics set of configurations offered by the Settings app and Control Panel.

For these and other advanced networking tasks, Microsoft provides a command line utility that we know as Netsh (Network Shell), which has been part of the operating system since Windows 2000. With this command line utility, you can view, troubleshoot, and configure virtually every network adapter on a local or remote computer.

Although, you can manage wireless as well as wired networks using this command line utility, in this Windows 10 guide we're focusing on commands to manage wireless network connectivity on your computer. We'll be looking at the Netsh WLAN commands to view current settings, generate reports, delete, and export and import wireless profiles stored on your computer.

Before we dive into the guide. You'll need to open the Command Prompt with administrator rights to perform most of the commands. To do this, use the Windows key + X keyboard shortcut, and select Command Prompt (Admin).

View wireless network profiles saved on your PC

Every time you connect to a wireless access point, the operating system creates a "wireless network profile", and it's stored on your computer, you can view all these profiles using the following command line on the Command Prompt:

Netsh WLAN show profiles

On the list, which you can see in the screenshot, shows all the profiles stored on your computer for every wireless adapter and which users have the right to connect using those profiles.

Alternatively, you can use the "interface" parameter to show the list of profiles for a particular wireless adapter:

Netsh WLAN show profiles interface="Wireless_Interface_Neme"

View wireless adapter driver information

When you need to get driver information about your computer's wireless adapter, you can use the following command:

Netsh WLAN show drivers

"Show drivers" will provide relevant information about the driver currently installed on your system, including vendor, version, radio type and wireless display support, and much more.

You can always use the following command to view all supported wireless adapter capabilities:

Netsh WLAN show wirelesscapabilities

View wireless adapter settings

When you need to see specific wireless adapter information, such as radio type, channel, wireless signal, and type of authentication your computer is currently using, you can use the following command:

Netsh WLAN show interfaces

"Show interfaces" will display the information for all the wireless adapters on your computer. If you only need to see the information for one adapter, you can use the following command:

Netsh WLAN show interface name="Interface_Name"

Recover network security key from any wireless profile stored on your PC

If you lost and cannot remember your network security key to connect another device to a particular Wi-Fi access point, you can use the following command to view your network security key:

Netsh WLAN show profile name="Profile_Name" key=clear

Keep in mind that you can view your current network security key through the wireless adapter properties in Control Panel. However, you can use this command to recover any network security key of any profile stored on your computer.

Stop connecting automatically to a wireless network out of range

Sometimes, you have your Windows 10 PC configured to connect to different wireless networks automatically, but then you realize that your device always connects to the access point that offers poor connectivity, or your device tries to connect to a network that is out of range. For those cases, you can use the following command to prevent your computer from connecting to different networks automatically:

Netsh WLAN set profileparameter name="Profile_Name" connectionmode=manual

It's important to note that Windows 10 will always make a priority those networks you choose to connect automatically. If you want to move up a network in the list of precedence, you can use the following command:

Netsh WLAN set profileparameter name=" Profile_Name" connectionmode=auto

Delete wireless network profiles stored on your PC

When you no longer need to connect to a particular wireless network, the access point is no longer available, or you need to reset the network profile settings, you can also use Netsh WLAN to delete any profile stored on your computer using the following command:

Netsh WLAN delete profile name="Profile_Name"

If you can't remember the name of the network profile, you can use the Netsh WLAN show profiles command to list all the available profiles.

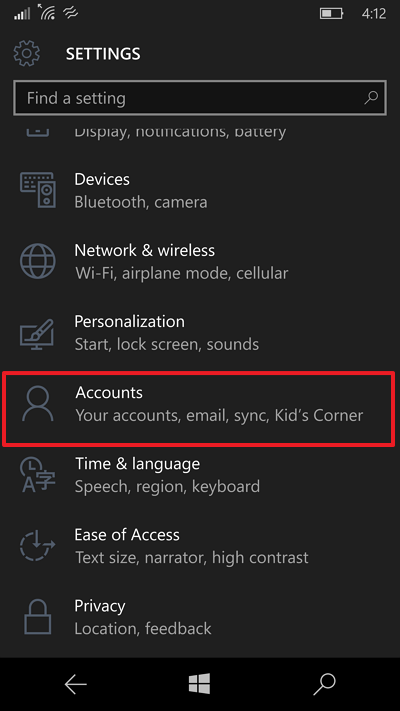
Note: Windows 10 is capable of syncing your wireless network profiles between computers when you use a Microsoft Account and sync is enabled. However, when you delete a wireless profile on your computer, the changes won't sync to other devices.

Export and import wireless network profiles

Up until Windows 7, users had the ability to export and import wireless network profiles using Control Panel. Then in Windows 8.x and Windows 10, Microsoft removed the feature in favor of the modern operating system being able to sync these settings using a Microsoft Account and the new wireless networks sharing capability. However, there are still situations where users will need to export and import wireless profiles.

The following command exports all your wireless network profiles:

Netsh WLAN export profile key=clear folder="Folder_Path"

The following command only exports one specific wireless network profile to a specified location:

Netsh WLAN export profile name="Profile_Name" key=clear folder="Folder_Path"

The export command will create an XML file for each wireless network profile stored on your computer. Also, note that the command we're using has the key=clear parameter, which will trigger to include the network security key for each network in the XML file, so make sure to keep these records in a secure place, as it can easily be viewed or edited using Notepad.

You can then use the exported XML configuration file to import each wireless profile settings to all interfaces and users using the following command:

Netsh WLAN add profile filename="File_Path.XML"

Alternatively, if you want to import profiles to a particular wireless interface and only to the current user, you can use the following command:

Netsh WLAN add profile filename="Path_With_Filename.xml" Interface="Wireless Network Connection" user=current

Generate wireless adapter report

If you need to troubleshoot your wireless connectivity to an access point, Netsh also offers a command to create a detailed report with many important details.

You can create a wireless report using the following command:

Netsh WLAN show WLANreport

This command will generate a report in the following path: C:\ProgramData\Microsoft\Windows\WLANReport\WLAN-report-latest.html

Once the WLAN report has been created, copy and paste the path into your web browser's address bar to open the report.

The WLAN reports contain a graph with details of the connectivity status, including information, such as when the connection started, when it got disconnected, errors, and more. The report also summarizes network adapters information configured on your system, session success/failures, disconnect reasons, and a lot more. It's a very detailed report that can help you ping point many Wi-Fi connectivity issues.

Wrapping things up with Netsh WLAN

While you can configure many wireless settings through the Settings app and Control Panel, the Netsh is a more robust utility that will give you more advanced tools to view, configure, and troubleshoot your wireless settings.

It's important to note that this guide shows some of the most important commands you can use in the utility to manage wireless networks, but you can always type the command Netsh WLAN and hit Enter in Command Prompt to explore other available commands.

Have you ever used Netsh commands Windows? Let us know in the comments below.

More resources

For more tips and tricks on Windows 10, and get the latest news, you can visit the following resources:

How to create a Windows 10 installer USB drive from a Mac

$
0
0

Windows 10 ISO USB

We previously showed you how to create a Windows 10 USB installation media when performing a clean install of Windows 10, but there might be an instance where the only machine you have available is a Mac. We'll show you to create a bootable USB flash drive with the Windows 10 installer from a Mac. It's easier than you think, thanks to the built-in Boot Camp Assistant from Apple.

Download Windows 10 Disc Image

First, you need to download the Windows 10 ISO file. Go to the download page and select the proper edition of Windows 10 in the dropdown menu. If you don't know what K, KN, or Single Language edition stands for, just select Windows 10 in the list.

Download Windows 10 ISO

Download Windows 10 ISO

Create USB installer with Boot Camp Assistant

After downloading the ISO file, you'll need to use Boot Camp Assistant to move it to a bootable USB drive.

  1. Insert a USB flash drive to your Mac. Make sure it's at least 8GB, which is usually marked on the USB stick. You can also check by right-clicking the USB drive on your desktop and clicking Get Info. Check if the number next to Capacity is at least 8GB. All the files in the drive will be deleted, so make sure there are no important documents inside.
  2. Open Boot Camp Assistant. The easiest way to launch it is through Spotlight Search, which you can bring up by pressing Command and Spacebar. Press Enter to launch the app.
  3. Check the box for "Create a Windows 7 or later version install disk" and deselect "Install Windows 7 or later version."
  4. Click Continue to proceed.

    Boot Camp Assistant

  5. Boot Camp Assistant will automatically locate the ISO file from your downloads folder, but make sure it is the right file. Click the "Choose…" button and locate the ISO file. Make sure the destination disk is the USB thumb drive you've inserted.

  6. Click Continue. It can take about 20 minutes to format and set up the USB installer on the Mac.

    Boot Camp Assistant

  7. When Boot Camp Assistant is done, the USB drive will be renamed to WININSTALL. Click Quit to close the app and then Eject the USB drive.

    Windows 10 ISO

That's it! You now have a bootable USB drive with the Windows 10 installer. You can use it to configure new Windows 10 PCs from scratch. We told you it was easy!

Have you tried creating a Windows 10 installer USB drive from a Mac before? Did you encounter any issues? Let us know your experience in the comments!

How to turn your Windows 10 PC into a wireless hotspot

$
0
0

Windows 10 includes a feature called "Hosted Network" that allows you to turn your computer into a wireless hotspot, and this guide we'll show you how to do it.

Whether you're connecting to the internet using a wireless or wired adapter, similar to previous versions, Windows 10 allows you to share an internet connection with other devices with a feature called "Hosted Network".

Hosted Network is a feature that comes included with the Netsh (Network Shell) command-line utility. It's was previously introduced in Windows 7, and it allows you to use the operating system to create a virtual wireless adapter – something that Microsoft refers to "Virtual Wi-Fi"— and create a SoftAP, which is a software-based wireless access point.

Through the combination of these two elements, your PC can take its internet connection (be it an ethernet connection or hookup through a cellular adapter) and share it with other wireless devices — essentially acting as a wireless hotspot.

In this Windows 10 guide, we'll walk you through the steps to verify if your network adapter supports the feature, how to configure and enable a wireless Hosted Network, and how to stop and remove the settings from your computer when you no longer need the feature.

To follow this guide, you'll need to open the Command Prompt with administrator rights. To do this, use the Windows key + X keyboard shortcut, and select Command Prompt (Admin).

How to check if your wireless adapter supports Hosted Networks in Windows 10

While some adapters include support for Hosted Network, you will first need to verify your computer's physical wireless adapter supports this feature using the following command:

NETSH WLAN show drivers

If the generated output shows Hosted network supported: Yes, then you can continue with the guide. If your wireless adapter isn't supported, you could try using a USB wireless adapter that supports the feature.

How to create a wireless Hosted Network in Windows 10

Creating a wireless hotspot in Windows 10 is relatively straightforward — don't let the command line scare you. Simply follow the steps below to configure a wireless Hosted Network:

  1. While in Command Prompt (Admin) enter the following command:

    NETSH WLAN set hostednetwork mode=allow ssid=Your_SSID key=Your_Passphrase

    Where the SSID would be the name you want to identify your wireless network when trying to connect a new device, and the passphrase is the network security key you want users to use to connect to your network. (Remember that the passphrase has to be at least 8 characters in length.)

  2. Once you created a Hosted Network, enter the following command to activate it:

    NETSH WLAN start hostednetwork

How to share your internet connection with a Hosted Network in Windows 10

Up to here, you created and started a Hosted Network in your Windows 10 PC. However, any wireless capable device won't be able to access the internet just yet. The last thing you need to do is to share an internet connection using the "Internet Connection Sharing" feature from a physical network adapter.

  1. Use the Windows key + X keyboard shortcut to open the Power User menu, and select Network Connections.
  2. Next, right-click the network adapter with an internet connection – this could be a traditional Ethernet or wireless network adapter — select Properties.

    Note: In Network Connections, you should now see a new our new Microsoft Hosted Virtual Adapter which is labeled Local Area Connection* X, and with the SSID name.

  3. Click the Sharing tab.
  4. Check the Allow other network users to connect through this computer's Internet connection option.
  5. Next, from the Home networking connection drop-down menu select the Microsoft Hosted Virtual Adapter.

  6. Click OK to finish.

At this point, you should be able to see and connect any wireless capable device to the newly created software access point, and with access to the internet.

How to stop sharing an internet connection with other devices in Windows 10

If you want to temporary stop allowing other devices to connect wirelessly through your computer, you can type the following command in the Command Prompt and hit Enter:

NETSH WLAN stop hostednetwork

At any time, you can just use the start variant of the command to allow other devices to connect to the internet using your computer as an access point without extra configuration:

NETSH WLAN start hostednetwork

Similarly, you can also use the following command to enable or disable a wireless Hosted Network:

NETSH WLAN set hostednetwork mode=allow

NETSH WLAN set hostednetwork mode= disallow

How to change a Hosted Network settings in Windows 10

In the case you want to change some of the current settings, such as SSID or network security you can use the following commands:

NETSH WLAN set hostednetwork ssid=Your_New_SSID

NETSH WLAN set hostednetwork key=Your_New_Passphrase

How to view the current Hosted Network settings

There are two commands to view the Hosted Network settings on your computer:

The following command shows the mode and SSID name in use, max number of clients that can connect, type of authentication, and cipher:

NETSH WLAN show hostednetwork

And the following command will also reveal the current network security key among other settings, similar to the previous command:

NETSH WLAN show hostednetwork setting=security

How to disable a wireless Hosted Network in Windows 10

While the setup of a wireless Hosted Network in Windows 10 is not very complicated, Microsoft doesn't make very straightforward to remove the configurations when you no longer need the feature.

Although you can use the stop or disallow commands, these actions won't eliminate the settings from your computer. If you want completely delete the Hosted Network settings in Windows 10, you'll need to modify the Registry.

Important: Before you change anything settings on your computer, it's worth noting that editing the Windows Registry can be a dangerous game that can cause irreversible damages to your system if you don't know what you are doing. As such, it's recommended for you to make a full backup of your system or at least System Restore Point before proceeding with this guide. You have been warned!

  1. Open the Start menu, do a search for regedit, hit Enter, and click OK to open the Registry with admin rights.
  2. Scroll down the following path in the Registry:

    HKEY_LOCAL_MACHINE\system\currentcontrolset\services\wlansvc\parameters\hostednetworksettings

    Right-click the HostedNetworkSettings DWORD key, select Delete, and click Yes to confirm deletion.

  3. Restart your computer

  4. Open to the Command Prompt and use the following command:

    NETSH WLAN show hostednetwork

    You will know that you have successfully deleted the settings when the Settings field reads Not configured.

  5. Make sure you turn off "Internet Connection Sharing" in the physical network adapter that was sharing the internet with other devices. Use the Windows key + X keyboard shortcut to open the Power User menu, and select Network Connections.

  6. Right-click the network adapter, and select Properties.
  7. Click the Sharing tab.
  8. Uncheck the Allow other network users to connect through this computer's Internet connection option.

  9. Click OK to complete the process.

Things you need to know

Although the wireless Hosted Network feature in Windows 10 allows you to implement an access point solution to share an internet connection with other devices, it's not meant to be a solution to replace a physical wireless access point.

Also, there are a few things you want to consider. For example, wireless speeds will dramatically be reduced compared to the rates provided from a physical access point. Perhaps it would not be a big deal for internet browsing, but downloading or transferring big files could be an issue for some users.

You also need to consider that your computer needs to be always turned on to act as a wireless access point. If the computer enters into sleep, hibernate, or restarts, your wireless hotspot will stop working, and you will need to start manually the feature using the NETSH WLAN start hostednetwork command.

You cannot run a SorftAP and ad hoc at the same time on Windows. If you need to create a temporary network connection between two computers, setting up ad hoc will turn off SoftAP — you can run one or the other, not both at the same time.

Wrapping things up

Wireless Hosted Network is a nifty feature in Windows can be a great tool to have for when you need to create a wireless access point on the go. It won't match the performance of a physical wireless access point, but it can be useful for many unexpected scenarios — like having one wired ethernet connection and several devices you want to get online. It's not a replacement for the real thing, but in a sticky situation, it can be just the fix you need.

More resources

For more tips and tricks on Windows 10, and get the latest news, you can visit the following resources:


9 tips to help you fix OneDrive sync problems on Windows 10

$
0
0

When files stored on OneDrive aren't syncing on your Windows 10 PC, it's likely a problem with the desktop sync app, and in this guide, we'll help you fix the issue.

Although, Microsoft touts OneDrive as the best cloud storage experience in Windows 10 to store and sync your personal documents and settings across your devices, sometimes the desktop client sync app won't work as it should.

Since the cloud storage service has gone through some changes, reports from users about syncing related problems has been increasing. Users have been reporting issues uploading photos, the OneDrive desktop sync app on Windows 10 not connecting, sync problems after upgrading to Windows 10 from Windows 8.1, and then just simply not being able to sync files between devices.

While the company proactively continues to work to improve its cloud storage service with every new update that rolls out, in this Windows 10 guide, we'll walk you through the suggested Microsoft solutions to help you fix OneDrive sync problems.

Before fixing OneDrive sync issues

  • Make sure you have Windows 10 and OneDrive running the latest update. You can check for update on Settings > Update & security > Windows Update.
  • Make sure the file to sync is not larger than 10GB, which is the current size limit for the service.

1. Restart the OneDrive sync client app on your PC

If OneDrive isn't syncing any file or folder, the first thing you want to try is to reset the desktop sync client app.

  1. On the notification area, right-click the OneDrive (cloud) icon. (If you don't see the icon, click the Show hidden icons up arrow button on the far-left side of the notification area.)
  2. Click the Exit option.

  3. On the dialog box prompt click the Close OneDrive button.
  4. Open the Start menu, do a search for OneDrive, and open the desktop app. (This will open the OneDrive folder indicating that the app is running.)

2. Check if your OneDrive account is connected to Windows 10

When OneDrive isn't syncing, you want to make sure your account is connected to Windows 10, and you also want to ensure you're using the correct Microsoft Account.

  1. Use the Windows key + I keyboard shortcut to open the Settings app.
  2. Select Settings > Accounts > Your email and accounts
  3. If the account is not connected, click the Sign in with a Microsoft account instead option.

  4. Follow the on-screen instructions to switch to your Microsoft Account.

If you're not using the same Microsoft Account associated with your OneDrive account, you may want to create a new account using the correct credentials related to the cloud storage service. You can use this guide to learn how to manage user accounts in Windows 10.

3. Make sure you select OneDrive folders to sync

OneDrive has gone through a lot of changes lately, placeholders are gone and so is automatic syncing. In Windows 10, Microsoft has moved to selective sync, which means that you have to select manually the files and folders you want to sync before you can download or upload anything.

If you have just upgraded to Windows 10 from Windows 8.1, you can select the folders and files you want to sync using the following instructions.

  1. On the notification area, right-click the OneDrive (cloud) icon. (If you don't see the icon, click the Show hidden icons up arrow button on the far-left side of the notification area.)
  2. Select the Settings option.

  3. Click on the Account tab.
  4. Click the Choose folders button.

  5. Select either the Sync all files and folders in my OneDrive or select the files and folders you want to sync to your computer.

  6. Click OK to save the new changes.

Note: Keep in mind that if you don't choose to sync all your OneDrive folders when someone else shares a new folder or file, the new content won't sync with your computer until you manually select it to do so.

4. Complete the OneDrive setup process

In case you're on a brand new computer, your files may not be syncing because you probably haven't finished the OneDrive configuration.

  1. Use the Windows key + E keyboard shortcut to open Explorer.
  2. Click the OneDrive (blue) folder from the left pane to open the wizard.

  3. Select the folders and files you want to sync to complete the setup.

5. Keep file path short in OneDrive

Another factor that can cause OneDrive not to sync some data is the length of the path. According to Microsoft, the path, including the filename, should not exceed 255 characters.

Long file path example: C:\Users\You_User_Name\Pictures\EveryYear\2016\
January\Holiday\Christmas\Home\This_is_my_picture_with_a_long_name.jpg

You can try making the file name shorter and avoid having too many subfolders, inside of subfolders, by bringing folders closer to the root directory.

6. Check your PC's available storage space

OneDrive no longer offers placeholders to indicate content that is only available with an internet connection, which means that your computer must have (at least) the same amount of available space as the storage you're using in OneDrive. Otherwise, if you don't have enough available local storage, OneDrive won't sync your files.

To make more room on your computer's hard drive, move or delete some of your files on your computer.

  1. Check the amount of storage you're currently using on OneDrive and compare it to the available hard drive space in your computer on, and delete or move files as necessary.

  2. Click on Start, search for OneDrive to open the desktop client sync app.
  3. Follow the instructions to select the files you want to sync to your computer and choose the location to sync your personal files.

Bonus: How to use Disk Cleanup on Windows 10

You can also use the Disk Cleanup tool built in Windows to free up disk space, which you can easily do with the following instructions:

  1. Use the Windows key + E keyboard shortcut to open Explorer.
  2. Click This PC from the left pane.
  3. Right-click the hard drive you want to sync your files, and select Properties.

  4. Click the Disk Cleanup button.

  5. Click Clean up system files.

  6. Select the files you want to delete. If applicable, you also want to check the Previous Windows Installations item too.
  7. Click OK.

  8. Click the Delete files button on the dialog box.

Note: It's worth pointing out that if you delete the previous Windows installation files, you will no longer be able to roll back to the previous version of the operating system.

7. Check for conflicting files or folders in the same location

You may come across conflicts if you are making changes to a folder with files trying to sync, or when you try to upload multiple files using the OneDrive web experience. If you notice conflicting content, rename the files or folders, and try syncing one more time.

8. Unlink OneDrive and start over

There could be an issue with your account settings on your computer that is preventing OneDrive to sync your files. If this is the case, you can unlink your account and go through the setup wizard one more time.

  1. On the notification area, right-click the OneDrive (cloud) icon. (If you don't see the icon, click the Show hidden icons up arrow button on the far-left side of the notification area.)
  2. Select Settings.

  3. Click the Unlink OneDrive button.

  4. The desktop sync app will launch and follow the instructions to select the files you want to sync to your computer and choose the location to sync your personal files.

9. When nothing else is working, reset OneDrive

When you have tried everything and nothing seems to fix the sync issue. You can reset the OneDrive desktop client sync app.

  1. Use the Windows key + X keyboard shortcut to open the Power User menu, and select Command Prompt (Admin).
  2. Type the following command: %localappdata%\Microsoft\OneDrive\onedrive.exe /reset and hit Enter.

  3. Make sure the OneDrive icon is no longer visible in the taskbar's notification area (bottom right corner) to verify the command worked.

  4. According to Microsoft, the icon should re-appear after two minutes. If it doesn't re-appear, open Start, do a search for OneDrive and hit Enter to restart the desktop sync app.

More resources

For more tips and tricks on Windows 10, and get the latest news, you can visit the following resources:

Have you come across any sync issues with OneDrive? How did you fix the problem? Tell us in the comments below.

How to enable 6-digit PIN to lock your Windows 10 Mobile phone remotely

$
0
0

Did you get locked out of your phone or it got lost or stolen? This guide will show you the steps to enforce a new 6-digit PIN to lock/unlock your Windows 10 Mobile phone.

Windows 10 Mobile offers different options to sign into your phone as the first line of defense against prying eyes. If you're a Windows Phone user, you already know two locking mechanisms: the standard PIN password and Windows Hello, which is a new feature that uses iris scanner as a form of authentication.

However, Microsoft also offers a third method to lock your phone, which is a 6-digit PIN feature that can be enabled through your Microsoft Account online, and allows you to lock your phone remotely.

The main reason for this third locking mechanism is to add an extra layer of security if your phone ever gets lost or stolen. While you can configure Windows Hello, which is very secure, anyone can still have access to the Lock screen and guess your PIN -- even more likely if the device falls into the hands of someone you know. Additionally, if for any reason you get locked out of your phone, you can also set a 6-digit PIN remotely to unlock the device without having to wait hours before trying again.

In this Windows 10 guide, we'll walk you through the steps to set a 6-digit PIN to lock your phone and how to go back to your original PIN once you regain physical control of the device.

How to secure your Windows 10 Mobile phone using a 6-digit PIN

  1. Open your web browser and access your Microsoft Account with the credentials you're using on your phone.
  2. On Your devices, click the Find my phone link for the device you want to lock remotely.

  3. On the Find My Phone page, click the Lock button.

  4. Enter the 6-digit PIN you want to use.

    Note: Keep in mind that a new 6-digit PIN is all you need for the feature to work, but you can also include a phone number where you can be reached. You can also add a message of up to 160 characters that will appear on the Lock screen.

  5. Click the Lock button to complete.

Now your mobile device will lock immediately, and anyone trying to sign in will see a pop-up message with your custom text and call back number. (Only you with the new PIN will be able to unlock the phone.)

How to revert to your original PIN password on Windows 10 Mobile

Once you set a 6-digit PIN to lock your phone remotely, it will become your PIN to unlock your phone every time you want to sign in. If you want to go back to your original PIN, you will need to change your sign-in options in the Settings app.

  1. Open the Settings app on your Windows 10 Mobile phone.
  2. Tap Accounts.

  3. Tap Sign-in options.

  4. Under PIN, tap Change.

  5. Enter your current 6-digit PIN password in the first field, then enter and confirm your new PIN, and tap OK.

Now you should be able to lock and unlock your Windows 10 Mobile phone using your original PIN.

It's important to note that you don't need an active phone line, as long the device is connected to the internet, you'll be able to lock it. Additionally, Microsoft will send you an email letting you know your device has been locked with the 6-digit PIN in case you forget it.

The 6-digit PIN is not only useful when your phone gets lost or stolen, but it can come in handy in certain other scenarios too. For example, it could happen that after installing the latest preview of Windows 10 Mobile and hard resetting it, or you tried to sign in too many times, you'll get greeted with a message that reads: "This device has been locked for security reasons. Connect your device to the power source for at least two hours, and then try again." Instead of waiting, you can use the instructions above to set a new PIN and unlock your phone.

What do you think about the 6-digit PIN password option on Windows 10 Mobile Tell us what you think in the comments below.

More resources

For more Windows 10 Mobile tips and tricks, and the latest news, you can visit the following resources:

How to remove personal information from pictures on Windows 10

$
0
0

You're probably sharing personal information every time you upload a picture online. In this guide will show you the steps to remove EXIF metadata properties from image files on Windows 10.

You probably didn't know this, but every time you take pictures with your digital camera or using the camera on your smartphone, pieces of information, such as the location where the picture was taken, date and time, and camera settings are saved into the file along with the image you captured.

This kind of information is typically stored as EXIF (Exchangeable Image File Format) metadata which is part of the image file — typically for JPEG format files. Properties that can be stored as EXIF metadata will vary on the features supported by your camera, but usually, it will include GPS location coordinates, date and time, the application used to create or edit the file, and camera settings like make and model, aperture, ISO speed, and focal length.

If you're a photographer, EXIF metadata can be valuable information, but for the average user, it can be a privacy concern as few simple clicks can potentially reveal personal information to strangers.

In this Windows 10 guide, we'll show you some easy steps to remove sensitive personal information in your pictures and how to stop your camera from saving location data in the future.

How to remove personal information from pictures

  1. Right-click the file and select Properties. (Alternatively, if you're editing a single file, you can just press and hold the Alt key and double-click the image file to access its properties.)
  2. Click Details.
  3. On this section, you can examine EXIF metadata available for the particular file. Click the Remove Properties and Personal Information link.

  4. On the Remove Properties section, select the Remove the following properties from this file option.

    Note: You'll notice that there is also a Create a copy with all the possible properties removed option, but a bug makes this option unusable in Windows 10. However, the option works with the latest Insider preview of the operating system.

  5. Check each box for the properties you want to remove or click the Select All to remove all potential properties.

  6. Click OK to remove the selected information from the image's EXIF metadata

It's important to note that you can remove information embedded in one or multiple pictures at the same time. If you want to delete the same properties on multiple files, just select the files you want to edit, right-click on them, click Properties, and continue with the steps listed above.

How to stop your Windows 10 Mobile camera from saving GPS location on new pictures

While it's almost unlikely to be able to stop cameras from storing all EXIF metadata, you can prevent GPS location from being included in future images — an important step in protecting your privacy online.

If you own a Windows 10 Mobile phone, you can use the following steps to turn off location on your camera:

  1. Open the Settings app on your phone.
  2. Tap Privacy.
  3. Tap Location.
  4. Scroll down and under "Choose apps that can use your location" tap the switch under Camera to turn off location logging.

On digital cameras with built-in GPS, you can also open the configuration section to disable the location feature. Keep in mind that almost every manufacturer has its own way of implementing settings, as such make sure to check your device's support website for more information.

Furthermore, every bit counts when you need to save disk space and bandwidth. If you have a large collection of pictures, you can remove EXIF metadata to make images a little smaller without having to sacrifice quality, instead of using compression.

More resources

For more tips and tricks on Windows 10, and get the latest news, you can visit the following resources:

Do you usually remove personal information from pictures? Let us know in the comments the techniques you use.

How to download Xbox One achievement images on full HD in Windows 10 without an app

$
0
0

If you want to show off your Xbox One achievements on your Windows desktop and in full HD, you can do that with ease.

Achievements on Xbox One are rewards granted to users after completing certain activities within a game or even an app. You can view your achievements on your Xbox, through your Xbox Live account on the web, and through the Xbox app— and you can easily set achievements as your dashboard background on Xbox One, but it's a little more involved on a Windows PC. There's a nice little Windows 10 app called Achievement Art to browse and use the achievement images to personalize your desktop. But you can do it without any app in any version of Windows. Here's how:

How to download high-resolution Xbox One achievement images

  1. Open your web browser (e.g., Microsoft Edge), visit Xbox.com.
  2. Sign-in with your Xbox Live account.
  3. On your profile, click on Achievements.
  4. Click on any game or app you want.

  5. Click on any unlocked achievement. A larger preview of the achievement image will open.

  6. On Microsoft Edge, right-click the low-resolution version of the achievement image, and select Copy.

  7. Use the Ctrl + Tab keyboard shortcut to open a new tab.
  8. Right-click in the address bar click Paste. The URL of the image you copied will be pasted.
  9. Scroll to the end of the URL and delete this bit: &format=jpg&h=640&w=1138.

  10. Hit Enter, The high-resolution version of the Xbox One achievement image will download.

  11. Right-click the image, select Save as, and choose the folder you want to store the image.

How to personalize your PC using Xbox One achievement images

After downloading the high-resolution Xbox One achievement images, you can easily use them as Lock screen or desktop backgrounds, and you can share them with friends using the following instructions.

Set a new desktop background

  1. Use the Windows key + I keyboard shortcut to open the Settings app.
  2. Click Personalization.
  3. Click Background.
  4. Under Background, choose whether you want to use one Picture or Slideshow.
  5. Click the Browse button.

  6. Select the image or folder with the images you want to set as background and click the Choose picture or Choose this folder depending on your option.

Set a new Lock screen background

  1. Use the Windows key + I keyboard shortcut to open the Settings app.
  2. Click Personalization.
  3. Click Lock screen.
  4. Under Background, select Picture.
  5. Click the Browse button.

  6. Select the image you want to set on the Lock screen and click the Choose picture button.

Create a Windows Theme with Xbox One achievement images

Additionally, you can group your Xbox One achievements images into a Windows theme pack that you can then use on other computers or share it with someone else.

  1. Use the steps mentioned above set a desktop Slideshow with the images in you to want to include in your theme.
  2. Use the Windows key + I keyboard shortcut to open the Settings app.
  3. Click Personalization.
  4. Click Themes.
  5. Click the Theme settings link.

  6. Right-click the theme that is currently labeled as "Unsaved Theme" with your achievements images, and select Save theme for sharing.

  7. Enter a name of the new theme, select the folder where to store the theme, and click Save.

Windows themes will be saved as .deskthemepack file format that you can install on any Windows 8.1 or Windows 10 computer by just double-clicking the file. It's worth pointing out that the instructions in this guide can also apply for users who want to download Xbox One achievement images on previous version of the operating system, including Windows 7.

Resources

For more tips and tricks on Windows 10, and get the latest news, you can visit the following resources:

Do you have another technique to download achievements to your desktop? Let us know in the comments below.

How to generate a Battery Report in Windows 10

$
0
0

Editor's Note: With the new Surface Book and Surface Pro 4 firmware last night, we figured this would be a good how-to to re-run for those wanting to see if the patch fixed things. You can also do a Sleep Study as well.

If you are running Windows 10 on a laptop or tablet battery life is one of the most important things you are constantly observing. There is never enough battery for a portable device, so how we manage them is important.

Checking the estimated battery life on your laptop or tablet is super simple. Just click the battery icon in the notification area and you can see the percentage battery left and the estimated time you have to work. That estimate, however, is just that, and it is solely dependent on what you are doing at that moment. Just because it shows 8 hours does not mean you can get that much time if you start gaming, for instance.

This issue brings up the question: What is your actual battery life on your laptop? In other words, from your real-life usage combined with charge and discharge rates is there an actual battery time? The answer is yes, although to find it is a bit tricky.

By no means is this method new, in fact, every recent version of Windows can do it not just Windows 10. However, for many people just starting out you will want to know this command. Let's go!

How to generate a Battery Report in Windows 10

1. Right-click on the Start menu to bring up the menu

2. Command Prompt

Choose Command Prompt (Admin) from the menu. Note that this must be the Admin version and not a regular command prompt.

3. Yes to UAC prompt

A prompt will appear to which you need to give permission

4. Command

Copy and paste powercfg /batteryreport /output "C:\battery_report.html" into the command prompt window. Note that for the pros you can designate the output to any directory. For simplicity, we are placing it in the C:\ root folder.

5. Open file

Using Explorer navigate to C:\ aka the root directory. You should see a file labeled battery_report.html. Double-click on it to open the file in your default browser e.g. Microsoft Edge, Chome, Opera.

That's it!

Making Sense of the Report

The report itself is made up of a few somewhat obvious subsections. The first area defines the parameters of the hardware, OS version, and other file details. Here you can see samples from my MacBook Pro running Windows 10, although it works on any portable device. Note that this report does not generate for desktop PCs for somewhat obvious reasons.

The next section is called Installed batteries and gives a general breakdown of the battery installed on your computer. This information includes name, manufacturer, chemistry, design capacity and full charge capacity.

Recent Usage is a very useful section as it details the time, state (active, suspended), power source and remaining capacity of the battery. In short, this is the record of when the laptop went to sleep, became active, and or charged with AC power along with the mWh capacity. If your computer is waking when it should not, you should see it here. There is also a nifty Battery Usage graph below this area.

Other areas like Usage history and Battery capacity history are good to check for battery health. It is well known that Li-On batteries deteriorate over time, and this is where you can see that happen.

Battery life estimates is probably the most interesting section for most users. Here you can see what the OS is predicting for your computer's battery life with regular usage. This feedback tends to be more stable and accurate than the live estimate found by clicking the battery icon.

Like all data sources, the more information this tool has, the more accurate the report. If you just installed a new OS (including some Insider builds), you need a few power cycles and a few days for the Battery Report to have enough data for it to be valuable. The longer you use the OS and the more you keep the laptop off of AC power the better the estimates are for the long run.

Regardless, you now know a cool trick to get a lot more details about your laptop's battery! Make use of it and occasionally check it to make sure nothing is going wrong.

More Resources

Remember that we have many other articles on Windows 10, if you need help you always check these other resources:

Our definitive review of Windows 10

Windows 10 on Windows Central – All you need to know

Windows 10 help, tips, and tricks

Windows 10: Help and discussion forum at Windows Central

How to make older desktop apps run again on Windows 10

$
0
0

If you have an older desktop application that isn't running on Windows 10, use this guide to configure the appropriate compatibility mode settings.

Although, Windows 10 is not very different from previous versions regarding handling desktop applications, sometimes older apps designed for earlier versions (e.g., Windows XP or Windows 7) may not run as expected or they won't even start. However, in most cases, you can try to use the compatibility mode feature built into the operating system to resolve this issue.

In this Windows 10 guide, we'll walk you through the easy steps to let the operating system automatically fix the compatibility issue and how you can set the compatibility mode options manually to get older apps running again on your desktop.

Before diving into this guide, it's important that you take the time to check to see if there is any new update available for the application that might fix the problem and may save you from having to go through all the steps below.

How to use the Program Compatibility Troubleshooter

If you have an application designed for Windows XP or Windows 7 that refuses to run on Windows 10, you should try running the Program Compatibility Troubleshooter utility to let the operating system automatically find the best possible compatibility mode.

  1. On the Start menu, do a search for Run programs made for previous versions of the operating system, and press Enter.

  2. Click the Advanced link on the Program Compatibility Troubleshooter.

  3. Click Run as administrator.

  4. Click Next.
  5. The troubleshooter will scan the PC for possible solutions. If your desktop application isn't listed, select the Not Listed option, and click Next.

  6. Click the Browse button and locate the application. Usually, you will find your desktop applications installed under the C:\Programs Files (x86) or C:\Program Files folder.
  7. Make sure to select the file that runs the application and click Open. (Usually, the app file looks like this: YourAppName.exe.)
  8. Click Next.

  9. Click the Try recommended settings option to apply the new compatibility settings.

  10. Click Test the program to see if the application works properly.
  11. Click Next.

  12. Click Yes, save these settings for this program option to complete the process.

  13. Click Close to complete the process.

How to change Compatibility mode options manually

If you want to change the compatibility settings manually, you can use the following instructions.

  1. Open the Start menu, do a search for the application you wish to troubleshoot, right-click and select Open file location.

  2. The file location will open highlighting the executable file that runs the app. Right-click the app you want and click Properties.

  3. Click the Compatibility tab.
  4. Check the Run this program in compatibility mode option, and select the version of Windows you remember worked for the application.

  5. In the Settings section, you can also change a number of options that may help to fix the problem, including the ability to run the programs as an administrator, change high DPI and resolution settings. Choose the options that apply your application.

  6. Click Apply.
  7. Click OK to complete the process.

Note: Keep in mind that changes you configure on the Compatibility tab only applies to your account. If you want to apply the settings to all users in your computer, you must click the Change settings for all users button, and make the set the options in the "Compatibility for all users" tab.

Once you apply the new settings try to run the desktop application, if it's still not working, go back to the Compatibility tab, and try configuring a different version of the operating system until you find a setting that works for that particular application.

It's worth pointing out that you shouldn't apply compatibility mode settings to applications bundled with the operating system, hard drive utilities, and on antivirus and firewall software, as they may open up security risks or cause data loss.

More on Windows 10

For more tips and tricks on Windows 10, and get the latest news, you can visit the following resources:

Do you still depend on older desktop apps on Windows 10? Let us know in the comments below.

How to properly remove the Windows.old folder on Windows 10

$
0
0

Did you upgrade to Windows 10 or install a new Insider test build? Then use this guide to get rid of the Windows.old folder that is only wasting gigabytes of space in your PC's hard drive.

Every time you upgrade your PC from an older version of Windows to Windows 10 without first formatting the hard drive, or when you install a new Windows Insider Preview test build, the install wizard will save a copy of the previous version inside of the "Windows.old" folder on your computer.

This copy is a safeguard mechanism in case something goes wrong during the installation process. If something bad happens, the operating system can use the backup copy to roll back any change automatically. Or in the case of Windows 10, you also get the option to go back to your previous version of the operating system within the first month if you don't like it.

If everything is working as expected after upgrading to Windows 10, you probably don't need these files, as they will just be wasting precious hard drive space. In this Windows 10 guide, we'll walk you through the steps to delete the Windows.old folder and other files that can be taking more than 15GB of storage space on your computer.

How to delete the Windows.old folder on Windows 10

The Windows.old folder resides in the hard drive where the operating system is currently installed (typically the C: drive). However, you can't just hit the delete key and to make it disappear, you need to use the Disk Cleanup tool.

  1. Use the Windows key + E keyboard shortcut to open File Explorer.
  2. From the left pane, click This PC.
  3. Under Devices and drives, right-click the drive with the Windows 10 installation, and click Properties.

  4. Click the Disk Cleanup button.

  5. Click the Clean up system button.

  6. Select the Previous Windows Installation(s) option to delete the Windows.old folder. Here you can also choose to delete other installation related files, including Windows upgrade log files and Temporary Windows installation files, which can take up several gigabytes of storage as well.

  7. Click OK.
  8. Click Delete Files on the pop-up dialog to confirm the deletion.
  9. On the Disk Cleanup warning click Yes to complete the process.

While saving a previous installation is a useful method to rollback in case of problems, if the installation completes successfully, the Windows.old folder and other related installation files will just waste valuable storage space on your computer. Even more on mobile devices with limited storage, such as particular models of Surface and low-end PCs.

Keep in mind that it's safe to delete the Windows.old folder and related files from your computer. However, you should also consider that after removing these files, you will no longer be able to roll back to the previous version of Windows 10 using the recovery options. After deleting the Windows.old folder, the only way to go back is by performing a clean installation of the operating system.

Resources

For more tips, coverage, and answers on Windows 10, you can visit the following resources:


5 tips to free up hard drive space on your Windows 10 PC

$
0
0

When you're running out of hard drive space, use this guide to delete wasteful files and folders from your Windows 10 PC.

While storage devices keep getting larger, and price per gigabyte keeps coming down, we also keep filling up drives with more pictures and videos we take with our mobile devices in addition to the many files we download from the internet. This problem is even bigger when you have a computer with limited storage or solid-state drive (SSD), which still doesn't offer a lot capacity compare to traditional rotating platters hard drives.

If you're starting to notice that the available space is shrinking fast on your computer's internal or external hard drive, your first strategy shouldn't be buying a new drive to expand the storage. Instead, you should analyze and delete those files that are just wasting valuable space.

In this Windows 10 guide, we'll show you five tips to reclaim some hard drive space on your computer.

1. Delete unnecessary files

We often have the tendency to save a lot of files, even if we're never are going to need them. Moreover, we store these files in nested folders, and we never really understand the space they end up wasting in the hard drive. In part because Windows doesn't provide folder size on File Explore by default.

However, in Windows 10, we can use the Store settings to get an overview on how space is being utilized on the main system drive and external hard drives. But more importantly, now you can see which folders are using the most space, which can help you to identify and make a decision on the files you can delete to free up some storage.

Here's how to find and delete temporary files:

  1. Use the Windows key + I keyboard shortcut to open the Settings app.
  2. Click on System.
  3. Click on Storage.
  4. Under Storage select the drive you want to analyze. (Note that the This PC drive is the main computer's hard drive where Windows 10 is installed.)

  5. On Storage usage, you can see that Windows 10 categorizes the content based on default folders (e.g., Documents, Pictures, Music, etc.), apps and games, and system files, and you can view the storage usage. Simply click on of the item's name to get more information.

  6. If you want to delete its content, click the view button to open the folder location, and delete the files you don't need.

  7. Go back to Storage usage and click on Temporary files. In this section, Windows 10 will list different kind of temporary files you may want to delete, including Temporary files, Downloads folder, Recycle bin, and more. Click on the button of the content you want to remove and follow the instructions to delete the files.

  8. Go back to Storage usage and now click Other. Windows 10 uses this section to list all the folder that couldn't be categorized. Identify which folders are using the most storage space and click on them to access the location.

  9. Select its content, right-click, and select Delete to remove the files and folders.

2. Delete File History versions

If you're running out of space on your external hard drive, it's possible that you've configured File History to keep your personal files constantly backed up.

However, it's likely that you've only set the basic settings, which by default creates copies of your files every hour and keeps them forever. This setup configuration can quickly use a large amount of storage shrinking the available space that you could use for other storage.

Here's how to change the File History version setting and how to use the cleanup tool to delete older version of files and folders:

  1. Use the Windows key + X keyboard shortcut to open the Power User menu and select Control Panel.
  2. Click File History.
  3. On the left pane, click Advanced settings.

  4. Under Versions, change the default options by clicking the drop down menu on the right for Save copies of files and Keep saved versions to the best options that suit your needs. For example, Every 12 hours and 3 months respectively.

  5. Click the Clean up versions link.
  6. In the File History Cleanup tool, select the file versions you want delete from the drop down menu. For example, select the All but the latest one option, if you wish to get the most space by only keeping one version of the files.

  7. Click the Clean up button to complete the process.
  8. Click the Save changes button on Advanced settings to commit the new changes.

With these new settings tweaks, you will reclaim a healthy amount of available space, and future File History backups will take less space as we have reduced the frequency in which each file backup is triggered.

3. Uninstall apps you don't need

Uninstalling applications you rarely use can help to free up some space too.

In the past, we only needed to open Programs and Features in Control Panel to get rid of applications. However, in Windows 10, you can now use the Settings app to uninstall traditional desktop programs as well as the new Windows Store apps.

Here's how to uninstall desktop and Store apps:

  1. Use the Windows key + I keyboard shortcut to open the Settings app.
  2. Click System.
  3. Click Apps & features.
  4. Identify the applications you don't need and are using the most space on your computer. Select an app and click the Uninstall button.
  5. Confirm by clicking the second Uninstall button.

  6. If the you're trying to uninstall a Windows 10 Store app, no further action is required. If it's a legacy desktop application, you will need to follow the on-screen directions to complete the uninstall.
  7. Repeat the steps to remove any other application.

4. Delete duplicate photos

Duplicates photos can waste valuable space on your PC's hard drive, external storage, and even on OneDrive -- now that users no longer can enjoy unlimited storage. If you often take multiple pictures of the same thing, you can use third-party tools, such as Awesome Duplicate Photo Finder, to find and delete duplicate images.

Note: Keep in mind that the tool we're mentioning today is a free third-party software, and as always download and use at your own risk.

  1. Visit the Duplicate Photo Finder download page, and click the Download portable version link to download the application on your computer.
  2. Right-click the zip folder and select Extract all.
  3. Click the Extract button.

  4. The tool is portable, which means no installation is required. Simply double-click the AwesomePhotoFinder.exe file you extracted to launch the tool.
  5. On the Awesome Duplicate Photo Finder main screen, click the plus "+" sign button to add a folder location you want to scan for duplicate images.
  6. Click the Start Search button to begin the scan.

  7. After the scan completes, you'll be presented with all the duplicate pictures and similarity score. Click the Delete button on the images you don't want to keep.
  8. Click Yes to confirm deletion to the Recycle bin.

  9. Repeat the same process until there no more photos listed in the application.

Now the folder you scanned should only contain one version of a particular photo. If you change your mind, you can restore the images from the Recycle bin.

It's worth noting that even though Awesome Duplicate Photo Finder hasn't been updated for quite some time, all its features should work as expected. Also, if you use the portable version, you don't need to install anything, which can prevent unexpected results in your computer.

5. Delete previous installations of Windows

When you upgrade to Windows 10 without formatting, or you install a new test build of the operating system, a copy of the previous installation will be stored on your computer inside the Windows.old folder.

The backup copy of your PC's previous installation is a mechanism the operating system uses to roll back in case something goes wrong during the upgrade. However, after the upgrade completes successfully and if you're not planning to go back to the previous version of Windows, these temporary files will just be wasting valuable space on your computer.

Luckily, the operating system ships with its Cleanup tool to delete system temporary files. Use this guide to remove a previous installation of Windows, which can help you to reclaim over 15GB of storage space.

More on Windows 10

For more tips, coverage, and answers on Windows 10, you can visit the following resources:

Do you use any other techniques to free up storage space in your PC? Tell us in the comments below.

How to create a System Restore Point in Windows 10 with a simple double-click

$
0
0

In this guide, we'll show you the quickest way to create a System Restore Point on your Windows 10 PC with a simple script.

Windows 10 ships with many recovery features that can help you to fix most problems you may come across. One of these functions includes System Restore Point, which allows you to take your PC back to a point in time where everything correctly worked if there are problems due to a recently installed update, driver, or app.

Typically the operating system will create a new restore point before changes are made to your computer, and you can also create restore points manually. However, in this Windows 10 guide, we'll walk you through the steps to create a desktop shortcut with a special script, which it'll allow you to create new restore points with a simple double-click.

How to check if System Restore Point is enabled in your PC

Before diving in, you first need to make sure that System Restore Point is enabled on your PC:

  1. Open the Start menu, do a search for Create a restore point, and press Enter.
  2. On System Protection, under Protections Settings, verify whether the setting is turned On or Off. If the system drive's protection is On, then no further actions are required, and you can jump to "How to create a System Restore Point shortcut script" below.

    If it's the system protection is Off, select your PC system drive, and click the Configure button.

  3. Select the Turn on system protection option.
  4. Click Apply.
  5. Click OK.

How to create a System Restore Point Shortcut script

To create a restore point with a double-click follow the steps below:

  1. Right-click on the desktop, select New, and click Shortcut.

  2. On the Create Shortcut wizard, type the this command:

    cmd.exe /k "wmic.exe /Namespace:\\root\default Path SystemRestore Call CreateRestorePoint "My Shortcut Restore Point", 100, 7", and click Next.

    Note: The command basically tells the operating system to open Command Prompt and use Windows Management Instrumentation Command-line (WMIC) tool to create a system restore point of your Windows 10 PC.

  3. Enter a descriptive name for the shortcut, and click Finish.

  4. Right-click the newly created shortcut, and select Properties.
  5. If you want to add a more appropriate icon, click the Change icon button.

  6. In the field type the following path C:\Windows\System32\imageres.dll and press Enter.

  7. Select the icon you want and click OK.
  8. Click the Advanced button.
  9. Select Run as administrator.

  10. Click OK.
  11. Click Apply.
  12. Click OK to complete the task.
  13. Finally, double-click the desktop shortcut to test if a system restore point can be created. If you get a Command Prompt with the output identical to the screenshot below, then everything is working correctly.

Now the next time you're about to install a new app, driver, or you're planning to modify anything on your PC, you can quickly double-click the shortcut to create a new restore point, instead of going through a number of other steps.

Note that we're focusing this guide for Windows 10, but these steps will also work on Windows 8.1 and Windows 7 PCs. Also, it's important to point out that on Windows 8.1 and newer versions, the script will run, but it won't create a new restore point if there are earlier points created in the past 24 hours. If this is the case, you'll need to delete previous restore points for the script to work:

  1. Open the Start menu, do a search for Create a restore point, and press Enter.
  2. Select the hard disk you want to create a new restore point.
  3. Click the Configure button.
  4. Click the Delete button.

  5. Click Continue to confirm deletion.

More on Windows 10

For more tips, coverage, and answers on Windows 10, you can visit the following resources:

How to upgrade from a 32-bit to 64-bit version of Windows 10

$
0
0

If your PC has a 32-bit version of Windows 10, then you're missing out on some productivity advantages. Use this guide to switch to the 64-bit version.

Microsoft offers Windows 10 as a free upgrade for computers running a genuine copy of Windows 7 or Windows 8.1. Also, similar to previous releases, the operating system is available on different editions and two versions: 32-bit and 64-bit.

While upgrading from Windows 10 Home to Windows 10 Pro is not free, what many people are unfamiliar with is that Microsoft won't ask for more money to upgrade from a 32-bit to a 64-bit version.

However, the upgrade path only allows moving from a qualifying version to its equivalent edition on the same architecture. This limit means that if your PC is running a 32-bit version of Windows 8.1, after the upgrade you'll be stuck with the 32-bit version of Windows 10 -- even if your computer's processor can handle the 64-bit version. The only solution is to make a clean installation of the operating system and reconfigure all your apps and settings.

In this Windows 10 guide, we'll walk you through the steps to verify whether your computer in fact includes support for a 64-bit version and we'll guide you through the upgrade process to Windows 10 (x64).

Make sure Windows 10 64-bit is compatible with your PC

A 64-bit version of Windows can only be installed on computers with capable hardware. As such, the first thing you need to do is to determine whether your computer has a 64-bit processor.

You can easily get this information from the Settings app.

  1. Use the Windows key + I keyboard shortcut to open the Settings app.
  2. Click System.
  3. Click About.
  4. Under System type, you will see two pieces of information: if it says 32-bit operating system, x64-based processor, then it means that your PC is running a 32-bit version of Windows 10 on a 64-bit processor. If it says 32-bit operating system, x86-based processor, then your computer doesn't support Windows 10 (64-bit).

Alternatively, you can open System Information to gather the processor information:

  1. Open the Start menu, do a search for System Information, and press Enter.
  2. Under System Summary, on the right side, look for System Type. If you see x64-based PC, then your computer is capable of running a 64-bit version of Windows. If you see x86-based PC, then you can't install another architecture of the operating system.

Also, even though most current PCs will run Windows 10, if you have an older computer, you'll also need to make sure the processor includes the required features. According to Microsoft's support page in Windows 8.x and later, the operating system requires three essential characteristics, including Physical Address Extension (PAE), No-eXecute (NX), and Streaming SIMD Extensions 2 (SSE2). Additionally, Windows 10 (64-bit) also requires CMPXCHG16b (CX16) feature to be present in the processor.

The Windows Setup wizard always checks for hardware compatibility before the installation begins. If these features are not supported by the processor, Windows 10 won't install.

If you want to verify that your computer includes support for these features, you can use a command-line tool called Coreinfo from Microsoft's Windows Sysinternals.

  1. Visit Windows Sysinternals and download Coreinfo.

  2. Open the folder you downloaded Coreinfo, right-click the zip folder, and select Extract all.

  3. When the Coreinfo folder opens, click on File, and select Open command prompt.

  4. Type the command coreinfo and press Enter.
  5. Coreinfo will now list the processor information and make sure PAE, NX, SSE2, and CX16 are present (you can use Ctrl+F keyboard shortcut to open the find command). If the four features are present, then you can upgrade to Windows 10 (x64).

Make sure there 64-bit versions of device drivers

Also, you also want to ensure that other components in your system, such as video and sound cards are 64-bit compatible, as 32-bit versions of drivers won't work.

If your computer is only a few years old, it's more than likely that there are 64-bit drivers available. However, older components may not even be supported anymore. Before switching from a 32- to a 64-bit version of Windows, check your manufacturer's website to see if there are 64-bit drivers available.

Make a full backup of your PC

You will be doing making significant changes on your computer, as such it's a good idea to make a full backup of your system before upgrading.

You can use our previous guide to make a full backup of Windows 10, Windows 8.1, and even Windows 7.

Remember that you will also need to backup your personal files to an external drive or OneDrive, as they will be deleted during the installation process.

Make a clean install of Windows 10

Because there is not a direct path from 32-bit to a 64-bit version of Windows 10, the only solution is to make a clean installation of the operating system.

Quick Tip: Before making a clean install, it's a good idea to make sure your copy of Windows 10 is properly activated. You can view this information on Settings > Update & security > Activation.

Create Windows 10 installation media

  1. Connect a USB drive with at least 4GB of available space.
  2. Visit Microsoft's Windows 10 download page.
  3. Click the Download tool now button and save the Media Creation Tool on your desktop.

  4. Double-click the MediaCrationTool.exe file.
  5. Read the license terms and click Accept.
  6. Select the Create installation media for another PC option.
  7. Click Next.

  8. Uncheck the Use the recommended options for this PC option.
  9. Make sure to select your language, edition, and, more importantly, the architecture, which in this case is 64-bit (x64).
  10. Click Next.

  11. Select the USB flash drive option.
  12. Click Next.

  13. Select the removable drive from the list.
  14. Click Next.

  15. Once the installation media is created, close the Media Creation Tool.

Install a 64-bit version of Windows 10

  1. Restart your PC with the installation media connected and begin the installation of Windows 10.
  2. On the Windows Setup, click Next.
  3. Click Install now.
  4. As you previously have an activated version of Windows 10, you can skip the option if you're prompted to enter a product key.
  5. Accept the licensing agreement and click Next.
  6. Click the Custom: Install Windows only (advanced) option.

  7. Select and delete system partitions -- usually: Drive 0 Partition 1 and Drive 0 Partition 2.

  8. Click Next and follow the on-screen directions to complete the installation.

After the installation, make sure to go to Settings > Windows Update to download the latest updates and drivers. If some of the drivers are not available through Windows Update, make sure to check your computer's manufacturer website download and install the 64-bit version of the drivers needed.

Now, it's also the time to install any previous app and restore your personal files from backup.

Windows 10 64-bit benefits

Between a 32-bit and a 64-bit version of Windows, there are no differences in features. However, there are productivity benefits. For example, the 64-bit version addresses the 3.5GB of RAM limitation found in the 32-bit version of the operating system. This advantage means that on computers with at least 4GB of RAM, you'll be able to run more applications simultaneously. Other applications like Google Chrome will be able to handle more opened tabs, and you will be able to run more memory-intensive applications, such as AutoCAD, Photoshop, and video editing programs.

It's worth pointing out that while we're focusing on Windows 10, Microsoft doesn't support a direct path between architectures for previous versions of the operating system either.

More on Windows 10

For more tips, coverage, and answers on Windows 10, you can visit the following resources:

Which version of Windows 10 are you running? 32-bit or 64-bit? Tell us in the comments below.

How to setup and use Auto Pause for the Microsoft Band 2

$
0
0

Auto Pause for the Microsoft Band 2

Earlier today, Microsoft released a new update for the Band 2 fitness and activity tracker. The update came via a firmware upgrade, which bumps the firmware to version 2.0.4313.0.

Once the update is completed, users will have the option to enable Auto Pause for bicycle and running modes. General exercise modes like strength, stair climber and elliptical do not get the feature.

Auto Pause is a huge addition for runners and those who bicycle a lot.

For instance, I often ride a bike on a designated 'rail trail' here in Massachusetts, but it also runs through some major streets requiring you to stop and wait for a traffic light. Before, if I wanted to keep time I would have to pause when at the light and obviously un-pause when I start back up. The problem is sometimes you forget to either do the pause or (even worse) un-pause. Now, with the new feature enabled it should be all hands-on making this feature very significant for runners too.

Check firmware

To check you have the proper firmware, do the following:

  1. Open the Microsoft Health app
  2. Open the split view Menu () in the upper left corner
  3. Choose My Microsoft Band
  4. The Band software should read as 2.0.4313.0 R (or later)

If you do not have the update yet waiting 24 hours and reopening the app should force it automatically when the Band 2 syncs to your phone. Otherwise, you can force the update by uninstalling and reinstalling the Microsoft Health app (this is also one reason the app seemed like it was updated today as it can force this firmware update).

Enabling Auto Pause

By default, the Auto-Pause feature is set to off. To enable, do the following

  1. Tap the Run Tile and/or Bicycle Tile on the Band 2 directly
  2. Scroll over to Use GPS
  3. When on the Use GPS screen scroll down until you see Auto Pause (this part is actually counter intuitive)
  4. Toggle from Off to On

Note that you do not need to use GPS to utilize this feature, and you will need to enable it for either the Bicycle and Run Tile (it's up to you if you want either or both). Once the Auto Pause feature is on it should stay on thereafter.

Now, when you are bicycling or running the Band 2 will stop your session when you are standing still, getting water, taking a breath or like me waiting for the traffic light!

Microsoft has been adding many new features to the Band 2 since its release last October, but this one and the music player controls likely rank near the top for 'best of.'

Let us know what you think of the new Auto Pause feature and remember the Band 2 is currently on sale for $174.99 at Best Buy, Amazon.com, and the Microsoft Store, which is $75 off from its standard price.

See the Band 2 at the Microsoft Store

Need more help? Check out all our Band and Band 2 tips and tricks: Microsoft Band and Band 2 Help.

Download Microsoft Health from Windows Store (Free)

QR: Microsoft Health

How to set up and manage Windows 10 HomeGroup on a local network

$
0
0

When you have multiple PCs in the house, you can use HomeGroup to share securely content and printers with other members.

HomeGroup is a network sharing feature that has been part of Windows for a long time, and it's also part of Windows 10. Microsoft included HomeGroup to allow Windows devices to share resources with other PCs on a local network with an easy to set up approach that anyone can use.

HomeGroup is a feature best suited for small home networks to share files and printers with devices running Windows 10, Windows 8.1, and Windows 7. Also, you can also configure media streaming for other devices, such as Xbox One, to play music and video from your computer on the biggest screen in the house.

In this Windows 10 guide, we'll walk you through the steps to set up and manage a HomeGroup to share resources with other users on your local network.

Before you begin

HomeGroup is very particular on the network configurations you use and if your computer was previously part of another HomeGroup. To make sure you will be able to configure everything correctly, shut down all other the computers on the network, leaving only the computer you'll use to create the new HomeGroup turned on.

Additionally, you want to make sure all your devices are running Internet Protocol Version 6 (TCP/IPv6). Otherwise, you won't be able to join any computers to HomeGroup.

  1. Use the Windows key + X keyboard shortcut to open the Power User menu, and click Network Connections.
  2. Right-click the network adapter you use to connect to the internet and select Properties.
  3. Make sure to check the Internet Protocol Version 6 (TCP/IPv6) option.

  4. Click OK.

How to create a HomeGroup on Windows 10

HomeGroup hasn't changed much from previous versions, as such we'll be using Control Panel to make the configuration.

  1. Open the Start menu, do a search for HomeGroup and press Enter.
  2. Click Create a homegroup.

  3. On the wizard, click Next.
  4. Choose what to share on the network. By default Windows sets Pictures, Videos, Music, Printers & Devices as Shared. However, the Documents folder is marked as Not shared.

    Note: The sharing options you choose will only apply to devices connecting with different accounts. If you sign-in with the same user account on another computer, you will have access to all files regardless of what you chose to share.

  5. Once you've decided what content to share, click Next.
  6. The wizard will complete the setup, and you'll be presented with a HomeGroup password, which is needed to allow other computers to access files and printers. Write down or click the link to print the password.

  7. Click Finish to complete the task.

How to change which content is shared with your HomeGroup

If at any time, you want to change the folders you share with other computers do the following:

  1. Click the Change what you're sharing with the homegroup link.

  2. Make the correct changes by using the drop down menu and choosing Shared or Not shared for each folder.
  3. Click Next.
  4. Click Finish to complete the task.

How to change your HomeGroup media streaming options

HomeGroup also allows you to control which media devices, including TV, Xbox One, Xbox 360, and PlayStation can access and stream the content shared on your computer.

On the HomeGroup settings page in Control Panel, click the Allow all devices on this network such as TVs and game console to play my shared content link.

The first thing you want to do is to pick a name for the media library, as Windows 10 by default uses your account's email address.

Then you can click the Choose default settings link to change a few streaming settings, including star rating and parental control settings allowed to stream from another media device.

You can also change on which networks you will let devices stream shared content by using the Show devices on drop down menu.

In addition, you can configure which devices are allowed to play remote content. You can block or allow each device individually, or you can click the Allow All or Block All buttons.

Remember that shared content will be available to other devices as long the device sharing the content is turned on and when it's not in sleep mode. If you need to change the power settings, click the Choose power options link.

How to change your HomeGroup password

If for security reasons you need to change the HomeGroup password, Windows gives you the option to change it at any time.

  1. Click the Change the password link.

  2. Make sure to have all the computers part of HomeGroup are up and running.
  3. Click Change the password.

  4. Note the new password and click Next.
  5. Click Finish.

  6. Immediately after getting the password go to each computer's HomeGroup settings in Control Panel, and click the Type new password button.

  7. Type the new password and click Next.

  8. Click Finish to complete the task.

How to add computers to a HomeGroup

Now it's the time to turn on all the computers around the house and join them to the HomeGroup.

To join devices do the following:

  1. Open the Start menu, do a search for HomeGroup and press Enter.
  2. Click the Join now button.

    Note: If you don't see the Join now button, there is something wrong, make sure you're connected to the network and restart your computer.

  3. Click Next.
  4. Select the content you want to share on the network by using the drop down menu for each folder and click Next.

  5. Enter your HomeGroup password and click Next.

    Note: If you're signed into another computer, but you're using your Microsoft Account, then you won't be prompted to enter a password.

  6. Click Finish to complete the task.

If you're prompted to choose network privacy settings, make sure to select the Private option.

In the same way, you've done after configuring a new HomeGroup steps, for each machine you join, you'll need to specify manually the media devices that will be allowed to stream shared content.

How to share additional folders with your HomeGroup on Windows 10

While setting up or joining a new computer to a HomeGroup you're given the choice to share only your Pictures, Videos, Music, and Documents folders, but you can always share more folders.

You can share more content in two different ways, including adding new locations to the libraries currently being shared, or you can also share a new folder as you would normally do in Windows.

How to add new folders to shared HomeGroup libraries

  1. Use the Windows key + E keyboard shortcut to open File Explorer.
  2. On the left pane, expand your computer's libraries on HomeGroup.
  3. Right-click Documents.
  4. Click Properties.

  5. Click Add.

  6. Select the folder you want to share and click Include folder.
  7. Click Apply.
  8. Click OK.

Now the folder will be accessible by anyone joined in the HomeGroup when they browse the Documents folder.

How to add new folder via Windows network share to your HomeGroup

  1. Right-click the folder you want to share.
  2. Select Share with and click the Homegroup (view) option.

Users can access the newly shared folder by:

  1. Using the Windows key + E keyboard shortcut to open File Explorer.
  2. Clicking Network on the left pane.
  3. Double-clicking the computer name with shared content, and browsing the folder location.

By default, every HomeGroup folder shared on the network are set with read only permissions. It has to be this way to prevent accidental deletions and modification to your files by other users. However, if you're using your same Microsoft account to access content from another computer, then you will have read and write permissions.

If you need other users to be able to access, modify, and delete content, the best solution is to share another folder and granting users view and edit permissions.

You can do this with the following instructions:

  1. Right-click the folder you want to share.
  2. Select Share with and click the Homegroup (view and edit) option.

How to remove a PC from your HomeGroup in Windows 10

When you no longer want a computer to be part of the HomeGroup, Microsoft makes it very easy remove a device without complicated configurations.

  1. Click the Leave the homegroup link.
  2. Click Leave the homegroup.

  3. Click Finish to complete the task.

At any time, if you want to rejoin a computer, you can easily do this by using the join a computer to a HomeGroup instructions.

What to do when your HomeGroup isn't working right

While Microsoft tried to design HomeGroup to be a feature that works effortlessly, at times things may not work as expected. Consider the following tips to troubleshoot and fix HomeGroup problems on Windows 10.

The first thing you always want to do is to make sure all the computer are connected to the network. You can verify by going to Settings > Network & internet. Depending on your connection, check Wi-Fi or Ethernet.

Often rebooting and trying to create or join a computer to a HomeGroup again will solve the problem.

Temporarily disable the firewall on your computer. If you're using the Windows Firewall go to Control Panel\All Control Panel Items\Windows Firewall\Customize Settings, and turn off the firewall. If this is the problem, make sure to configure the firewall correctly, and don't forget to re-enable the firewall after everything is working properly.

Having the incorrect time can also cause problems trying to set up a HomeGroup. Make sure every computer has the correct time. On Windows 10, go to Settings > Time & language and adjust time as needed.

You can't have two computers on the network with the same name. Names must be unique on a HomeGroup. You can use our previous Windows 10 guide to rename your PC.

Make sure Network discovery, File and printer sharing, and HomeGroup connections are enabled on your private network. Simply go to Control Panel\All Control Panel Items\Network and Sharing Center\Advanced sharing settings and turn on all these options.

Your computer can only belong to one HomeGroup, if the it's connected to a different one, make sure to follow the steps to leave the HomeGroup before trying to join.

If you still can't create or join a new computer to a HomeGroup, Microsoft is also including a diagnostic tool to fix common problems. On Windows 10, go to Control Panel\All Control Panel Items\HomeGroup, and click the Start the HomeGroup troubleshooter link and follow the on-screen directions to fix the problem.

Other things you need to know about HomeGroups

  • HomeGroup is only available on Windows 7, Windows 8.x, and Windows 10, which means that you won't be able to connect any Windows XP and Windows Vista machines.
  • There can be only one HomeGroup per network.
  • A HomeGroup does not create a hub and spoken network, where a central device has to be up and running for HomeGroup to work. However, the computer with shared content must be running for you to access its files and resources.
  • Only computers joined with a HomeGroup password can use the resources on the local network.
  • While HomeGroup has to be configured once per computer, each user must specify what content is accessible through the network.
  • Once you set up a HomeGroup on a local network, users also have full access to view and edit content in the Public user folders.

Although we focus on configuring and managing HomeGroup on Windows 10, you can also connect Windows 7 and Windows 8.x computers to the network and share content.

How do you share files and other resources on your local network? Do you use HomeGroup? Let us know in the comments below.

Viewing all 5861 articles
Browse latest View live


Latest Images