Quantcast
Channel: Help & How To
Viewing all 5861 articles
Browse latest View live

How to track a workout with the Microsoft Band

$
0
0

Microsoft Band

One of the main features of the Microsoft Band is workout tracking. Any physical activity such as playing basketball, your favorite workout routine, or just walking the dog can be recorded. You can view your stats so you can see if there needs to be changes in your routine. Check out our hands-on video to see how it works.

Follow these steps when you're ready to start your workout or other physical activity:

  1. Press the power button on your Microsoft Band
  2. Swipe left, and tap the Exercise Tile
  3. Press the action button to begin your exercise routine.
  4. When you're done or want to take a break, press the action button again.

During the activity, the Microsoft Band stays on. It displays the timer with the duration, current heart rate, and calories burned.

Microsoft Band workout lede

Viewing stats

On your Band, you can see the stats of your most recent activity. It shows your workout duration, calories burned, and max and average heart rate. There's more data available though the Microsoft Health app on your phone. You'll see a chart of the changes in your heart rate throughout the workout, as well as:

  • Workout Duration and recovery time
  • Calories burned with detail on fats and carbs burned
  • Maximum, average, and ending heart rate with high and low

Microsoft Band Workout

It's recommended that you name your activity so that it's better to identify when checking your history. After a workout, head to your most recent activity in the Microsoft Health app and tap 'name' all the way at the bottom. Enter a name for your workout, and tap Accept.

The workout tracker on the Microsoft Band provides a quick and simple way to record your physical activities, whether it is walking the dog or lifting weights at the gym. Is tracking your workout an important feature for you? Will you be using this a lot on the Microsoft Band? Let us know in the comments!


How to share your Xbox One game clips on Twitter

$
0
0

Xbox One and Twitter

It's now a lot easier to share your favorite Xbox One game clips on Twitter. One of the new features available on the November Update is Twitter integration. You can try this now if you're a member of the Xbox One preview program. If you need an invite, just ask in the comments. We have plenty of Windows Central readers here that can help you out. Want to see the Twitter integration in action? Watch our how-to video.

Follow these steps to add your Twitter account to the Xbox One:

  1. From home, go to settings.
  2. Go down and select 'Sign-in, security & passkey'
  3. Click on 'Sign in to Twitter'

So now, whenever you are viewing your recorded Xbox One game clips, press the menu button on the controller and select Share. Twitter is now one of the options. You can share the clip right away, or add a little caption. The tweet from the video can be seen here.

Will you be using this feature on your Xbox One? Let us know in the comments!

How to track your run with the Microsoft Band

$
0
0

Microsoft Band Run

We've already shown you how to track a workout with the Microsoft Band. Another cool tracking feature is within the Run tile. This tracker is recommended for activities that cover distance. Some examples are running, walking, cycling, or kayaking. Want to see it in action? Watch our hands-on video!

Follow these steps when you're ready to start your run or other activities that cover distance:

  1. On your Microsoft Band, press the power button.
  2. Swipe left, and tap the Run Tile.
  3. Swipe left to see Run with GPS. Turn off GPS if you're running on a treadmill or turn it on if you're covering a distance.
  4. Press the action button to begin. If the GPS is on, the Band is going to try to lock your location. You can run immediately while your band searches for a GPS signal.
  5. When you're done running (or want to take a break), press the action button.
  6. Tap End to stop tracking your run

Microsoft Band

Just for reference, I ran with the Microsoft Band on a track outside without my phone. It took about 7 minutes to lock my position. This isn't a huge problem since you can run while the Band is searching for your location.

While you're running, the Microsoft Band's display stays on. It shows your duration, calories burned and current heart rate. Swiping down the Band displays your GPS status, current pace, and total distance.

Viewing Stats

On your Band, you can see the stats of your most recent activity. It shows the date of your last run, duration, distance, pace, calories burned, max heart rate, and average heart rate. There's more data available though the Microsoft Health app on your phone. It includes the same data available on your Band, plus:

  • Calories burned with details on fats and carbs burned
  • Average heart rate (High and Low)
  • Recovery Time
  • Map of your route (if GPS was used)
  • Best Split chart
  • Elevation chart

Microsoft Health

It's recommended that you name your activity so that it's better to identify when checking your history. After a run, head to your most recent run in the Microsoft Health app and tap 'name' all the way at the bottom. Enter a name, and tap Accept.

The run tracker on the Microsoft Band is a great feature if you want to see stats about your runs or other activities. I've run with apps on my phones, but they don't provide information about heart rate. The Microsoft Band helps with that. The Band also lets you leave the phone behind during your run. This is great because phones have been getting bigger.

While there's no official Runkeeper (runkeeper.com) app for Windows Phone, there is Runkeeper integration with the Microsoft Band. It's a very popular fitness tracking service and social network with more than 30 million users around the world. You'll need to add your Runkeeper account within the 'Connected Apps' section in the Microsoft Health app on your phone. Your run data automatically gets uploaded.

Will you be tracking your runs with the Microsoft Band?

WhatsApp now tells you what time someone read your message

$
0
0

Yesterday, the popular messaging service WhatsApp had two updates: one was server side and the other was an actual app update. Although bugs and fixes were listed in the changelog, as it turns out much was included than previously thought.

WhatsApp now included detailed 'seen' and 'read' information for messages you sent to either individuals or groups. In fact, for groups it will show who read the message and at what time, alongside who has not yet read your message (but the time it was delivered to them).

Yes, with these new WhatsApp features, no longer can you use the excuse 'Sorry, I must not have received the message' because the sender will know what time you received it and what time you read it. In addition, it even works for audio messages as well.

WhatsApp read message time

How to view sent and read message info in WhatsApp

In order to access the information, all you have to do is long-press on your sent message. A pop-up menu will appear with four choices: copy, delete, forward, info. Choosing 'info' then brings you to the detailed message history page, which will included the aforementioned data. For group messages, it will be broken down by who is in the group.

Overall, a very cool, albeit creepy, feature that augments those 'new' blue check marks from yesterday.

Thanks for the tip Hudson H.

How to change your goal for steps with the Microsoft Band

$
0
0

Microsoft Health Steps

The Microsoft Band tracks your steps automatically. You can see this number from the main tile. Keep pressing the action button until you see the shoe icon. You can use the number of steps to measure the progress against your goals. By default, the Microsoft Band sets the goal at 5,000 steps. We'll show you how to change (increase) that goal. Watch our how-to video.

  1. Open the Microsoft Health app on your phone, and on the Home screen, tap Steps
  2. You can see the goal percentage below the graph. Tap the pencil icon.
  3. Slide the white touch-point around the circle. The selected number of steps will display with the estimated distance underneath.
  4. That's it! After setting your goal, tap the confirm button at the bottom.

To give you a better idea of what number of steps to set as your goal, take a look at your history. I noticed I was hitting close to 9,000 steps per day, so that encourages me to set a goal of 10,000 steps.

Microsoft Health Steps

You should be aware that we've recently found some weird bugs with the steps data on the Microsoft Health app for Windows Phone. It's possible that your steps may be under-reported. Hopefully, Microsoft knows about these issues and releases an update soon.

Viewing your steps

You can view your steps history from the Microsoft Health app on your phone.

  1. From the app's home screen, tap Steps.
  2. Swipe to view day and week charts.
  3. The data of your previous steps are shown below the graph. Scroll down and select from your history to see how you have performed previously.
  4. Tapping the day chart cycles between steps and heart rate.

Are you going to change the default goal of 5,000 steps on your Microsoft Band? What are you aiming for? Let us know in the comments!

How to watch HaloFest live tonight on phone, tablet, PC and TV

$
0
0

HaloFest

HaloFest is happening tonight. Microsoft and 343 Industries are kicking off the launch of the Master Chief Collection for Xbox One with HaloFest. They're also going to use the opportunity to give you your first look at the Halo 5: Guardians, present the world premier of the digital series Halo: Nightfall and exclusive interviews from the folks behind Halo. Here's how you're going to watch it across phone, tablet, PC and TV.

Xbox One

The easiest way to watch HaloFest? Xbox One of course. On your dashboard, you should see a promo card for HaloFest. Just click that to launch the Xbox Live Events app. There you'll see a timer counting down the remaining time until HaloFest starts. Once it starts you'll be able to watch live on your Xbox One.

Xbox.com

Not near your Xbox One tonight, but still want to watch? No worries, just head to the Xbox.com website to catch HaloFest in your browser of choice.

Windows Phone

In the Windows Phone Store, you'll find an app called Live Video Player from Microsoft. This is the app the Xbox team has used in the past to stream live events to Windows Phone. We aren't seeing Microsoft promote it this time around as a way to watch HaloFest on Windows Phone, so it may not work! But download just in case. Don't worry, we have a back up involving Twitch if you want to watch HaloFest on your Windows Phone.

Twitch

Microsoft and 343 Industries will also be streaming HaloFest on the official Xbox Twitch account. This ensures you're able to watch on Windows Phone using an app like Livegaming (an unofficial Twitch app).

Microsoft Stores

Select Microsoft Stores will also be streaming HaloFest. So if you head to your local Microsoft Store for Halo launch festivities you won't have to miss HaloFest while you're in line!

The HaloFest broadcast starts tonight (November 10) at 8 p.m. PT.

How are you going to watch HaloFest tonight? I'll be watching on my Xbox One.

Why you should buy Microsoft Complete for your phone, Band or Surface

$
0
0

Microsoft Complete Surface

Buying a new device like a Surface Pro 3 is a significant decision. Not only is it a substantial financial commitment, but there are many other questions that come along with it. Which configuration should you get? What accessories are "must haves" from the start?

Today, we want to answer another question: Is it worth buying the extended Microsoft Complete warranty?

When you are already spending $800 or more on the device itself, and presumably another $130 on a Type Cover, it's hard to swallow another $150 on a warranty. However, Microsoft Complete is more than just an extended warranty. And as someone who is typically wary of such things as myself, I thought it would be useful to share my thoughts on why I decided to buy Microsoft Complete.

What is Microsoft Complete?

If you wanted the tl;dr answer, someone might tell you that Microsoft Complete is an extended warranty you can buy for just about any new Microsoft product. Unfortunately, that explanation overlooks many other benefits that Microsoft Complete offers. It is two-year support system for you and your new device.

Microsoft Complete varies from device to device, but you can purchase the extend warranty when you buy something new direct from Microsoft, including:

Pricing

Besides the type of coverage, the pricing also varies. For instance, for the Surface Pro Microsoft Complete runs for $149 but for a Surface 2, it is just $99. For the new Microsoft Band, you are looking at a much lower $19 for a full, extended warranty. If you are buying an Xbox One, it will run you $69.99.

When it comes to a high-end laptop, you are usually facing an extra $199 for two-year protection.

How to buy

You can only buy Microsoft Complete during the 'add to cart' sequence when buying online from the Microsoft Store.

When in a physical Microsoft Store, the sales associate should offer you the warranty during the checkout stage, allowing you to ask him or her about the cost, benefits and how the program works.

Update: As many have noted in comments, if you do buy a Surface or Xbox from another retailer, you can bring it into a Microsoft Store within 45-days to add Microsoft Complete. The Store will just need to see a receipt and that the item is in working order.

What is included?

Microsoft Complete includes four services:

1. Extended Warranty

Out of the box, a new Surface Pro 3 and its accessories come with a 1-year warranty that protects you from manufacturing defects. Microsoft Complete doubles that to two years. For the Band, it merely extends it by one-month to thirteen total.

2. Accidental Damage Protection

An essential piece to your coverage. The manufacturer warranty only protects you against defects. With Microsoft Complete, even if you drop your device or spill something on it, you can get it replaced.

It is very similar to the insurance that you may have for your cell phone. If something happens to your purchased item, just pay a deductible, and you get a replacement device. You can only file two claims over the life of the warranty, but it's still better than the alternative.

You're going to shell out a lot of money for your Surface. It would be tragic to lose it because you tripped on your way out the door or your clumsy coworker spilled coffee on it.

3. Technical Support (for PCs, laptops, or Surface)

In addition to protection for your hardware, Microsoft Complete gives you two years of access to their Answer Desk for technical support via phone, live chat, or in person at a Microsoft store.

They will answer questions, help you fix problems and assist with PC tune-ups and virus prevention/removal. And should the worst occur, your Microsoft Complete also entitles you to their data recovery services.

4. Training (for PCs, laptops, or Surface)

Often, the move to a new device also means venturing into unfamiliar territory. Maybe you aren't familiar with Windows 8 or Office 2013. Perhaps you are not a technical person, but you want to get the most out of your Microsoft Band. If your device is covered under the Microsoft Complete plan, you can partake in in-store training sessions that will teach you how to use it. There is no limit to how many of these you can attend during your coverage period.

For an accessory device like the Microsoft Band, Microsoft Complete includes:

  • Extends the standard warranty coverage for your Microsoft Band by one additional month (for a total of 13 months of hardware warranty coverage).
  • Provides one-time replacement of your Microsoft Band for accidental damage within 13 months of purchase.

The one downfall of the Microsoft Band is the scratch-prone display. Assuming you do not use the free screen protector, you could replace your Microsoft Band for free one time within the first year, making it well worth the $19.

Is it worth it?

In the end, that is a question you are going to have to answer for yourself. As an IT professional, I will probably never use most of the perks that come with Microsoft Complete. I do not need the training and can provide 99% of the support that I would need for myself.

However, after spending over $1000 on my Surface Pro 3 and its accessories, I felt that it was worth the extra money solely to protect my investment. It also helped that Microsoft was offering the Surface Essentials Bundle, which packaged a Type Cover, Office 365, a Surface sleeve and Microsoft Complete together at a discounted price. That made it a no-brainer for me.

Unfortunately, Microsoft is no longer offering this bundle. However, when it comes to the high-priced items, Microsoft Complete stands on its own as a good deal for everyone including knowledgeable techies. You do not have to look far on forums or reddits to find stories of people dropping their new Surface or spilling coffee on their laptop. Considering how laid-back Microsoft Complete is to redeem, the small investment indeed seems to be worth it.

Remember, If you still aren't sure about whether you want it or not when you buy your machine, you still have 45 days after the purchase date to add Microsoft Complete coverage.

Finally, perhaps a significant downside of Microsoft Complete is that it is most easily obtainable through a Microsoft Store. Although there are now over 100 across the US, for those outside the States, finding a Store is still impossible. Still, assuming you are lucky enough to be buying something directly through Microsoft, their Microsoft Complete warranty seems like a good value to protect your investment.

Have you had to use Microsoft Complete before? Share your experience below!

Cracked Surface display photo via Reddit

7 steps to make amazing videos with Movie Creator Beta

$
0
0

Movie Creator

I've been playing with the newly released Movie Creator Beta and I'm surprised at how good it is for quick and easy editing. You can add videos, photos or Cinemagraph content files together with no length limitations. I shot some videos from Color Me Rad (colormerad.com) a few months ago, but they've just been sitting idle inside my Lumia Icon. With Movie Creator, I was able to create a movie from those clips in just few minutes.

Here are some of my tips to make an incredible video with Movie Creator.

1. Variety is key

Use footage with different angles and movements. To get started with Movie Creator, you'll need to add some clips. For best results, select different types of clips. Use close-ups, action shots, or shots with panning movement. This trick keeps things interesting for your viewers.

Movie Creator

2. Short clips are the best

The next step is to trim the clips. Tap a clip and then select the trim tab. You can drag the start and end points. Try to make each clip shorter that 30 seconds. Viewers get bored when it's longer than that. There's no option to split clips, but a workaround is to duplicate a clip and then re-trim.

Movie Creator

3. Reorder at will

You can drag and drop clips in the timeline if you need to rearrange them. Just press and hold a clip, then drag it to the position you want.

4. Theme it up

Use themes. If you want to get things done quickly, take advantage of the built-in themes. This automatically adds transitions and background music that make your movie feel whole instead of separate clips attached to each other. There are several themes to choose from, and it appears Microsoft will be adding more in the future. There's a Theme Store where you can get new themes. They're all currently free.

Movie Creator

5. Mix that sound

You can adjust the volume of each clip and even reduce or increase the sound of the background music. This is really handy if a clip has dialog. Tap a clip and then select the volume tab. Play with the sliders for clip and soundtrack volumes.

Movie Creator

6. Export in HD

Increase the output quality of your movie. By default, it is set to low quality. Tap the controls button to the left of the question mark. Change it to medium quality for 720p video or high quality for 1080p. You can also change the frames per second in the advanced settings. Slide it all the way to the right for 30 fps.

Movie Creator

7. Post and share to YouTube

After saving your movie, you can upload it directly to YouTube. Use the Upload to YouTube app for Windows Phone.

Movie Creator has a lot more features like adding captions and filters, but these are the 7 tips that will help you tremendously with video editing on your device. You can watch our sample video below which was shot, edited and uploaded from the Lumia Icon. Do you shoot videos with your Windows tablet? Movie Creator is also available for Windows 8.1. Give it a try and let us know what you think!

512MB RAM devices supported

QR: movie creator


How to change the background of your Xbox One Dashboard

$
0
0

Xbox change background

The Xbox One November system update has begun rolling out over a week ago and one of the new features let you customize your console even more. Each account on your Xbox One can now have a customized background. You can choose a custom color as a theme or achievement art as your background image. You can also use your own image. Want to know how? Watch our how-to video.

Follow these steps:

  1. On your controller, press the Xbox button to return to Home.
  2. On the Home screen, press the Menu button and select Settings.
  3. Select My Xbox.
  4. Select My background, and then select from the available choices in Your background.

You can use achievement art, a solid color, or an image of your choice uploaded from a USB flash drive or a DLNA media server.

Xbox color background

Xbox Achievement

If you want to use your own image, keep in mind that the screen resolution is 1920 x 1080. Also,Xbox tiles will cover up most of the image, so not all wallpapers will be visually appealing. The Xbox Design Team created a handy Photoshop template so you can see what parts of your image will be blocked by the tiles. This will help better position your background. You can download it here.

Xbox USB

Want to see awesome wallpapers specifically made for the Xbox One? There is a subreddit for that. Check out reddit.com/r/xboxthemes. Using a solid color, custom images or achievement art as background gets transferred to other Xbox One consoles you sign in with your account.

The Xbox One November update also brings Twitter integration, showcase items, and other improvements. Check out the complete list of changes if you haven't seen it yet. Do you have really cool wallpaper for your Xbox One? Share it in the comments below!

What is S/MIME and should you use it for email on Windows Phone?

$
0
0

No matter how technically savvy you consider yourself to be, there's always a good chance you will come across something that you just don't know anything about. For instance, a few of us at Windows Central were chatting online, and someone asked what S/MIME is and whether they should enable in their email settings on their Windows phone.

Having worked in IT for a number of years, I had heard the term S/MIME before. However, I didn't know nearly enough about it to answer the questions. Immediately, we all agreed that it was a good idea for a post. What you now have before you is an attempt to explain what S/MIME is and help guide you in deciding if it is something you should use on your Windows phone.

You may or may not have the option to use S/MIME with your email. If you have a Hotmail or Outlook account on your phone, the option will appear in the Settings section of your email account.

Google and Yahoo accounts do not have these options on Windows Phone. If you are using a business email address through your employer, your IT administrator will tell you whether or not you need to use it.

What is it?

S/MIME stands for Secure/Multipurpose Internet Mail Extensions. To put it simply, it is a universal standard for securely signing and encrypting email. It is essentially used to prove that the email came from the person says it is from.

It works using a unique certificate, a fingerprint of sorts, issued by a third party. That certificate gets recorded in a database, be it a private company's server or a public registry on the internet. When an email is sent using S/MIME, it gets stamped with that digital signature. When the recipient receives the message, the signature gets checked against the sender information to validate that it indeed came from the person it claims to be from.

That same certificate can be used to encrypt email to avoid a third-party from viewing it. Much like encryption programs like PGP, the email gets encrypted using a "public key" derived from the user's digital certificate and a password. Once sent, the recipient uses their "private key," derived the same way, to decrypt the message to make it readable.

While identity validation is always part of a message sent using S/MIME, message encryption is optional.

Is it safe?

Since it was developed to be a universal standard of encryption, S/MIME has been put through its paces to ensure that it is an effective method of securing data. However, that same universality makes it a target as well. Finding a way to crack S/MIME would mean gaining access to an untold wealth of information.

However, there is good news. Firstly, in my (albeit limited) research, I could not find any record of S/MIME being breached. Private/public key-based encryption is difficult to crack by its very nature. That doesn't mean that the NSA hasn't secretly found a way to do it though.

Secondly, the forces behind S/MIME have improved it over time. It is currently in its third iteration, which has added measures of protection. There is no sign of that stopping anytime soon.

What's the downside?

Using S/MIME will indeed affect your current email routine, mostly in the form of some occasional added legwork. First and foremost, because it requires validation from a third party, you must obtain a certificate through a Certification Authority. There are many out there that provide certificates free of charge. The certificate expires, usually every year, so you also need to make sure you renew it.

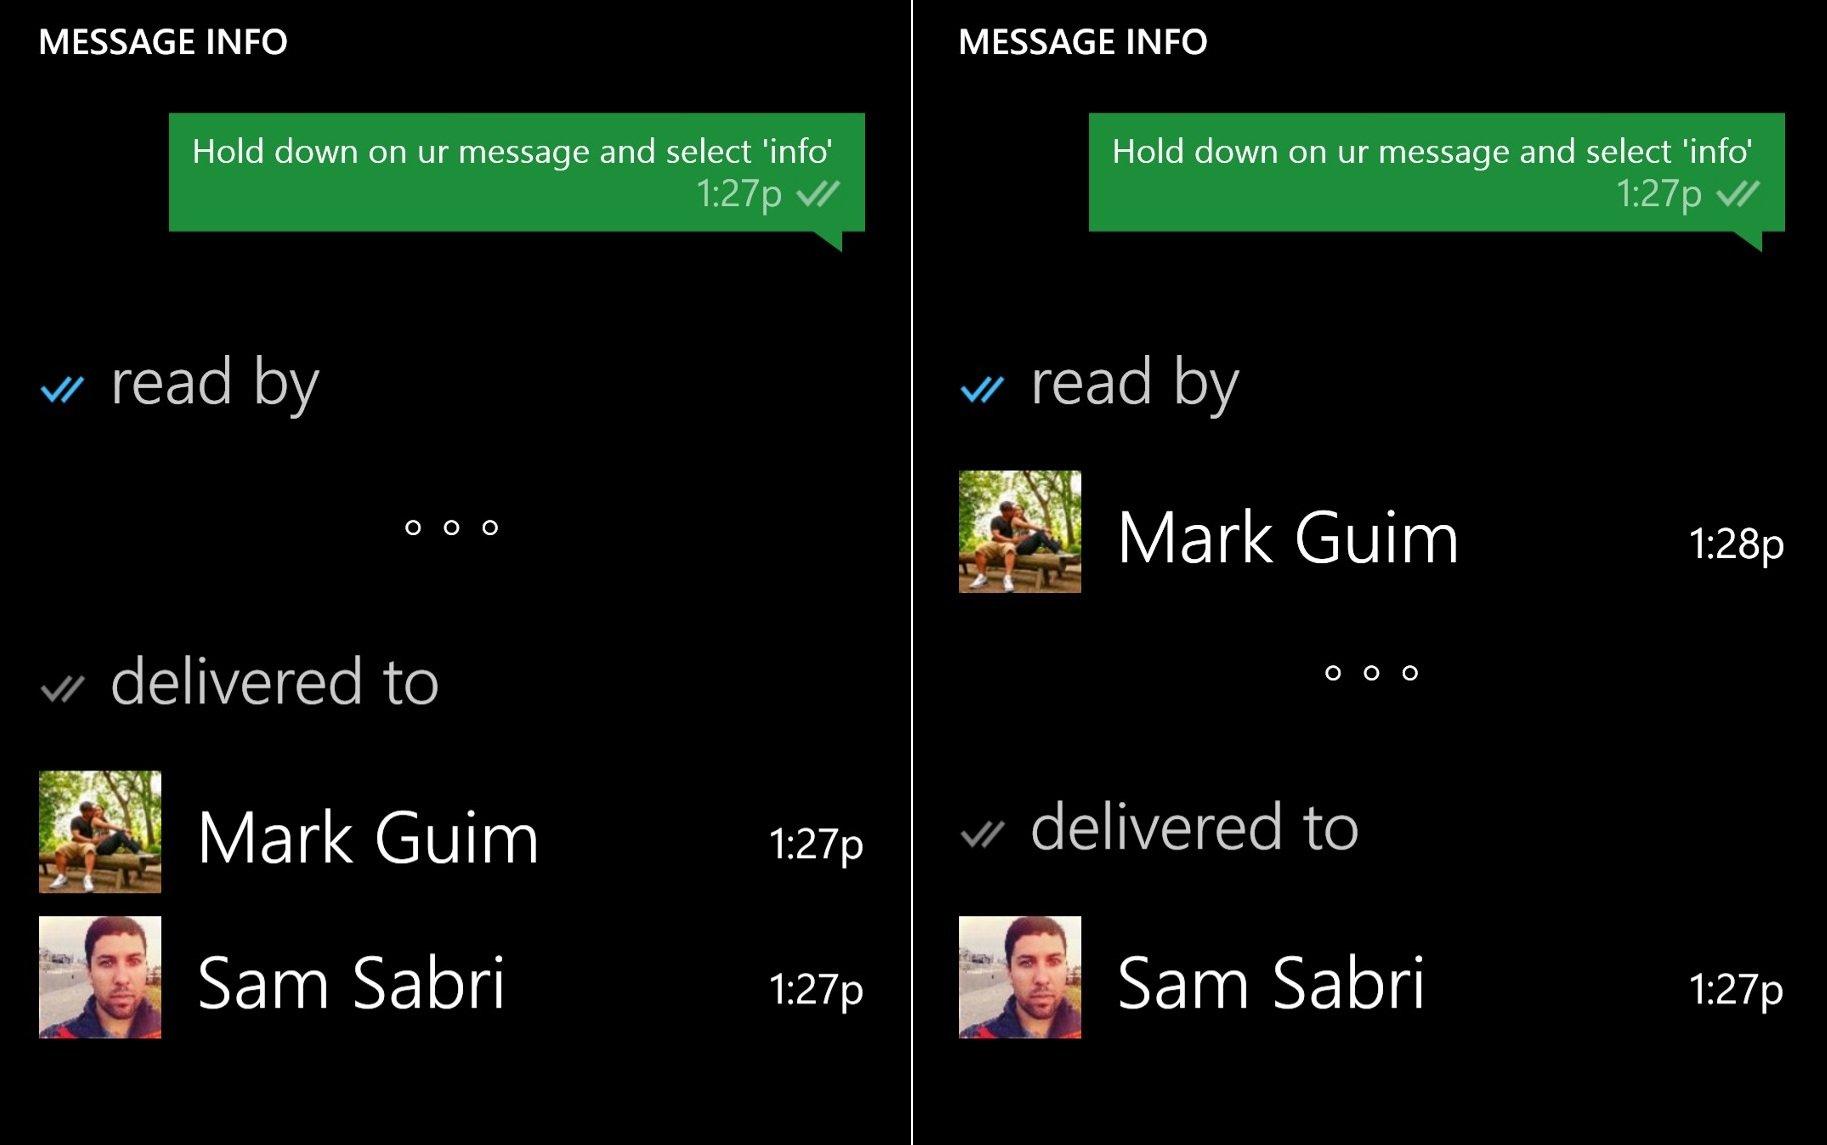
If you are only using the digital signing feature of S/MIME, there isn't too much downside. A recipient who has S/MIME setup will get verification that you are the legitimate sender of the email. If they or their email provider do not use S/MIME, then they will likely see an attachment on your message named smime.p7s. This lack of support will not cause any issues, other than possible confusion on the part of the recipient.

This scenario is especially common with people who use web-based email services, like Gmail and Yahoo and access their mail from a web browser. If the account is accessed using an email application, like Microsoft Outlook, the S/MIME typically gets decoded correctly.

And if it doesn't, it's not a big deal because the email was sent in plain text. The recipient just can't be sure that you are the actual sender.

As far as encryption goes, there is some more added hoops. Encrypting an email requires that the person on the other end also uses it. Therefore, if you want them to be able decrypt your message that uses your private key, they must have your public key. Otherwise, they just get a garbled mess of an email.

Encrypting a message also adds data to that message, increasing the overall size of it. S/MIME encryption typically triples the size of your message. Given that most emails are pretty small, it shouldn't affect you too much. However, it should be taken into consideration when using S/MIME a lot, as it can pile up on a device with limited storage.

Also keep in mind that encrypting email not only keeps out the bad guys, but the good guys too. Attachments in encrypted emails cannot be scanned by anti-malware services, leaving you unprotected until opening them.

Sounds like a good idea. Should I use it?

For the overwhelming majority of ordinary users, there is no need to sign or encrypt our everyday email. Any email provider worth its salt uses SSL encryption to transmit data, so you are reasonably protected.

Even if we are sending sensitive information, like tax documents or health records, we may find it easier to password protect the documents or combine them into a password protected ZIP file. This situation is also one of the last places on Earth that fax machines are still useful.

That being said we are living in a world where more and more data breaches occur every day. If you feel so inclined, S/MIME can help protect your information and maintain your privacy.

S/MIME on Windows Phone

So why the heck is it even an option?

In a word, business. Microsoft is in the business of business and knows that if Windows Phone is going to have any chance in the smartphone wars it is going to have to accommodate enterprise users and technology.

S/MIME is a common component of corporate email, so Windows Phone needs to take that into consideration.

In Summary

S/MIME has been a universal standard in securing email for very long time, and rightfully so. But most of its usages has been in the business world, not the public realm. Implementing it for your personal email is not overly complicated, but does present its challenges.

In the end, it's up to you to decide how useful it would be to you.

Have any of you implemented S/MIME in your personal routine? What is your experience?

References: Wikipedia, Microsoft, Mozilla, JustinRummel.com

6 tips to extend the battery life on your Microsoft Band

$
0
0

Microsoft Band

The Microsoft Band has been advertised of having 48 hours battery life, but that can vary significantly depending on your settings, usage, and other factors. On the days we track workouts or runs, and sleep, we find the Band to last until about lunchtime the next day. Want to extend the battery life on your Microsoft Band? Here are some tips that can help you out. These tips include turning off some features when you aren't using them and other settings that can save battery.

1. Turn off GPS when tracking a run

When you track a run, the Microsoft Band asks if you want to turn on GPS. Leave this off if you don't care about seeing a map of your run. GPS uses a lot of battery power, so leaving this off can extend your battery life. You'll still be able to see your stats for duration, distance, pace, calories burned, max heart rate and average heart rate. Keep in mind thatGPS can only be turned on during a run. The rest of the time, it is off.

2. Turn on Airplane Mode or turn off Bluetooth

While your phone is connected to the Internet and connected to your Microsoft Band via Bluetooth, data is synchronized about every thirty minutes. You can turn off Bluetooth when you don't want your Band to sync automatically. Airplane mode and Bluetooth options are in the Settings tile. When Airplane Mode is on, an airplane icon displays on the Me Tile.

Microsoft Band

3. Lower the screen brightness

You can change the brightness of your Microsoft Band screen. Go to Settings -> Brightness. It's on medium by default. I change this to automatic, but you can change this to low if you want to extend the battery life of your Microsoft Band.

4. Choose a lower vibration level

Your Microsoft Band vibrates when you receive notifications. You can change vibration power to extend the battery life of your Microsoft Band. By default, it's on Medium. You can change this to Low. Go to Settings and select the tool icon. Swipe to the right until you see Haptic Alert Level.

5. Turn on Do Not Disturb

If you think you're going to be too busy to care about notifications, and then turn on Do Not Disturb. Calls, messages, and other data are still downloaded to your Band, but you won't get the vibration to notify you when they arrive.

6. Turn off Daily Heart Rate

This tip defeats part of the reason of wearing the Microsoft Band, but you can turn off continual monitoring of your heart rate. This feature is used to help calculate the calories you burn during the day. When the Microsoft Band is just being worn under regular conditions, users can expect ten-minute intervals for heart rate data collection. We have more details if you want to know how often the Microsoft Band checks your heart rate. Your heart rate will still be monitored during Workouts, Runs, or Sleep. You can turn off Daily Heart Rate by going to Settings, tapping the Tool icon, and then switching off the heart icon.

Microsoft Band

What are you willing to give up?

These 6 tips will extend the battery life of your Microsoft Band, but you'll lose out on some features. Will you be following some of these tips or are you happy with the battery life on the Microsoft Band? Let us know in the comments!

How to edit or create custom text replies on the Microsoft Band

$
0
0

Microsoft Band

The Microsoft Band lets you see who's calling without taking your phone out of your pocket. It can also let you respond quickly with preset messages. By default, the Microsoft Band has three messages, but you can add one more or edit all of them. Want to know how? We'll show you in our hands-on video.

When a call comes in, you'll get a notification and vibration on your Microsoft Band. The caller's name is displayed if it exists in your contact list. If you're busy and can't take a call, this is how you can reply:

  1. When a call appears on your Microsoft Band, swipe left, and tap Reply.
  2. Swipe left to scroll through your available text replies.
  3. Tap the reply you want to text to your caller to send it.

Here's how to modify the replies:

  1. Open the Microsoft Health app on your phone.
  2. Tap the band icon, and then tap Manage Tiles.
  3. Tap Calls, and then tap edit.
  4. You can keep the three built-in replies or replace them with your own. You can also add a fourth one.
  5. Tap Accept when you're done

Microsoft Health SMS Reply

That's it! Messages you send from your Microsoft Band will also appear in your phone's messaging app just as if you had sent it from your phone. Of course, you can also choose not to reply to the phone calls. You can dismiss the calls directly from the Microsoft Band, too. When you receive a call, swipe left and tap Dismiss.

It's interesting to point out that iPhone users are not able to send text replies with their Microsoft Band. Going to the Calls tile with the Microsoft Health app on iOS does not show the same options found on the Windows Phone version.

Do you think you'll be using this nifty feature on the Microsoft Band? Let us know in the comments!

HomeGroups and Windows 8: How to share everything (or nothing)

$
0
0

HomeGroup Windows

Beginners' Tips Series!

The days of having a single family computer that everyone shares are long gone. Now it isn't uncommon to find multiple computers, tablets, printers, gaming consoles, etc. all in one household. With so many users and devices in a single place, it may seem like sharing data between them might be a challenge.

Fortunately, you don't have to be a network engineer to figure out how to get Microsoft devices all talking to each other and sharing data. With HomeGroups, it's easy to set up.

What is a HomeGroup?

A homegroup is two or more computers that reside on the same home network. Members of a homegroup can share pictures, documents, music, videos and printers with each other.

They can be used to share individual folders and files with other computers in a way that can be easily managed by everyone who is part of the group. A homegroup can also be used to create a central server of sorts for media, printers, etc. that can be accessed by different computers, but managed centrally by one user.

HomeGroups can be secured using passwords, and each member can control exactly what they share with the other members of the group.

Any computer running Windows 7, Windows 8, Windows 8.1 and Windows 10 can be part of a homegroup. However, Windows 7 Starter/Home Basic and Windows 8/8.1 RT have limited functionality. The former cannot create homegroups of their own and the latter cannot create homegroups or share content with other members.

How to set up a HomeGroup from scratch

If you want to set up a new homegroup for the first time:

  1. Go to Control Panel> Network and Internet> HomeGroup, then click Create
  2. Select which libraries you would like to share with future members of the group

How to join an existing HomeGroup

Before joining an existing homegroup, you will need its password. To find it, you need to go to the computer that the homegroup was created on.

  1. Then, open Control Panel> HomeGroup.
  2. Click View or print the homegroup password.

Now that you have a password, go to the computer you want to join to the group.

  1. Go to Control Panel> HomeGroup.
  2. The computer should automatically detect that a homegroup exists and will prompt you for the password. Enter the password and click Join.
  3. Select the Libraries that you want to share with the rest of the group.
  4. Click under Media Devices and select what devices you wish to share.

NOTE: This is where you would activate sharing for streaming media to your Xbox 360 or Xbox One.

In Windows 8.1, you can get easy access to the HomeGroup settings by opening the Charms bar on the right, then going to Settings> Change PC settings> Network> HomeGroup.

Here you can use the sliders to choose what Libraries you want to share, or toggle printer sharing and media streaming. You can also view your homegroup password, or leave the group all together.

To share individual folders instead of Libraries

  1. Open File Explorer
  2. Navigate to the folder you want to share
  3. Right-click, then select Share with> Specific people.
  4. Click the drop down arrow, select and then HomeGroup
  5. Click Add
  6. You can change what level of sharing you want by clicking the arrow next to the homegroup in the list and choosing Read or Read/Write. This is also where you would remove permissions from the folder.
  7. Click Share to save your changes

All set. Now what?

You can get a view of all of the computers and devices that are part of your homegroup by going to Control Panel> Devices and Printers. There you will see computers, printers, and gaming consoles that belong to your group.

To access files from your computer

If you want to open documents, watch videos or listen to music that has been shared out to your computer via the homegroup, you can open File Explorer (known as Windows Explorer in Windows 7) and simply navigate to them under the HomeGroup section on the left.

To remove your computer from the homegroup

If you no longer want a computer to be part of the group:

  1. Go to Control Panel> HomeGroup
  2. Click Leave the homegroup
  3. Click Leave the homegroup again to confirm your decision

As more and more devices creep into our homes, it becomes increasingly important to manage them in a simple way. The development of HomeGroups has taken the once esoteric world of home networking to a level that anyone can understand, making it easy to share between them all.

How to create a VIP list to limit mail notifications on the Microsoft Band

$
0
0

Microsoft Band VIP

If you get a lot of emails, you can limit the notifications you receive on your Microsoft Band by creating a VIP list. This makes the Band send you mail notifications only from contacts you select. We'll show you how to do it in our hands-on video.

  1. Open the Microsoft Health app on your phone.
  2. Tap the Band icon on the upper right corner, and then tap Manage Tiles.
  3. Tap Mail, and under Only receive notifications for emails from VIPs, tap On.
  4. Under VIP List, tap the edit button.
  5. Tap add more to list, choose the contact you want to add, and tap Accept.

That's it! You can add up to 10 contacts to your VIP list. You can remove contacts by tapping the X located to the right of their name.

Creating a VIP list is a good way to limit your mail notifications. Will you be taking advantage of this feature on your Microsoft Band? Let us know in the comments!

How to personalize handwriting recognition on your Surface Pro 3

$
0
0

Beginners' Tips Series!

One of the many features that is alluring about the Surface Pro 3 is its incredible stylus with OneNote integration. It in a convenient way to take notes in meetings or jot down ideas, and then transform your writing into type.

While the Surface Pro 3 is splendid at recognizing handwriting out of the box, it can be an imperfect science, as writing varies from person to person. Not to mention that writing on a tablet takes some practice, if it is not something you are used to doing, so that can affect the form of your handwriting.

But just like you can learn how to write on a Surface, the Surface Pro 3 can learn to recognize your handwriting. Training your Surface Pro 3 takes a little bit of time, but it is worth doing.

To personalize the handwriting recognition on your Surface:

  1. Go to Control Panel> Language.
  2. Click Options on the right-hand side.
  3. Click Personalize handwriting recognition at the bottom.
  4. Click Teach the recognizer your handwriting style. Note: If you only have specific characters or words that you want to teach, select the top option and follow the prompts.
  5. You now have the option to teach your Surface by inputting Sentences or just Numbers, symbols, and letters.

The former is clearly a more comprehensive way to go about it, but the latter is likely suitable for most people to start with.

There are fifty screens of sentences that you can go through to hone the handwriting recognition, but you don't have to go through them all at once. You can save your progress and update the recognition tables with what you have done.

There are only nine screens of the individual characters and symbols.

To start from scratch:

If you decide that you want to scrap everything you have taught your Surface and start training all over again, simply follow these steps:

  1. Go to Control Panel> Language.
  2. Click Options on the right-hand side.
  3. Click Personalize handwriting recognition at the bottom.
  4. Click Delete handwriting samples that you provided for the current language.

There is no limit to how many times you can add or remove handwriting samples. It all depends on how accurate the recognition is and how much time you want to devote to getting it right.

Once mastered though, it can be versatile and powerful tool.

What has been your experience with using the Surface Pen to write notes? Let us know in the comments.


Help & How-to

$
0
0

New Windows Phone, Surface Pro 3, or Xbox? We're here to help you get the most out of your Microsoft device. Here's where you'll find helpful guides and how-tos for your stuff. We'll show you simple things like how to take a screenshot on Windows Phone and offer more advanced guides for things like moving your contacts from Gmail to Outlook.com

Don't see a help guide or how-to on our site? Just ask us, and we'll make it for you! Otherwise, you can always ask our resource community forums yourself!

How to adjust the screen brightness with the Surface Pro 3 Type Cover

$
0
0

Surface Pro 3 Type Cover

Beginners' Tips Series!

Do you have the Type Cover for Surface Pro 3? If you said yes, we have a very quick tip for you. There's no dedicated screen brightness button, but you can still adjust the brightness with a couple of keyboard shortcuts. Simply press Fn + Del or the Fn + Backspace buttons. A screen brightness indicator pops up on the top left corner of the screen. You can play with the slider to continue adjusting the screen brightness.

The Surface Pro Type Cover is available in 5 colors with bright, backlit keys. It functions as a classic laptop keyboard and a screen protector. You can find the Type Cover on Amazon for $129.99.

Of course, you can change the screen brightness directly on the Surface Pro 3. Simply swipe from the right edge of the display, tap Settings, and then Screen. Use the slider to adjust the brightness.

And in case you missed it, make sure to watch our Surface Pro 3 review.

Surface Hub app finally lets artists disable the Windows button to avoid accidental clicks

$
0
0

Surface Button

When the Surface Pro 3 was announced, Microsoft had righted many wrongs with the previous version of the hardware. Faster, more processor choices, thinner, lighter, larger display, the list goes on.

However, one thing that irked some people who used the Surface Pen was the placement of the Windows Key. Due to the new keyboard positioning, placing the key near the bottom was simply not possible, so Microsoft opted to put it on the right. The downside? Some artists and graphic designers complained of accidental clicks when they laid their hands on the display to draw.

Today, that issue is finally fixed as Microsoft had promised.

The fix comes via the Surface Hub software, which lets Microsoft dynamically update and add features to the Surface Pro 3's hardware. Besides adjusting pen sensitivity and the assigning the top button on the Surface Pen, users can now enable or disable the Windows button with a simple toggle. This replaces the earlier user hack, which had some negative side effects.

Although we suspect not all users will even bother with this choice, for those who rely on the Surface Pro 3 for drawing or note taking today's Surface Hub update will be a lifesaver. Grab the update, and get going, creators!

Via: Neowin

Cortana is annoying some users with endless weather alerts, here's how to disable them

$
0
0

Cortana weather alerts

Microsoft's Cortana is certainly one of the most exciting consumer stories for the company in 2014. Building on the legacy of the Halo franchise, Cortana is rapidly becoming a well-known piece of tech for those who follow mobile. However, Cortana still has a few bugs and quirks, including one that is rearing its head for users in New England today.

If you use Cortana and you have weather alerts set up, you probably have witnessed the flood of…well, flood alerts that arrive on your phone. Although one or two warnings are okay during a six-hour period, when you bump it to more than five (and upwards of twenty) it is downright annoying. Even more so if you use the Microsoft Band.

This morning, many of us in New England (Massachusetts, Connecticut, New Hampshire, Maine, Rhode Island) are experiencing the usual bad winter New England weather: cold, rain, snow, sleet, local flooding, etc. Unfortunately, the avalanche of alerts coming in, as evidenced by the above photo, is causing some of us here (and on Reddit) to rage.

Clearly, Microsoft needs to set some type of limiter on weather alerts, which are dependent on the National Weather Service. In fairness to Microsoft, the NWS is just updating things very often, and Cortana merely pulls in that information. Not all of our phones are experiencing the deluge, although we figured it was an appropriate time to tell you to how to disable those alerts, in case you are suffering from the issue.

Cortana weather alerts

Enable/Disable Weather Alerts in Cortana

  1. Launch Cortana
  2. Tap the hamburger button (upper right corner)
  3. Interests
  4. Weather > Weather near me
  5. Enable/Disable 'Notify me when there are weather incidents'
  6. Save (floppy disk near the bottom)

The downside to this trick is you will, of course, lose all weather alerts until you re-enable it. Assuming the bad weather passes, you could ironically set a reminder using Cortana to tell you to re-enable them.

The long-term goal for Microsoft is to fix this through Cortana, but for now, if you are one of the unlucky bunch suffering from this annoyance, you now know how to get rid of it.

How to stream your video collection from a PC to the Xbox One

$
0
0

Xbox One USB

Beginners' Tips Series!

Xbox One is more than just a game console. It is an entertainment hub for games, television, music, and videos. And although the available apps put a ton of media at your fingertips, you can get even more out of your Xbox One by configuring it to play your own music and video collection with it.

You can stream via Play (Charms > Devices > Play), but today we will walk you through the networked approach, which assumes you have computers sharing the same network. There are two primary ways to do this. The first is to stream your media from your computer or tablet, and the second is to play it directly off of a USB drive. Today we will review how to do both. The beauty of this method over the Play system is you can do it all from your couch via the Xbox One, instead of sending the video from a PC to your console.

Streaming media from your computer

Step 1: Configuring your HomeGroup

The key to playing music and videos from your computer on your Xbox One is setting up a HomeGroup. If you do not have one set up yet, you can click the link in the previous sentence to see how.

You must make sure you configure your computer to share files with your Xbox. To do so:

On Windows 8.1:

  1. Open the HomeGroup settings by opening the Charms bar on the right, then going to Settings> Change PC settings> Network> HomeGroup.
  2. Locate the slider under Let devices on this network (like TVs and game consoles) stream my music and videos and move it to the one position.
  3. You can fine-tune your settings by going to Control Panel> All Control Panel Items> HomeGroup and clicking on Allow all devices on this network such as TVs and game consoles to play my shared content. In this case, choose Allow next to your Xbox One.

On Windows 7:

  1. Go to Control Panel> All Control Panel Items> HomeGroup.
  2. Make sure Music and/or Videos is checked under Share libraries, and printers.
  3. Under Share media with devices, check Stream my pictures, music and videos to all devices on my home network. If you would prefer, you can pick and choose which devices are allowed to stream media by clicking on Choose media streaming options… and choosing Allow next to your Xbox One.

Step two: Accessing shared media from your Xbox One

Once you have configured your HomeGroup properly, accessing media from your Xbox One is simple. The process is the same, whether you are streaming music or videos or pictures.

  1. On your Xbox One, open the Media Player app.
  2. Here you should see a list of computers that are on your network. Choose the one that you would like to stream from.
  3. Choose either music, videos, pictures or playlists.
  4. Choose how you want to sort your media
  5. Make your selection of what you want to play.

Accessing media from a USB drive

Media Player is also what you will use if you want to play music, view pictures, or watch a video from a USB drive.

Just plug your drive into the USB port on the left side of the Xbox One console, and then open Media Player. You will now see the USB drive show up alongside the networked computers.

Choose the drive and browse to your media, just like you would on a computer.

Xbox One stream

From day one, Xbox One was already a force to be reckoned with, but it left a lot to be desired in the way of apps and functionality that we were used to seeing on Xbox 360. The apps continue to arrive, making it better and better. And with the addition of Media Player, it is officially an entertainment juggernaut.

Do you use your Xbox One for accessing your home media? Share your experience with us in the comments.

Viewing all 5861 articles
Browse latest View live


Latest Images