Stay secure and keep your data and identity your own while shopping online.
Shopping online is only getting more popular thanks to the convenience and variety of retailers. One of the downsides, however, is that there are plenty of individuals out there waiting to jump on a chance to take advantage of someone who doesn't properly protect themselves. The result? Credit card or even identity fraud. To help keep your identity (and your data) your own, let's take a look at a few tips to staying safe while online shopping.

Only shop on websites with a secure connection

Shopping online through a web browser is made exponentially safer when the connection between your PC or phone and the website is protected by Secure Sockets Layer (SSL) encryption.
As opposed to a standard HTTP page, an HTTPS page has a level of encryption that makes it safer to input your sensitive information (like a credit card number). To check whether or not a website is using a secure connection, all you have to do is look in the address bar of your browser. Does the address start with HTTPS? It's secure! Some browsers will also show a padlock and will say Secure when the connection is using SSL.
Do not shop while using public Wi-Fi
Public Wi-Fi is convenient, but it's nowhere as safe as private Wi-Fi or a cellular data connection. It might be tempting to sit at a cafe and shop online, but be wary of completing transactions or even signing into any accounts that contain sensitive information.
If you must use public Wi-Fi when shopping online, a VPN can go a long way in keeping you secure.
Use a VPN while shopping online

No matter how you're connecting to the internet, a Virtual Private Network (VPN) adds a layer of security and privacy that can mean the difference between a positive shopping experience and a headache.
A VPN acts as an encrypted tunnel between your PC or phone and the open internet, blocking interested parties from seeing the information you're sending and receiving. Wondering where to start? We've written a ton of guides on the subject.
- The best VPN services for 2017
- Best free VPN services
- VPNs for beginners: A simple guide to protecting your online privacy
- 6 good reasons why you should use a VPN
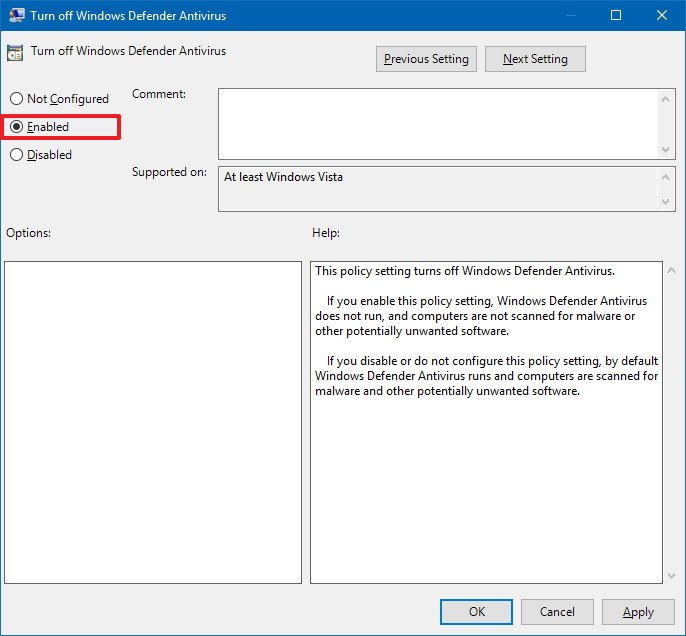
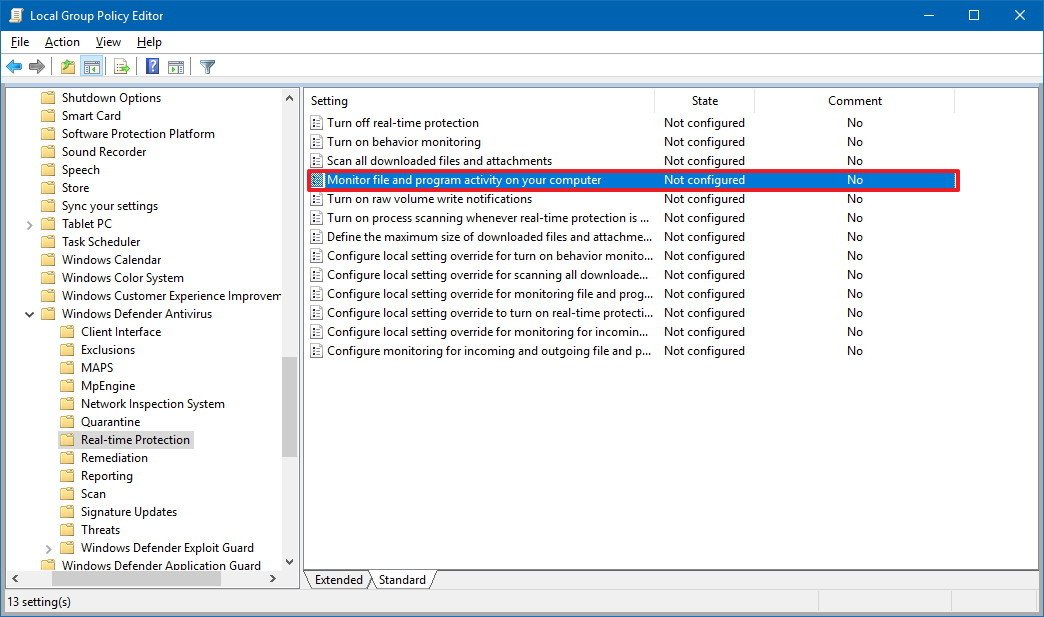
Run anti-malware software before starting

If your PC is already infected with malware — especially a keylogger — you might be at risk right from the start when shopping online. Entering your information, like a credit card number, could be recorded and relayed to an interested party.
Before shopping, it's a good idea to run a scan on your PC, both with an antivirus and with Malwarebytes to ensure your PC is clean.
- Download Malwarebytes (free)
- Best free antivirus alternative to Windows Defender
- Best antivirus software of 2017
- Do you really need PC antivirus in 2017?
- 7 tips to keep your Windows PC protected from malware
- 9 best ways to keep your PC secure
Don't fall for fake shopping apps

Most big online shopping companies have excellent apps that provide a safe and secure shopping experience. However, app stores often have knockoffs that attempt to masquerade as official apps in order to skim your information.
You always want to make sure that the app you're using is the official version. How can you tell? Official apps for big sites will often have thousands of reviews, which you can read to see if the app is for real. Checking out the website of the company might also provide you with a link to the real app, allowing you to bypass any impostors in an app store.
Best shopping apps for Windows 10
Keep an eye out for phishing emails
One of the most common ways for interested parties to get your information is through phishing emails. A legit-looking message talking about some promotion or other attractive offer will be sent your way, and the link provided in the email will lead you somewhere malicious.
If you receive an email offering some sort of too-good-to-be-true offer, ignore all links in the email and try finding the deal online yourself. Mark these messages as spam and carry on.
Always use a strong password for shopping accounts

Going to all the hassle of protecting your identity when shopping online only to have someone guess your password is counterproductive. Be sure to create strong, different passwords for each service you use, including accounts with online retailers.
A strong password should be made up of capital letters, numbers, and symbols in no order. How to remember all those passwords? Think about working with a password manager.
Best password manager for Windows
Don't give online retailers more information than is required
Most online retailers will require payment information — including credit card — and shipping information, but they should never ask for anything more. Are you being pumped for your date of birth or other sensitive information? The retailer might not be above board.
Only ever fill in required fields when checking out, and if something seems like it's asking too much, do a search online to verify the legitimacy of the website. Searching for the website's name and the word "review" or "legit" will usually do the trick.
Try to pay with a credit card or PayPal

Some online retailers will let you pay with a debit card, but that doesn't mean you should. Sticking with a credit card usually means you'll be treated to a checkout process that's more secure, and there's often fraud protection in the case you do get burned.
If you'd rather not deal with a credit card, PayPal is an excellent middleman. You can still pay with your actual funds, but your financial information won't be shared with the retailer.
Put a lock on your phone or laptop

Shopping apps on mobile devices make it easy to shop online, but they also contain a ton of your personal information. If your phone is full of these apps, be sure to either log out after each use or be sure to put a lock on your phone. Likewise, think about adding a lock to your laptop if you use it in public.
If you misplace your device or it is stolen, the person who finds it will have a much harder time getting ahold of credit card and billing information when there's a password in the way.
Are you shopping online?
Do you often take advantage of the convenience of online shopping? Do you worry about the security of your data and identity? What are your tips for staying safe? Let us know in the comments section!