Quantcast
Channel: Help & How To
Viewing all 5861 articles
Browse latest View live

Four big differences between DDR3 and DDR4 RAM

$
0
0

Four big differences between DDR3 and DDR4 RAM

Which type of RAM is best for me?

Not having enough RAM in your PC can truly wreck your day no matter what you're trying to accomplish. If you're in the market for more RAM, you might be wondering about the differences between DDR3 and DDR4 RAM, and whether or not they really matter to you.

RAM explained

The random-access memory (RAM) in your computer is used to hold data that is frequently accessed by your processor (CPU). It can be likened to your office where you have a corkboard with a bunch of papers on it for easy, quick reference.

Kingston DDR3 RAM

Why use RAM when we have hard-disk drives (HDD) and solid-state drives (SSD)? Reading from and writing to a hard drive, even a solid-state drive, is much slower than reading from and writing to RAM. The connection between the CPU and the RAM, also know as the memory bus, is designed for speed, and the entire package uses a small amount of energy to do its job. Accessing a hard drive is sort of like standing up, opening a filing cabinet, and pulling out a paper — much slower than if the paper is already on a corkboard in front of you.

DDR3 and DDR4 RAM don't work together

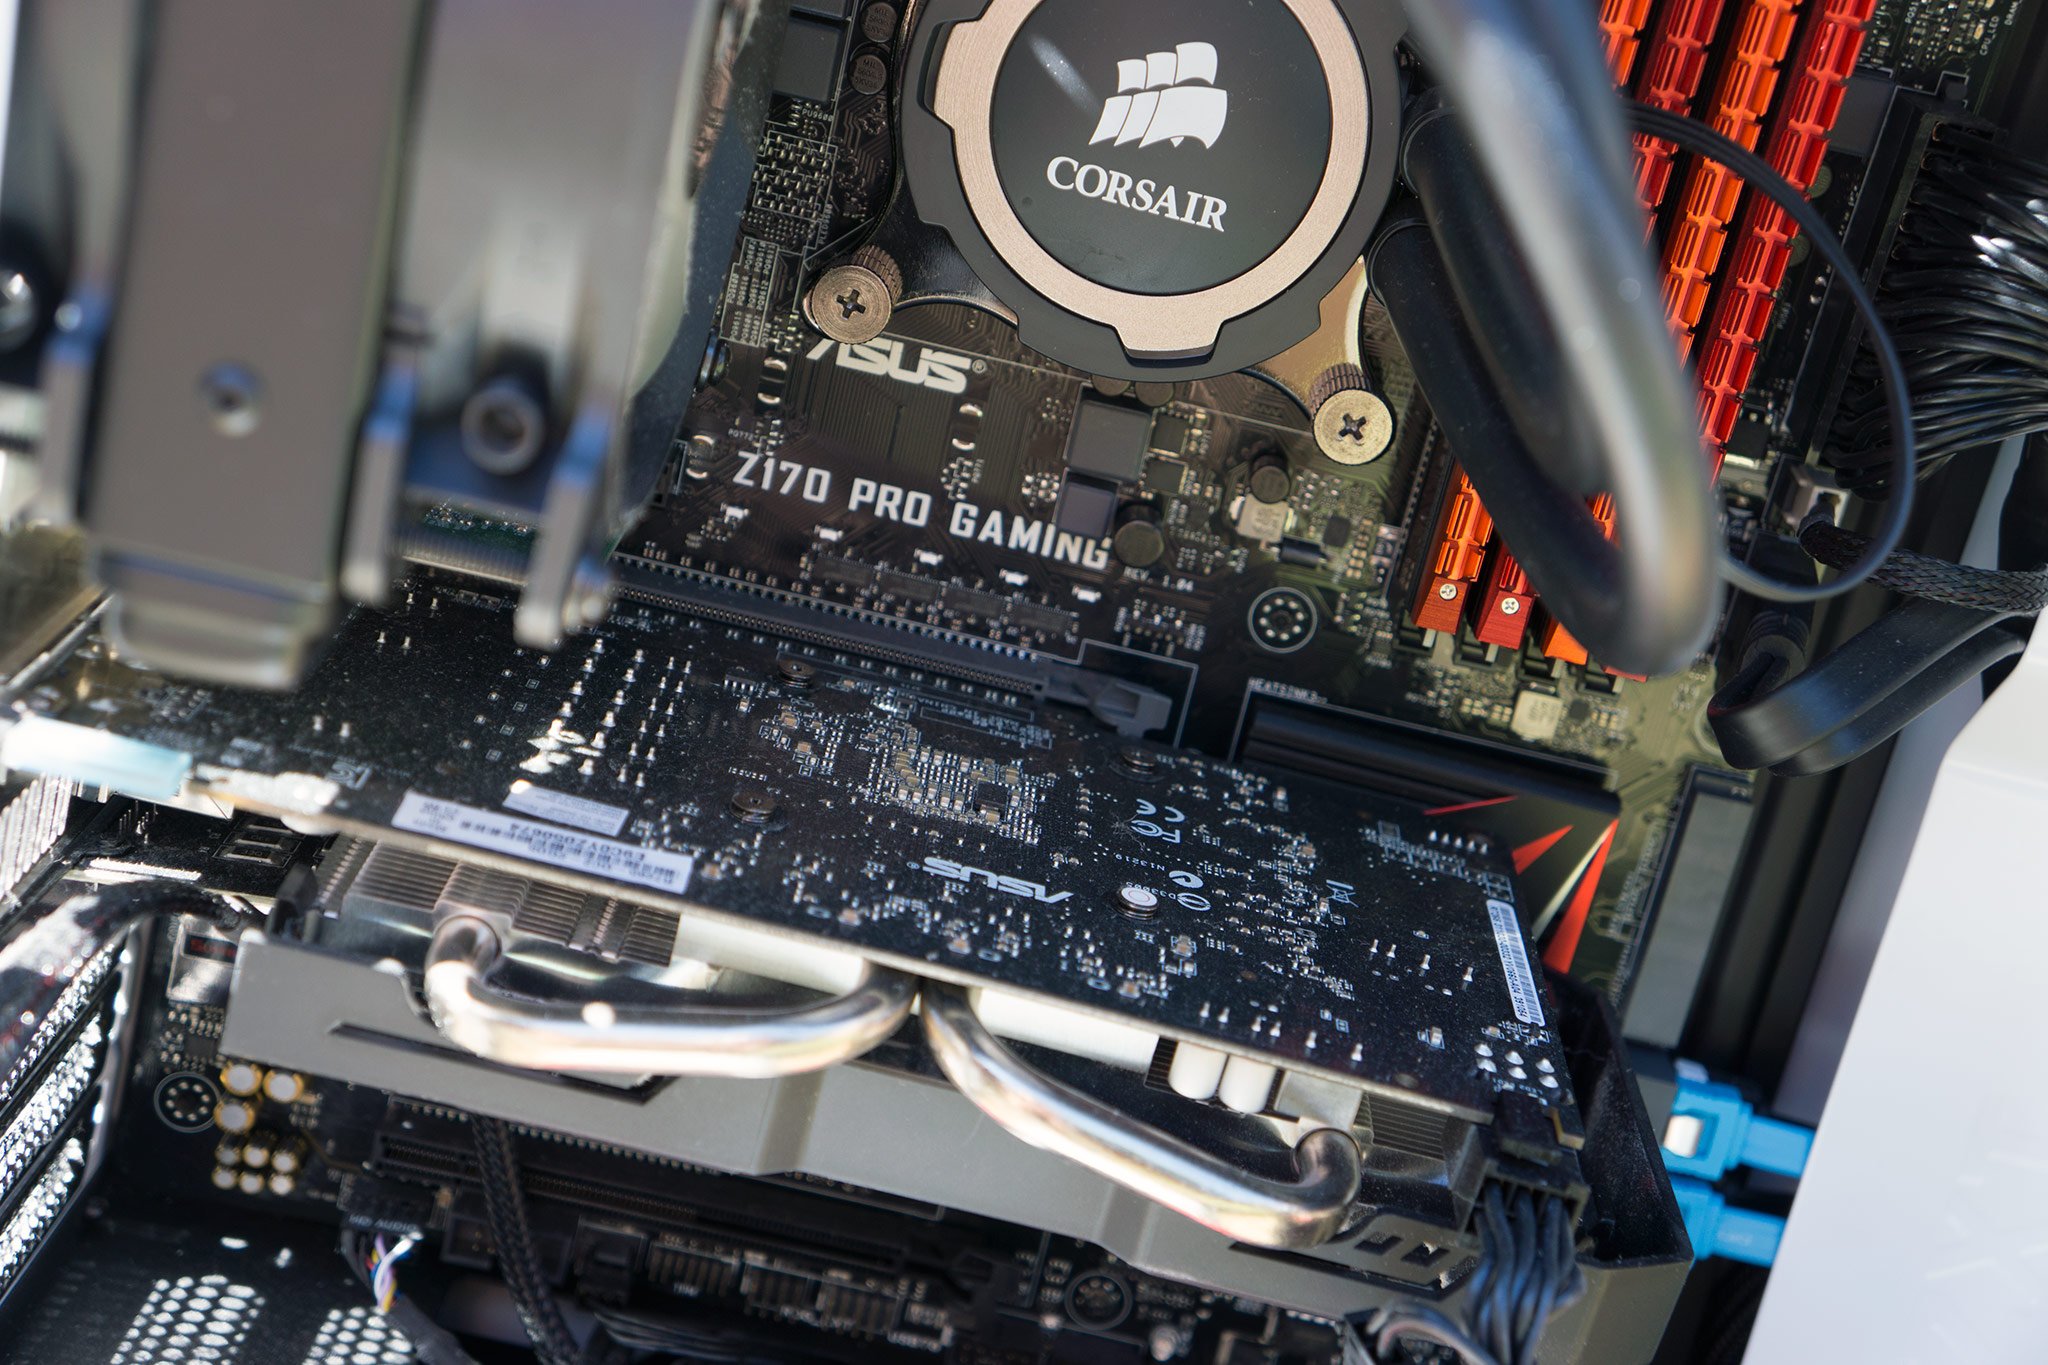
The first noticeable difference between the two RAM-types is the physical layout of the pins on each module. DDR3 RAM uses a 240-pin connector, while DDR4 RAM uses a 288-pin connector.

DDR3 RAM with 240 pinsDDR4 RAM with 288 pins

Why are they different? A motherboard and CPU that work with DDR3 RAM don't work with DDR4 RAM and vice versa. The different connectors ensure no one accidentally installs the wrong type of memory. Also, take note that not all RAM works with all processors, even if it fits into the motherboard. Take time to research and make sure all parts of your PC are compatible. If you need a hand, PC Part Picker has a wonderful tool that shows you what works together and what doesn't.

You might also hear mention of DDR3L RAM. This RAM has the same pins and works with any CPU and motherboard that works with DDR3 RAM. The difference? DDR3L RAM can function at both 1.5V and 1.35V, while DDR3 RAM is stuck at 1.5V.

DDR4 RAM looks faster on paper

When studying data transfer rates of RAM, you'll see it measured in either million transfers per second (MT/s) or gigatransfers (billion) per second (GT/s). A higher transfer rate means you have more bandwidth and will thus be able to transfer more data at once. DDR4 RAM can transfer data at a rate between 2133MT/s and 4266MT/s, while DDR3 RAM can only hit transfer data rates between 800MT/s and 2133MT/s.

Another number you'll see is the clock speed, which is how fast the RAM can read and write data. The clock speed number, represented in megahertz, is the number of cycles per second the RAM can perform.

Finally, Column Access Strobe latency, also known as CL, must be taken into consideration. CL is the number of clock cycles it takes for the RAM to deliver a piece of data requested by the CPU. Even if you have blazing fast clock speeds, high latency will put a damper on your RAM party.

If we compare four types of Corsair RAM, it's evident that a higher clock speed and the higher transfer rate afforded by DDR4 RAM doesn't necessarily always make it better.

NameTypeClock speedLatencyResult
Corsair Vengeance ProDDR3L1600MHzCL99/1600MHz = 0.0056
Corsair Vengeance LPXDDR42400MHzCL1414/2400MHz = 0.0058
Corsair Dominator PlatinumDDR32400MHzCL1111/2400MHz = 0.0045
Corsair Dominator PlatinumDDR43200MHzCL1616/3200MHz = 0.0050

When shopping for RAM, always take all specifications into consideration. Higher numbers on the label don't necessarily mean faster performance.

DDR4 RAM uses a lower voltage

The standard voltage of DDR3 RAM sits at 1.5V, while DDR3L RAM can use both 1.35V and 1.5V. DDR4 RAM, on the other hand, uses 1.2V. While this isn't a big difference for most of us using one or two RAM modules — you're not going to see a difference on your electricity bill — server farms with thousands of RAM modules will definitely enjoy sucking less power.

DDR4 RAM costs more

Patriot Viper DDR4 RAM

When DDR4 was first released, the price gap was quite large. The gap has shrunk a lot since then, but in general, DDR4 RAM still costs more.

If we look at the prices of the Corsair Dominator Platinum RAM from the table above, it's clear that even though the DDR3 RAM performs better when considering clock speed versus latency, it is still cheaper — DDR3 costs about $115, while DDR4 costs about $130. Again, this isn't a huge difference if you're only buying one or two modules, but in instances where you need a lot of RAM, the cost can really add up.

So...which RAM do I choose?

Going with DDR3 or DDR4 RAM really depends on what other hardware you're currently using, and what hardware you plan on using in the future.

If you have an aging motherboard and a 4th- or 5th-generation Intel CPU, you'll probably be going the route of DDR3 once you figure out all the compatibility stuff. If you have a recent motherboard and, say, a 6th-generation Intel CPU, DDR4 RAM is a good investment for the future — it's hard to believe DDR4 RAM won't be used for quite some time to come.

Which RAM do you use?

What are you running in your PC build? Were you able to go with DDR4, or are you still using DDR3? Tell us in the comments section below!


How to flush Live Tile notifications during shutdown on Windows 10

$
0
0

When Live Tile notifications become overwhelming, you can use this guide to clear their content as you exit Windows 10 for a less noisy experience.

Windows 10 is a significant shift from Windows 8.x, but the new operating system still carries over some of the features Microsoft introduced in the previous version, including the Live Tiles you see in the Start menu.

These Live Tiles can light up and display updates for certain events depending on the application. For example, the News app tile may show you the latest trending headlines; the Mail app will notify you of recent unseen emails; and the Store app may promote certain apps and services.

The idea behind the Live Tiles is to give you a glimpse with useful information about apps or services you're using without you having even to open the app. However, as you start your computer, the information on tiles can be overwhelming and repetitive, especially if a particular tile got hangup and continuously shows you the same update.

Fortunately, Windows 10, similar to Windows 8.x, includes an option to quickly flush the cache content of the Live Tiles as you sign out or restart your computer.

So they can get re-hydrated with new information automatically or after you launch the app.

In this Windows 10 guide, we'll walk you through the steps to clear the Live Tiles notifications for apps as you exit the operating system.

How to clear app Live Tiles notifications on exit

Important: This is a friendly reminder to let you know that editing the registry is risky, and it can cause irreversible damage to your installation if you don't do it correctly. It's recommended to make a full backup of your PC before proceeding.

  1. Use the Windows key + R keyboard shortcut to open the Run command, type regedit, and click OK to open the registry.
  2. Browse the following path:

    HKEY_CURRENT_USER\SOFTWARE\Policies\Microsoft\Windows\

  3. Right-click the Windows (folder) key, select New, and click on Key.
  4. Name the key Explorer and press Enter.

  5. Select the Explorer (folder) key, and right-click on the right side, select New, and click on DWORD (32-bit) Value.
  6. Name the new DWORD ClearTilesOnExit and press Enter.
  7. Double-click the newly created DWORD and change its value from 0 to 1.

  8. Close the registry.
  9. Restart your computer to complete the task.

Once you completed the steps, when you're signing out, the operating system will automatically clear the notification information on the Live Tiles on the Start menu. Then when you sign back in, you should see the Live Tiles empty.

At any time you can revert the changes by using the steps mentioned above, but this time on step 7, change the value of the ClearTilesOnExit from 1 to 0, and restart your computer.

Keep in mind that resetting the Live Tiles won't prevent the app from re-downloading new notifications. Depending how the app is designed, some will eventually download new updates, and some other apps like the Store app will resume showing updates once you launch the app again.

You can always turn off Live Tiles by using the apps context menu to prevent from showing notifications, but sometimes you may want to reset its content and not necessarily disable the notifications. In addition, this is a good way to reset Live Tiles that might get stuck, and they're not updating its content properly.

More Windows 10 resources

For more help articles, coverage, and answers on Windows 10, you can visit the following resources:

Beginner's guide to redstone in Minecraft: Windows 10 Edition Beta

$
0
0

Beginner's guide to redstone in Minecraft: Windows 10 Edition Beta

How do I use redstone in Minecraft?

Redstone is an amazing resource found in the Minecraft world that lets you create basic or complex contraptions. Create a hidden door to help protect your castle, or create a functioning calculator to help you with your homework. While some of these contraptions are incredibly difficult to build, we're here to help you get off to a good start with redstone!

Where to find redstone

Redstone ore blocks are found in the bottom 16 layers of the Overworld. Use either an iron or diamond pickaxe to mine the block.

Redstone in the wild!

Each block of redstone ore, when mined, will drop four or five pieces of redstone. If you're not into mining that deep, you can also get redstone from killing witches, trading with villagers, or looting chests found throughout the world. There is also 15 pieces of redstone in every jungle temple.

How redstone works

Redstone is used in plenty of recipes, but using it to create contraptions is where things really get fun. When you place redstone on the ground, it creates a line of redstone dust that can transmit power.

A line of redstone.

Redstone dust can turn 90 degrees.

Redstone turning the corner.

Redstone dust can climb one block at a time.

Redstone going up a block at a time.

You must attach a power source to the redstone in order to power it. Power can be transmitted up to 15 blocks away. The light in the redstone dust dims until the last piece becomes completely unpowered.

A line of redstone that powers out at 15 blocks.

Power carried by redstone will transmit to blocks adjacent to it.

The blocks adjacent to the powered block are also powered.

Some power sources also give power to other blocks. As you can see below, the blocks around the block the lever is attached to also receive power.

Get to know how power around levers works!

If one of the redstone lamps that are lit up were, say, a piston, it would be extended because it is receiving power.

A piston that is receiving power.

Common power sources

You don't necessarily need actual redstone to create a powered contraption. You can, for example, craft a lever, attach it directly to a piston, and switch it on. Redstone really comes into play when you need to link several small devices together to create a complex contraption. Here are a few sources of power that you'll use most when experimenting with redstone.

Redstone torchRedstone torch: Craft one of these from a stick and a single piece of redstone. These provide constant power.

ButtonButton: Buttons are great when you want to activate your redstone contraption for only a few seconds.

LeverLever: Place a lever in a redstone contraption when you want to be able to turn it on and off.

Pressure platePressure plate: Pressure plates can be used to trigger redstone contraptions. Try one of these with a door so that you can enter your home with ease when you approach.

Redstone blockRedstone block: Craft one of these from nine pieces of redstone. A redstone block will power the blocks around it.

Blocks not compatible with redstone

Pretty much every block in Minecraft will let you put redstone on it and will conduct power. A good general rule to follow is if you can't see through it, it works. There are, however, some exceptions:

  • Chests
  • Glass
  • Glowstone
  • Hoppers
  • Pistons
  • Slabs
  • Stairs

If you're building a contraption and can't figure out why your power isn't where it's supposed to be, ensure all the blocks you're using are compatible with redstone.

Tips and tricks

Here are a few tips and tricks to help you build a great redstone contraption.

Extend your power

If you need to extend the range of your redstone power, you can use a redstone repeater.

A repeater extends your line of power.

This will carry the current another 15 blocks past the repeater.

Create a tower

You can move power up the chain using redstone torches.

Sometimes you need power on the upper floor! Creating a stack of blocks with redstone torches between lets you transfer power straight up. Hitting the lever at the bottom will cause the torches to all switch on or off, so plan accordingly.

Use a daylight sensor to create automatic lighting

Want your house to light up when night falls? All you need is a daylight sensor, some redstone, a redstone torch, and a redstone lamp.

A simple example of an automatic lighting system.

The torch is on by default, so when it receives power from another source, it turns off. When night falls, the power to the torch will stop, and the polarity will change — the torch will turn on again and the redstone lamp will light up.

Your redstone contraptions

Have you gone to great lengths to create a complex contraption? What was its use? Let us know in the comments section below!

Guide Default Menu: 
menu-minecraft-ultimate-guide

Farming Simulator 17 Guide: How to make unlimited easy money

$
0
0

Farming Simulator 17 Guide: How to make unlimited easy money

Farming Simulator 17 allows console and PC gamers to manage all activities of a farm. Running a farm costs money, though. This guide tells you how to endlessly generate money with no extra effort, so you can concentrate on the tasks you want and buy all the best equipment without ever going broke.

See on the Xbox Store

Before we begin

Xbox One Power mode settings

Note that this strategy involves leaving your Xbox One or other console of choice on for several hours at a time while you build up your fortune. You'll want to use a wired controller (such as the Hori Pad Pro) or plug a wireless one into the console to prevent the controller from powering off and interrupting the game. Don't worry, the effort (and electricity) will pay off!

You'll also need to make sure your console or PC doesn't automatically power off while idling. On Xbox One:

  1. Double tap the Home/Xbox button to access the guide menu.
  2. Go to the Settings icon near the bottom.
  3. Select All settings.
  4. Head to Power & startup.
  5. Select Power mode & startup.
  6. Change the turn off after setting to Don't turn off automatically.

This method works with either a new save or an existing one, and it can be done on any difficulty. We'll start from scratch on Easy difficulty on the Goldcrest Valley map and go from there. You can turn DLC vehicles on or off, but having them off to start with is better.

Selling starting equipment

Farming Simulator 17 Guide: How to make unlimited easy money

Our goal is to produce structures that create money on their own and then let the game idle over time while the money comes pouring in. The big impediment to doing that in Farming Simulator 17 is that some vehicles and equipment have upkeep costs. We'll have to ditch that stuff.

After starting your new save:

  1. Press the Shop button (View/Back on Xbox One) to launch the shop.
  2. Press the Garage button (Y on Xbox One) to view the equipment you own.
  3. Identify each machine that costs 100 or more currency per day in upkeep. This cost is indicated by a green money symbol in the equipment description.
  4. Select each of these high-upkeep items and choose to sell it.
  5. Equipment to sell on Easy difficulty: New Holland 8340, Case 1455 XL (2), Case 1660 Axial-Flow, and Case 1030 14FT

Equipment sells for only 23 percent of its original value, so you're losing money by selling off the starting equipment. But don't worry – you'll make it back tenfold in just a few days of real-time.

Borrowing more money

Farming Simulator 17 Guide: How to make unlimited easy money

Before we can start making money, we still need a larger nest egg. We'll take out a bigger loan and pay it back once we're comfortably wealthy.

  1. Press the menu button (Menu/Start on Xbox One).
  2. Access the Finances tab (Change tabs with the bumper buttons on Xbox One).
  3. Select Borrow 5,000 and borrow the maximum amount of money. You should now have 250,000 in the bank.

With our nest egg secured, it's time to invest in a couple of solar collectors , also known as solar panels. These generate 110 money per hour with no supervision and minimal maintenance costs. That's down from 380 per hour in Farming Simulator 15, but it still works for our purposes.

Investing in solar panels

Farming Simulator 17 Guide: How to make unlimited easy money

To buy solar collectors:

  1. Press the Shop button (View/Back on Xbox One) to launch the shop.
  2. With the default Category sorting, head all the way to the right to Placeables.
  3. Select solar collector and place it nearby, preferably where it won't get in the way of your vehicles.
  4. Place a second solar collector as close as possible to the first. That's 250,000 spent.

Now that we have our Solar collectors ready, it's time to speed up their money generation.

  1. Press the menu button (Menu/Start on Xbox One).
  2. Access the Game Settings tab (Change tabs with the bumper buttons on Xbox One).
  3. Change Timescale to 120x.
  4. Make sure plant withering is off. All other settings can stay at default on Easy difficulty.
  5. Save the game (X button on Xbox One) and leave the menu screens.

At 120x, every 30 seconds of real-time equate to one in-game hour. One minute equals two game hours. With daily maintenance costs factored in, each solar collector generates 298 money per minute at this speed. With two of them, you're raking in 596 per minute and 35,760 per hour of real time.

Farming Simulator 17 Guide: How to make unlimited easy money

Our eventual goal is to buy eight solar collectors before graduating to more expensive equipment. You just need to leave the game running and amassing money until you accumulate enough money for each subsequent solar collector. You can work on Achievements while you wait, or just leave the game running while doing something else entirely. Be sure to let the game run while you sleep. And very importantly, remember to save periodically!

Here's how long it will take to earn 125,000 money as you buy more collectors:

  • Two solar collectors: 3.5 hours
  • Three solar collectors: 2 hours, 20 minutes
  • Four solar collectors: 1 hour, 45 minutes
  • Five solar collectors: 1 hour, 25 minutes
  • Six solar collectors: 1 hour, 10 minutes
  • Seven solar collectors: 1 hour
  • Eight solar collectors: 53 minutes

Winning with windmills

Farming Simulator 17 Guide: How to make unlimited easy money

Our next goal is to buy a wind energy generator, also known as a windmill. These cost 1,200,000 money and generate 1500 per hour, down from 4,000 per hour in Farming Simulator 15. With daily maintenance costs factored in, a wind energy collector produces 2996 per minute and 179,760 per hour of real-time. Add in the solar panels and you're making 322,800 every real-time hour.

With eight solar panels, it will take 8 hours and 24 minutes to save up 1,200,000 money for your first wind energy converter. Given the long wait, it's a good idea to let the game run overnight at this point. During this time, you should earn the 'In for the Long Haul' and 'Peak Profits' Achievements.

Once you have 1,200,000 saved up:

  1. Press the Shop button (View/Back on Xbox One) to launch the shop.
  2. With the default Category sorting, head all the way to the right to Placeables.
  3. Select wind energy converter and place it near your solar panels.

How many wind energy converters to buy is up to you. I like having an arsenal of them. That way, when you turn the in-game time back to normal, you'll still have a constant flow of easy income.

Farming Simulator 17 Guide: How to make unlimited easy money

Here's how long it will take to earn 1,200,000 as you buy more wind energy converters:

  • One wind energy converter, eight solar panels: 3 hours, 44 minutes
  • Two wind energy converters, eight solar panels: 2 hours, 24 minutes
  • Three wind energy converters, eight solar panels: 1 hour, 45 minutes
  • Four wind energy converters, eight solar panels: 1 hour, 24 minutes
  • Five wind energy converters, eight solar panels: 1 hour, 10 minutes
  • Six wind energy converters, eight solar panels: 59 minutes
  • Seven wind energy converters, eight solar panels: 52 minutes
  • Eight wind energy converters, eight solar panels: 46 minutes

Once you start amassing wind energy collectors, the wait between millions shrinks exponentially. Return time to normal and start playing whenever you're ready. You can now buy all the equipment you want, regardless of maintenance costs. You should also pay back your loan (use the Repay option from the Finances menu) to get the 'Financial Independence' Achievement.

Congratulations, you're a wealthy farmer

Farming Simulator 17 Guide: How to make unlimited easy money

Wind and solar power sure pay off in Farming Simulator 17. By following our guide, you can be a millionaire in as fast as three days of real time. With financial independence, you're free to build your farming empire and focus on your favorite activities. If only it were so easy in real life!

See on the Xbox Store

How to create shortcuts to start a Windows Defender scan on Windows 10

$
0
0

Here's a quicker way to run certain Windows Defender tasks to keep your computer free of malware on Windows 10.

Windows Defender is the security software that protects your PC against different types of malware, including viruses, spyware, and other kinds of malicious code that may cause harm to your device.

Although you can choose from a slew of alternative antivirus software, Windows Defender has been improving over the years, and it has proven to be a robust security solution. You don't only get real-time protection and free updates, but for advanced users, there is even a command-line utility to manage and schedule custom tasks.

Furthermore, you can also use the command-line utility to create scripts to quickly run certain tasks and keep your computer running smoothly.

In this Windows 10 guide, we'll walk you through the steps to create different shortcuts using specific commands to run a full or quick virus scan with a single double-click. Plus, we'll show you a quick way to scan the Downloads folder for infected files without even having to open File Explorer.

How to create a shortcut to do a full scan using Windows Defender

Instead of opening up Windows Defender, you can use the following steps to create a shortcut to run a full virus scan on your computer:

  1. While on the desktop, right-click, and from the context menu select New, and click Shortcut.

  2. Copy the following commands and paste it in the location of the item field, and click Next:

    "%ProgramFiles%\Windows Defender\MpCmdRun.exe" -Scan -ScanType 2

    Or as an alternative, you can use the following command, which will start a full scan while opening the Windows Defender interface:

    "%ProgramFiles%\Windows Defender\MSASCui.exe" -FullScan

    Also, you can use the same command but adding the -Hide switch to run the full scan with the Windows Defender interface minimized.

    "%ProgramFiles%\Windows Defender\MSASCui.exe" -FullScan -Hide

  3. Enter a custom name for the shortcut, such as "AV Full Scan" and click Finish.

  4. Right-click the shortcut and select Properties.
  5. Click the Change Icon button.
  6. In Change Icon, enter the following path and press Enter::

    %ProgramFiles%\Windows Defender\MSASCui.exe

  7. Select the Windows Defender icon and click OK.

  8. Click Apply.
  9. Click OK to complete the task.

Once you completed the steps, simply double-click the shortcut to launch a full scan using Windows Defender.

How to create a shortcut to do a quick scan using Windows Defender

If you prefer, you can create a shortcut to do a quick malware scan on your computer with a single double-click with the following steps:

  1. While on the desktop, right-click, and from the context menu select New, and click Shortcut.

  2. Copy the following commands and paste it in the location of the item field, and click Next:

    "%ProgramFiles%\Windows Defender\MpCmdRun.exe" -Scan -ScanType 1

    Or as an alternative, you can use the following command, which will start a quick scan while opening the Windows Defender interface:

    "%ProgramFiles%\Windows Defender\MSASCui.exe" -QuickScan

    You can use the same command but adding the -Hide switch to run the quick scan with the Windows Defender interface minimized.

    "%ProgramFiles%\Windows Defender\MSASCui.exe" -QuickScan -Hide

  3. Enter a custom name for the shortcut, such as "AV Quick Scan" and click Finish.

  4. Right-click the shortcut and select Properties.
  5. Click the Change Icon button.
  6. In Change Icon, enter the following path and press Enter:

    %ProgramFiles%\Windows Defender\MSASCui.exe

  7. Select the Windows Defender icon and click OK.

  8. Click Apply.
  9. Click OK to complete the task.

Once you completed the steps, simply double-click the shortcut to launch a quick virus scan using Windows Defender.

Bonus: How to quickly scan Downloads folder for malware

If you usually download a lot of files from the internet, instead of doing a full scan, you can setup a batch file to scan only the Downloads folder on-demand to make sure you didn't download any file that can harm your computer.

  1. Open Notepad.
  2. Copy and paste the following commands:

    "%ProgramFiles%\Windows Defender\MpCmdRun.exe" -Scan -ScanType 3 -File %userprofile%\Downloads
    @pause

  3. Click on File.
  4. Click on Save as.
  5. Pick a descriptive name, such Scan_Downloads, and append the .bat file extension.

Now simply double-click the Scan_Downloads.bat file to begin the scan on the Downloads folder.

If the scan return code is 0, the no malware has been found, or it was successfully removed. And if the scan returns code is 1, then a malware was found and couldn't be cleaned.

It's worth pointing out that you're not limited to scan the Downloads folder, you can always change the folder path %userprofile%\Downloads on step 2 and replace it with the location you want to do a quick scan for malware.

Remember that the Windows Defender command-line utility (MpCmdRun.exe) includes a number of features you can use to get even more creative.

While we're focusing this guide on Windows 10, these instructions should also work with previous versions of the operating system, including Windows 8.1 and Windows 7.

Do you usually manually do a malware scan on your computer? Tell us in the comments below.

More Windows 10 resources

For more help articles, coverage, and answers on Windows 10, you can visit the following resources:

How to rack up the most points with the assault class in Battlefield 1

$
0
0

How to rack up the most points with the assault class in Battlefield 1

How do I play as the assault class in Battlefield 1?

The assault class in Battlefield 1 is suited for players who like to confront the enemy up close. They have the best gadgets for taking out tanks and other vehicles and are the only class that can use shotguns. Ready to focus on getting kills rather than reviving friends or handing out ammo? Here's how to do your best while playing as the assault class in Battlefield 1.

Assault basics

There are some general tips to follow to maximize your potential when playing as the assault class.

Be disposable

Be disposable!

Your place on the battlefield is at the front line. When you're playing as the assault class, expect to die a lot while you try to cap objectives, disable armor, and kill enemy infantry. Don't make your medic friend rush into a building first — if they die, you're going to miss out on a revive. Volunteer to take the lead whenever possible. You'll get more points, both as an individual and as a squad.

Wait for a revive

Wait for a revive!

When you go down, you might be tempted to skip the revive process so that you can get right back out onto the battlefield. Try waiting for the full extent of the revive process — a medic will most likely come along before you skip back to the menu, and you will have saved your team a reinforcement ticket. These tickets add up across a large team, and saving one here and there can make a big difference at the end.

Don't ignore armor

Take out armor!

The assault class is expected to deal with armor! Sure, other classes can help out, but you are the only ones with anti-tank mines and heavy anti-tank grenades. When armor comes rolling onto the battlefield, finish up whatever you're currently working on before coming up with a strategy to take it out. Your team will love you if you remove armor, as even one tank can seriously tilt a battle if it goes ignored for too long.

Take your time

Just because you're disposable and have a powerful shotgun in your hands doesn't mean you can't play smart. Taking the lead when entering an objective's area can be done strategically to best prolong your expendable life — use your gadgets to flush out any entrenched enemies, and be sure to check your corners when entering a new building.

Change the magnification on your weapon

The iron sights on guns in Battlefield 1 have a few magnification options. While it's not the same as looking down a red-dot sight, if you're having problems hitting enemies who are a decent distance away, you can add magnification. There aren't any optics involved; the number represents how zoomed in your view becomes when you aim down the sights.

Change your magnification.

When playing as the assault class, it's never a bad idea to lower the magnification as low as it can go. This gives you way better peripheral vision. You'll probably be mostly dealing with close-quarters combat, and you'll be able to identify your next target way easier.

Ideal loadouts

Here are some great loadouts based on how you like to play the assault class in Battlefield 1.

Hellfighter

One of the most frustrating things in Battlefield is trying to fight through gas. The gas mask you're forced to wear doesn't let you aim down the sights of your gun, and visibility is limited. The premise of this playstyle is simple — you toss your gas grenades, you get a few squad members to toss their gas grenades, and you go rushing in with your gas mask and shotgun. Because you don't need iron sights or much range, the shotgun is very effective. Try this tactic when flushing out heavily contested bunkers or houses.

Hellfighter loadout

Primary: Model 10-A Hunter. This is arguably the best shotgun in the game — maximum damage, great hip-fire control, and good accuracy.

Sidearm: The P08 pistol holds nine rounds and does decent damage. For more stopping power, go with the Gasser M1870.

Gadgets: Anti-tank grenades and dynamite let you do the most damage at close range.

Grenade: Gas grenades are your best friend here.

Melee: Take whatever you're most comfortable with — you'll be using it often.

Tank buster

The assault class is relied on heavily to take out armor when it comes rumbling onto the battlefield. A good squad should have a medic and support class feeding you health and ammo while you fire explosives and set traps. Here's a great loadout for taking out enemy armor as quickly as possible.

Tank buster loadout

Primary: Whatever you're comfortable with. The MP 18 and the Model 10-A are both great choices.

Sidearm: Again, whatever you're comfortable with. You're going to need some up-close firepower when the tank crew comes pouring out.

Gadgets: Use the AT rocket gun and anti-tank grenades. If you like setting traps, swap out the grenades for anti-tank mines.

Grenade: Why not add a light anti-tank grenade to the mix? If you really want to frustrate the driver, take a smoke grenade and pop it next to the tank.

Melee: Whatever you want.

Front-line infantry

The assault class is the most expendable class on the battlefield — consider yourself like the pawns in a game of chess. Yes, you're valuable, but you're expected to die for a greater cause. Playing with this loadout will see you get plenty of points as you capture objectives and move your team toward victory.

Front-line infantry

Primary: The MP 18 is the gun the assault class starts with, and it's also arguably the best weapon available. Use it for its excellent hip-fire accuracy.

Sidearm: Take whatever you're most comfortable with.

Gadgets: Take the anti-tank grenades and dynamite.

Grenade: Incendiary or frag grenades will be your best bet.

Melee: Take something that's fast. You're going to want to move from enemy to enemy as fast as you can.

How do you play?

For an even better Battlefield experience, don't forget to have a look at our multiplayer tips!

Do you love the assault class? What's your favorite loadout and playstyle? Tell us in the comments section below!

How to prevent frying your PC insides with static electricity

$
0
0

PC

When working on the insides of a desktop PC — or any electronic device for that matter — static electricity should be a real concern. While the chance of actually frying the internals of your PC are slim, it's a risk you should always consider before opening up that side panel. We take a look at why this can cause problems and how you can go about preventing damage to expensive components.

How can static electricity cause damage?

I'm sure you've had a giggle or two at a balloon being attracted to the hair of another person or have felt a sudden jolt of electricity when touching a metal object. This is all static electricity and is something that can cause problems for electronics equipment.

This occurs due to a difference in electrical charge between two surfaces, be it a balloon and your hair, your body and a doorknob, or a cloud and the ground — yes, lightning is essentially a static discharge. The positively and negatively charged objects are attracted to each other; the balloon draws your hair, or the spark jumps from your finger to the doorknob.

GPU Anti-Static Bag

This all may come across as amusing and entertaining, but it's simply not so for your CPU, motherboard, RAM modules, GPU, and other sensitive components. There's a chance that this electrical jolt transferred to a circuit could damage or render a component inoperable.

Manufacturers of these internal products usually package units in special anti-static bags to protect them in transit, but you could easily provide unwanted juice to the component by having static charge when handling it. The worst part about all this is you won't spot any physical damage if a component has been fried by static electricity.

The best way to prevent this is to ground yourself and your workspace.

How to discharge oneself

Anti-Static Band

Before you're completely thrown off the idea of venturing inside your PC chassis, it's actually really simple to ensure you're not handling any unwanted static charge. Here are some handy tips:

  • Leave your PSU cable connected (but switch the unit off) to keep it grounded.
  • Avoid rubbing oneself against carpeted flooring.
  • Touch a metal part of the chassis itself prior to handling components.
  • Work on a hard, solid surface.
  • Use an ESD mat.
  • Wear an anti-static wristband (pictured above) and connect it to your PC case.

But fear not if you're concerned as the chance of you damaging a component through static charge is indeed low. In the wise words of Reddit users, "99% sure you won't have a problem unless you had just been dancing on the carpet, while on his trampoline, eating Cheetos, with a ominous thundercloud looming overhead, licking syrup off his hands."

Remember though, we're not removing static electricity. Think of these measures as means to offer electricity a faster route to ground. It's better to be safe than sorry.

How to be the best support player in Battlefield 1

$
0
0

How to be the best support player in Battlefield 1

How do I play the support class in Battlefield 1?

The support class in Battlefield 1 is an essential part of the team, right up there with medics. It's your job as a support player to give ammo, repair armor and vehicles, and provide much-needed mortar support over positions that are heavily entrenched. Here's how to get the most out of the support class in Battlefield 1.

Support class basics

There are a few things that every support player should remember no matter what map they're playing on or what loadout they're using.

Give lots of ammo

Your primary job is to supply the team with ammo. There's nothing more annoying than running out, standing beside a friendly support player and having them ignore you while you spam the 'Ammo needed' button.

Resupplying a large group.

Whenever you see some friendly troops, whether or not they've already requested ammo, toss some down. You'll get more points, and your team will love you. Also, keep an eye on your minimap to see where friendly units have requested ammo.

Use mortars on heavily defended areas

Is your team having a hard time taking an objective? Time to switch one of your gadgets over to a mortar.

Mortaring a contested area.

You have two options: high-explosive and airburst. High-explosive mortar rounds land on the ground and can do damage to vehicles and infantry, but you have to be very precise. Airburst mortar rounds explode in the air and do damage to infantry over a wider area.

Shoot a lot of bullets

The primary weapons available to the support class are light machine guns (LMGs). Many of them have a large magazine that allows for continuous fire.

Most other guns in the game punish holding down the trigger with wicked recoil. LMGs actually get more accurate the longer you fire, so don't be afraid of getting a little trigger happy. You can always replenish your own ammo supply with a pack.

Repair vehicles

Repair vehicles!

If your squad is planning on jumping into a tank, don't forget to equip the repair tool. Without it, you'll be at a serious disadvantage.

When taking damage from afar, it's not a bad idea to hop out of the vehicle, position yourself on the side not taking damage, and get to repairing. This allows the driver to continue firing and driving, whereas the driver repairing from inside requires the vehicle to cease all other operations.

Ideal loadouts

There are plenty of combinations to choose from when building a loadout. Here are a few loadouts based around certain playstyles!

Bunker buster

Bunker buster

The nature of trench warfare means your team will come up against some heavily fortified positions. Instead of throwing infantry at the position and losing plenty of tickets, the support class should whip out their mortars and soften up the enemy. Position yourself behind cover, but don't get too close — you don't want the mortar rounds hitting anything and blowing up as soon as they're out of the tube. It will take some getting used to, but figuring out appropriate distances will help you decide where to set up.

Primary: You won't be doing much up-close fighting, so take whatever you want.

Sidearm: Take whatever you're most comfortable with, but a long-range pistol is never a bad idea. The No. 3 revolver is a good choice.

Gadgets: If the enemy team has armor on the objective, take the HE mortar — if they have infantry only, go with the airburst mortar. Also, grab an ammo crate to resupply yourself and teammates.

Grenade: Smoke grenades will help you get a way if a sniper spots you from across the map.

Tanker

Tanker

Every good tank crew needs someone who can repair their machine. Having a full squad inside of a tank with everyone working together is a great feeling and you'll rack up quite the score if you communicate well and play smart.

Primary: The MG15 n.A. is a great weapon, as is the BAR M1918 Trench variant. Keep in mind you'll need it only if infantry gets too close and you have to hop out of the tank to defend.

Sidearm: Take whatever you're comfortable with, but the P08 is a great pistol.

Gadgets: You definitely want the repair tool here, and you can either go with the limpet charge for blowing up enemy vehicles or the ammo crate if you think you might move to infantry support at some point after the tank is gone.

Grenade: Smoke grenades will give you and the tank cover if you need to repair or escape.

Frontline support

Frontline support

There are many opportunities in Battlefield 1 for your team to attack a position as a whole. You'll see medics reviving and healing, assault players launching explosives, snipers keeping the flanks clear, and support units offering, well, support. Bring ammo, bring grenades, and bring a gun with a big magazine.

Primary: The MG15 n.A. Suppressive will be your best friend. It has a 100-round magazine, great control and accuracy, and does decent damage.

Sidearm: Take whatever you're most comfortable with. A suggestion? Try the P08.

Gadgets: Bring an ammo crate to resupply friendly soldiers, and also bring limpet charges. These magnetic explosives can be attached to a vehicle and will detonate automatically after a few seconds.

Grenade: Frag, impact, or incendiary grenades will do plenty of damage to enemy infantry units.

How do you play?

What is your favorite support loadout? Which primary gun have you been most successful with? Let us know in the comments section below.


Here's why you should build your next PC

$
0
0

Intel Motherboard

We take a look at reasons as to why you should build your next PC, saving money by purchasing components themselves and getting the most out of your budget by choosing parts yourself.

Custom PCs like Alienware used to be regarded as seriously overpriced hardware, but the price of pre-built PCs have actually decreased somewhat in recent years. Bring in discounts, promotions and competitive pricing and you have more affordable options. That said, it's still relatively difficult to locate a read-to-order system that can match the price, configuration and expandability of a rig you put together yourself.

Why should you build your next PC?

ZOTAC GTX 1070

The main reason people enjoy building their own PC is it enables them to go shopping for components, as opposed to a single system that can be lightly configured. You'll be able to pick and choose exactly what will be inside the very chassis you end up selecting. It's an incredible feeling, knowing that a full batch of PC internals are on their way to your doorstep. The time arrives to prepare the workshop and brush the dust of the trusty screwdriver.

As well as picking parts out, going for a custom build enables one to get really creative when it comes to cooling components and adding personalized elements to the system. Think custom water cooling with colored coolant, LED lighting effects, high-quality case fans, and preparations for an overclocking environment. There are some magical PC designs out on the web and at various gaming and technology trade shows.

AMD Motherboard

The custom build is also likely easier to upgrade and swap out new parts. Some pre-built systems could be designed in such a way to discourage the owner to remove the side panel and take a peek inside to throw in upgraded RAM or a new GPU, without having to go back through the company. That and putting everything together yourself ensures you know exactly where each component is located, not to mention having cables managed exactly how you wish.

It's also cheaper. Even taking into account Windows licensing, peripherals and other extras, packing in some serious hardware will save you some cash if you put it all together and don't go through a third-party. You're also likely able to go for more advanced components and enjoy features like overclocking, which may not have been available with a similar pre-built system.

Finally, a PC you put together yourself is quite the object to show off. Go on, be proud of your hard work.

Why you perhaps shouldn't

PC Build

It's not all good news when it comes to building your own PC. If you're looking at this option for the very first time and have little experience under your belt, you'll need to take note of a few reasons as to why pre-built can be the better option. If you do not have the knowledge in putting together a PC and know no one who does, simply shopping for components can be quite the daunting task.

What do you need? Is a Core i5 processor overkill? Will it work with an NVIDIA GPU? What the hell is TDP? These are just some of the questions that will likely fill the mind. Luckily, there are some handy guides available to walk through the installation of components, and there are even calculation tools that can tell if components will be compatible and if everything will work when you hit that power button for the first time.

Alienware

The whole process takes more effort too. Even for those who know exactly what they're doing, putting together a PC can take some time, especially if there's an issue or component that's DOA (dead on arrival). This brings me to the next potential downfall for building your own PC — warranties. Instead of having a warranty arranged with a retailer or company that supplied a pre-build PC, you'd be dealing with a manufacturer of an individual component, and that's after you work out which part is causing the problem.

Companies that churn out pre-built systems often buy components in bulk and enjoy better pricing on licensing for operating systems and optional extras. When one takes into account promotions and more aggressive pricing by companies like Dell, you could find a pre-built PC that cost around the same as picking out parts and throwing everything together yourself. It all depends on the type of machine you're after, but usually speaking you'll save some pennies going out on your own.

What's best for you?

Insomnia PC

If you don't have the time, don't care about potential savings (or find a seriously good deal on a unit), don't know what you're doing, or simply do not trust your own judgement when it comes to picking components and installing everything, pre-built or all-in-one PCs are the ideal option for you. You'll be able to configure the machine you want to a degree and simply turn the PC on when it arrives. Job done.

For everyone else, custom PC building is still considered the more affordable and enjoyable route. That and it's rewarding to witness the end result.

How to display last sign-in information during logon on Windows 10

$
0
0

Keep tabs of successful and unsuccessful sign-in interactions by displaying the previous sign-in information during logon on Windows 10.

Windows 10 comes with a lot of security features to keep your account and data safe from prying eyes. You get features like your standard password protection, two-factor authentication when using a Microsoft account, and you can even use a PIN as a secondary method of authentication, which you can make very hard to crack, just to name a few.

However, even with all the security features that the operating system has to offer, if you're sharing your PC or you're in a place where other people may have physical access to your device, there is not an easy way to tell if someone gained access to your computer.

Fortunately, on Windows 10 using a local account, you can view if someone successfully signed in to your PC (and failed attempts), which can help to determine if you need to yell at someone for trying to access your PC without authorization and if you have to reinforce your device security.

In this Windows 10 guide, we'll walk you through the steps to use the Local Group Policy Editor and the Registry to display the last sign-in information and failed attempts to your account since the last interactive logon.

How to display last sign-in information using Local Group Policy

If you're running Windows 10 Pro, Enterprise, or Education, you can use the Local Group Policy Editor to quickly enable a policy to display the last sign-in information during logon.

To view the previous sign-in information and unsuccessful attempts, do the following:

  1. Use the Windows key + R keyboard shortcut to open the Run command.
  2. Type gpedit.msc and click OK to open the Local Group Policy Editor.
  3. Browse the following path:

    Computer Configuration > Administrative Templates > Windows Components > Windows Logon Options

  4. On the right side, double-click the Display information about previous logons during user logon policy.

  5. On the top-left, make sure to select Enabled to enforce the policy.
  6. Click Apply.
  7. Click OK to complete the task.

At any time you can revert the changes by following the same steps, but this time on step 5, you'll need to select the Not Configured option.

How to display last sign-in information using the Registry

In the case your computer is running Windows 10 Home, you won't have access to the Local Group Policy Editor, but if you're up to the challenge, you can tweak the Registry to achieve the same result.

Important: As always, this is a friendly reminder to let you know that editing the registry is risky, and it can cause irreversible damage to your installation if you don't do it correctly. It's recommended to make a full backup of your PC before proceeding.

  1. Use the Windows key + R keyboard shortcut to open the Run command.
  2. Type regedit, and click OK to open the registry.
  3. Browse the following path:

    HKEY_LOCAL_MACHINE\SOFTWARE\Microsoft\Windows\CurrentVersion\Policies\System

  4. Select the System (folder) key, and right-click on the right side, select New, and click on DWORD (32-bit) Value.

  5. Name the new DWORD DisplayLastLogonInfo and press Enter.
  6. Double-click the newly created DWORD and change its value from 0 to 1.

  7. Close the Registry to complete the task.

If you're tweaking the Registry, you can revert the changes by following the same steps, but this time on step 6 change the DWORD value from 1 to 0.

Once you completed the steps, you can restart your computer, and when you sign back in to your local account, you'll now see a first message about interactively signing in to your computer.

Then during the second time and moving forward, you'll see the previous logon information (see image above).

Wrapping things up

While this won't prevent other people from trying to access your computer, now you have at least one way to review if someone broke into your local account or if anyone tried to guess your password but failed in the process.

Keep in mind that even though we're focusing this guide for Windows 10, displaying the previous sign-in information during logon is a feature that has been around for a long time, which means that this should also work in Windows 7 and Windows 8.1.

More Windows 10 resources

For more help articles, coverage, and answers on Windows 10, you can visit the following resources:

How to remove the Network button from the Lock screen on Windows 10

$
0
0

Use this tweak to prevent users from viewing and changing network settings from the Lock screen on Windows 10.

The Lock screen on Windows 10 is the first screen you see before signing in to your account, and it's quite functional. Using the personalization settings, you can configure a number of options, such as app status, a custom background image, and even enable Cortana to perform some basic task when your PC is locked.

Although Windows 10 let you disable many of the Lock screen features, the operating system lacks options to remove certain functionalities, such as the Network icon, which sits in the bottom-right corner, and allows anyone to view and disconnect your device from a Wi-Fi network.

The good news is that if you're trying to make the Lock screen more private, you can tweak the operating system to remove the Network button from the Lock and Sign-in screen, just like removing the Power options.

In this Windows 10 guide, we'll walk you through the steps to modify the Registry to remove the Network button from the Lock screen, and prevent other users from viewing or changing related settings when your PC is locked.

How to remove the Network button from the Lock screen

Important: As always, this is a friendly reminder to let you know that editing the registry is risky, and it can cause irreversible damage to your installation if you don't do it correctly. It's recommended to make a full backup of your PC before proceeding.

  1. Use the Windows key + R keyboard shortcut to open the Run command
  2. Type regedit, and click OK to open the registry.
  3. Browse the following path:

    HKEY_LOCAL_MACHINE\SOFTWARE\Policies\Microsoft\Windows\System

  4. Select the System (folder) key, and right-click on the right side, select New, and click on DWORD (32-bit) Value.
  5. Name the new DWORD DontDisplayNetworkSelectionUI and press Enter.

  6. Double-click the newly created DWORD and change its value from 0 to 1.

  7. Close the Registry and restart your computer to complete the task.

Once you completed the steps, you'll now notice that the Network icon is no longer available in the Lock or Sign-in screen, which help you to make your sign-in experience a little more private.

Sign-in screen with Network button (left), Sign-in screen without Network button (right)

If you want to see the Network icon again on the Lock screen, just follow the same steps, but on step 5 change the DWORD value from 1 to 0.

More Windows 10 resources

For more help articles, coverage, and answers on Windows 10, you can visit the following resources:

How to transfer photos from iPhone and iPad to your Windows 10 PC

$
0
0

How to transfer photos from iPhone and iPad to your Windows 10 PC

How do I get pictures from my iPhone or iPad onto my PC?

The reality of our device-rich world is this: you'll sometimes have a phone or tablet that isn't the same make as your computer. The horror! To make matters worse, you have photos on your iPhone or iPad that you want transferred over to your Windows 10 PC. If you're already using OneDrive on your iOS device, here's how to sync your photos folder with your PC Otherwise, here are a few other simple methods that will get your photos where you want them.

How to download and install iTunes

In order for your PC to recognize the iPhone or iPad in File Explorer, you'll need to install iTunes. Here's how to do it.

  1. Launch your favorite web browser from the Start menu, taskbar, or desktop.
  2. Navigate to www.apple.com/itunes/download.

    Launch your favorite web browser. Navigate to the website.

  3. Click Download Now. You might have to scroll down a bit.
  4. Click Save. iTunes will now download.

    Click Download Now. Click Save.

  5. Click Run when the download is complete. The iTunes installer will open.
  6. Click Next.

    Click Run. Click Next.

  7. Click Install when you're satisfied with the installation parameters.
  8. Click Finish.

    Click Install. Click Finish.

How to transfer iPhone and iPad photos using File Explorer

Using File Explorer to transfer photos from iPhone and iPad won't take long. Install iTunes first, then follow these steps:

  1. Plug your iPhone or iPad into your PC using a suitable USB cable.
  2. Launch Windows Explorer from your desktop, Start menu, or taskbar. You can also use the Windows key + E shortcut on your keyboard.
  3. Click the arrow next to This PC in the menu on the left side of the window. The arrow looks like >.
  4. Click NAME's iPhone or NAME's iPad in the This PC sub-menu.

    Click the arrow next to This PC. Click the iPhone or iPad in the sub-menu.

  5. Double-click Internal Storage.
  6. Double-click DCIM.

    Double-click Internal Storage. Double-click DCIM.

  7. Double-click a folder. They should all contain images.
  8. Click an image. You can hold the Ctrl key on your keyboard and click to select multiple images. You can also use the Ctrl + A shortcut on your keyboard to select all photos at once.

    Double-click a folder. Click an image or multiple images.

  9. Click Copy to— it is located near the top of the window.
  10. Click Choose location… to select a location. You can also click one of the options listed in the dropdown menu.

    Click Copy to. Click Choose location.

  11. Click a destination to save the pictures.
  12. Click Copy. Make sure you don't unplug your iPhone or iPad during the process!

    Click a destination. Click Copy.

How to transfer iPhone and iPad photos using the Windows 10 Photos app

If you'd like import all photos from your iPhone or iPad at once, you can use the handy Photos app that comes standard with Windows 10. Here's how to do it.

  1. Plug your iPhone or iPad into your PC using a suitable USB cable.
  2. Launch the Photos app from the Start menu, desktop, or taskbar.
  3. Click Import. It is located in the top-right corner of the window.

    Launch the Photos app. Click Import.

  4. Click any photos you'd like to not import; all new photos will be selected for importing by default.
  5. Click Continue. The Photos app will begin the import process. Make sure you don't unplug your iPhone or iPad during the process!

    Select or deselect any photos. Click Continue.

How to transfer iPhone or iPad photos using iCloud

Windows 10 has the ability to use iCloud to wirelessly sync your photos as long as you've backed up the photos on your iPhone or iPad to iCloud. Here's how to do it.

  1. Launch your favorite web browser from the Start menu, taskbar, or desktop.
  2. Navigate to www.support.apple.com/en-ca/HT204283.
  3. Click Download. You might have to scroll down a bit to find it.
  4. Click Save.

    Click Download. Click Save.

  5. Click Run when the download his finished.
  6. Click I accept the terms….

    Click Run. Click I accept the terms.

  7. Click Install.
  8. Click Finish. Your computer will restart and, upon restart, the iCloud window will automatically appear.

    Click Install. Click Finish.

  9. Type your Apple ID.
  10. Type your password.

    Type your Apple ID. Type your password.

  11. Click Sign In.
  12. Click the Options button next to Photos.

    Click Sign In. Click the Options button next to Photos.

  13. Click the box next to My Photo Stream so that a checkmark appears.
  14. Click the box next to Upload new photos from my PC so that the checkmark disappears. You can set these options how you'd like, but this ensures you're just getting the photos off your iPhone or iPad onto your PC.

    Click the box next to My Photo Stream so that a checkmark appears. Click the box next to Upload new photos from my PC so that the checkmark disappears.

  15. Click Done.
  16. Click Apply. Any photos in your iCloud will now download to your PC.

    Click Done. Click Apply.

Your iPhotos

Did you successfully transfer the photos from your iPhone or iPad to your Windows 10 PC? Did you use one of the methods above? Let us know in the comments section below!

Does the power supply inside your the PC provide enough juice?

$
0
0

GPU Power

If there's one component you simply cannot cheap out on, it's the power supply (PSU). We run through how you'll be able to tell what you'll need.

When looking at various build plans or a new component to upgrade, one has to consider the power supply unit. Can it provide enough power? Is it from a reliable brand to ensure a stable supply? These are but just two questions that will need to be answered and thankfully we can lend a helping hand, not to mention there are handy calculator tools available that can determine whether or not you require additional power.

The power supply unit needs to provide enough stable electricity to the motherboard, CPU, GPU, connected hard drives, any case mods and fans. While manufacturers offer up TDP calculations and the like, it remains fairly difficult to accurately calculate exactly how much power you're going to need.

There's a safe margin that's considered more than adequate for a single-GPU PC build: 500W. You'll be able to power not only the GPU, which requires separate power connections as you hit the more demanding segments, but also numerous fans, some lighting and everything else in-between. The goal is to not go with the highest watt, but the best in the business for your buck.

It's better to go for a reliable model from a reputable brand that has just 500W-750W capacity over a more affordable 1500W PSU. Often the marketed capacity is what the unit will be able to provide at peak under full load. Your PC not only requires power, but "clean" and stable power. It's all about frequencies, how much juice is provided through the 12v rails, whether you have modular cables to keep everything tidy and improve airflow, silent operation, and higher efficiency.

Calculate your needs

PSU

There are a number of calculation tools available that help give you an idea as to what capacity you should be looking at. While we'd not recommend you need anything more than 500W or 750W at the most, if you're looking to throw in a second GPU, or simply wish to future proof for upgrades, you may need some more capacity. Find below a list of tools that can be used to estimate how much power your system may draw:

While we urge folk to give these tools a try if you're not entirely sure what you'll need, they shouldn't be used as final verdicts. After calculating your PC build, see our best power supply round-up and work from there.

Best power supplies for your PC

How to relocate Cortana search box to the top on Windows 10

$
0
0

Let's have a little fun! Use this guide to tweak Cortana and move the search box to the top of the app on Windows 10.

Windows 10 includes an array of customization settings to help you make your experience more personal, even when using Cortana. However, the available options provided by the operating system can sometimes be limited, but if you know where to look, you can further tweak and personalize your experience.

For example, on Windows 10, you can change many aspects of Cortana, but you might not know that there are even more options you can configure, including the ability to change Cortana's behavior and move the search box to the top of the app.

While this might seem like a small tweak, it can be especially helpful if you want to keep search suggestions below the search box, just like doing a search on the web. In addition, it can make it a little easier for you to notice and use the search filters, which otherwise you may forget you have them.

In this Windows 10 guide, we'll walk you through the steps to edit the Registry to relocate the Cortana search box to the top of the app.

How to move Cortana search box to the top

Important: As always, this is a friendly reminder to let you know that editing the registry is risky, and it can cause irreversible damage to your installation if you don't do it correctly. It's recommended to make a full backup of your PC before proceeding.

  1. Use the Windows key + R keyboard shortcut to open the Run command.
  2. Type regedit, and click OK to open the registry.
  3. Browse the following path:

    HKEY_CURRENT_USER\Software\Microsoft\Windows\CurrentVersion\Search\Flighting\0\SearchBoxOnTop

  4. On the right side, double-click the Value DWORD, and change its value from 0 to 1.

  5. Click OK.
  6. Close the Registry.
  7. Restart your computer to complete the task.

After completing the steps, as you start a new search in the taskbar, the search box will appear at the top of the Cortana app showing instant suggestions below the box.

If you want to revert the changes, just follow the same steps, but this time on step 4, change the value from 1 to 0.

Keep in mind that Microsoft has previously announced that will be restricting tweaks to Cortana, which means that it's possible that in future updates this may not work. However, at the time of the writing, this tweak works with the Windows 10 Anniversary Update.

More Windows 10 resources

For more help articles, coverage, and answers on Windows 10, you can visit the following resources:

How to completely remove the 3D Builder app from Windows 10

$
0
0

If the 3D Builder app isn't for you, in this guide, we'll show you the steps to remove it while preventing from accidentally installing it back on Windows 10.

Windows 10 isn't only about new features and improvements. It's also about an operating system that focuses on apps. As Microsoft keeps updating the OS, you might have noticed that they are regularly replacing old apps with new modern ones and adding whole new apps.

One of these new default apps is the new 3D Builder app, which was designed to create, edit, and print 3D models to a 3D printer. However, even though 3D printers are now more affordable, not everyone has one nor needs to use the 3D Builder app.

If you don't have an use for the 3D Builder app — like with other built-in apps — you can uninstall it from Windows 10. But there is a little problem: merely uninstalling the app will leave behind the "3D Print with 3D Builder" option in the context menu for .bmp, .jpg, and .png file extensions. And if you click the option by accident, the 3D Builder app will reinstall automatically. Fortunately there is a workaround to prevent this from happening.

In this Windows 10 guide, we'll walk you through the steps to completely remove 3D Builder by uninstalling, and removing the option from the context menu to prevent the app from coming back.

How to uninstall the 3D Builder app

  1. Open Settings.
  2. Click on System.
  3. Click on Apps & features.
  4. Select 3D Builder.
  5. Click Uninstall.

  6. Click the Uninstall button again to confirm and complete the task.

How to remove the 3D Builder context menu option

Once you uninstall the app, you'll need to edit the Registry to remove the "3D Print with 3D Builder" from the context menu to prevent the app from coming back to Windows 10.

Important: As always, this is a friendly reminder to let you know that editing the registry is risky, and it can cause irreversible damage to your installation if you don't do it correctly. It's recommended to make a full backup of your PC before proceeding.

  1. Use the Windows key + R keyboard shortcut to open the Run command
  2. Type regedit, and click OK to open the registry.
  3. Browse the following path:

    HKEY_CLASSES_ROOT\SystemFileAssociations\.bmp\Shell

  4. Under the Shell (folder) key, right-click the T3D Print subkey, and click Delete.

  5. Click Yes to confirm.

  6. Browse the following path:

    HKEY_CLASSES_ROOT\SystemFileAssociations\.jpg\Shell

  7. Under the Shell (folder) key, right-click the T3D Print subkey, and click Delete.
  8. Click Yes to confirm.
  9. Browse the following path:

    HKEY_CLASSES_ROOT\SystemFileAssociations\.png\Shell

  10. Under the Shell (folder) key, right-click the T3D Print subkey, and click Delete.
  11. Click Yes to confirm.
  12. Close the Registry to complete the task.

After completing the steps, when you right-click an .bmp, .jpg, or .png image files, the context menu will no longer show "3D Print with 3D Builder", which will also prevent you from reinstalling the app by mistake.

Context menu with "3D Print with 3D Builder" (left), Context menu without "3D Print with 3D Builder" (right)

How to bring back 3D Builder and the context menu option

If the time comes when you need 3D Builder back, you can always reinstall the app by downloading it from the Windows Store.

It's important to note that reinstalling the app won't bring back the T3D Print keys you deleted from the Registry. The only way to restore them is by using a previous backup or exporting each key before deleting them with the steps mentioned above.

To export the T3D Print keys before removing them from the Registry, do the following:

  1. Use the Windows key + R keyboard shortcut to open the Run command
  2. Type regedit, and click OK to open the registry.
  3. Browse the following path:

    HKEY_CLASSES_ROOT\SystemFileAssociations\.bmp\Shell

  4. Right-click the T3D Print subkey, and click Export.

  5. Save the file with a descriptive name.
  6. Browse the following path:

    HKEY_CLASSES_ROOT\SystemFileAssociations\.jpg\Shell

  7. Right-click the T3D Print subkey, and click Export.
  8. Save the file with a descriptive name.
  9. Browse the following path:

    HKEY_CLASSES_ROOT\SystemFileAssociations\.png\Shell

  10. Right-click the T3D Print subkey, and click Export.
  11. Save the file with a descriptive name.

When you want to restore the "3D Print with 3D Builder" option in the context menu, simply double-click each .reg files you exported with the above steps and click Yes to merge the key into the Registry.

More Windows 10 resources

For more help articles, coverage, and answers on Windows 10, you can visit the following resources:


Get to know the leveling systems in Battlefield 1

$
0
0

Get to know the leveling systems in Battlefield 1

How does class leveling work in Battlefield 1?

In Battlefield 1's multiplayer, there are actually two systems that you progress through: class rank and overall rank. Here's an explanation of both to help you unlock upgrades and new weapons for your favorite class.

Your overall rank

Your soldier's overall rank has no bearing on the game other than earning you war bonds each time you move up a level. Oh, yeah, there's also the prestige and bragging rights amongst your friends and enemies that come with having a high level. The maximum level right now seems to be 100, but that will likely increase with each expansion pack as we saw with Battlefield 4.

To gain levels, you just play the game in any fashion — hop in a tank and wreak havoc, pilot a behemoth airship when your team falls behind, or play as any of the classes available.

A nice amount of war bonds.

Any score you accrue from any means goes toward your overall rank. When you level up, you receive a set number of war bonds — the number increases as you reach higher levels — that can then be used to purchase gadgets and weapons. All gadgets are available for purchase when you begin the game, but weapons are not.

Here's what each item costs:

  • Primary: 200 war bonds
  • Sidearms: 150 war bonds
  • Gadgets: 60 war bonds
  • Grenades: 60 war bonds
  • Melee: 150 war bonds

In order to unlock the ability to purchase better weapons, you must rank up the class in which you're buying.

Your class rank

You will notice in the customization menu that a bunch of weapons have a lock to the left of their name. You will also see a number to the right of the name — this number represents what class rank you have to be to purchase the weapon.

Locked weapons.

So how do you rank up each class? You focus on playing to that class' strength and playing the overall objective of the game-type. No matter what class you play as, work on capturing objectives, killing enemies, and supporting your team. For reference, your current rank within a class is displayed in the top-left of the customization menu, and the amount of war bonds you have is displayed in the top-right corner.

Class rank is displayed in the top-left. War bonds are displayed in the top-right.

Are you a medic? Revive, heal, and revive some more. Don't ignore downed teammates. Here are a bunch more tips for getting the most points as a medic.

Are you a support player? Give ammo and repair friendly vehicles. Lay down suppressing fire with your LMG, and even take out an enemy tank or two with a limpet charge. Check out these other tips for support players.

If you're playing as a sniper, you can't always sit back and work on your kill/death ratio, although counter-sniping does reward you with some juicy points. You have to balance your play between helping capture objectives and holding off advancing troops. Have a look at more great tips for snipers.

Assault players should always focus on removing armor from the battlefield as well as being the first people onto an objective. Blowing up tanks will get you a ton of points, as well as capping objectives. Check out a few more tips for assault players to rank up as fast as possible.

Tips for leveling up your class rank

Your class rank when you level up.

These tips might seem obvious for veterans of the Battlefield series, but they are worth repeating for any newcomers.

Pay attention to your medals: Each week, Battlefield 1 has five medals you can work toward achieving. Medals have three or five missions to complete based on a class or game mode. If you're trying to rank up a class, ensure you choose a medal that suits that class. You'll get more XP and you'll rank up faster.

A medal focusing on the scout class.

Play as a squad: Most of the actions you perform within your class, including reviving, supplying ammo, or repairing a tank, will net you double XP if it's done for a squad member. Don't forget to ask your squad leader to mark objectives they want attacked or defended, and if you're the squad leader, don't forget to take care of this yourself.

Don't be afraid to spend: Did you go up a level in a class and have your eye on a new primary weapon? Don't worry about saving war bonds for later — you'll receive plenty. If you think you'll do better with a certain item, go ahead and get it. Your score will reflect the decision.

Your favorite class

Which class do you usually play as? What's your favorite weapon in that class? Let us know in the comments section below!

How to disable Taskbar thumbnail preview on Windows 10

$
0
0

When app thumbnail previews get in the way, use this guide to disable the functionality in the Taskbar on Windows 10.

On Windows 10, every time you hover over an app icon in the taskbar you get a small pop-over preview of the app's window. If you happen to have multiple windows or tabs of that app open, that preview expands to show every one of them. They can be useful — clicking one takes you straight to that app. But sometimes it just gets in the way. Thankfully, you can disable this feature. It's not as easy as it used to be, but there's a workaround for killing app preview thumbnails on Windows 10.

In this Windows 10 guide, we'll walk you through the steps to edit the Registry to disable Taskbar thumbnail preview, and only make them appear when clicking the app button.

How to disable Taskbar thumbnails

Important: As always, this is a friendly reminder to let you know that editing the registry is risky, and it can cause irreversible damage to your installation if you don't do it correctly. It's recommended to make a full backup of your PC before proceeding.

To disable Taskbar thumbnails on Windows 10, do the following:

  1. Use the Windows key + R keyboard shortcut to open the Run command
  2. Type regedit, and click OK to open the registry.
  3. Browse the following path:

    HKEY_CURRENT_USER\Software\Microsoft\Windows\CurrentVersion\Explorer\Advanced

  4. Select the System (folder) key, and right-click on the right side, select New, and click on DWORD (32-bit) Value.

  5. Name the new DWORD ExtendedUIHoverTime and press Enter.
  6. Double-click the newly created DWORD and change its value to 30000.

  7. Click OK.
  8. Close the Registry.
  9. Restart your computer to complete the task.

It's important to note that Windows 10 doesn't have a particular option to turn off Taskbar thumbnail, but we can use the ExtendedUIHoverTime Registry tweak to delay the time to show the previews as an alternative workaround.

In the steps, we used the value 30000, which represents the delay time in milliseconds. This means that we're delaying thumbnails to appear on hover for 30 seconds, which should be more than enough to effectively disable the feature.

Once you completed the steps, you will no longer see Taskbar previews when hovering over apps, but you will still be able to see the thumbnails by clicking the app button, which is less intrusive.

At any time you can revert the changes by following the steps, but on step 6 change the value from 30000 to 0. Alternatively, you can right-click and select Delete to remove the ExtendedUIHoverTime DWORD.

More Windows 10 resources

For more help articles, coverage, and answers on Windows 10, you can visit the following resources:

Where to find all field manuals in the Battlefield 1 Runner campaign

$
0
0

Where to find all field manuals in the Battlefield 1 Runner campaign

Where are field manuals in The Runner located?

The Runner is a Battlefield 1 campaign that contains a whopping 15 field manuals spread out over three chapters. Here's how to find each field manual in each chapter.

See at Microsoft Store

Cape Helles chapter field manuals

There are five field manuals in total to find in the Cape Helles chapter. Here's how to find each one.

First field manual

  1. Following the Dreadnought portion of the mission, you'll make your way to the beach.

    Make your way to the beach.

  2. Run along the beach for about 10 seconds.

    Run along the beach for about 10 seconds.

  3. The field manual is located to your right against the embankment.

    The field manual is located to your right against the embankment.

Second field manual

  1. After grabbing the first field manual, head up the hill and get into the first trench.

    After grabbing the first field manual, head up the hill and get into the first trench.

  2. Run along the trench until you reach an artillery gun. Take out any enemies.

    Run along the trench until you reach an artillery gun.

  3. The field manual is located behind the artillery.

    The field manual is located behind the artillery.

Third field manual

  1. After grabbing the second field manual, turn to your left and take the path that leads up the hill.

    After grabbing the second field manual, turn to your left and take the path that leads up the hill.

  2. Go right at the first intersection.

    Go right at the first intersection.

  3. Run along the trench until you see two red flags.

    Run along the trench until you see two red flags.

  4. The field manual is located in a small alcove just before the red flags.

    he field manual is located in a small alcove just before the red flags.

Fourth field manual

  1. After grabbing the third field manual, head back down the trench toward the objective marker.

    After grabbing the third field manual, head back down the trench toward the objective marker.

  2. After receiving orders to capture the Helles Overlook, keep going up the hill.

    After receiving orders to capture the Helles Overlook, keep going up the hill.

  3. At the first fork, head left. You will see a stone building at the top of the hill.

    At the first fork, head left. You will see a stone building at the top of the hill.

  4. The field manual is located against the wall of the stone building.

    The field manual is located against the wall of the stone building.

Fifth field manual

  1. Head toward the A objective. You want to grab the fifth field manual before capturing A.

    Head toward the A objective. You want to grab the fifth field manual before capturing A.

  2. Make your way around the A objective, keeping the flag on your left.

    Make your way around the A objective, keeping the flag on your left.

  3. You will see a small stone shed at the back of the objective.

    You will see a small stone shed at the back of the objective.

  4. The field manual is located inside the shed.

    The field manual is located inside the shed.

The runner chapter field manuals

There are five field manuals in total to find in The Runner. Here's how to find each one.

First field manual

  1. Run down the hill and head to the right of the town.

    Run down the hill and head to the right of the town.

  2. You will see some artillery guns to your right, pointing out to sea. Run past them.

    You will see some artillery guns to your right, pointing out to sea. Run past them.

  3. Enter the medium-sized stone house past the artillery guns.

    Enter the medium-sized stone house past the artillery guns.

  4. The field manual is located next to the wooden bench inside the house.

    The field manual is located next to the wooden bench inside the house.

Second field manual

  1. After grabbing the first field manual, exit the stone house and head for the center of town. Take out any enemies.

    After grabbing the first field manual, exit the stone house and head for the center of town. Take out any enemies.

  2. You will see an overturned cart and a stone fence ahead. Hurdle over the fence so that you land in a small field.

    You will see an overturned cart and a stone fence ahead. Hurdle over the fence so that you land in a small field.

  3. The field manual is located against the stone barn in front of you.

    The field manual is located against the stone barn in front of you.

Third field manual

  1. After grabbing the second field manual, turn 90 degrees to your left and start running.

    fter grabbing the second field manual, turn 90 degrees to your left and start running.

  2. Run for the house located ahead of you.

    Run for the house located ahead of you.

  3. Enter through the front door.

    Enter through the front door.

  4. The field manual is located in the back-right corner of the house.

    The field manual is located in the back-right corner of the house.

Fourth field manual

  1. After grabbing the third field manual, continue playing the campaign until you reach the temple.
  2. Enter the temple through the door facing the town.

    Enter the temple through the door facing the town.

  3. Continue through the first doorway and turn to your right.

    Continue through the first doorway and turn to your right.

  4. The field manual is located next to a pillar and some wounded friendlies.

    The field manual is located next to a pillar and some wounded friendlies.

Fifth field manual

  1. After grabbing the fourth field manual, continue playing the campaign until you reach Whitehall and you talk to your commander.
  2. Follow the objective marker after speaking with your commander.

    Follow the objective marker after speaking with your commander.

  3. Run down the main road, keeping the objective marker in front of you.

    Run down the main road, keeping the objective marker in front of you.

  4. Head toward the bombed building to your left.

    Head toward the bombed building to your left.

  5. The field manual is located outside the bombed building, to the left of the doorway.

    The field manual is located outside the bombed building, to the left of the doorway.

Be Safe chapter field manuals

There are five field manuals in total to find in the Be Safe chapter. Here's how to find each one.

First field manual

  1. Clear out enemies in front of you when the mission begins.
  2. You will notice a half-demolished watch tower in the center of town. Head toward it.

    You will notice a half-demolished watch tower in the center of town. Head toward it.

  3. Climb the ladder to the second floor of the tower.

    Climb the ladder to the second floor of the tower.

  4. The field manual is located behind you once you've climbed the ladder.

    The field manual is located behind you once you've climbed the ladder.

Second field manual

  1. Continue on to the next objective marker.
  2. Go through the blue doors.

    Go through the blue doors.

  3. Pass through the first arch, taking out any enemies that appear.

    Pass through the first arch, taking out any enemies that appear.

  4. Head up the set of stairs directly ahead of you.

    Head up the set of stairs directly ahead of you.

  5. Go left at the top of the stairs. Run along the top of the wall.

    Go left at the top of the stairs. Run along the top of the wall.

  6. The field manual is located at the end of the wall, next to some green crates.

    The field manual is located at the end of the wall, next to some green crates.

Third field manual

  1. After grabbing the second field manual, turn to your left and run back toward the staircase.

    After grabbing the second field manual, turn to your left and run back toward the staircase.

  2. Run past the staircase, staying atop the wall.
  3. You will see some artillery guns to your right and a building's foundation to your left.

    You will see some artillery guns to your right and a building's foundation to your left.

  4. The field manual is located on the ground inside the foundation.

    The field manual is located on the ground inside the foundation.

Fourth field manual

  1. After grabbing the third field manual, head straight toward the next blown-out building.

    After grabbing the third field manual, head straight toward the next blown-out building.

  2. Take a left immediately after entering the blown-out building.

    Take a left immediately after entering the blown-out building.

  3. Head down the stairs into the bunker.

    Head down the stairs into the bunker.

  4. The field manual is located to the right of the stairs.

    The field manual is located to the right of the stairs.

Fifth field manual

  1. Continue the mission until you reach the point of securing the base. You'll want to grab the fifth manual before securing the base.

    Continue the mission until you reach the point of securing the base. You'll want to grab the fifth manual before securing the base.

  2. Run straight through the enemy positions until you reach the small shed at the far end.

    Run straight through the enemy positions until you reach the small shed at the far end.

  3. The field manual is located inside the small shed.

    The field manual is located inside the small shed.

Your collection

Did you manage to grab all the field manuals from this campaign? Let us know in the comments section below!

How to use Skype chat commands from any device

$
0
0

You probably didn't know this, but besides sending emoji, you can also use commands on Skype to do a variety of tasks — here's everything you can do!

Skype is perhaps one of the most popular communication services on the planet. Not only can you chat with voice and video and text, send files and emoji, but you can also used command lines to manage various aspects of a chat session and query information.

Microsoft calls these Skype commands "cloud-based chat commands," they have been around for a long time, and they allow you to do an array of administrative tasks.

For example, let's say you forgot your laptop or phone at your friend's house, or you left Skype signed in on a public computer, then you can use the /remotelogout command to sign out of every instance on any device, and prevent anyone from sending inappropriate text from your account.

If you're not sure in which devices you're signed with Skype, you can quickly retrieve such information using the /showplaces command.

In addition, you can use commands like /add [Skype name] to add a person to the conversation; /me [custom text] to set a new mood text, and /alertson [keyword] to turn on alerts only when a particular word appears in a message.

While the command-lines are limited when you're doing a one-on-one conversation, the cloud-based chat commands really shine when you need to manage administrative tasks in a group chat.

For example, you can use the /showmembers to retrieve a list of every person on the chat with their current role. The /kick [Skype name] removes a member from the group chat, /set banlist [+Skype_name] prevents users from joining a conversation, /setrole to make users administrators in the group, and many more.

How to use Skype chat command-lines

Using Skype commands is a straightforward process. Whenever you're chatting with one person, or you're in a group chat, simply type the command in the message box and press Enter.

The best part is that Skype cloud-based chat command-lines are invisible to users in the chat. Additionally, at any time, you can use /help to view a list of available commands. However, depending on whether you're chatting with one person or a group of people, the options available will be different.

It's important to note that you can use these commands on the desktop client of Skype, on mobile devices, and you can even use many of them in the Skype Preview app for Windows 10.

List of Skype chat command-lines

Here's the list of essential commands you can use on Skype and their descriptions:

CategorySpecification
/add [Skype name]Adds a new person to the conversation. Ex.: /add WC_01.
/alertson [custom text]Allows you to disable notifications except when the message includes a keyword. Ex.: /alertson Windows 10.
/alertsoffAllows you turn off all message notifications.
/find [keywords]Useful when you need to find a particular text on an extended conversation (works on the legacy desktop client). Ex.: /find release date.
/wikimarkup [on - off]Lets you enable write in wiki-markup style.
/me [custom text]Allows you to change the punchline text next to your name. Ex.: /me Everything will be OK!.
/remotelogoutSends a command and logs you out of every instance of Skype on any device, except the one that originated the command. It might take a little bit of time, but this also works in the Skype Preview app for Windows 10.
/showplacesReveals all the devices where you're signed in with your Skype account.
/get adminsShows a list of users with administrative privileges in the chat.
/get optionsShows a list of current options enabled in the chat.
/get roleDisplays your current role in the chat.
/get blobAllows developers to grab the chat name information for integration purposes.
/get URICreates a link that you can send to other people to join the chat. You can also create a link using the Skype app for Windows 10, but the link will only work on the legacy desktop client.
/goliveLaunches a group call with everyone in the chat session (works on the legacy desktop client).
/showmembersRetrieves a list everyone in the chat with Skype ID, name, and role.
/infoRetrieves chat details, including the number of people in the chat and session limit (works on the legacy desktop client).
/kick [Skype name]Removes a person from the group chat session. Ex.: /kick WC_01.
/kickban [Skype name]Removes and bans a person from the group chat session. Ex.: /kickban WC_01.
/leaveAllows you to quickly quit the current group chat (works on the legacy desktop client).
/set options ["+""-"]Allows you to enable or disable particular options for the chat group. Options available include joining_enable to let users join the chat, and history_disclosed to let new joiners see the history chat for a group conversation. Ex.: /set options -joining_enabled or /set options +history_disclosed.
/setrole [Skype name] speaker or adminChanges the role of a particular member of the chat. Ex.: /setrole WC_01 admin.
/topic [custom text]Allows you to change the headline for the group chat session. Ex.: /topic Weekly meeting.
/set allowlist ["+""-"]Adds or removes members from the allow to join list. Ex.: /set allowlist +WC_01.
/get allowlistRetrieves a list of members allowed to be in the chat session.
/set banlist ["+""-"]Adds or removes members from the ban list. Ex.: /set banlist +WC_01.
/get banlistRetrieves a list of members not allowed to be in the chat session.

Note: I'm not including /invite in the list, as it appears not to be working.

While most of these commands work across devices, keep in mind that they're more effective when using the legacy desktop client, but you can also use most of them on the Skype Preview app.

However, you must take into consideration that the preview app for Windows 10 (and even the web version of Skype) are still under development, as such expect some commands not to work. For example, commands such as /find, /golive, /info, and /leave currently don't work with the Skype Preview app for Windows 10.

What's your favorite Skype cloud-based command? Tell us in the comments below.

More Windows 10 resources

For more help articles, coverage, and answers on Windows 10, you can visit the following resources:

How to make sure all your PC components are compatible

$
0
0

PC Motherboard

There's nothing worse than ordering a bunch of PC parts online, receiving the delivery and finding out that the CPU you've ordered isn't compatible with the motherboard. Some components like the CPU, have specific characteristics that only work with supported hardware. You won't be able to install an Intel CPU into an AMD socket motherboard, for example. We take a look at some ways you can help avoid this.

The main culprit when it comes to compatibility issues is the motherboard, which has to work with various other components, like the CPU, RAM, and more. It's the heart of the PC and needs to interact with various connected hardware, and thus we need to be vigilant when checking specifications and requirements. Here are a few tips that will help to ensure the motherboard and other parts you're purchasing will work together:

  • Check the motherboard CPU socket and compare against your chosen processor.
  • See what RAM the motherboard supports (example being DDR4 2300MHz).
  • Similarly to the board, see what RAM the CPU can support.
  • Whether or not the motherboard will support an GPU SLI configuration.
  • Check ATX size and dimensions when fitting inside smaller cases.
  • Ensure your PSU will provide enough juice.

PCPartPicker

PCPartPicker

There's a handy website that can help out with configuring a new PC build (or an upgrade if you select what hardware you have already installed. Working with the CPU first, the system actually eliminates incompatible motherboard sockets and RAM. Should you somehow manage to add in various items that simply won't work together, the website will throw out an alert for you to fix an issue.

There are some handy little features as well, like the ability to save and share builds. Should you be new to system building, this makes it possible for you to have your list of components checked over by someone with more experience who can verify the build and possibly recommend cheaper alternatives to save a little cash. As an added bonus, it will even provide a rough estimate as to how much power the PSU will need to output.

Overall, PCPartPicker is a invaluable tool when it comes to picking out parts for a new PC.

Visit PCPartPicker

Viewing all 5861 articles
Browse latest View live


Latest Images