Quantcast
Channel: Help & How To
Viewing all 5861 articles
Browse latest View live

Upgrading your hard drive? Don't bother with cloning, just do a clean Windows 10 install

$
0
0

Dell Inspiron 15 7559

If you've had issues updating Windows 10 after a drive clone, it's probably time to clean install.

Since I've had this issue myself recently, I'm probably not the only one to experience it. Upon delivery of my new Dell Inspiron 15 7559 the first thing I did was pop in an extra stick of RAM and install an m.2 SSD in the vacant slot. This laptop is generally superb but can suffer from some serious slow downs thanks to the slow 5200rpm HDD installed as standard equipment.

I was able to easily upgrade the RAM and HDD and install an SSD, but issues presented around the time the Windows 10 Anniversary Update dropped. Here's what went wrong and why I recommend doing a clean install over a clone.

Inspiron 15 7559

Everything seemed to work just fine. Windows 10 was on the new SSD, everything was booting very fast, no drama. That is, until I tried to install a Windows Update. Every time the update would download, reboot to install and nothing happened. The laptop just booted straight back to Windows. No error messages, nothing. Just as though I'd turned it on for the first time.

In the end, resetting the laptop resulted in an endless boot loop and so it came to pass that a clean install was required. Upon completion and booting, being presented with a choice of drive to boot from sounded alarm bells, and then it became clear what had happened.

During the cloning process the partitions had become a total mess. The formatting of the HDD now destined to be mass storage hadn't cleared the drive properly (which was probably my fault) but as I discovered during the install process, the SSD had too many partitions for Windows on it. Best guess is that the laptop didn't know where to install Windows updates or something like that.

So, the conclusion is pretty simple. Even though cloning is quick and easy, with a lot of very user friendly software, a clean install of Windows 10 on any new drive is going to give you the best, most reliable results.

How to perform a clean install of Windows 10


How to make Broadcast Lists in WhatsApp on Windows 10 Mobile

$
0
0

How to use a Broadcast List in WhatsApp on Windows 10 Mobile

How do I send a WhatsApp message to a group of contacts — but have the replies come only to me? Broadcast Lists!

Group messages in WhatsApp are great when you want to get a discussion going between you and a bunch of your friends (like whether your crew wants to play airsoft or paintball for a friend's birthday). But sometimes you want to send the same message to a big group, but don't necessarily want the replies visible to everyone (like asking how much everyone wants to chip in to cover the costs for the birthday boy or girl).

When you want to send a small or large group the same message, but want to replies to only be visible to you, set up a Broadcast List in WhatsApp. Think of it as an email-style BCC, but for WhatsApp.

How to add contacts to your Windows 10 Mobile Phone to make a WhatsApp Broadcast List

Before you actually make a Broadcast List, you need to make sure the people you are sending the broadcast message to have saved your contact information in their phone's contact book (not just on WhatsApp).

This also means that if you hope to receive messages from a Broadcast List, you need to add your friend's phone number in your Windows 10 Mobile. Adding a Windows 10 contact to your phone is simple. Here's how:

  1. Launch People from the Applications List on your Windows 10 Mobile phone.
  2. Tap on the add a contact button. It's the "+" icon at the bottom of the screen.

    Launch People and tap add a contact.

  3. Fill in your friend's information (Name, phone, email, etc) by tapping on a text field and typing in the details.

  4. Tap the save button. It looks like an old-fashioned floppy disk and is at the bottom of the screen.

    Fill in contact information and tap save button.

Your new contact will be saved to your phone and can now be used in WhatsApp's Broadcast List feature. Make sure to add any other people you commonly chat with in WhatsApp so you don't miss out on the Broadcast List experience with them.

How to make a Broadcast List in WhatsApp on Windows 10 Mobile

  1. Launch WhatsApp from the Applications List on your Windows 10 Mobile phone.
  2. Tap on the more menu button. It looks like three dots in a row and is in the bottom right corner of the screen.
  3. Tap on broadcast lists in the pop-up menu.

    Launch WhatsApp, tap more, and tap broadcast lists.

  4. Tap on the + button to begin creating your Broadcast List (as with any WhatsApp message, whatever contacts you're sending messages to will need to have your phone number in their contacts).

  5. Tap on the + button to add recipients to the list.

    Tap the plus sign and tap the plus sign.

  6. Tap on a contact to add to the Broadcast list (repeat steps 5 and 6 for each person you want to add).

  7. Tap on the checkmark at the bottom of the screen to launch your newly composed broadcast list.

    Tap a contact and tap the checkmark.

Your Broadcast List is now ready to go! You can now type and send a message only one time, and it will be delivered to everyone on your broadcast list. Spam away, spammy pants. Spam away!

How to send messages to a Broadcast List on Windows 10 Mobile

You've got your broadcast list made, now it's time to start sharing messages, photos and more with you list! It's the same process you would use with a regular chat; however, Broadcast Lists are a little trickier to find than regular chats, which is good, since you don't want to start a chat with a friend asking for crucial relationship advice only to discover you accidentally tapped your broadcast list that included your significant other! Though that could be a fast route to ending those relationship problems.

Here's how to send messages and more to your broadcast list.

  1. Launch WhatsApp from the Applications List on your Windows 10 Mobile phone.
  2. Tap on the more menu button. It looks like three dots in a row and is in the bottom right corner of the screen.

    Launch WhatApp and tap on the more menu button.

  3. Tap on broadcast lists in the pop-up menu.

  4. Tap on the broadcast list you would like to use (mine is called info and has a megaphone beside it).

    Tap on Broadcast Lists and tap on a broadcast list.

Once you've opened your Broadcast List you can send photos and videos to your list and send messages and more.

Guide Default Menu: 
menu-whatsapp-for-windows-10-mob

This cheap little add-on is all you need to enable Cortana on your Xbox One

$
0
0

Cortana is available on Xbox One, bringing natural language commands to the console, but she comes with some specific hardware requirements.

As specified by Microsoft, to use Cortana on Xbox One you either need to have a Kinect or a headset microphone.

As much as I love my Kinect, it can be expensive to purchase as a standalone device, especially if you have no intentions of using its motion tracking features. Since the new Xbox One S comes with an IR blaster built in, you may find yourself even less likely to want a Kinect unit. Additionally, if you have invested in a dedicated sound system, donning to a headset just for Cortana might seem a little counter-intuitive and silly.

But if you have the revised Xbox One controller with a built-in 3.5mm headset jack, there's an easy, cheap and cheerful method for activating Cortana voice commands on Xbox One.

Amazon is crammed with mini-microphones designed for use on smartphones with dictation software. Thanks to the standardized 3.5mm jack, the Xbox One will detect these discrete mics as a headset. Attaching them to your controller will allow you to activate Cortana commands without purchasing a Kinect or dedicated headphones.

Here are a couple of 3.5mm microphones that should work on your Xbox controller, but if you search Amazon for "3.5mm smartphone microphone" there will be dozens of options. And don't forget to check out our comprehensive Cortana guide!

Thanks Adam for the tip!

How to archive and backup your messages in WhatsApp on Windows 10 Mobile

$
0
0

How to backup your messages in WhatsApp on Windows 10 Mobile

How do I backup and archive my WhatsApp calls and messages?

When your significant other becomes your ex, what do you do with your rich chat history? You don't want it visible in your WhatsApp chats, but you don't want to delete it forever in case you reconcile. The Archive feature in WhatsApp is the answer to your problem!

You can also backup all of your content to your phone so you can reload your chats and media should you ever need to uninstall the app or switch phones.

Using WhatsApp's archive and backup features can be really helpful is also really simple!

How to archive a chat in WhatsApp on Windows 10 Mobile

Archiving a chat will hide the conversation from your WhatsApp chat screen like it never happened. This is perfect if you're living a double life as a superhero and don't want your friends to snatch your phone and discover you've been messaging with Commissioner Gordon, Alfred, and an interior decorator for the batcave.

It's also helpful if you want to hide a chat, but not necessarily delete it forever, or just clean up your conversations.

  1. Launch WhatsApp from the Applications List on your Windows 10 Mobile phone.
  2. Tap and hold on the chat you want to archive from your chats list.
  3. Tap on archive from the pop-up menu.

    Launch WhatsApp, tap and hold a chat, and tap archive.

Your chat will now be archived on your phone and no longer show up in your chats list.

How to unarchive a chat in WhatsApp on Windows 10 Mobile

When it's time to resurrect that great chat from the archives, WhatsApp will be ready to bring it back for you.

  1. Launch WhatsApp from the Applications List on your Windows 10 Mobile phone.
  2. Tap on the more button at the bottom of the screen (it looks like three dots in a row).
  3. Tap on archived chats. A list of chats you previously archived will open.

    Launch WhatsApp, tap on the more button, and tap archived chats.

  4. Tap and hold on the chat you want to unarchive.

  5. Tap on unarchive.

    Tap and hold a chat and tap unarchive.

Presto! Your chat is back in your chats list and ready to use again.

How to archive all chats in WhatsApp on Windows 10 Mobile

Chat history looking cluttered? Need a clean slate? Archive all of your current chats to hide them from your chat window.

  1. Launch WhatsApp from the Applications List on your Windows 10 Mobile phone.
  2. Tap on the more button at the bottom of the screen (it looks like three dots in a row).
  3. Tap on settings. The WhatsApp settings page will open.

    Launch WhatsApp, tap more, and tap settings.

  4. Tap on chats and calls from the settings list.

  5. Tap on archive all.
  6. Tap on yes on the confirmation screen to archive all your chats.

    Tap chats and calls, tap archive all, and tap yes.

All of your chats will now be archived and your chats window will now be clean. To unarchive all chats, follow the exact same steps, but select unarchive all.

How to backup your chats in WhatsApp on Windows 10 Mobile

Worried about losing the years of messages, jokes, and late-night nonsense you've exchanged in chats with your friends? Stop worrying! WhatsApp has you back, or rather, backed up, automatically!

WhatsApp messages are automatically backed up to your phone's memory every day at 4 a.m. while you're comfy in your bed (or about to head to it). However, if you're about to switch phones or delete WhatsApp and you want to ensure you have the latest backup saved, here's how to manually initiate a backup in WhatsApp.

  1. Launch WhatsApp from the Applications List on your Windows 10 Mobile phone.
  2. Tap on the more button at the bottom of the screen (it looks like three dots in a row).
  3. Tap on settings. The WhatsApp settings page will open.

    Launch WhatsApp, tap more, and tap settings.

  4. Tap on chats and calls from the settings list.

  5. Tap on backup.

    Tap chats and calls and tap backup.

That's it. Your WhatsApp data is now backed up on your phone. The exact location of the backup file depends on where you told your phone to save data (on the phone's internal storage or an SD card if your phone supports one). Backups are important for when you want to move your WhatsApp messages to a new phone. If you create a backup before you move your messages over, you can choose to restore your backed up messages when transferring to a new device.

How to backup your pictures and videos in WhatsApp on Windows 10 Mobile

After you use WhatsApp for awhile, you've probably collected a whole bunch of great photos and videos from friends through your chats. If you're worried about losing precious pictures of people's food, cats, and selfies you've received through WhatsApp, then you'll want to back them up.

Here's the rub: WhatsApp for Windows 10 Mobile doesn't let you backup or view all your WhatsApp photos and videos through the app. Thankfully, Windows 10 Mobile is really smart, and will store your WhatsApp photos and videos in a file on your phone automatically! No special backups required.

Find your WhatsApp photos and videos on your Windows 10 Mobile phone

  1. Launch File Explorer from the Applications List on your Windows 10 Mobile phone.
  2. Tap on the menu button (looks like three horizontal lines stacked on top of each other).
  3. Tap on this device to view the files on your device.

    Launch file explorer, tap on the menu button, and tap this device.

  4. Tap on the pictures folder.

  5. Tap on the WhatsApp folder.
  6. Scroll through the photos and videos to locate the specific file you're looking for (FYI, I only have one photo and one video).

    Tap on the pictures folder, tap on the WhatsApp folder, and locate your file.

Note Your photos and videos will all save in your phone's WhatsApp folder under pictures (even if it's a video). Once you know how to find these WhatsApp photos and videos, you can share them in other applications, email them to friends and family, or just admire your full folder of WhatsApp media gold!

How to export messages in WhatsApp on Windows 10 Mobile

Do you doubt the ability of your Windows 10 Mobile phone to save your important WhatsApp messages? Shame on you! But that's okay, better safe than sorry.

Your export options are limited to creating a plain text file which you can email to yourself. Time to learn how!

  1. Launch WhatsApp from the Applications List on your Windows 10 Mobile phone.
  2. Tap on the chat you would like to export to open it.
  3. Tap on the more button at the bottom of the screen (it looks like three dots in a row).

    Launch WhatsApp, tap on a chat, and tap more.

  4. Tap on info from the pop-up menu.

  5. Tap on the more button at the bottom of the screen (it looks like three dots in a row).
  6. Tap on the email chat history which will launch a new mail message with your WhatsApp chat message attached as a .txt file.

    Tap info, tap more and tap email chat history.

From here you can email the text file from the chat to yourself, the friend you were chatting with, or anyone else you like. Take it to the next level by printing off the attached text document and making a lovely coffee table book so you never lose those important WhatsApp chats!

Guide Default Menu: 
menu-whatsapp-for-windows-10-mob

How to fix NVIDIA Control Panel not opening on Windows 10 Anniversary Update

$
0
0

How to fix NVIDIA Control Panel not opening on Windows 10 Anniversary Update

How do I get NVIDIA Control Panel working in Windows 10 Anniversary Update?

The most recent upgrade to Windows 10 might have pulled a few tricks on your NVIDIA graphics card. Trying to open the NVIDIA Control Panel yields nothing but a blank stare from your PC.

Here's the problem: Windows Update thinks your NVIDIA driver is up to date, but in reality it is not. Here's how to download the latest graphics card driver and get NVIDIA Control Panel up and running again.

How to fix NVIDIA Control Panel not opening on Windows 10 Anniversary Update

  1. Right-click the Start button.
  2. Click Device Manager.

    Right-click the Start button. Click Device Manager.

  3. Double-click Display adapters.
  4. Double-click your NVIDIA graphics card.

    Double-click Display adapters. Double-click your NVIDIA graphics card.

  5. Click the Driver tab at the top of the window.
  6. Click the Update Driver button.

    Click the Driver tab. Click the Update Driver button.

  7. Click Search automatically for updated driver software. Windows will search for and download a driver.
  8. Click Close when the download and install is complete.

    Click Search automatically for updated driver software. Click Close when the download and installation is complete.

  9. Click the X in the top right corner of the Device Manager window.
  10. Click Yes to restart your computer.

    Click the X in the top right corner of the Device Manager window. Click Yes to restart your computer.

Your NVIDIA Control Panel

Did your NVIDIA card crap out on you following the Windows 10 Anniversary Update? Did this solve the Control Panel problem? Let us know in the comments section below.

How to upgrade Office 365 Personal to Home edition so you can use it on more devices

$
0
0

How to upgrade Office 365 Personal to Office 365 Home

How do I upgrade my Office 365 subscription?

Office 365 is a great way to access Microsoft's suite of office tools on a subscription basis. It ensures you won't be left in the dust when a new version of the product comes out — your Office is going to be kept up to date as long as you're a subscriber.

Did you start with Office 365 Personal but now need Office on multiple computers, tablets, and phones? No problem. Upgrading from Personal to Home won't take long.

See at Microsoft Store

Office 365 subscriptions

There are several options to choose from when purchasing a subscription. Each one gets you access to classic Office tools like Word, Excel, PowerPoint, and Outlook. Where the subscriptions really differ, however, is in how many individual devices can use Office 365.

EditionPCsTabletsPhones
Personal111
Home555
Business555
University2*2*2

* Office 365 University allows installation on a combined two PCs or tablets.

If you initially purchased Office 365 Personal but now need Office on multiple devices, fret not. Upgrading to Office 365 Home from Personal is a snap.

How to upgrade to Office 365 Home using a product key

If you bought a physical copy of Office 365 Home from a brick and mortar store — usually either a box, a card, or a receipt — the product key will be located on that packaging. Follow these steps to upgrade from Office 365 Personal.

Remember that only one subscription can be linked per account, so your Personal subscription will be gone following your upgrade to Home. The time remaining in your existing subscription will be added to your new subscription.

  1. Navigate to www.office.com/setup using your favorite web browser.
  2. Click Sign in.
  3. Type your Microsoft account name or number and hit Tab on your keyboard.

    Click Sign in. Type your Microsoft account name or number.

  4. Type your Microsoft account password.
  5. Click Sign in.

    Type your Microsoft account password. Click Sign in.

  6. Type in the product key found on the physical copy of Office 365 Home.
  7. Click the dropdown arrow beneath Country or region and click your country of residence.

    Type the product key found on your physical copy. Click the dropdown arrow beneath Country or region and click your country of residence.

  8. Click the dropdown arrow beneath Your language and click your language.
  9. Click Next.

    Click the dropdown arrow beneath Your language and click your language. Click Next.

Microsoft will verify your information and your subscription will change to Office 365 Home. Your subscription time will be extended one year past however much time you had remaining on your Personal subscription.

How to upgrade to Office 365 Home without a product key

If you want to upgrade to Office 365 Home straight from your computer, follow these steps.

Remember that only one subscription can be linked per account, so your Personal subscription will be gone following your upgrade to Home. The time remaining in your existing subscription will be added to your new subscription.

  1. Navigate to www.microsoftstore.com using your favorite web browser.
  2. Click on your account name in the top right corner of the window.
  3. Ensure the account listed here is the same account you use for your Office 365 subscription. If it isn't the same account, sign out of the account and log back in with the account linked to your current Office 365 Personal subscription.

    Click on your account name in the top right corner of the window. Ensure the account listed here is the same account you use for your Office 365 subscription.

  4. Click Office.
  5. Click Office 365 Home.

    Click Office. Click Office 365 Home.

  6. Click Buy and download now.
  7. Click Checkout.

    Click Buy and download now. Click Checkout.

Your new one-year subscription to Office 365 Home will be added to however much time is remaining on your current Personal subscription.

Your Office 365 subscription

Do you use Office 365? Which version do you use? Let us know in the comments section below!

How much RAM does your Windows 10 PC really need?

$
0
0

How much RAM does your Windows 10 PC really need?

How much RAM do I need for my PC?

RAM is a vital hardware component used by your Windows 10 PC to store temporary data that can be accessed quickly by software, speeding up processes and keeping you from banging your head against the desk in frustration. Essentially, the more RAM you have, the more you can have going on at once.

The amount of RAM you need in your PC depends on what you plan on doing with that PC — gaming, for instance, takes a generous amount of RAM, while media editing can take a lot of RAM.

Find out how much RAM you currently have, what type of RAM is compatible with your system, and how much RAM you should have for specific daily tasks.

Benefits of upgrading your RAM

Let's get one thing straight: adding RAM to your computer is not a process that will magically make everything faster. It will, however, aid your PC in multi-tasking and performing heavy duties like gaming and multimedia editing. More RAM doesn't make the computer faster, but it will make it harder for it to get bogged down.

If you have a PC with a beefy graphics card and fast processor but you can't figure out why 17 browser tabs won't load without grinding things to a halt, adding RAM will probably help.

If you have an old PC that you want to eke a few more years out of, adding RAM could make the difference between a couple years of frustration and a couple years of fond memories.

How much RAM do you really need?

How much RAM you really need in your PC depends heavily on what you use your PC for on a day-to-day basis, and depends on how long you intend to keep the computer. If you're thinking of investing in a completely new machine in the near future, waiting things out might be the best bet.

If you already have a computer you love but want to shift gears into a different daily task that requires better performance, upgrading your RAM as part of the process is a great idea.

Productivity

If you use your Windows 10 computer for word processing, checking emails, browsing the internet, and playing Solitaire, you should have no problem using 4GB of RAM. If you are performing all of these activities at once, however, you might experience a dip in performance.

Most budget PCs come with 4GB of RAM as a base option, but if you plan on keeping your machine for several years, then opting up to 8GB of RAM is the safer bet, even if you only use it for light duties.

Gaming

We're not talking about Solitaire — heavy PC gaming at acceptable performance levels requires a substantial amount of RAM. Using a few popular modern titles as references, it is evident that gamers should have at least 8GB of RAM — the recommended minimum amount for Fallout 4, No Man's Sky, and Star Wars Battlefront (which actually would prefer even more RAM at 16GB).

If you're a gamer and want to ensure you have enough RAM for some current titles and future titles, go with at least 16GB.

Game streaming

If you'd like to join the thousands who stream video of themselves playing games or other activities, go with at least 8GB of RAM but consider opting for 16GB depending on the game's requirements. Don't forget your PC has to deal with both running the game and streaming video to the internet at the same time.

Video and photo editing

This really depends on your workload. If you're editing a lot of HD video, go for 16GB or more. If you're working with photos and a bit of video thrown in, 8GB should get you through.

Editing apps will work on lower amounts of RAM, but you'll become so frustrated with poor performance you'll soon start yearning for an upgrade. Don't skimp here.

Your PC's RAM configuration

RAM configurations differ depending mostly on your motherboard. Some motherboards have four dual-inline memory module (DIMM) slots for RAM, some have two, some have a lot more. Here's how to see how much RAM you currently have, what type of RAM is compatible with your PC, and how many slots you're currently working with.

How to check your PC's current amount of RAM

This method will simply and quickly tell you how much RAM your PC currently has installed:

  1. Right-click the Start button.
  2. Click System.
  3. Verify the Installed memory (RAM) line. In this case you can see we have 8GB of RAM installed.

    Click System. Verify the Installed memory (RAM) line.

How to check RAM configuration and compatible RAM using Crucial System Scanner

To take things even further, Crucial System Scanner is a great app that will scan your computer and show you how much total RAM your motherboard and processor can handle, how many slots are available for RAM, and some options for purchasing compatible RAM.

  1. Navigate to www.crucial.com/usa/en/systemscanner using your favorite web browser.
  2. Click the checkbox next to Agree to the terms & conditions.
  3. Click download the scanner.

    Click the checkbox next to Agree to terms and conditions. Click download the scanner.

  4. Click Save. The download will begin.
  5. Click Run when the download is complete.

    Click Save. Click Run.

When the scan is complete you will see on the left side of the window a memory section with the number of slots for RAM and the maximum amount of RAM your PC's motherboard can handle. In this case, the motherboard has two slots and can handle up to 32GB of RAM.

You will see on the right side of the window a list of compatible RAM available for purchase from Crucial. This is a clear indicator of what type of RAM your PC uses, and is a great tool for anyone not comfortable with buying RAM on their own. In this case, you can see that our PC is using DDR4 SODIMM RAM.

Crucial system scan results

RAM is available in two common types: DDR3 and DDR4. DDR4 is newer than DDR3, and uses a different pin configuration to fit into your motherboard. For this reason, DDR3 RAM can't go into a motherboard designed for DDR4, and vice versa. Also, "small outline dual in-line memory module" (SODIMM) RAM won't fit in a standard RAM slot — it's just too small. If you're using a laptop or an all-in-one PC, chances are you've got SODIMM RAM inside, so keep that in mind when you're buying RAM.

Best RAM for your PC

Once you've determined how much RAM you need for your specific PC duties and what type of RAM works with your processor and motherboard, you can start shopping.

Corsair Vengeance LPX DDR4 RAM

Corsair Vengeance LPX

Bump your RAM up to 16 with this pair of 8GB DDR4 RAM sticks. They come in multiple colors to match your gaming rig and are designed to be overclocked without problems. An aluminum heat spreader ensure things don't overheat when you're putting it to the test, and a lifetime limited warranty gives you some peace of mind about your investment. This 288-pin RAM starts at about $90.

See at Amazon

Crucial Ballistix Tactical DDR3 RAM

Crucial Ballistix Tactical

Available in several configurations, including 8GB and 16GB, this RAM is a low-cost option with high performance. This RAM is designed for gamers and users with heavy work loads, and features heat-spreading technology to keep temperatures down when pushed to the limit.

This 240-pin RAM comes with a limited lifetime warranty and starts at about $50.

See at Amazon

Kingston HyperX Impact DDR4 SODIMM RAM (laptop)

Kingston HyperX Impact

Kingston's HyperX SODIMM DDR4 RAM is a favorite amongst gamers using laptops. Its low voltage technology won't kill your battery, and with several configurations available, you'll be able to find the right amount of RAM for your daily needs.

Kingston includes a lifetime warranty with free technical support. This RAM starts at about $85.

See at Amazon

Crucial DDR3L SODIMM RAM (laptop)

Crucial DDR3L SODIMM

This laptop RAM is easy to install on compatible laptops and its low voltage engineering won't tax your battery. Available in several configurations, including 8GB and 16GB, you'll find the DDR3 SODIMM RAM to fit your needs. This RAM starts at about $65.

See at Amazon

Your PC RAM

Do you plan on upgrading RAM soon? How much will you be installing? What does your daily workload look like? Let us know in the comments section below!

How to move your WhatsApp messages to a new phone on Windows 10 Mobile

$
0
0

How-to-move-WhatsApp-messages-to-a-new-Windows-10-Mobile-Phone

How do I move my WhatsApp messages to a new Windows phone?

An exciting new phone hits stores and you just have to have it! But your old phone has all your classic WhatsApp messages that you can't bare to lose (like that late night when you and your boo discovered you both love ham and peanut butter sandwiches with the crusts cut off).

You can transfer your chat history to a new phone, but it depends on a lot of things. If you're going from a Windows 10 Mobile phone that has an SD card to a new Windows 10 Mobile phone that has an SD card, you're fine. If you're going to any other type of phone, or your Windows 10 Mobile phone doesn't have an SD card slot, unfortunately, you're out of luck.

You can't transfer your WhatsApp history from a Windows 10 Mobile phone to any other platform, so if you've just upgraded to an iPhone, Android phone, or a Blackberry, you're options are limited. You can always export your chat history as a .txt file and email it to yourself if you really want to keep those messages, which is pretty easy to do.

Here are the things you should do first

  1. Change your WhatsApp phone number: If you are getting a new Windows phone and a new phone number, the first thing you should do is change your number in WhatsApp. If you are using the same phone number, then skip this step.
  2. Make a WhatsApp backup: To make sure your most recent messages are included in the transfer, perform a backup in WhatsApp.

How to transfer your WhatsApp messages to a new Windows 10 Mobile phone

Once the above steps are completed, you're ready to move your WhatsApp messages from your old Windows 10 Mobile phone to your new Windows 10 Mobile Phone.

First you need to remove the microSD card containing your WhatsApp backup from your old phone and put it into your new phone. On your new phone, you're now ready to begin the transfer process. You can transfer over your old data during the WhatsApp installation process on your new phone.

  1. Launch store from the Applications List on your new Windows 10 Mobile phone.
  2. Tap on the search button at the top of the Shop screen (looks like a magnifying glass).
  3. Type WhatsApp in the search bar.

    Launch Store, tap search, and type WhatsApp.

  4. Tap on WhatsApp.

  5. Tap on Install and WhatsApp will begin installing on your phone.
  6. Tap on the open button to launch WhatsApp.

    Tap on WhatsApp, tap on install, and tap the open button.

  7. Tap on the next arrow to agree to the WhatsApp terms and conditions and continue the setup process.

  8. Tap and select the country your phone number is registered in the your country field.
  9. Enter your phone number in the phone number field.

    Tap the next arrow, enter your country, and enter your phone number.

  10. Tap the continue arrow button at the bottom of the screen.

  11. You will be sent an SMS with a verification code. Enter your verification code to continue automatically.
  12. WhatsApp will recognize the backup data on your SD card and ask if you want to restore your message history from the SD backup. Tap the restore button.

    Tap the continue arrow, enter your verification code, and tap the restore button.

  13. Once the restoration is complete, WhatsApp will tell you how many messages were restored. Tap the arrow at the bottom of the screen to continue.

  14. Enter your profile name you would like to use on the new phone.
  15. Tap the arrow at the bottom of the screen to continue and start using WhatsApp.

    Tap the continue arrow, enter your profile name, and tap the continue arrow.

Your chat history has now been transferred to your new phone! Congratulations! You can now resume your WhatsApp chats on your slick new phone!

Guide Default Menu: 
menu-whatsapp-for-windows-10-mob

How to change your phone number in WhatsApp for Windows 10 Mobile

$
0
0

How do I change my phone number in WhatsApp?

If you've recently switched phones and cell phone providers, chances are you've had to change your phone number. You're a heavy WhatsApp user and need to get back in the saddle because the honeys overseas can't wait too long to hear from you.

You're going to have to change your phone number within WhatsApp. Lucky for you, it's a quick and easy process. Before thinking of changing numbers, you'll want to backup your WhatsApp chats so that they transfer to your new account.

Also, you'll have to make sure that your phone has a SIM card that's set up to receive texts and calls. If you've got a new phone number, then you'll have a new SIM card, so just make sure you can send and receive messages and you'll be good to go!

How to change you phone number in WhatsApp for Windows Mobile 10

  1. Launch WhatsApp from the Start screen or the applications list.
  2. Tap the menu button in the bottom right of your screen. It looks like three dots in a row.
  3. Tap settings.
  4. Tap account.

    Launch WhatsApp, tap menu, settings, account

  5. Tap change my number.
  6. Tap the next on the bottom of the screen. It's an arrow in a circle.
  7. Enter your old phone number and new phone number in the fields.

    Tap change my number, next, enter old and new phone numbers

  8. Tap the next button on the bottom of the screen.
  9. Tap continue.
  10. Enter the six-digit code that you receive via text message. You'll have to check your regular messaging app for the code.

    Tap the check mark, continue, enter the code

As soon as you enter the code, your phone number will be verified and you'll be right back where you started. And by that, I mean using WhatsApp like a wizard.

Guide Default Menu: 
menu-whatsapp-for-windows-10-mob

How to disable Windows Ink Workspace on Windows 10

$
0
0

If Windows Ink Workspace isn't a feature you need, this guide will walk you through the steps to disable the experience on your Windows 10 PC.

Windows Ink is a new pen experience that Microsoft is introducing with the Windows 10 Anniversary Update. At the core of Windows Ink, there is the same pen support that the operating system has included for years, but there are a number of new improvements.

It all starts with the Windows Ink Workspace that acts as the central hub to access the new Sticky Notes to create notes and reminders using Cortana, and you can also draw on a whiteboard or on a screenshot using Sketchpad or Screen sketch. In addition, Microsoft has promised to keep improving the experience to make it easier for developers to implement Windows Ink support on their apps.

If you own a Surface Book, Surface Pro 4, or similar device that includes support for an active pen, the Windows Ink experience will be enabled by default. However, as with any feature, the new improvements may not be for everyone, and this Windows 10 guide, we'll walk you through the steps to disable Windows Ink Workspace completely from your device.

How to disable Windows Ink Workspace using Group Policy

There are multiple ways to disable Windows Ink Workspace, but the quickest way to completely turn off the experience is by using the Local Group Policy Editor -- that's of course if you're using Windows 10 Pro, Enterprise, or Education.

  1. Use the Windows key + R keyboard shortcut to open the Run command.
  2. Type gpedit.msc and click OK.
  3. Select Computer Configuration.
  4. Expand the following path: Administrative Templates\Windows Components\Windows Ink Workspace.

    Note: It's worth pointing out that if you see two "Windows Ink Workspace" entries, you must choose to configure the second one. Otherwise, the instructions will not work.

  5. On the right side, double-click the Allow Windows Ink Workspace setting.

  6. Check the Enabled option.
  7. Under Options, select Disabled from the drop-down menu.
  8. Click Apply.
  9. Click OK.

  10. Restart your computer to see the new changes.

Once you restart your device, the Windows Ink Workspace icon will no longer be available in the taskbar. And you'll notice that the "Show Windows Ink Workspace button" option on the taskbar context menu will become unavailable.

To revert the changes follow the steps mentioned above, but this time on step 8 select the Not Configured option instead.

How to disable Windows Ink Workspace using the registry

The Local Group Policy Editor is not a feature available on Windows 10 Home, but you can achieve the same results using the registry (if you're up to the challenge).

Important: Before you make any changes to the registry, make sure to understand that these changes may cause irreversible damage to your installation if they're not done properly. It's recommended that you do a full backup of your computer before proceeding. You've been warned!

  1. Use the Windows key + R keyboard shortcut to open the Run command.
  2. Type regedit, and click OK to open the Windows registry.
  3. Browse the following path:

    HKEY_LOCAL_MACHINE\SOFTWARE\Policies\Microsoft\WindowsInkWorkspace

  4. If you don't see the WindowsInkWorkspace key (folder), then do the following:

    1. Right-click the Microsoft key, select New, and click Key.

    2. Name the new key WindowsInkWorkspace.
    3. Click OK.
  5. Right-click on the right side, select New, and click DWORD (32-bit) Value.

  6. Name the key AllowWindowsInkWorkspace.
  7. Click OK.
  8. Double-click the key and make sure its value is set to 0, which means disabled.

  9. Restart your computer to apply the changes.

Once you restart your device, identically as the process done with the Local Group Policy Editor, the Windows Ink Workspace icon will no longer be available in the taskbar. And you'll notice that the "Show Windows Ink Workspace button" option on the taskbar context menu will become unavailable.

To enable Windows Ink Workspace again, simply follow the steps mentioned above and on step 9 make sure to change the value from 0 to 1, and restart your computer.

Wrapping things up

It's important to note that after you've disabled Windows Ink Workspace, you won't be able to launch Sketchpad or Screen sketch, but you'll still be able to use Sticky Notes, as it's a regular Windows Store app.

In addition, disabling the experience doesn't remove the Pen & Windows Ink settings page from the Settings app. If you had the pen shortcuts configured to open Windows Ink Workspace, the pen button functions will fall back to open the OneNote app for all the options.

Do you use Windows Ink Workspace on the regular basis? Would you consider disabling the feature? Tell us in the comments below.

More Windows 10 resources

For more help articles, coverage, and answers on Windows 10, you can visit the following resources:

How to protect your privacy in WhatsApp on Windows 10 Mobile

$
0
0

How-to-protect-your-privacy-in-Whats-App-on-Windows-10-Mobile

How do I block a WhatsApp contact or turn off read receipts?

You've just got started with WhatsApp and things are going great! You've got your profile picture uploaded, your account synced to your phone number, you've input a witty, early-2000s throwback status (WhazzzzzzAaaaaaap), but now you're thinking to yourself, "who can see this stuff? Do I want everyone in the world to see my profile pic of me at the annual cat calendar convention?" Maybe not.

WhatsApp lets you control how much of your account information is viewable and whether or not it can be seen by everyone in the world, just your contacts, or no one at all!

How to adjust your privacy settings in WhatsApp on Windows 10 Mobile

  1. Launch WhatsApp from the Applications List on your Windows 10 Mobile phone.
  2. Tap on the more button at the bottom of the screen (it looks like three dots in a row).
  3. Tap on settings from the pop-up menu.

    Launch WhatsApp, tap the more icon, and tap settings.

  4. Tap on account.

  5. Tap on privacy.

    Tap account and tap privacy.

From here you can adjust your privacy settings in three different categories: profile photo, status, and last seen.

How to adjust who can see your profile photo on WhatsApp on Windows 10 Mobile

  1. Tap on the visibility menu under "profile photo" to choose who can see your photo:

    • Everyone (anyone who searches for you on WhatsApp can see your profile picture).
    • My Contacts (only your contacts can see your profile picture).
    • Nobody (no one will be able to see your profile picture).

      Tap the visibility menu and choose your profile photo settings.

  2. Tap on the visibility menu under "status" to choose who can see your WhatsApp status:

    • Everyone (anyone who searches for you on WhatsApp can see your status).
    • My Contacts (only your contacts can see your status).
    • Nobody (no one will be able to see your profile status).

      Tap the visibility menu and choose your status settings.

  3. Tap on the visibility menu under "last seen" to change whether people can see how recently you were last using WhatsApp:

    • Everyone (anyone who searches for you on WhatsApp can see when you last used WhatsApp).
    • My Contacts (only your contacts can see when you last used WhatsApp).
    • Nobody (no one will be able to see when you last used WhatsApp).

      Tap the visibility menu and manage your last used settings.

How to turn off read receipts in WhatsApp on Windows 10 Mobile

Read receipts are a super handy way to track when your message has been sent, delivered, and eventually read by the person you send it to. In WhatsApp, your messages have little check marks by them. One gray checkmark means your message is sent. Two grey checkmarks mean your message has been delivered, and the checkmarks turn blue when your message has been read.

WhatsApp turns this feature on by default when you install the app. However, you might not want people to know when you read their messages (it makes you seem more mysterious).

It's easy to turn off read receipts in WhatsApp.

  1. Launch WhatsApp from the Applications List on your Windows 10 Mobile phone.
  2. Tap on the more button at the bottom of the screen (it looks like three dots in a row).
  3. Tap on settings from the pop-up menu.

    Launch WhatsApp, tap more, and tap settings.

  4. Tap on account.

  5. Tap on privacy.
  6. Move the read receipt slider to the left to turn off read receipts.

    Tap account, tap privacy, and move the read receipt slider.

If you change your mind, follow these same steps but move the read receipt slider to the right to turn this setting back on.

Also, if you turn off this feature to prevent people from seeing your status, you also won't be able to see when other people read your messages. When you're in a group chat, read receipts will be sent, even if you have this feature turned off.

How to block a contact in WhatsApp on Windows 10 Mobile

WhatsApp is great for talking to people. It's also great for NOT talking to people. You can block a WhatsApp contact who is blowing up your phone, sending you nonsense, or is generally creeping you out.

If you block them, they will no longer be able to chat or call you through WhatsApp (you're on your own if they show up outside your bedroom window holding a boom box over their head blaring "Total Eclipse of the Heart").

  1. Launch WhatsApp from the Applications List on your Windows 10 Mobile phone.
  2. Tap on the more button at the bottom of the screen (it looks like three dots in a row).
  3. Tap on settings to launch the settings menu.

    Launch WhatsApp, tap more and tap settings.

  4. Tap on contacts.

  5. Tap on blocked contacts.

    Tap contacts and tap block contacts.

  6. Tap on the + button at the bottom of the screen.

  7. Tap on a contact you want to block and they will be added to your blocked list.

    Tap the plus sign and tap a contact.

Blocking doesn't have to be permanent, but might be the best way to tell a "friend" you don't want to see anymore pictures of their toe blister they think looks like Elvis.

How to unblock a contact in WhatsApp on Windows 10 Mobile

If you change your mind and you're ready to move someone out of the doghouse and back to your WhatsApp life, with just a few taps you can unblock a contact.

  1. Launch WhatsApp from the Applications List on your Windows 10 Mobile phone.
  2. Tap on the more button at the bottom of the screen (it looks like three dots in a row).
  3. Tap on settings to launch the settings menu.

    Launch WhatsApp, tap more, and tap settings.

  4. Tap on contacts.

  5. Tap on blocked contacts.

    Tap contacts and tap blocked contacts.

  6. Tap and hold on the contact you want to unblock.

  7. Tap on unblock and the contact will be removed from your blocked list.

    Tap and hold a contact and tap unblock.

If the contact starts annoying you again. You can always banish them back to the realm of blocked contacts on WhatsApp!

Guide Default Menu: 
menu-whatsapp-for-windows-10-mob

How to fix the webcam freezing issue on the Windows 10 Anniversary Update

$
0
0

If your PC webcam keeps freezing up, even when trying to make a Skype video call, use this guide to get around this issue after installing the Windows 10 Anniversary Update.

Microsoft recently released the Anniversary Update bringing a lot of new features and improvements to Windows 10. Aside from all the good that brought the update, during the rollout, many users also reported a number of issues after installing the update, and today, unfortunately, we also have to add a problem with webcams.

According to various reports from customers, some PC webcams are not working correctly after installing the Windows 10 Anniversary Update. Microsoft says that is aware of the problem, but the company won't be issuing a permanent fix until sometime in September.

On a support thread at the Windows Dev Center, some users explained that their webcams are freezing up, even when trying to make a simple Skype video call. The bigger problem is that this isn't just affecting home users, but it is also impacting many enterprise customers.

Fortunately, it looks like there is a possible temporary workaround to fix the freezing issue on webcams as posted by Rafael Rivera (@WithinRafael) on Twitter. In this Windows 10 guide, we'll walk you through the steps to modify the registry to try to resolve this problem until Microsoft releases a permanent fix.

How to resolve the freezing issue on webcams on the Windows 10 Anniversary Update

Important: Before you make any changes to the registry, make sure to understand that these changes may cause irreversible damage to your current installation if they're not done properly. It's recommended that you do a full backup of your computer before proceeding. You've been warned!

  1. Use the Windows key + R keyboard shortcut to open the Run command.
  2. Type regedit, and click OK to open the Windows registry.
  3. Browse the following path: HKEY_LOCAL_MACHINE\SOFTWARE\WOW6432Node\Microsoft\Windows Media Foundation\Platform
  4. Right-click on the right side, select New, and click DWORD (32-bit) Value.

  5. Name the new key EnableFrameServerMode.
  6. Click OK.
  7. Double-click the newly created key and make sure it set to 0.

  8. Click OK.
  9. Restart your computer to complete the task.

Once your computer restarts test your USB camera one more time, perhaps making a Skype video call, and now you should no longer experience the freezing issue. Make a note of this change for later in September when the official fix comes out so you can undo this fix if necessary.

According to one member of the Microsoft's Windows Camera team, the problem is caused by the Anniversary Update removing support for two video compression formats, including MJPEG and H.264 codecs on Windows 10, and opting to support YUY2 encoding instead.

The company claims that the decision was made to prevent performance issues due to the change on how Windows Store apps can now access the camera features with the Anniversary Update.

Are you experiencing freezing issues on your webcam? Did the workaround work on your Windows 10 PC? Let us know in the comments below.

More Windows 10 resources

For more help articles, coverage, and answers on Windows 10, you can visit the following resources:

How to delete your account from WhatsApp on Windows 10 Mobile

$
0
0

How to delete your account from WhatsApp on Windows 10 Mobile

How do I clear my WhatsApp history and delete my account on Windows 10 Mobile?

You heard great things, you downloaded the app, you gave it a shot, but decide WhatsApp isn't for you. It's cool. No need to make this breakup long and drawn out. Time for you both to move on with your life! But who gets to keep the cat?

WhatsApp makes deleting your account easy, but it is a permanent action. You can always download the app again, but when you reinstall you'll be starting over from scratch — all of your settings and chat histories will be gone forever.

How to delete your account from WhatsApp on Windows 10 Mobile

  1. Launch WhatsApp from the Applications List on your Windows 10 Mobile phone.
  2. Tap the more button to launch a pop-up menu. It's the three dots in the bottom right corner.
  3. Tap settings from the pop-up menu.

    Launch WhatsApp, tap more and tap settings.

  4. Tap account.

  5. Tap delete account.
  6. Tap the phone number text field.

    Tap account, tap delete account and tap the text field.

  7. Enter the phone number associated with your WhatsApp account.

  8. Tap the next arrow at the bottom of the screen.
  9. Enter any feedback you would like to share with WhatsApp about your experience (optional).

    Enter phone number, tap next, and enter feedback.

  10. Tap the next arrow at the bottom of the screen.

  11. Tap the trashcan icon to delete your account. It's located at the bottom of the screen.

    Tap the next arrow and tap the trashcan icon.

That's it! Your account is now deleted from WhatsApp. Your message history, groups, and WhatsApp contacts are now gone from your phone. If you decide to sign up for WhatsApp again on this phone or a new phone down the road, you will not have any of your previous WhatsApp chats available and you will have to re-add your contacts and groups to WhatsApp.

Guide Default Menu: 
menu-whatsapp-for-windows-10-mob

How to safely and smartly clean your dirty Xbox One

$
0
0

It's time to clean your Xbox One!

After you've had your Xbox One console for a while, you'll probably notice that it starts to get dusty. Dust can easily build up, and cause a problem down the line. That's why we've put together this handy guide to cleaning your Xbox One. Here's what to do — and what not to do — to keep your console shiny and clean!

Dust cloth

Your very best friend, when it comes to cleaning your Xbox One, is a dust cloth. That's because as long as you keep the exterior clean and dust free, you shouldn't ever have to clean out the inside of your console. A dust cloth lets you grab most of the dust that can accumulate on your system.

All you need to do is run the dust cloth over the outside of your system. This includes the top, bottom, sides, and ports. Depending on how long it's been since you've wiped down your Xbox One you may need to clean off the cloth a few times, but for the most part this method will get the job done.

Compressed air

If it's been a while since you've cleaned out your Xbox One, then you might notice that there is dust everywhere. On the top and sides of your console, as well as in all of the grates. While a dust cloth can easily deal with everything on the outside of your console, if you've got dust inside your grates you'll need to go a slightly different route.

Thankfully it isn't hard to go ahead and clean out the dust inside those grates. All you'll need is a can of compressed air. Using the detail nozzle, use short directed sprays to clean the dust out. This should only take a few minutes, and you'll be able to see when the dust has evacuated the area. Canned air is also useful for getting into all of the ports along the back of the Xbox One. These can easily collect dust, but they're hard to get into with a cloth (and you'll probably end up leaving behind lint or shreds of paper towel if you do).

Of course, in doing this you'll be kicking a bunch of dust into the air, and inevitably that's going to settle back on your Xbox. So give it a few minutes and then come back with the dusting cloth and give it a quick wipe down.

Avoid damp wipes

Now plenty of folks use wipes doused in cleaning chemicals (or even a bit of water) to clean just about every surface in their homes, from countertops to windows to TV screens. Most of that's fine. Do not use them on your Xbox One. Specifically this is because your Xbox One is covered in vents, and you don't want moisture of any kind to seep in there. Really, you shouldn't use these on any electronics — TV and Xbox included.

In general, you should avoid using anything that is wet since it has the capacity to screw up your console. Liquid + electrical components = bad time. By sticking with the combo of a dust cloth, and compressed air you should be able to easily clean out your Xbox without accidentally causing any damage to it.

How to prevent Windows 10 Insider builds from accidentally installing on your PC

$
0
0

When your PC is ready to install a Windows 10 Insider Preview that you don't want, use this trick to cancel the installation.

If you've been testing pre-releases of Windows 10, you're probably familiar with the Windows Insider Preview program. The program let you get early access to releases of the operating system to test new features and changes that will be part of a new major update.

The caveat using early versions of Windows 10 are potential bugs and problems running unstable code, as builds available through the Insider program are heavily under development.

Although many times Microsoft releases great Windows 10 previews with a lot of changes and features, other times (usually at the beginning of a new development) builds may include a lot of bugs and things not working correctly, which could make you think twice before installing them.

Of course, you can always change your Windows Insider Preview preferences to stop getting new flights. However, if you forget to change your settings, new versions of Windows 10, regardless of how stable they might be, will download automatically to your PC without an option to cancel the installation.

In this Windows 10 guide, we'll walk you through the steps to cancel an installation of a new Windows 10 Insider preview build after it downloaded to your computer.

How to prevent Insider builds from installing on your Windows 10 PC

If there is a new version of Windows 10 Insider preview available through the Fast ring, which it's known to be significantly buggy, and it's ready to install on your computer, you can use these instructions to stop the installation.

Important: Do not restart your computer while going through this process.

1. Change your Active Hours settings

To prevent the operating system from automatically restarting while you're making these changes, you want to change the Active Hours settings to postpone the restart as much as you can.

  1. Open Settings.
  2. Click on Update & security.
  3. Click on Windows Update.
  4. Click the Change active hours link.

  5. Set the Start time and End time to postpone the restart the maximum period of time (12 hours).
  6. Click Save.

2. Change your Windows Insider Preference

In the following steps, you'll change your Windows Insider Preview settings to opt out of the current branch and stop getting further builds.

  1. Open Settings.
  2. Click on Update & security.
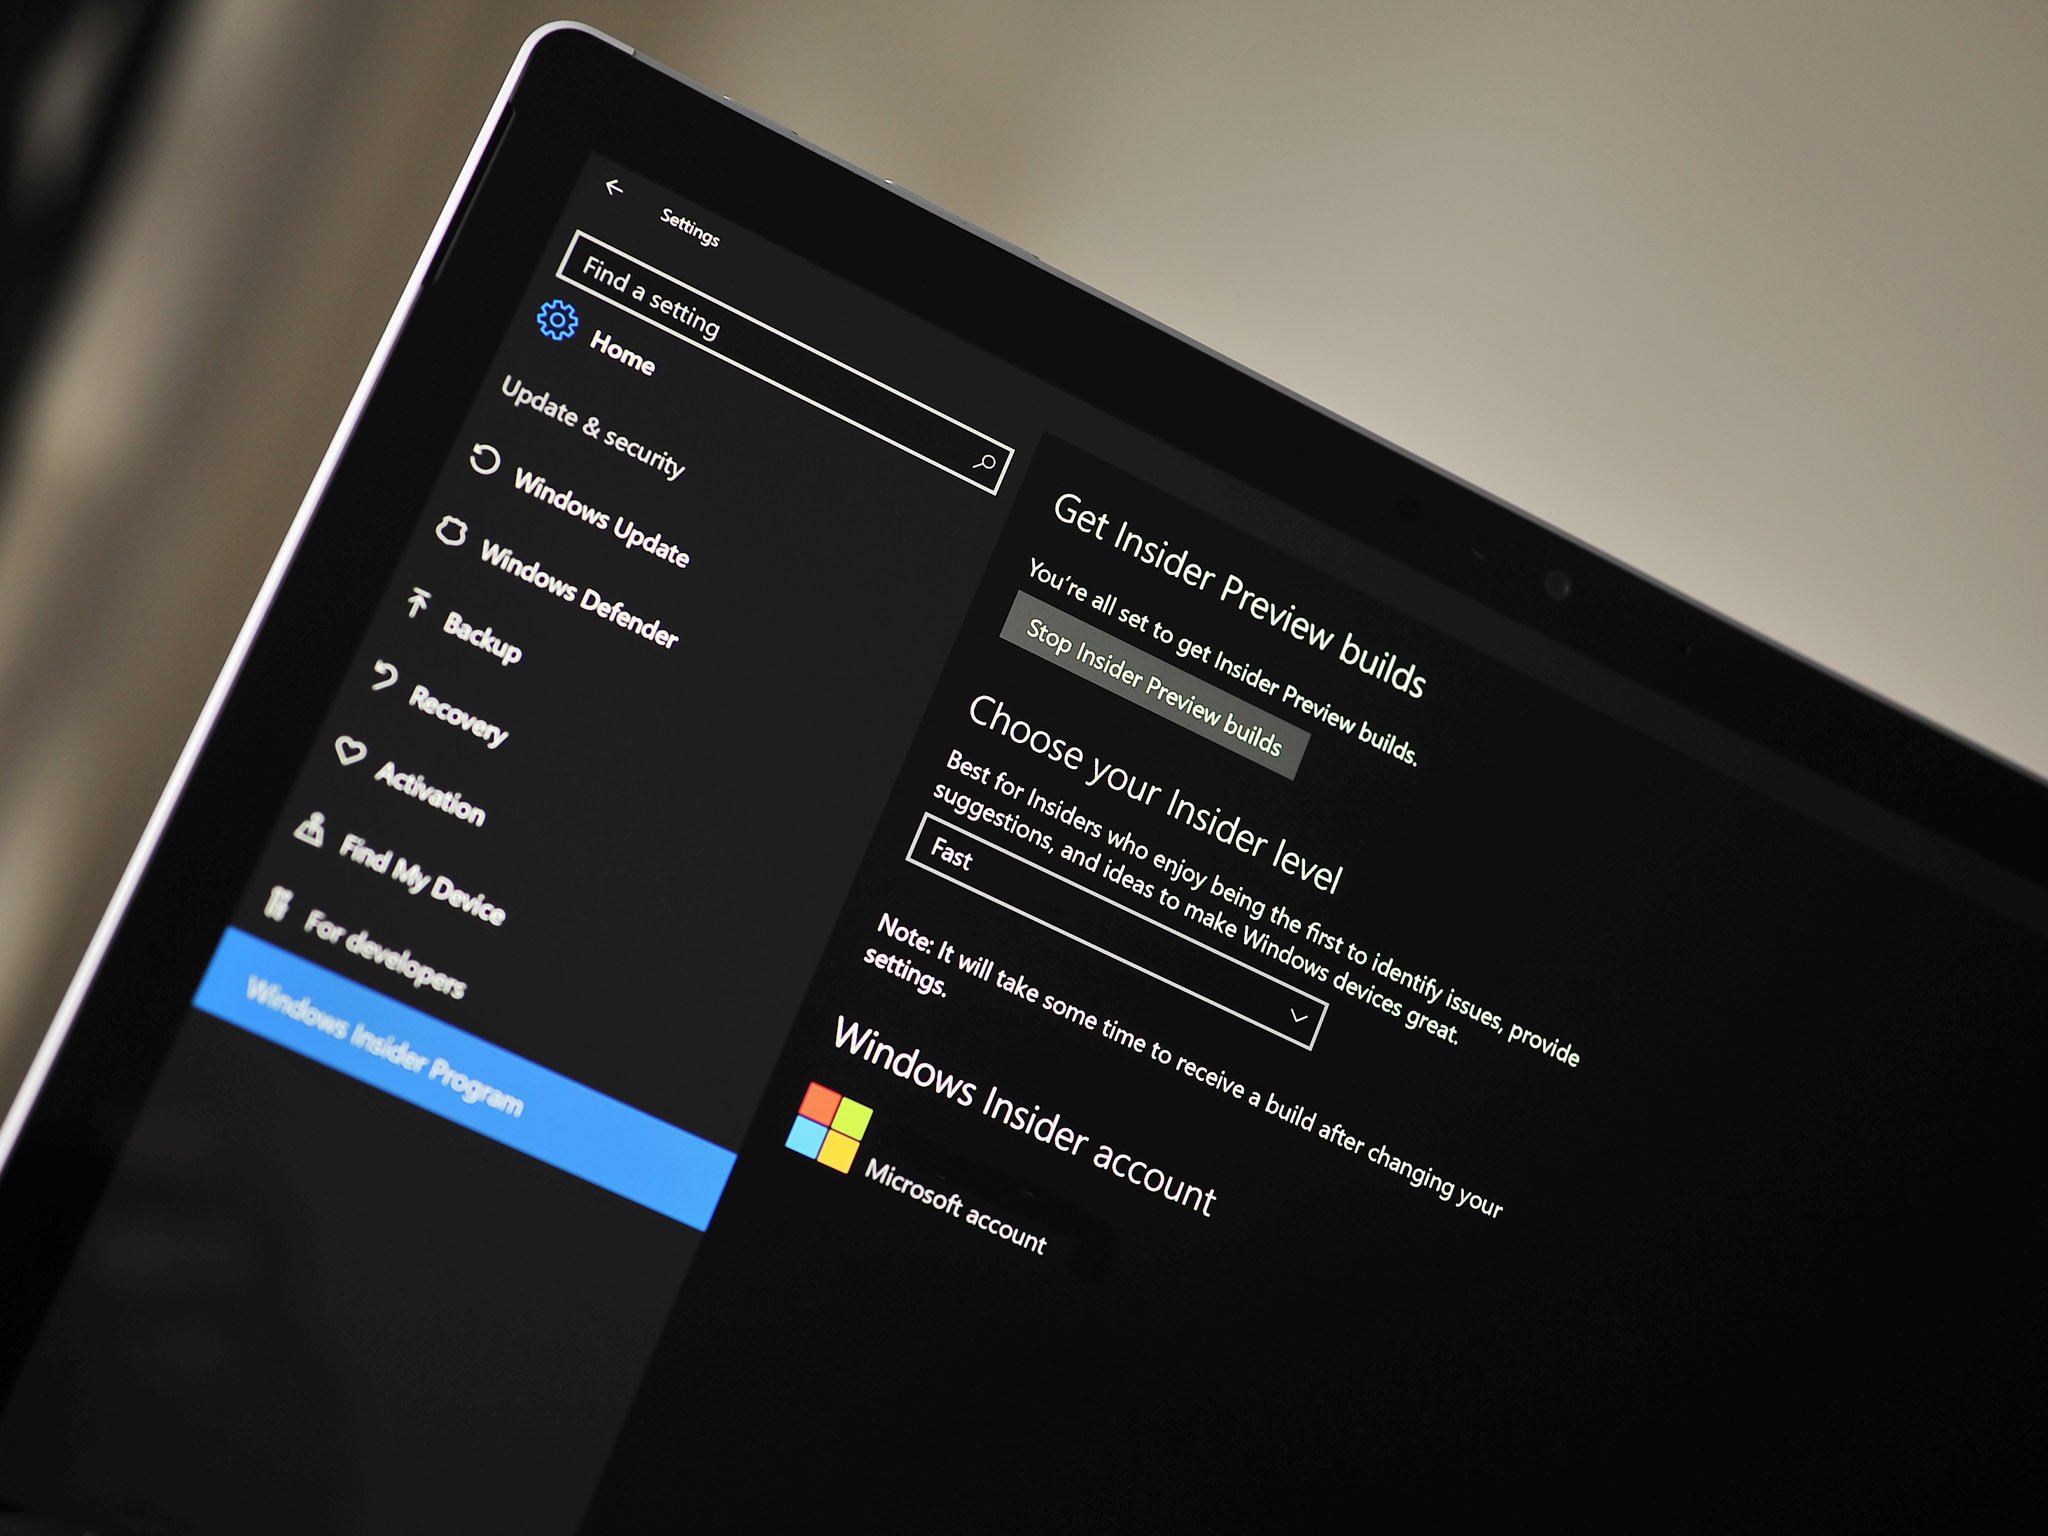
  3. Click on Windows Insider Program.
  4. Lower your ring level to Slow or Release Preview (if available).

Quick Tip: If you change your settings while the build is downloading, it will also stop the download.

3. Remove the installation files from your computer

Although you changed your settings to stop getting new flights, you will notice that Windows Update will still show the preview as an update ready to install during the next restart.

Now what you need to do is to use the Disk Cleanup tool to delete the installation files correctly and quickly remove the update from list on Windows Update.

  1. Use the Windows key + R keyboard shortcut to open the Run command.
  2. Type cleanmgr and click OK to launch the Disk Cleanup tool.
  3. Make sure you're selecting the drive C: and click OK.
  4. Click the Clean up system files button.

  5. Make sure you're selecting the drive C: and click OK.
  6. Select the Temporary Windows installation files option.
  7. Make sure to remove the checkmark for anything you don't want to delete.
  8. Click OK.

  9. Click Delete files.

Once you go through these instructions, wait several minutes, and go back to Windows Update, and you'll notice that as Windows 10 checks for new updates, the installation files for the new build downloaded to your computer will magically disappear from the list.

If there are available new cumulative updates, you can now go ahead and restart your computer to install them.

After preventing a new build from installing to your PC, if you're not planning to test new versions of Windows 10, make sure to unenroll your device from the program.

Did you ever have to install a new Windows 10 Insider Preview just because it automatically downloaded to your PC? Tell us in the comments below.

More Windows 10 resources

For more help articles, coverage, and answers on Windows 10, you can visit the following resources:


How to add new Cortana search file locations on Windows 10

$
0
0

If some files are not showing up on search results, it's probably because Cortana doesn't know where to look. Here's how to add alternative search locations on Windows 10.

Cortana is your personal digital assistant in Windows 10. It's a feature designed to help you accomplish many tasks, including reminding you of important appointments, track packages and flights, and sync notifications between devices.

In addition, Cortana shares a deep integration with Windows Search and search on the web using Bing. If there is anything you need (e.g., image, document, or another type of file), you simply enter the query in the search box in the taskbar, and Cortana will return the best results based on local and online searches. However, if you store files on an external hard drive or in different folders other than the defaults (Downloads, Documents, Music, Pictures, etc.), you'll notice that the digital assistant will never bring up those files in the results.

The reason is that Cortana relies on Windows Search for local files, and Windows Search uses a set of default configurations that specify which folders are indexed for search. And these default settings don't include additional storage locations you may have added to your computer or alternative folder paths.

In this Windows 10 guide, we'll walk you through the steps to enable Cortana to search all your drives connected to your computer, and how to remove those locations you want to prevent from indexing.

How to add new storage locations for indexing on Windows 10

Use the following steps to modify the default local search configurations, which Cortana can use respond accordingly to your search queries.

  1. Use the Windows key + X to open the Power User menu and select Control Panel.
  2. Change the view to Large Icons.

  3. Click on Indexing Options.

  4. Click Modify.

  5. Click Show all locations .
  6. On Indexed Locations, select the folders and drives you want to give Cortana permission to search.

    • Quick Tip: If you have sensitive files (or videos), in this step, you can also exclude the locations you don't want Cortana to use to show search results.

    • Getting Granular: If you want to index a folder, but you don't want a subfolder to be indexed, expand the folder and remove the checkmark for those files and folders inside it you don't want Cortana to consider during a search.

  7. Click the OK button to complete the task.

Once you completed the task, Windows 10 will automatically begin indexing the new files, but it may take some time. If you don't want to wait, or it's been too long and search isn't working correctly, while in the Indexing Options settings page do the following.

  1. Click Advanced.
  2. Click Rebuild.

  3. Click OK to confirm.

If you have encrypted files stored on your computer, you always want to check the Index encrypted files option under Advanced Options.

You can even go to the File Types tab and configure which files extensions you want to see in search results.

Once you completed your new customization, click the OK button to commit the changes.

Wrapping things up

As you can see, Cortana may know many nifty tricks, but when it comes to search certain options have to be customized manually before getting the best results. If you have been wondering why certain files didn't show in search -- well, this is why.

Do you think that Cortana should be able to search your entire computer by default, or this is the right approach? Tell us what you think in the comments below.

More Windows 10 resources

For more help articles, coverage, and answers on Windows 10, you can visit the following resources:

How to improve battery life on Dell XPS 13

$
0
0

How to improve battery life on Dell XPS 13

How do I get more time out of my Dell XPS 13 battery?

Your favorite little laptop has a solid battery already, but what if you want to get the most out of it? Say you're on a long flight and want to watch a few movies, or you're on a road trip trying to get work done while someone else drives; you're going to need a few tricks to keep your battery running longer!

Dim your screen

Yes, this might seem obvious, but it can help you eke out more minutes from your battery. How bright is your screen right now? Do you need it that bright? Try going as low as you can and letting your eyes adjust. Both your eyes and your battery will thank you.

To dim your screen, you can use either the XPS 13 keyboard's Windows key + F11 shortcut, or you can use the Action Center.

Here's how to dim your XPS 13's screen through the Action Center:

  1. Click the Action Center button in your system tray. It looks like a speech bubble.
  2. Click the screen brightness button. It has a small sun in the top left corner. This will raise your screen's brightness in increments of 25% before resetting to 0%.

    Click the Action Center button. Click the screen brightness button.

Close any unnecessary programs

Making your XPS 13 work at keeping unused programs open is a drain on the battery. You can either close programs from their window or from the taskbar, or you can use task manager to end those that don't show up in the taskbar. Here's how to use task manager to close unnecessary programs:

  1. Use the Ctrl + Alt + Del shortcut on your keyboard. A blue screen will appear.
  2. Click Task manager.
  3. Click any program you'd like to close.
  4. Click End task to close the program.

    Click any program you want to close. Click End task.

Limit your wireless use

Keeping networks open is a drain on your battery — have you ever noticed how long the battery on your phone lasts when you have airplane mode enabled? The same applies to your XPS 13. Cutting off all communications with airplane mode will save you the most battery power, but you'll also lose access to the internet and connected Bluetooth devices.

Here's how to turn on Airplane mode:

  1. Click the Action Center button in your system tray. It looks like a speech bubble.
  2. Click the Airplane mode button so that it turns blue.

    Click the Action Center button. Click the Airplane mode button.

Your wireless connections will now be turned off. To re-enable connections, just repeat the same steps.

If you'd like to disable Bluetooth but leave Wi-Fi intact, you'll still be saving a bit of battery power. Here's how to only disable Bluetooth connectivity:

  1. Click the Action Center button in your system tray. It looks like a speech bubble.
  2. Click the Bluetooth button so that it is no longer blue.

    Click the Action Center button. Click the Bluetooth button.

Bluetooth will now be disabled. To re-enable Bluetooth, just repeat the same steps.

Use and configure battery saver mode

Windows 10 has a great, customizable battery saving feature that you can enable when you're getting low on juice. It will kick on automatically when your battery dips below a certain point, but here's how to manually enable battery saver:

  1. Click the Action Center button in your system tray. It looks like a speech bubble.
  2. Click the Battery saver button so that it turns blue.

    Click the Action Center button. Click the Battery saver button.

If you'd like to disable battery saver, just repeat the same steps.

Not satisfied with how battery saver is working? You can customize battery saver to better suit your needs.

Here's how to access battery saver settings:

  1. Click the Search Windows field in your taskbar.
  2. Type battery saver.
  3. Click Change battery saver settings.

    From here you can tweak settings, including changing when battery saver automatically kicks in, changing whether or not the screen dims when battery saver is turned on, and allowing certain apps to still draw full power from the battery.

    Type battery saver. Click Change battery saver settings.

Here's how to allow apps to run in the background even when battery saver mode is enabled.

  1. Click Add an app.
  2. Click an app to allow.

    Click Add an app. Click an app to allow.

  3. Click Add.

    Click Add.

Here's how to remove an app from the always allowed list:

  1. Click the app you want to remove.
  2. Click Remove.

    Click an app you want to remove. Click Remove.

Change your power plan

Windows 10 has a functional built-in power settings function that allows you to set sleep times, change what power buttons do, and ultimately set up a power plan that works for your needs.

Here's how to open power and sleep settings to change sleep times:

  1. Click the battery button in your system tray.
  2. Click Power & sleep settings.

    Click the battery button. Click Power and sleep settings.

  3. Click the dropdown arrow next to any options you want to change.
  4. Click the time option you'd like to use. In this case we set the screen to turn off after two minutes when using battery power.

    Click the dropdown arrow next to any settings you would like to change. Click the time option you would like to use.

If you'd like to create and name your own power plan, it is possible on your XPS 13. Here's how to do it:

  1. Click the battery button in your system tray.
  2. Click Power & sleep settings.
  3. Click Additional power settings.

    Click Power and sleep settings. Click Additional power settings.

  4. Click Create a power plan.
  5. Click an option that best suits your needs. In this case we choose Power Saver.

    Click Create a power plan. Click an option that best suits your needs.

  6. Click the Plan name field and type a name. This step is optional.
  7. Click Next.

    Click the Plan name field and type a name. Click Next.

  8. Change power settings as you see fit.
  9. Click Create when you're satisfied with the plan. It will now appear in the main Power Options menu.

    Change power settings as you see fit. Click Create.

To go one step further, you can now lower Thermal Design Power (TDP), the maximum temperature your laptop's internal hardware is allowed to reach. This will cut performance, but you're going to get more time out of your battery.

  1. Click the battery button in your system tray.
  2. Click Power & sleep settings.

    Click the battery button. Click Power and sleep settings.

  3. Click Additional power settings.
  4. Click Change plan settings beside the plan you'd like to tweak the TDP in.

    Click Additional power settings. Click Change plan settings.

  5. Click Change advanced power settings.
  6. Click the expand button (looks like a +) beside Intel(R) Dynamic Platform and Thermal Framework Settings.

    Click Change advanced power settings. Click the expand button.

  7. Click the expand button (looks like a +) beside Config TDP Level.
  8. Click On Battery.

    Click the expand button beside Config TDP level. Click On Battery.

  9. Click the dropdown arrow next to High TDP.
  10. Click Low TDP.

    Click the dropdown arrow next to High TDP. Click Low TDP.

  11. Click Apply.
  12. Click OK.

    Click Apply. Click OK.

Update your BIOS and drivers

Over the course of XPS 13's life, Dell has released multiple driver updates, as well as a few basic input/output system (BIOS) updates that significantly improve battery life and performance. Updating your BIOS is a serious process; make sure your XPS 13 is plugged into a power outlet, and make sure all apps are closed.

Dell has made updating the XPS 13's BIOS and drivers through their website really easy:

  1. Navigate to Dell's support webpage using your XPS 13.
  2. Click Detect Product.
  3. Click Detect Drivers.

    Click Detect Product. Click Detect Drivers.

If your XPS 13 has out-of-date drivers and BIOS you will be prompted to download them. Follow carefully the on-screen steps as they guide you through the update process. Remember to keep your XPS 13 plugged in at all times when updating.

How to use the Sonos Controller desktop app on Windows 10

$
0
0

HHow to control Sonos on Windows

Command and control your tunes right from your desktop with the Sonos desktop app for Windows.

While you can control your music's volume directly from any Sonos player, the Sonos app for Windows gives you full control over all aspects of your home audio. If you have more than one room set up, then you'll definitely want to take advantage of the options the app gives you.

Here's a quick look at what you can do:

How to control the volume with the Sonos Controller app for Windows 10 PC

  1. Launch the Sonos app from your Desktop or the Start menu
  2. Click and drag the volume slider to your desired level. It's in the upper left corner of the application window.

    Launch songs app then click and drag volume slider to desired level

Can you feel the music rattling your eardrums? Be sensible with it, though. You don't want to make yourself deaf in your old age or annoy your neighbors too badly!

How to mute the volume with the Sonos Controller app for Windows 10 PC

  1. Launch the Sonos app from your Desktop or the Start menu
  2. Click the mute button to turn mute on. It's to the left of the volume slider in the upper left corner of the application window.

    Launch app then click on mute button

How to pause playback in the Sonos Controller app for Windows 10 PC

  1. Launch the Sonos app from your Desktop or the Start menu
  2. Click the pause button. It's in the middle top of the application window.

    launch app then click the pause button

How to go back to the previous track or advance to the next track in the Sonos Controller app for Windows 10 PC

If you want to hear the next song in your playlist or if you want to go back to the previous song, the controls are in one place in the Sonos app.

  1. Launch the Sonos app from your Desktop or the Start menu
  2. Click the back button to play the previous track. The back button is to the left of the pause button.
  3. Click the forward button to play the next track. The forward button is to the right of the pause button.

    launch app then click the either the forward or back buttons

How to turn on cross fade in the Sonos Controller app for Windows 10 PC

Cross fading is a neat effect for seamless music play. It "fades" in the beginning of the next song while the current song is still playing to eliminate silences during playback.

  1. Launch the Sonos app from your Desktop or the Start menu
  2. Click the cross-fade button to turn it on. It looks like two horizontal lines with small circles on opposite ends.

    launch app then click cross fade button to turn it on

That's all you have to do to experience cross fading. Now, you can listen to your tracks back-to-back in seamless continuity.

How to customize alarms in the Sonos Controller app for Windows 10 PC

Another cool feature of Sonos is the ability to choose alarms from any of the music in your library. Here's how you can customize alarms in Sonos:

  1. Launch the Sonos app from your Desktop or the Start menu
  2. Click Alarms. It's on the bottom left corner of the application window.

    launch app then click alarms

  3. Click the Add button.
  4. Click inside the time box to set the time for your alarm.

    Click and then set time

  5. Click the room selector, if you have multiple rooms set up, to select which room the alarm will play in.
  6. Click the Select button to choose the music for your alarm.

    click room selector to choose room and then click select to choose music

  7. Click on your choice in the displayed list of locations from where to pull your alarm music.
  8. Click the checkboxes to choose the schedule for your alarm. Your choices are as follows:

    • Once only
    • Monday
    • Tuesday
    • Wednesday
    • Thursday
    • Friday
    • Saturday
    • Sunday

      select choice of music then click any checkboxes that you choose to schedule the alarm

  9. Click and drag the volume slider to your desired level.
  10. Click inside the duration box to select the duration of your choice for your alarm. Your choices are:

    • 15 minutes
    • 30 minutes
    • 45 minutes
    • 1 hour
    • 2 hours
    • No limit

      Click and drag volume slider to desired level, then choose duration options from drop down menu

  11. Click Done to finish setting up your alarm.

    Click done

How to set a sleep timer in the Sonos Controller app for Windows 10 PC

Do you want to set your Sonos to automatically turn off after a certain period of time each day? You can do that by setting a sleep timer. Here's how you can do it:

  1. Launch the Sonos app from your Desktop or the Start menu
  2. Click the Sleep Timer button. It's to the left of the Alarms button at the bottom of the application window.
  3. Click on the option of your choice to select it. Your choices are as follows:

    • Off
    • 15 minutes
    • 30 minutes
    • 45 minutes
    • 1 hour
    • 2 hours

      launch app then click sleep timer and choose option of your choice

How to find and play music with Sonos for Windows 10 PC

$
0
0

How to find and play music on Sonos for Windows

How to blast music on Sonos from your Windows PC.

You've got your Sonos player all set up and you're ready to fill your house with the sweet strains of your favorite music. There are a few ways that you can get started. Let's review them:

How to add a music service to the Sonos Controller app for Windows 10 PC

  1. Launch the Sonos app from your Desktop or the Start menu.
  2. Click Add Music Services under Select a Music Source.

    Launch the Sonos app, click music service

  3. Click on your desired music service. You will have to log in to your account to use the service.

    Click a music service

If you don't see the music service you want to use listed, you can click on More Music Choices at the bottom of the list to be taken to a webpage with an expanded list of music services that work with Sonos.

How to play music from a music service with the Sonos Controller app for Windows 10 PC

  1. Launch the Sonos app from your Desktop or the Start menu.
  2. Click on the music service you want to play from under Select a Music Source.

    Launch the Sonos app, choose  a music service

From there, you'll have different sorting options depending on the music service you're using.

Once you have selected the music you want to play, use the standard media controls to play, pause, rewind, fast-forward, or stop playback.

How to play your own music on the Sonos Controller app for Windows 10 PC

  1. Launch the Sonos app from your Desktop or the Start menu.
  2. Click Music Library under Select a Music Source.

    Launch the Sonos app, click Music Library

  3. Click on your desired sorting for the song(s) you want to play:
    • Artists
    • Albums
    • Composers
    • Genres
    • Songs
    • Imported Playlists
    • Folders
  4. Click the arrow to the right of the song you want to play.
  5. Click your desired option from the pop-up list:

    • Click Play Now to play the song immediately.
    • Click Play Next to play the song after the current song finishes.
    • Click Add to Queue to schedule the song to play in a line-up.
    • Click Replace Queue to replace the current queue.
    • Click Add to Sonos Favorites to add the song to Sonos Favorites.
    • Click Add to Sonos Playlist to add the song to a Sonos Playlist.
    • Click Info & Options to get additional information and options.

      Choose a sorting, click the arrow to the right of the song you want to play, choose when you play it

How to search for music in the Sonos Controller app for Windows 10 PC

If you are looking for a specific track or artist, you can search easily for it, whether you're looking at your music library or a music service. Here's how to do it:

  1. Launch the Sonos app from your Desktop or the Start menu.
  2. Click the arrow on the left side of the search box to choose where you want Sonos to search.
  3. Type your search query into the search box.

    Launch the Sonos app, click the arrow on the lefthand side of the search box, type your search query

How to add another Sonos speaker using the Sonos Controller on Windows PC

$
0
0

Adding additional players to your Sonos system on Windows has never been easier!

You've bought a shiny new Sonos player or SUB to add to your existing Sonos setup. How awesome for you! The process is pretty much the same as when you initially set it up, except that you don't have to go through setting up your music library again.

Here's how to connect additional players to your Sonos system:

How to add another Sonos speaker using the Sonos Controller on Windows PC

  1. Launch the Sonos app from your Home screen or the Start menu.
  2. Click Manage from the top menu bar.

    Launch songs app, then click manage

  3. Click Add a player or SUB….
  4. Follow the on-screen instructions through the setup process.

    Click add a player or sub then follow on-screen instructions

  5. Click on the model of player you're setting up from the drop-down list.
  6. Click the Set Up This Player button.

    Click on the type of player you're connecting from drop down menu then click set up this player

  7. Follow the on-screen instructions to complete the player setup.
  8. Click Next at the bottom of the dialog box to advance to the next part of setup.

    follow on screen instructions then click next button

  9. Click on the room where your Sonos will live, from the drop-down menu.
  10. Click Next at the bottom of the room selection window.

    Click on the room where your sonos will live then click next

  11. Click Next on the Sonos Registration window.
  12. Type your email address in the email address box.
  13. Click Next.
  14. Click your country/region to select it from the drop-down menu.

    Click next then select location

  15. Click Next.
  16. Type your Zip/Postal code in the box.

    click next then type zip/postal code

  17. Click Next.
  18. Click the checkbox if you want to share usage data with Sonos. Otherwise, leave it blank.

    click next then click tick box or leave it blank

  19. Click Next to complete the registration process.
  20. Click Done to complete the setup process.

    click next then done

That's it! Your new Sonos player is ready for you to stream music through. Whether you placed it in the bathroom or in the bedroom, your Sonos player will fill the room with exquisite sound for your enjoyment!

Viewing all 5861 articles
Browse latest View live


Latest Images