Quantcast
Channel: Help & How To
Viewing all 5861 articles
Browse latest View live

How to use Cortana on Xbox One: command list, tips and more

$
0
0

Cortana has arrived on the Xbox One, bringing fresh commands and new functionality to the console.

You can still use the legacy Xbox One voice commands with Kinect if that's your preference, but if you enable Cortana on your console you'll be able to issue commands via a headset microphone and access features that make multitasking far easier. Here's everything you need to know about Cortana commands on Xbox One.

Cortana is awesome!

Activating Cortana

When you first download the Xbox One Summer Update, if you haven't been automatically prompted, you can use the following steps to switch her on:

How to turn on Cortana on the Xbox One

  1. Double tap the Xbox logo button on your controller. Or, if you're using a Kinect, just say "Xbox, go to settings" and skip to step #3.
  2. Select Settings. It is the gear icon.
  3. Select All Settings.
  4. Select System.
  5. Select Cortana Settings.
  6. Tap the A button on your controller. You will then be guided through some telemetry agreements and prompted to reboot your Xbox.

Note: Cortana is currently only available in the US and the UK. You can change your language settings to enable Cortana, but this will only activate her Xbox-specific voice commands listed below. Her Bing-powered data commands will only work in supported regions.

For information on how to disable Cortana, hit the link below.

How to turn off Cortana on Xbox One

Using Cortana

To use Cortana, you either need Kinect or a compatible microphone connected to your console. Any Xbox One compatible headset microphone should work.

Cortana on Xbox

  1. To trigger Cortana, simply say "Hey Cortana." In my experience, she takes a little while to "warm up" after the first use.
  2. Follow up "Hey Cortana" with your voice command.

    With the legacy voice commands, it was usually a good idea to leave a brief pause after saying "Xbox." It seems less necessary to do that with Cortana on Xbox One. Simply saying "Hey Cortana is Daniel Rubino online?" should trigger the correct command, even without a pause after "Hey Cortana."

List of Xbox-specific Cortana commands

Remember that Cortana supports natural language, so there isn't necessarily a single specific syntax for each command. Some commands seem to support a wider range of sentence structures than others, but here's a list of commands that we've tested. Remember to start each command with "Hey Cortana."

Turn on your Xbox

  • "Turn on my Xbox."
  • "Start my Xbox."
  • "Xbox on."
  • "Turn on."

Turn off your Xbox

  • "Turn off my Xbox."
  • "Turn off."
  • "Xbox off."

Capturing game footage

  • "Take a screenshot."
  • "Broadcast on Twitch."
  • "Record that."
  • "Record the last (number) minutes."

Find out what your friends are currently doing

  • "What is (Gamertag / real name) doing?"
  • "Is (Gamertag / real name) online?"

Invite friends into parties

  • "Invite (Gamertag / real name) into a party."
  • "Start a party with (Gamertag / real name)."

Send messages

  • "Send a message to (Gamertag / real name)."

Select items on screen

  • "Select."
  • "Make a selection."
  • "Select mode."
  • When you've finished making a selection, say "stop listening."

Open apps and games

  • "Open (app/game name)."
  • "Go to (app/game name)."
  • "Snap (app name)."

    Note: Universal apps like Baconit and Cast currently cannot be snapped.

Switch between and close snapped apps

  • "Switch."
  • "Change view."
  • "Unsnap."

Media controls

  • "Pause."
  • "Play."
  • "Rewind."
  • "Fast forward."

TV controls

  • "Watch/go to TV."
  • "Watch (channel name)."
  • "Open/show OneGuide."
  • "Volume up (number)."
  • "Volume down (number)."
  • "Mute."

    Note: Some TV-specific commands require either the Xbox One S or Kinect's IR blaster to function.

General navigation

  • "Go home." To return to the dashboard.
  • "Go back." To cycle backward through previous actions.
  • "Show/open menu." To open menus in certain apps.
  • "Show/open guide." To open the Xbox quick guide.
  • "Show/open notifications."
  • "Show/go to my Friends List."

Signing in

  • "Sign in as (Gamertag/name)."
  • "Sign out."

Search the Xbox Store

  • "Search the store for (app/game name)."
  • "Search the store for (movie/tv show name)."

List of Bing-powered Cortana commands

If your console region is set to the US or the UK, you can perform dozens of commands and queries using Cortana's cloud-powered search engine. If you have a Windows 10 PC or Windows 10 Mobile, you are likely already familiar with these commands, but if not, here's some of the most useful.

Internet search

  • "Search the web for (search query)."

Weather queries

  • "What's the weather like in (location)?"
  • "What's the weather like at the moment?"

Dictionary

  • "What's the meaning of (word)?"
  • "Define (word)."

Time

  • "What's the time in (location)?"
  • "What time is it?"

Calculations

  • "Convert 10 kilograms into stone."
  • "Convert 15 American dollars into British pounds."
  • "What's 10 multiplied by 10?"
  • "What's 5 divided by 3?"

Directions

  • "How do I get to (location)?"
  • "How far away is (location)?"
  • "How do I get from (location) to (location)?"

Facts

  • "How old is (famous person)?"
  • "What is (company's) share price?"
  • "Who was the director of (movie)?"

Fun stuff

  • "Tell me a joke."
  • "Tell me a riddle."
  • "Sing me a song."
  • "Do an impression."
  • "Tell me something interesting."
  • "Tell me something funny."
  • "Tell me a scary story."

There are dozens of additional commands Cortana can perform and even some hidden ones. You can say to Cortana "what can you do?" to get more suggestions, and sometimes she'll make her own suggestions when she's snapped.

Cortana on Xbox

On Windows 10 PC and Mobile, Cortana can tie into apps, calling cabs in Uber and searching for movies in Netflix. However, as of writing, the Universal Windows Platform on Xbox doesn't support Cortana voice commands for external apps. This will probably change in the future, and it in doing so open up exciting possibilities for home automation services, customer service bots and much more.

Cortana is a cloud-based service, and Microsoft is continually refining the service, in addition to rolling her out to more territories. Localizing Cortana for each and every region will probably take years, but it does seem to be in Microsoft's interests, particularly now she's baked into every device running Windows 10.

Bookmark this article and check back for future updates on how Cortana works on Xbox One, as we'll be consolidating all the latest information into this piece.

What's your favorite Cortana command? Are there any missing from this list? Do you have any questions? Let us know in the comments!

Need more?

Check out our other articles for more info on the Xbox One Summer Update.


How to use the awesome new Groove Music app on Xbox One

$
0
0

Groove Music

Microsoft Groove has been updated on the Xbox One Preview, readying its universal music app for the entire Windows 10 device family.

Those of you who are familiar with the Windows 10 version of Groove will find the new app on Xbox very easy to use. If you're used to the previous Windows 8-based app, here's some handy tips and tricks to help you adjust!

Welcome to our quick guide for using the all-new UWP version of Groove, currently available on the Xbox One Preview and coming to public Xbox One consoles very soon.

Installing Groove Music

As of writing, Groove is only available on the Xbox One Preview. If you install the app on your non-Preview Xbox, it will give you a "Coming Soon" screen. Either way, here's how you currently install Groove on the Xbox One.

Uninstall the old Groove Music app

  1. Go to My Games & Apps, located at the top right-hand side of the dashboard.
  2. Navigate to the apps tab on the left side of the screen.
  3. Highlight the Groove app icon
  4. Press the view key on your controller, underneath and to the left of the Xbox logo button.
  5. Select Uninstall.

Install the new Groove Music app

  1. Press the Xbox button to return to the dashboard.
  2. Navigate to the store tab at the top.
  3. Select search
  4. Type Groove Music.
  5. Open the Groove Music search result.
  6. Select Install. This will download the latest version to your console.

Groove Music Store Page

Groove Music navigation

Some Universal apps on the Xbox One use a mouse-like cursor for navigation, but all of the Microsoft-produced apps utilize element highlighting. Presumably, Microsoft hopes that all developers make bespoke controls for their Xbox app versions in the future. Groove is an excellent example of how a complex app can ditch the mouse-like cursor and remain intuitive.

Xbox Controls

Xbox One S Controller

  • The menu button on the controller opens the sidebar menu. You can also navigate to it by moving to the left with your joystick.
  • The left joystick and D-pad highlights selectable elements.
  • 'A' acts as a left-click.
  • The view button acts as a right-click.
  • 'B' serves as a back button, allowing you to cycle backward through previous actions.
  • 'Y' acts as a global search key for finding albums, artists, and songs.
  • 'X' allows you to switch between the full-screen "Now Playing" list and your most recent menu selection.
  • The right and left bumpers allow you to track skip.
  • The right and left triggers don't appear to have any functions at this time.

Menu overview

Groove Music Menu

  • Search: Allows you to find music. You can access this from anywhere in the app by pressing 'Y'.
  • Your Groove: Contains dynamically generated playlists based on your listening preferences.
  • Albums: Shows music in your collection by album.
  • Artists: Shows music in your collection by artist.
  • Songs: Shows music in your collection by song.
  • Playlists: Allows you to create and manage playlists.
  • Radio: Generates a personalized radio station using tracks similar to an artist you specify.
  • Explore: Displays all the latest albums and artists added to Groove, in addition to carefully curated playlists and trending music.
  • Now Playing: Takes you back to the full-screen experience of songs queued up for play.
  • Settings: Allows you to enable or disable the automatic retrieval of metadata, the removal of duplicate music from your OneDrive, and quick access to your account, payment, and device management settings.

Setting up a Groove Music Pass

Groove is a collection-based music service, allowing you to save albums into a cloud collection for use across a limited number of devices. Groove is currently available on Windows 10 PCs, phones, iOS, and Android.

To utilize Groove's services, you need to either purchase music from the store or set up a Groove Music Pass subscription. Groove Music costs $9.99 per month in the U.S. and £8.99 per month in the UK and gives you access to millions of albums to collect and stream. It also comes with 100GB of OneDrive storage which allows you to save MP3s to the cloud for streaming as well.

Note: Technically, you can use Groove Music for free by storing MP3s in the 5GB complimentary space that comes with OneDrive on your Microsoft account. See further below for a guide on how to do that.

See on the Microsoft Store

Adding and removing music to your collection

Naturally, what music service is worth using without a collection of music? Here's how to add albums to your collection:

How to add albums to Groove Music from the Microsoft Store

  1. Press Y to initiate a search.
  2. Type the name of an album, artist, or song using the on-screen keyboard.
  3. Open the music you want to add.
  4. Open the Add to menu.
  5. Select My Music. A message will display saying that you have added music to your collection.
  6. Press the menu key
  7. Select Albums to view your newly added music.

Groove - Adding Music

How to add albums to Groove Music from OneDrive

  1. Open then OneDrive folder, either on OneDrive in your browser or on your PC.
  2. Open the Music folder. It should be there by default, though if it is not you can create a new folder and name it Music.
  3. Add a new folder.
  4. Name that folder for the artist.
  5. Open the artist folder.
  6. Create a new folder.
  7. Name that folder for the album.
  8. Add your MP3 files to the album folder.

Once the MP3s have uploaded, you should be able to see them on your Xbox by selecting artists or albums.

Note: If you delete OneDrive music from Groove, it will also remove the files from your OneDrive storage. It might take a little time for OneDrive music to appear in your Groove apps.

Groove filters on Xbox

Playlists, Explore and Your Groove

Groove has robust playlist features that make sorting your collection an easy feat. Here's an overview of how to do that.

How to create playlists with Groove Music on the Xbox One

  1. Press the menu key on your controller.
  2. Select Playlists.
  3. Select New playlist.
  4. Name the playlist.

Note: You can create new playlists straight from the ellipsis menu on albums too, or by hitting the view key on a song and selecting "Add to."

How to add albums to a playlist with Groove Music on the Xbox One

  1. Open the album you want to add to the playlist.
  2. Select the three-dot menu.
  3. Select Add do.
  4. Select your desired playlist.

How to add individual songs to a playlist with Groove Music on the Xbox One

  1. Open the song you want to add to the playlist.
  2. Press the view key on your controller.
  3. Select Add to.
  4. Select your desired playlist.

Groove Playlists

How to save playlists from Your Groove and Explore

Groove now features curated playlists generated automatically and by a team of editors. Your Groove creates playlists based on your listening habits and preferences, while the Explore tab has featured playlists for all types of activities, moods, and scenarios.

  1. Press the menu key on your controller.
  2. Select Your Groove or Explore.
  3. Navigate to a playlist you like.
  4. Press 'A' to select the playlist.
  5. Select Save a copy to turn it into a new playlist, or select the three-dot menu to add the songs to an existing playlist.

Note: Remember, you can delete songs, playlists, and albums at any time by highlighting them in your collection and then selecting the view key.

Your Groove

How to play music with Groove Music on your Xbox

Groove allows you to queue up music for extended playback sessions. Here's how it works.

  1. Press the menu key on your controller.
  2. Navigate to albums.
  3. Navigate to an album
  4. Press the view key to start playing the album.

    Alternatively, you can select the Add to menu and then Now Playing to add the album to your upcoming music list.

  5. Press the X key to exit out of the full-screen view.
  6. Double tap the Xbox button to open the background music settings.

Background Music

Get your Groove on!

Groove has transformed into an excellent music service, rising out of the ashes of the Windows 8 era's "Xbox Music." The app was rebuilt from the ground up for the Universal Windows Platform, meaning some features were missing in earlier incarnations of Windows 10 and Windows 10 Mobile.

As we move into the future, Groove Music is picking up functionality we haven't seen since the Zune days, such as metadata editing. It looks as though we have finally escaped Microsoft's reboot-a-rama of the past few years when it comes to its music offering. It finally feels safe to look forward to additional features and polish for this version of Groove, rather than expect complete overhauls.

Do you have any questions? Are you a music fan? What's your favorite band? Do you use Groove? Let us know in the comments!

See Groove Music on the Windows Store

How to use background music on Xbox One

How to setup and start using WhatsApp for Windows 10 Mobile

$
0
0

How do I get started with WhatsApp on Windows Phone?

Do you travel for work? Do you have friends on the other side of the world? Do you hate paying extra for texts when you're roaming? WhatsApp is the way to go! You can send texts, photos, audio, video, contacts, and locations. Let's not get ahead of ourselves, though. Setting up your WhatsApp account is priority numero uno.

How to download WhatsApp on Windows 10 mobile

Before all the messaging fun can begin, you of course have to download WhatsApp from the Microsoft Store.

  1. Launch the Store from your home screen or from All apps. It's blue and looks like a shopping bag.
  2. Tap the search button on the top right of the screen. It's the magnifying glass.
  3. Type WhatsApp in the field.

    Launch store, tap search button, type WhatsApp in the search bar

  4. Tap WhatsApp in the search results.
  5. Tap Install.
  6. Once downloaded, tap open.

    Tap WhatsApp, tap install, tap open after download

There we are. Much like He-Man, you now HAVE THE POWER… to send messages and media anywhere in the world over an internet connection for free. Note that any time you use WhatsApp without a Wi-Fi connection, you could be racking up data charges.

Now that you've got WhatsApp, you probably want to start using it. Right? No? You just want to admire the icon? Of course not! Let's get you set up.

How to pin WhatsApp to the Start screen on Windows 10 Mobile

To make life easier, you'll want to pin WhatsApp to your home screen. This way you don't have to constantly search through all your apps. Here's how:

  1. Scroll down the Home screen to the bottom.
  2. Tap All apps in the bottom right corner.
  3. Type WhatsApp in the search bar at the top of the screen.

    Tap all apps, type WhatsApp in the search bar

  4. Tap and hold WhatsApp in the search results.
  5. Tap Pin to start at the top of the menu that appears.

    Tap and hold WhatsApp, tap pin to start

Now that WhatsApp's on your Start screen, you won't have to dig through all of your apps every time you just want to send a quick message!

How to create your WhatsApp account on Windows 10 Mobile

With WhatsApp now on your Start screen, you're ready to get it set up. Here's how to set up WhatsApp your account!

  1. Launch WhatsApp from the start screen.
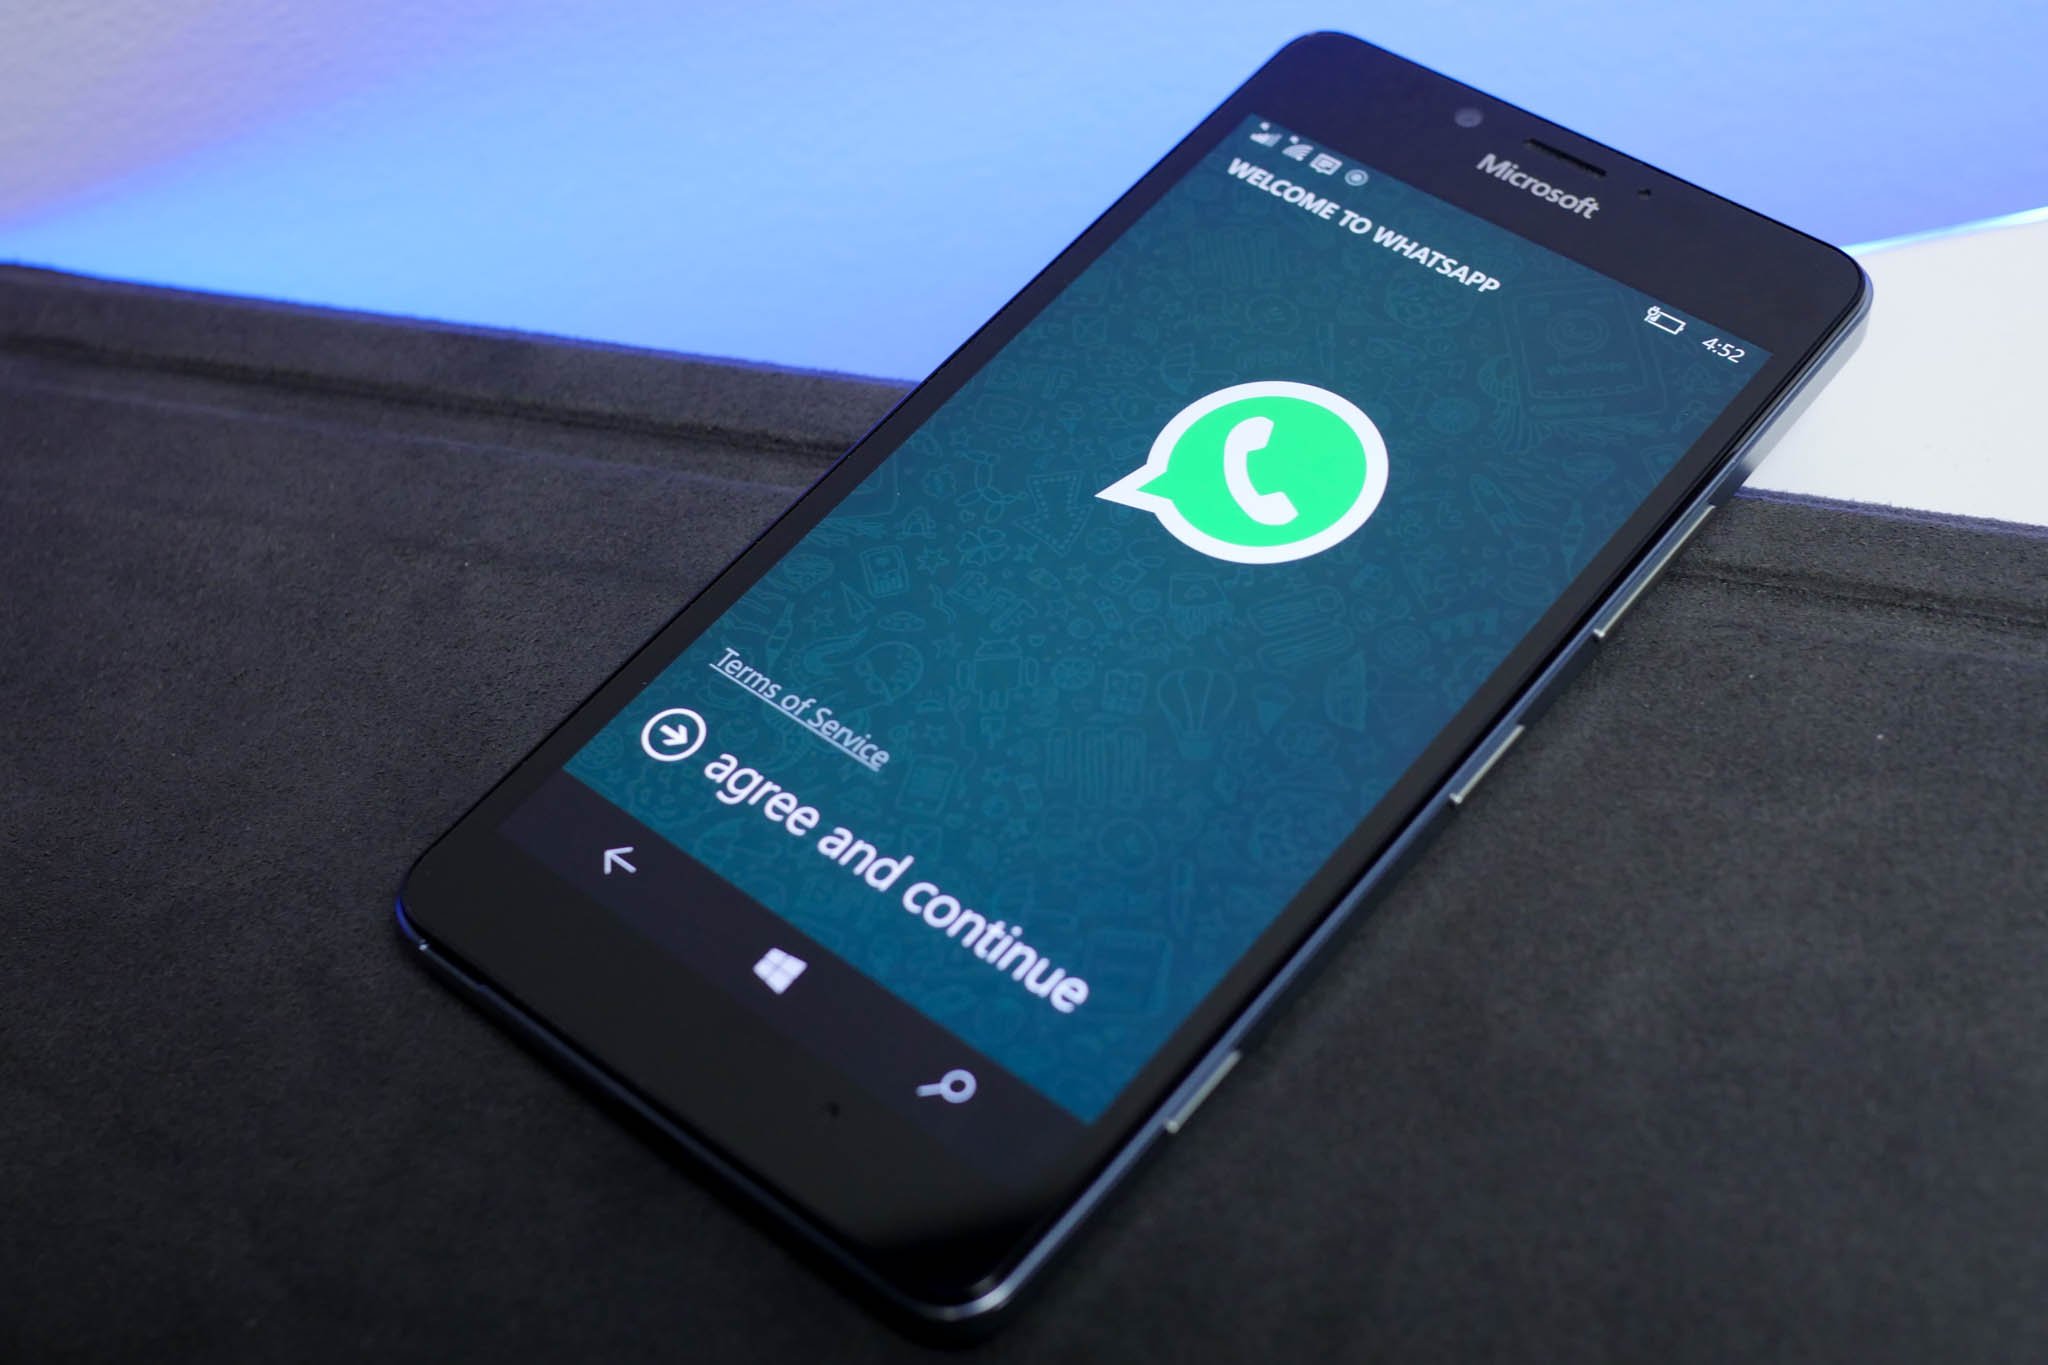
  2. Tap agree and continue at the bottom of the screen.

    Launch WhatsApp, tap agree and continue

  3. Tap the field under "Your country" and select your country.
  4. Enter your phone number in the field beneath "Your country code and phone number."

    Select your country, enter your phone number

  5. Tap the next button at the bottom of the screen. It's the arrow in the circle. You'll advance to the free service confirmation screen (WhatsApp used to run $1/year, but they have since nixed that charge)
  6. Tap the next button at the bottom of the screen.
  7. Tap ok. WhatsApp has automatically added all of the contacts from your phone who already use WhatsApp.

    Tap next, next, ok

You're ready to start using WhatsApp! Now that you have a WhatsApp account, you can add contacts and send messages and media around the globe, so long as you're connected to the internet! Don't forget that you may incur data charges without a Wi-Fi connection.

Guide Default Menu: 
menu-whatsapp-for-windows-10-mob

How to control notifications in WhatsApp for Windows 10 Mobile

$
0
0

How do I control what WhatsApp notifications get through on Windows 10 Mobile?

Some people can't wait until their phone starts "blowin' up," as the kids say. And folks cannot even stand when their phone buzzes even a little bit. Luckily, WhatsApp allows you to not just turn notifications on and off — you can also personalize tones and the types of notifications you do or don't want to receive. Here's how!

How to control notifications and alerts in WhatsApp for Windows 10 Mobile

There are a pile of options, so we'll go through each of them individually. WhatsApp makes personalization abundantly available in terms of notifications. However, you can't give each contact his or her own message or ring tone, so don't rack your brain trying to find that function. Windows 10 Mobile likes to keep things simple.

How to manage message notifications in WhatsApp for Windows 10 Mobile

  1. Launch WhatsApp from the Start screen or the applications list.
  2. Tap the menu button on the bottom right of the screen. It's a row of three dots.
  3. Tap settings.
  4. Tap notifications.

    Launch WhatsApp, tap menu, settings, notifications

  5. Tap the slider to the right of "on" to turn message notifications on or off.
  6. Choose a notification sound.

    1. Tap the bar beneath "Notification sound for new message".
    2. Tap the play button to the left of each alert tone to preview and/or apply it.

      Tap the slider, tap the bar, choose alert type

How to manage group notifications in WhatsApp for Windows 10 Mobile

  1. Launch WhatsApp from the Start screen or the applications list.
  2. Tap the menu button on the bottom right of the screen. It's a row of three dots.
  3. Tap settings.
  4. Tap notifications.

    Launch WhatsApp, tap menu, settings, notifications

  5. Tap the slider to the right of "on" to turn group notifications on or off. This will allow or prevent you from receiving notifications for group chats.
  6. Choose a notification sound.

    1. Tap the bar beneath "Notification sound for group message".
    2. Tap the play button to the left of each alert tone to preview and/or apply it.

How to manage call notifications in WhatsApp for Windows 10 Mobile

  1. Launch WhatsApp from the Start screen or the applications list.
  2. Tap the menu button on the bottom right of the screen. It's a row of three dots.
  3. Tap settings.
  4. Tap notifications.

    Launch WhatsApp, tap menu, settings, notifications

  5. Set the ringtone for incoming calls.

    1. Tap the bar beneath "Ringtone for incoming calls".
    2. Tap the play button to the left of each alert tone to preview and/or apply it.

      Tap the bar, select ringtone

How to manage in-app notifications for WhatsApp for Windows 10 Mobile

  1. Launch WhatsApp from the Start screen or the applications list.
  2. Tap the menu button on the bottom right of the screen. It's a row of three dots.
  3. Tap settings.

    Launch WhatsApp, tap menu, settings

  4. Tap notifications.
  5. Tap the slider to the right of each type of in-app notification to turn it on or off.

    Tap notifications, tap the sliders

How to manage message previews in WhatsApp for Windows 10 Mobile

The message preview will show the content of a message on your lock screen, so that you can view part of the message without actually enter the app. Here's how to turn the preview on and off:

  1. Launch WhatsApp from the Start screen or the applications list.
  2. Tap the menu button on the bottom right of the screen. It's a row of three dots.
  3. Tap settings.

    Launch WhatsApp, tap menu, settings

  4. Tap notifications.
  5. Tap the slider to the right of "Preview message in notifications" to turn message previews on and off.

    Tap notifications, tap the slider

Now you'll be able to manage what types of notifications you receive and which ones you don't.

Guide Default Menu: 
menu-whatsapp-for-windows-10-mob

How to make Broadcast Lists in WhatsApp on Windows 10 Mobile

$
0
0

How to use a Broadcast List in WhatsApp on Windows 10 Mobile

How do I send a WhatsApp message to a group of contacts — but have the replies come only to me? Broadcast Lists!

Group messages in WhatsApp are great when you want to get a discussion going between you and a bunch of your friends (like whether your crew wants to play airsoft or paintball for a friend's birthday). But sometimes you want to send the same message to a big group, but don't necessarily want the replies visible to everyone (like asking how much everyone wants to chip in to cover the costs for the birthday boy or girl).

When you want to send a small or large group the same message, but want to replies to only be visible to you, set up a Broadcast List in WhatsApp. Think of it as an email-style BCC, but for WhatsApp.

How to add contacts to your Windows 10 Mobile Phone to make a WhatsApp Broadcast List

Before you actually make a Broadcast List, you need to make sure the people you are sending the broadcast message to have saved your contact information in their phone's contact book (not just on WhatsApp).

This also means that if you hope to receive messages from a Broadcast List, you need to add your friend's phone number in your Windows 10 Mobile. Adding a Windows 10 contact to your phone is simple. Here's how:

  1. Launch People from the Applications List on your Windows 10 Mobile phone.
  2. Tap on the add a contact button. It's the "+" icon at the bottom of the screen.

    Launch People and tap add a contact.

  3. Fill in your friend's information (Name, phone, email, etc) by tapping on a text field and typing in the details.

  4. Tap the save button. It looks like an old-fashioned floppy disk and is at the bottom of the screen.

    Fill in contact information and tap save button.

Your new contact will be saved to your phone and can now be used in WhatsApp's Broadcast List feature. Make sure to add any other people you commonly chat with in WhatsApp so you don't miss out on the Broadcast List experience with them.

How to make a Broadcast List in WhatsApp on Windows 10 Mobile

  1. Launch WhatsApp from the Applications List on your Windows 10 Mobile phone.
  2. Tap on the more menu button. It looks like three dots in a row and is in the bottom right corner of the screen.
  3. Tap on broadcast lists in the pop-up menu.

    Launch WhatsApp, tap more, and tap broadcast lists.

  4. Tap on the + button to begin creating your Broadcast List (as with any WhatsApp message, whatever contacts you're sending messages to will need to have your phone number in their contacts).

  5. Tap on the + button to add recipients to the list.

    Tap the plus sign and tap the plus sign.

  6. Tap on a contact to add to the Broadcast list (repeat steps 5 and 6 for each person you want to add).

  7. Tap on the checkmark at the bottom of the screen to launch your newly composed broadcast list.

    Tap a contact and tap the checkmark.

Your Broadcast List is now ready to go! You can now type and send a message only one time, and it will be delivered to everyone on your broadcast list. Spam away, spammy pants. Spam away!

How to send messages to a Broadcast List on Windows 10 Mobile

You've got your broadcast list made, now it's time to start sharing messages, photos and more with you list! It's the same process you would use with a regular chat; however, Broadcast Lists are a little trickier to find than regular chats, which is good, since you don't want to start a chat with a friend asking for crucial relationship advice only to discover you accidentally tapped your broadcast list that included your significant other! Though that could be a fast route to ending those relationship problems.

Here's how to send messages and more to your broadcast list.

  1. Launch WhatsApp from the Applications List on your Windows 10 Mobile phone.
  2. Tap on the more menu button. It looks like three dots in a row and is in the bottom right corner of the screen.

    Launch WhatApp and tap on the more menu button.

  3. Tap on broadcast lists in the pop-up menu.

  4. Tap on the broadcast list you would like to use (mine is called info and has a megaphone beside it).

    Tap on Broadcast Lists and tap on a broadcast list.

Once you've opened your Broadcast List you can send photos and videos to your list and send messages and more.

Guide Default Menu: 
menu-whatsapp-for-windows-10-mob

How to archive and backup your messages in WhatsApp on Windows 10 Mobile

$
0
0

How to backup your messages in WhatsApp on Windows 10 Mobile

How do I backup and archive my WhatsApp calls and messages?

When your significant other becomes your ex, what do you do with your rich chat history? You don't want it visible in your WhatsApp chats, but you don't want to delete it forever in case you reconcile. The Archive feature in WhatsApp is the answer to your problem!

You can also backup all of your content to your phone so you can reload your chats and media should you ever need to uninstall the app or switch phones.

Using WhatsApp's archive and backup features can be really helpful is also really simple!

How to archive a chat in WhatsApp on Windows 10 Mobile

Archiving a chat will hide the conversation from your WhatsApp chat screen like it never happened. This is perfect if you're living a double life as a superhero and don't want your friends to snatch your phone and discover you've been messaging with Commissioner Gordon, Alfred, and an interior decorator for the batcave.

It's also helpful if you want to hide a chat, but not necessarily delete it forever, or just clean up your conversations.

  1. Launch WhatsApp from the Applications List on your Windows 10 Mobile phone.
  2. Tap and hold on the chat you want to archive from your chats list.
  3. Tap on archive from the pop-up menu.

    Launch WhatsApp, tap and hold a chat, and tap archive.

Your chat will now be archived on your phone and no longer show up in your chats list.

How to unarchive a chat in WhatsApp on Windows 10 Mobile

When it's time to resurrect that great chat from the archives, WhatsApp will be ready to bring it back for you.

  1. Launch WhatsApp from the Applications List on your Windows 10 Mobile phone.
  2. Tap on the more button at the bottom of the screen (it looks like three dots in a row).
  3. Tap on archived chats. A list of chats you previously archived will open.

    Launch WhatsApp, tap on the more button, and tap archived chats.

  4. Tap and hold on the chat you want to unarchive.

  5. Tap on unarchive.

    Tap and hold a chat and tap unarchive.

Presto! Your chat is back in your chats list and ready to use again.

How to archive all chats in WhatsApp on Windows 10 Mobile

Chat history looking cluttered? Need a clean slate? Archive all of your current chats to hide them from your chat window.

  1. Launch WhatsApp from the Applications List on your Windows 10 Mobile phone.
  2. Tap on the more button at the bottom of the screen (it looks like three dots in a row).
  3. Tap on settings. The WhatsApp settings page will open.

    Launch WhatsApp, tap more, and tap settings.

  4. Tap on chats and calls from the settings list.

  5. Tap on archive all.
  6. Tap on yes on the confirmation screen to archive all your chats.

    Tap chats and calls, tap archive all, and tap yes.

All of your chats will now be archived and your chats window will now be clean. To unarchive all chats, follow the exact same steps, but select unarchive all.

How to backup your chats in WhatsApp on Windows 10 Mobile

Worried about losing the years of messages, jokes, and late-night nonsense you've exchanged in chats with your friends? Stop worrying! WhatsApp has you back, or rather, backed up, automatically!

WhatsApp messages are automatically backed up to your phone's memory every day at 4 a.m. while you're comfy in your bed (or about to head to it). However, if you're about to switch phones or delete WhatsApp and you want to ensure you have the latest backup saved, here's how to manually initiate a backup in WhatsApp.

  1. Launch WhatsApp from the Applications List on your Windows 10 Mobile phone.
  2. Tap on the more button at the bottom of the screen (it looks like three dots in a row).
  3. Tap on settings. The WhatsApp settings page will open.

    Launch WhatsApp, tap more, and tap settings.

  4. Tap on chats and calls from the settings list.

  5. Tap on backup.

    Tap chats and calls and tap backup.

That's it. Your WhatsApp data is now backed up on your phone. The exact location of the backup file depends on where you told your phone to save data (on the phone's internal storage or an SD card if your phone supports one). Backups are important for when you want to move your WhatsApp messages to a new phone. If you create a backup before you move your messages over, you can choose to restore your backed up messages when transferring to a new device.

How to backup your pictures and videos in WhatsApp on Windows 10 Mobile

After you use WhatsApp for awhile, you've probably collected a whole bunch of great photos and videos from friends through your chats. If you're worried about losing precious pictures of people's food, cats, and selfies you've received through WhatsApp, then you'll want to back them up.

Here's the rub: WhatsApp for Windows 10 Mobile doesn't let you backup or view all your WhatsApp photos and videos through the app. Thankfully, Windows 10 Mobile is really smart, and will store your WhatsApp photos and videos in a file on your phone automatically! No special backups required.

Find your WhatsApp photos and videos on your Windows 10 Mobile phone

  1. Launch File Explorer from the Applications List on your Windows 10 Mobile phone.
  2. Tap on the menu button (looks like three horizontal lines stacked on top of each other).
  3. Tap on this device to view the files on your device.

    Launch file explorer, tap on the menu button, and tap this device.

  4. Tap on the pictures folder.

  5. Tap on the WhatsApp folder.
  6. Scroll through the photos and videos to locate the specific file you're looking for (FYI, I only have one photo and one video).

    Tap on the pictures folder, tap on the WhatsApp folder, and locate your file.

Note Your photos and videos will all save in your phone's WhatsApp folder under pictures (even if it's a video). Once you know how to find these WhatsApp photos and videos, you can share them in other applications, email them to friends and family, or just admire your full folder of WhatsApp media gold!

How to export messages in WhatsApp on Windows 10 Mobile

Do you doubt the ability of your Windows 10 Mobile phone to save your important WhatsApp messages? Shame on you! But that's okay, better safe than sorry.

Your export options are limited to creating a plain text file which you can email to yourself. Time to learn how!

  1. Launch WhatsApp from the Applications List on your Windows 10 Mobile phone.
  2. Tap on the chat you would like to export to open it.
  3. Tap on the more button at the bottom of the screen (it looks like three dots in a row).

    Launch WhatsApp, tap on a chat, and tap more.

  4. Tap on info from the pop-up menu.

  5. Tap on the more button at the bottom of the screen (it looks like three dots in a row).
  6. Tap on the email chat history which will launch a new mail message with your WhatsApp chat message attached as a .txt file.

    Tap info, tap more and tap email chat history.

From here you can email the text file from the chat to yourself, the friend you were chatting with, or anyone else you like. Take it to the next level by printing off the attached text document and making a lovely coffee table book so you never lose those important WhatsApp chats!

Guide Default Menu: 
menu-whatsapp-for-windows-10-mob

How to move your WhatsApp messages to a new phone on Windows 10 Mobile

$
0
0

How-to-move-WhatsApp-messages-to-a-new-Windows-10-Mobile-Phone

How do I move my WhatsApp messages to a new Windows phone?

An exciting new phone hits stores and you just have to have it! But your old phone has all your classic WhatsApp messages that you can't bare to lose (like that late night when you and your boo discovered you both love ham and peanut butter sandwiches with the crusts cut off).

You can transfer your chat history to a new phone, but it depends on a lot of things. If you're going from a Windows 10 Mobile phone that has an SD card to a new Windows 10 Mobile phone that has an SD card, you're fine. If you're going to any other type of phone, or your Windows 10 Mobile phone doesn't have an SD card slot, unfortunately, you're out of luck.

You can't transfer your WhatsApp history from a Windows 10 Mobile phone to any other platform, so if you've just upgraded to an iPhone, Android phone, or a Blackberry, you're options are limited. You can always export your chat history as a .txt file and email it to yourself if you really want to keep those messages, which is pretty easy to do.

Here are the things you should do first

  1. Change your WhatsApp phone number: If you are getting a new Windows phone and a new phone number, the first thing you should do is change your number in WhatsApp. If you are using the same phone number, then skip this step.
  2. Make a WhatsApp backup: To make sure your most recent messages are included in the transfer, perform a backup in WhatsApp.

How to transfer your WhatsApp messages to a new Windows 10 Mobile phone

Once the above steps are completed, you're ready to move your WhatsApp messages from your old Windows 10 Mobile phone to your new Windows 10 Mobile Phone.

First you need to remove the microSD card containing your WhatsApp backup from your old phone and put it into your new phone. On your new phone, you're now ready to begin the transfer process. You can transfer over your old data during the WhatsApp installation process on your new phone.

  1. Launch store from the Applications List on your new Windows 10 Mobile phone.
  2. Tap on the search button at the top of the Shop screen (looks like a magnifying glass).
  3. Type WhatsApp in the search bar.

    Launch Store, tap search, and type WhatsApp.

  4. Tap on WhatsApp.

  5. Tap on Install and WhatsApp will begin installing on your phone.
  6. Tap on the open button to launch WhatsApp.

    Tap on WhatsApp, tap on install, and tap the open button.

  7. Tap on the next arrow to agree to the WhatsApp terms and conditions and continue the setup process.

  8. Tap and select the country your phone number is registered in the your country field.
  9. Enter your phone number in the phone number field.

    Tap the next arrow, enter your country, and enter your phone number.

  10. Tap the continue arrow button at the bottom of the screen.

  11. You will be sent an SMS with a verification code. Enter your verification code to continue automatically.
  12. WhatsApp will recognize the backup data on your SD card and ask if you want to restore your message history from the SD backup. Tap the restore button.

    Tap the continue arrow, enter your verification code, and tap the restore button.

  13. Once the restoration is complete, WhatsApp will tell you how many messages were restored. Tap the arrow at the bottom of the screen to continue.

  14. Enter your profile name you would like to use on the new phone.
  15. Tap the arrow at the bottom of the screen to continue and start using WhatsApp.

    Tap the continue arrow, enter your profile name, and tap the continue arrow.

Your chat history has now been transferred to your new phone! Congratulations! You can now resume your WhatsApp chats on your slick new phone!

Guide Default Menu: 
menu-whatsapp-for-windows-10-mob

How to change your phone number in WhatsApp for Windows 10 Mobile

$
0
0

How do I change my phone number in WhatsApp?

If you've recently switched phones and cell phone providers, chances are you've had to change your phone number. You're a heavy WhatsApp user and need to get back in the saddle because the honeys overseas can't wait too long to hear from you.

You're going to have to change your phone number within WhatsApp. Lucky for you, it's a quick and easy process. Before thinking of changing numbers, you'll want to backup your WhatsApp chats so that they transfer to your new account.

Also, you'll have to make sure that your phone has a SIM card that's set up to receive texts and calls. If you've got a new phone number, then you'll have a new SIM card, so just make sure you can send and receive messages and you'll be good to go!

How to change you phone number in WhatsApp for Windows Mobile 10

  1. Launch WhatsApp from the Start screen or the applications list.
  2. Tap the menu button in the bottom right of your screen. It looks like three dots in a row.
  3. Tap settings.
  4. Tap account.

    Launch WhatsApp, tap menu, settings, account

  5. Tap change my number.
  6. Tap the next on the bottom of the screen. It's an arrow in a circle.
  7. Enter your old phone number and new phone number in the fields.

    Tap change my number, next, enter old and new phone numbers

  8. Tap the next button on the bottom of the screen.
  9. Tap continue.
  10. Enter the six-digit code that you receive via text message. You'll have to check your regular messaging app for the code.

    Tap the check mark, continue, enter the code

As soon as you enter the code, your phone number will be verified and you'll be right back where you started. And by that, I mean using WhatsApp like a wizard.

Guide Default Menu: 
menu-whatsapp-for-windows-10-mob

How to protect your privacy in WhatsApp on Windows 10 Mobile

$
0
0

How-to-protect-your-privacy-in-Whats-App-on-Windows-10-Mobile

How do I block a WhatsApp contact or turn off read receipts?

You've just got started with WhatsApp and things are going great! You've got your profile picture uploaded, your account synced to your phone number, you've input a witty, early-2000s throwback status (WhazzzzzzAaaaaaap), but now you're thinking to yourself, "who can see this stuff? Do I want everyone in the world to see my profile pic of me at the annual cat calendar convention?" Maybe not.

WhatsApp lets you control how much of your account information is viewable and whether or not it can be seen by everyone in the world, just your contacts, or no one at all!

How to adjust your privacy settings in WhatsApp on Windows 10 Mobile

  1. Launch WhatsApp from the Applications List on your Windows 10 Mobile phone.
  2. Tap on the more button at the bottom of the screen (it looks like three dots in a row).
  3. Tap on settings from the pop-up menu.

    Launch WhatsApp, tap the more icon, and tap settings.

  4. Tap on account.

  5. Tap on privacy.

    Tap account and tap privacy.

From here you can adjust your privacy settings in three different categories: profile photo, status, and last seen.

How to adjust who can see your profile photo on WhatsApp on Windows 10 Mobile

  1. Tap on the visibility menu under "profile photo" to choose who can see your photo:

    • Everyone (anyone who searches for you on WhatsApp can see your profile picture).
    • My Contacts (only your contacts can see your profile picture).
    • Nobody (no one will be able to see your profile picture).

      Tap the visibility menu and choose your profile photo settings.

  2. Tap on the visibility menu under "status" to choose who can see your WhatsApp status:

    • Everyone (anyone who searches for you on WhatsApp can see your status).
    • My Contacts (only your contacts can see your status).
    • Nobody (no one will be able to see your profile status).

      Tap the visibility menu and choose your status settings.

  3. Tap on the visibility menu under "last seen" to change whether people can see how recently you were last using WhatsApp:

    • Everyone (anyone who searches for you on WhatsApp can see when you last used WhatsApp).
    • My Contacts (only your contacts can see when you last used WhatsApp).
    • Nobody (no one will be able to see when you last used WhatsApp).

      Tap the visibility menu and manage your last used settings.

How to turn off read receipts in WhatsApp on Windows 10 Mobile

Read receipts are a super handy way to track when your message has been sent, delivered, and eventually read by the person you send it to. In WhatsApp, your messages have little check marks by them. One gray checkmark means your message is sent. Two grey checkmarks mean your message has been delivered, and the checkmarks turn blue when your message has been read.

WhatsApp turns this feature on by default when you install the app. However, you might not want people to know when you read their messages (it makes you seem more mysterious).

It's easy to turn off read receipts in WhatsApp.

  1. Launch WhatsApp from the Applications List on your Windows 10 Mobile phone.
  2. Tap on the more button at the bottom of the screen (it looks like three dots in a row).
  3. Tap on settings from the pop-up menu.

    Launch WhatsApp, tap more, and tap settings.

  4. Tap on account.

  5. Tap on privacy.
  6. Move the read receipt slider to the left to turn off read receipts.

    Tap account, tap privacy, and move the read receipt slider.

If you change your mind, follow these same steps but move the read receipt slider to the right to turn this setting back on.

Also, if you turn off this feature to prevent people from seeing your status, you also won't be able to see when other people read your messages. When you're in a group chat, read receipts will be sent, even if you have this feature turned off.

How to block a contact in WhatsApp on Windows 10 Mobile

WhatsApp is great for talking to people. It's also great for NOT talking to people. You can block a WhatsApp contact who is blowing up your phone, sending you nonsense, or is generally creeping you out.

If you block them, they will no longer be able to chat or call you through WhatsApp (you're on your own if they show up outside your bedroom window holding a boom box over their head blaring "Total Eclipse of the Heart").

  1. Launch WhatsApp from the Applications List on your Windows 10 Mobile phone.
  2. Tap on the more button at the bottom of the screen (it looks like three dots in a row).
  3. Tap on settings to launch the settings menu.

    Launch WhatsApp, tap more and tap settings.

  4. Tap on contacts.

  5. Tap on blocked contacts.

    Tap contacts and tap block contacts.

  6. Tap on the + button at the bottom of the screen.

  7. Tap on a contact you want to block and they will be added to your blocked list.

    Tap the plus sign and tap a contact.

Blocking doesn't have to be permanent, but might be the best way to tell a "friend" you don't want to see anymore pictures of their toe blister they think looks like Elvis.

How to unblock a contact in WhatsApp on Windows 10 Mobile

If you change your mind and you're ready to move someone out of the doghouse and back to your WhatsApp life, with just a few taps you can unblock a contact.

  1. Launch WhatsApp from the Applications List on your Windows 10 Mobile phone.
  2. Tap on the more button at the bottom of the screen (it looks like three dots in a row).
  3. Tap on settings to launch the settings menu.

    Launch WhatsApp, tap more, and tap settings.

  4. Tap on contacts.

  5. Tap on blocked contacts.

    Tap contacts and tap blocked contacts.

  6. Tap and hold on the contact you want to unblock.

  7. Tap on unblock and the contact will be removed from your blocked list.

    Tap and hold a contact and tap unblock.

If the contact starts annoying you again. You can always banish them back to the realm of blocked contacts on WhatsApp!

Guide Default Menu: 
menu-whatsapp-for-windows-10-mob

How to delete your account from WhatsApp on Windows 10 Mobile

$
0
0

How to delete your account from WhatsApp on Windows 10 Mobile

How do I clear my WhatsApp history and delete my account on Windows 10 Mobile?

You heard great things, you downloaded the app, you gave it a shot, but decide WhatsApp isn't for you. It's cool. No need to make this breakup long and drawn out. Time for you both to move on with your life! But who gets to keep the cat?

WhatsApp makes deleting your account easy, but it is a permanent action. You can always download the app again, but when you reinstall you'll be starting over from scratch — all of your settings and chat histories will be gone forever.

How to delete your account from WhatsApp on Windows 10 Mobile

  1. Launch WhatsApp from the Applications List on your Windows 10 Mobile phone.
  2. Tap the more button to launch a pop-up menu. It's the three dots in the bottom right corner.
  3. Tap settings from the pop-up menu.

    Launch WhatsApp, tap more and tap settings.

  4. Tap account.

  5. Tap delete account.
  6. Tap the phone number text field.

    Tap account, tap delete account and tap the text field.

  7. Enter the phone number associated with your WhatsApp account.

  8. Tap the next arrow at the bottom of the screen.
  9. Enter any feedback you would like to share with WhatsApp about your experience (optional).

    Enter phone number, tap next, and enter feedback.

  10. Tap the next arrow at the bottom of the screen.

  11. Tap the trashcan icon to delete your account. It's located at the bottom of the screen.

    Tap the next arrow and tap the trashcan icon.

That's it! Your account is now deleted from WhatsApp. Your message history, groups, and WhatsApp contacts are now gone from your phone. If you decide to sign up for WhatsApp again on this phone or a new phone down the road, you will not have any of your previous WhatsApp chats available and you will have to re-add your contacts and groups to WhatsApp.

Guide Default Menu: 
menu-whatsapp-for-windows-10-mob

How to pair a wireless Xbox controller with your Xbox One, Xbox One S or Windows 10 computer

$
0
0

Got a new wireless Xbox controller? Got a new Xbox One S? Wondering how to pair them together? Look no further!

Microsoft has a bunch of different controller configurations available for the Xbox One line at the moment. There's the high-powered Xbox One Elite Controller, the refreshed Xbox One standard controller with 3.5mm audio jack, and the all-new Xbox One S controller with textured grips and Bluetooth.

Whichever controller you decide to pick up for your Xbox One, here's a quick and handy guide on how to pair them to your console.

How to pair an Xbox wireless controller with your Xbox One

  1. Hold the Xbox button on the controll to turn it on.
  2. Press and hold the pairing button on your controller until the Xbox logo starts flashing. The button is situated on top of the controller next to the micro-USB port.
  3. Press the pairing button on your console until the power button starts flashing. The photographs below illustrate the location of the pairing button on the Xbox One and Xbox One S.

    This should pair the controller. Once paired, the lights should turn solid.

Note: You can also pair the Xbox One controller to your console by connecting it to the Xbox using a micro-USB to USB charging cable.

How to pair a Bluetooth Xbox controller with your Windows 10 PC

Xbox Design Lab

If you have a controller from the Xbox Design Lab or the one bundled with the Xbox One S, it will have Bluetooth support. Here's how you pair it to a Windows 10 PC that supports Bluetooth.

  1. Open the Start Menu.
  2. Open Settings.
  3. Click on Devices.
  4. Click on Bluetooth. Your computer will start scanning for nearby Bluetooth devices.
  5. Press and hold the Xbox button on your controller to turn it on.
  6. Hold the pairing button on your controller. It can be found at the top of the Xbox One controller next to the USB port. After a short time the controller will appear in the available Bluetooth devices on your computer.
  7. Click on Pair. You computer will pair with the controller and you'll be ready to go.

See on the Microsoft Store

How to pair an Xbox controller with your Windows 10 PC using the Xbox Wireless Adapter

Surface Book

If you don't have the Xbox One controller with Bluetooth, you can purchase the Xbox Wireless Adapter that's compatible with any Windows 10 device and the standard Xbox One controller. Here's how to pair those.

  1. Plug the Xbox Wireless Adapter USB dongle into your PC. It should automatically download and install the necessary drivers.
  2. Press and hold the Xbox button on your controller to turn it on.
  3. Hold the pairing button on your controller. It can be found at the top of the Xbox One controller next to the USB port.
  4. Hold the pairing button on the USB adapter (it is located on the upper side of the dongle). The adapter's lights should flash and then turn solid, pairing the controller to your PC.

Note: Just like on Xbox, you can pair a standard controller using a micro-USB to USB cable.

See on the Microsoft Store

Other controller resources

Microsoft's Xbox controllers are some of the best on the market, and there are all sorts of options for customization and more. Here's a few links you might find interesting.

How to send photos and videos in WhatsApp for Windows 10 Mobile

$
0
0

How to send photos and videos in WhatsApp for Windows 10 Mobile

Send pictures and videos to friends and family using WhatsApp for Windows 10 Mobile.

Say more with your WhatsApp chats by adding photos or videos. WhatsApp allows you to take photos and shoot videos right in the moment and add them to WhatsApp. You can also add images and video files from your phone and include them in your chats with friends. Never miss the opportunity to share an exciting moment by using photos and videos in your WhatsApp chats!

How to take and send a photo with WhatsApp on your Windows 10 Mobile phone

You're on vacation and touring through a really cool museum and telling your friend about it in WhatsApp. They ask what the museum looks like. You can easily take a photo and add it to a conversation all without ever leaving WhatsApp.

  1. Launch WhatsApp from the App List on your Windows 10 Mobile phone.
  2. Tap on an existing chat (I chose one between my friend Marc and I).
  3. Tap the attach icon at the bottom of the screen (it looks like a paperclip).

    Launch WhatsApp, tap on a chat, and tap the attach icon

  4. Tap the Camera icon (it has a white camera on it) to launch your phone's camera.

  5. Tap the camera icon at the bottom of the page to take a photo of whatever you want.

    Tap the camera icon and take a photo.

  6. Add a caption by tapping the caption field and typing in a caption (optional).

  7. Tap send.

    Add a caption and send.

Your photo will be shared in the current chat between you and your friend. It will also be saved on your phone into the Photos folder and viewed later with the Photos app.

How to send a photo on your Windows 10 Mobile phone with WhatsApp

You can add any photo from your phone into a WhatsApp chat, even if it's one you took a long time ago. As long as the file is on your phone, you can add it to WhatsApp.

  1. Launch WhatsApp from the App List on your Windows 10 Mobile phone.
  2. Tap on an existing chat (I chose one between my friend Marc and I).
  3. Tap the attach icon at the bottom of the screen (it looks like a paperclip).

    Launch WhatsApp, tap on a chat, and tap the attach icon.

  4. Tap the Album icon (its a square with a camera in it).

  5. Tap Camera Roll to browse through photos that are on your phone.
  6. Tap on the photo you would like to share.

    Tap the album icon, find your photo, and select the photo.

  7. Add a caption by tapping the caption field and typing in a caption (optional).

  8. Tap send.

    Add a caption and send

Your photo will be shared in the current chat between you and your friend.

How to record and send videos with WhatsApp on your Windows 10 Mobile phone

You're chatting with your friend on WhatsApp and all of a sudden something amazing happens! Maybe you're at the zoo and a monkey starts jigging or you're at a concert and the band starts playing your favorite song. You can shoot and share videos instantly with your friends using WhatsApp.

  1. Launch WhatsApp from the App List on your Windows 10 Mobile phone.
  2. Tap on an existing chat (I chose one between my friend Marc and I).
  3. Tap the attach icon at the bottom of the screen (it looks like a paperclip).

    Launch WhatsApp, tap on a chat, and tap the attach icon.

  4. Tap the Camcorder icon (its looks like an old video camera) to launch the camera into the video recording mode.

  5. Tap anywhere on the screen to start recording.
  6. When you're done tap anywhere on the screen again to stop recording.

    Tap the camcorder icon, start recording, and stop recording.

  7. Add a caption by tapping the caption field and typing in a caption (optional).

  8. Tap send.

    Add a caption and send.

Your video will be shared in the current chat between you and your friend. It will also be saved on your phone into the Photos folder and viewed later with the Photos app.

How to send a video on your Windows 10 Mobile phone with WhatsApp

You can add any video from your phone into a WhatsApp chat, even if it's one you shot a long time ago. As long as the file is on your phone, you can add it to WhatsApp.

  1. Launch WhatsApp from the App List on your Windows 10 Mobile phone.
  2. Tap on an existing chat (I chose one between my friend Marc and I).
  3. Tap the attach icon at the bottom of the screen (it looks like a paperclip).

    Launch WhatsApp, tap on a chat, and tap the attach icon.

  4. Tap the album icon (its looks like a camera inside a white frame).

  5. Swipe left to access your recorded videos album.
  6. Tap the video you would like to add.

    Tap the album icon, swipe to find recorded videos, and select a video.

  7. Add a caption by tapping the caption field and typing in a caption (optional).

  8. Tap send.

    Add a caption and send.

Your video will be shared in the chat between you and your friend.

Guide Default Menu: 
menu-whatsapp-for-windows-10-mob

How to make and receive calls using WhatsApp on a Windows 10 Mobile

$
0
0

How to make and receive calls using WhatsApp on a Windows 10 phone

Use WhatsApp to place calls to friends and family anywhere in the world for free when you're connected to Wi-Fi

Travelling is great! You see new sites, meet new people, eat mysterious foods, but sometimes it's nice to hear a familiar voice. WhatsApp let's you place calls to friends and family no matter what they are. No time for a full on chat? No problem. You can also send someone a quick voice note they can listen to at their leisure.

How to make a call using WhatsApp on a Windows 10 Mobile phone

  1. Launch WhatsApp from the App List on your Windows 10 Mobile phone.
  2. Tap Calls or swipe right to view your call log.
  3. Tap the phone button at the bottom of your screen (looks like an old-school phone receiver).

    Launch WhatsApp, tap cals, and tap phone button.

  4. Tap the contact you'd like to call (I chose my friend Mark) and WhatsApp will automatically dial them.

  5. Tap the end call button to disconnect when you're finished talking.

    Tap a contact to phone and tap end call.

By connecting to Wi-Fi and using WhatsApp's calling feature, you can place calls without using your phone minutes or data plan which can save you money when you're roaming.

How to receive calls with WhatsApp on a Windows 10 Mobile phone

You're sitting and home and are startled by an alarming noise! Your phone is ringing! An actual phone call, but it's on WhatsApp! Who could this be? What do they want? And why are they actually calling instead of just sending you a message? Only one way to find out. You'll have to answer the phone call.

  1. To accept the call:

    • Tap the answer button to pick up the call.
  2. To refuse the call:

    • Tap the ignore button to decline the call.
    • Tap reply with message to refuse the call, but type a quick reply via WhatsApp message.

      Tap answer, tap ignore, or tap reply with messages.

If someone calls you using WhatsApp, it will come through just like a regular call. You don't have to have WhatsApp open. Keep in mind if you use WhatsApp with your mobile data, instead of using Wi-Fi, you may rack up data charges, depending on your plan.

How to send a voice note using WhatsApp for Windows 10 Mobile phones

If you don't have time for a full-on chat with someone, but you want to check in and let them know how you're doing, WhatsApp allows you to send voice notes. If you have a lot to say, it's faster than texting, and a little more personal.

  1. Launch WhatsApp from the App List on your Windows 10 phone.
  2. Tap on an existing chat (I chose one between my friend Marc and I).
  3. Tap and hold the voice note icon next to the text field (it looks like a microphone) to begin the recording.

    Launch WhatsApp, tap an existing chat, and hold voice note icon.

  4. Speak into your phone to record the message.

  5. If you mess up during your recording, swipe right with the finger you're using to hold the voice note icon to cancel.
  6. Release your finger from the voice note icon to end the recording.

    Record note, swipe to start over, and release to end recording.

The recording will automatically be shared with your contact in your chat once you remove your finger.

Guide Default Menu: 
menu-whatsapp-for-windows-10-mob

How to track, favorite, and forward messages in WhatsApp on Windows 10 Mobile

$
0
0

How to manage messages in WhatsApp on Windows 10 Mobile

Track the status of your message, mark your favorites, forward your witty remarks, start a group chat, and more with WhatsApp on Windows 10 Mobile phones.

Time seems to grind to a halt when you're waiting for someone to reply back to an important text message. Did it actually send? Did they read it? Are they ignoring me? Oh no...nobody likes me! This is the worst!

Jump off the emotional rollercoaster of messaging doubt by learning WhatsApp's handy way of showing you the status of your messages.

Once you've got that down it's time to learn other ways to handle WhatsApp messages, including your favorites, forwarding a message, starting a group chat, and eventually deleting messages you don't want anymore (especially incriminating ones).

How to check the status of your sent message

A read receipt lets you know whether or not your message is delivered and/or read. WhatsApp displays read receipts in your chats with little check marks. They're easy to miss if you don't know what you're looking for and they change colour depending on whether a message has been delivered or read.

  1. Launch WhatsApp from the App List on your Windows 10 phone.
  2. Tap on an existing chat you'd like to view (I chose one between my friend Marc and I).
  3. Look for the check marks on the right side of your message (your messages appear on the right side of the screen, your friend's will be on the left).

    • One gray check mark means your message has been sent.
    • Two gray check marks mean your message has been delivered.
    • When the check marks turn blue it means your message has been read.

    Launch WhatsApp, tap chat, view check marks.

Note: If any of your WhatsApp contacts have disabled read receipts on their device, then your checkmarks in their chat will never turn blue. You'll still get the double gray checks confirmation that the message was delivered, but a has-been-read confirmation will never come.

With this new knowledge you can now message friends and family with confidence in WhatsApp. Well maybe not, confidence, but at least you'll know for sure whether or not people care enough to reply back to you right away.

How to favorite messages

Sometimes your messages will be really funny. Whether it's from an autocorrect fail or just pure brilliant hilarity that spews out of you like a comedy volcano, you may want to find these one-liners quickly. Using a star in WhatsApp will allow you to favorite any messages you like.

  1. Launch WhatsApp from the App List on your Windows 10 phone.
  2. Tap on an existing chat you'd like to view (I chose one between my friend Marc and I).

    Launch WhatsApp and tap on a chat.

  3. Tap and hold the message you want starred. This will open a pop-up menu.

  4. Tap star from the pop-up menu.

    Tap and hold a message and tap favorite.

Your message will now have a little star in the message bubble.

To unstar a message, follow the same steps.

How to view favorited messages in WhatsAppp on Windows 10 Mobile phones

Once you've put a star on a few messages to mark them as your favorites, it's easy to find all of these important messages.

  1. Launch WhatsApp from the App List on your Windows 10 phone.
  2. Tap on the menu icon on the bottom right of your screen (it looks like three dots in a line).
  3. Tap starred messages from the pop-up menu.

    Launch WhatsApp, tap menu icon, and tap starred messages.

This will open a window containing all of your starred messages. You can now scroll through all of your favorite messages. Tapping on any of these messages will take you to the chat to which that message belongs, scrolled to the point in time at which that message was sent.

How to forward messages, photos, and videos using WhatsApp for Windows 10 Mobile phones

Why retype something when you can just forward it? WhatsApp allows you to forward messages, pictures, and more from one chat to another. If you're already in a chat with someone, it's easy to forward a message to someone else.

  1. Tap and hold the message or media you want to forward (this will open a pop-up menu).
  2. Tap forward from the pop-up menu.

    Tap and hold a message and tap forward.

  3. Choose the recipient you would like to forward the message to (by default WhatsApp will offer you a list of recent chats, but you can also swipe left or right to find more contacts).

  4. You will be asked for confirmation that you want to forward the message. Tap yes if you want to forward the message.

    Choose a recipient and tap yes.

The message will show up in your most recent chat with whichever contact you selected.

How to copy and paste a message or media into a new chat

Instead of forwarding, you may want to copy and paste something from one chat to another in WhatsApp. No problem!

  1. Tap and hold the message or media you want to forward (this will open a pop-up menu).
  2. Tap copy from the pop-up menu.
  3. Go to an existing chat or create a new chat (I chose an existing chat).

    Tap and hold a message, tap copy and tap on a chat.

  4. Tap and hold in the message field.

  5. Tap the paste icon above the virtual keyboard (it looks like a clipboard and a piece of paper).
  6. Tap the send icon to share the message or media (it looks like a message bubble with three horizontal lines).

    Tap and hold the message field, tap paste icon, and tap send.

How to delete messages in WhatsApp

You can delete individual messages from your chat if you need to make the chat shorter, or are just tired of looking at a certain message in a conversation. Deleting messages in WhatsApp is easy; however, you need to know that when you delete a message from a WhatsApp chat, it only deletes on your phone, and it will remain visible to whoever you sent it to. So always think twice before hitting send!

  1. Launch WhatsApp from the App List on your Windows 10 Mobile phone.
  2. Tap the chat you'd like to view.
  3. Tap and hold the message you'd like to delete (this will open a pop-up menu).

    Launch WhatsApp, tap on a chat, and tap and hold a message.

  4. Tap delete from the pop-up menu.

  5. You will receive a confirmation request asking if you want to delete this message. Tap delete.

    Tap delete and tap delete.

One more time: deleting a message from a WhatsApp chat doesn't "unsend" it. Whoever you sent the message to will still see it, even if you delete it off of your phone.

Guide Default Menu: 
menu-whatsapp-for-windows-10-mob

How to manage contacts in WhatsApp for Windows 10 Mobile

$
0
0

How do you add and delete contacts in WhatsApp's Windows phone app?

Three's a crowd and that's OK! Add contacts to WhatsApp because talking to yourself make people think you're crazy, whether it's online or not!

Luckily, Whatsapp will automatically add contacts that you already have in your phone, if they're already using WhatsApp. But, now you ask, "what if I meet someone in the street and we hit it off and I want them on WhatsApp?" Relax, Jack, we've got you covered. Follow me.

How to add contacts in WhatsApp for Windows 10 Mobile

  1. Launch WhatsApp from the Start screen or from All apps.
  2. Swipe left until you get to the to the all screen.
  3. Tap the add icon at the bottom of the screen. It's the plus sign in a circle.

    Launch WhatsApp, swipe to all, tap add

  4. Enter the contact's name and phone number
  5. Tap Add photo in the top left circle if you want to add a photo to a contact.
  6. Tap the photo you'd like to use.

    Enter contact's information, tap add photo, choose a photo

  7. Tap and hold the photo and move it, so that it is framed the way you'd like it in the circle.
  8. Tap the check mark on the bottom right of the screen when you are satisfied with your photo.
  9. Tap the save icon on the bottom of the screen. It's the little floppy disk.

    Tap and hold photo to move it, tap check mark to save, tap save

There it is. You're adding contacts and literally taking names. Or, vice-versa. Either way you have people to chat with now! Just remember that your contact must also have WhatsApp installed and set up, in order for you to chat using it.

Once your contact has WhatsApp, WhatsApp will automatically move him or her to favorites.

How to delete contacts in WhatsApp for Windows 10 Mobile

Maybe you didn't really hit it off as well as you thought. Maybe that guy you met in the street recreates movie scenes with taxidermy mice. You probably want to get rid of this person from your phone and your life.

Luckily, WhatsApp doesn't make you keep every contact you acquire. Here's how to exorcise your WhatsApp of unholy weirdos (or, you know, regular people you just don't want to talk to anymore).

  1. Launch WhatsApp from the Start screen or from All apps.
  2. Swipe left to favorites.
  3. Tap and hold the contact you want to delete.
  4. Tap delete.

    Swipe to favorites, tap and hold a contact, tap delete

That's it. It's that easy. Make sure you really want to delete the contact from WhatsApp because it doesn't respond with an "are you sure?" It just deletes the contact. It won't delete them from your phone entirely, just from WhatsApp, so you can still add them again if you so desire.

How to restore a deleted contact in WhatsApp for Windows 10 Mobile

Woops. You deleted grandma from your WhatsApp contacts, but you really meant to delete grandpa. So long as grandma is still a contact in your phone, you can easily get her back into WhatsApp. Here's how!

  1. Launch WhatsApp from the Start screen or All apps.
  2. Swipe left to all.
  3. Tap the contact you want to re-add to WhatsApp.

    Launch WhatsApp, swipe to all, tap contact

  4. Tap the menu icon. It looks like three dots in a row and is in the bottom right corner of the screen.
  5. Tap add to favorites.

    Tap the menu, add to favorites

Your contact will now be back in your WhatsApp favorites list with all your other WhatsApp contacts.

Guide Default Menu: 
menu-whatsapp-for-windows-10-mob

How to use WhatsApp for Windows 10 Mobile

$
0
0

How to use WhatsApp for Windows 10 Mobile

With over a billion users, WhatsApp is one of the biggest messaging apps in the world, letting you send texts, photos, video, contact, locations, all for FREE!

You can even make voice calls to any number in the world, for FREE. Did I mention that it's all free? You don't need a pricy calling or data plan to connect with friends and family all over the world – you just need an internet connection!

WhatsApp also lets you back up all of your messages, photos, and video, so that you can take them with you every time you switch phones so that you never lose touch with your contacts.

WhatsApp is free to download and use.

Download WhatsApp

Guide Default Menu: 
menu-whatsapp-for-windows-10-mob

How to stream your Xbox One on Beam

$
0
0

Beam

How to stream your Xbox games on Microsoft's newly acquired Beam live streaming service.

What on earth is Beam you might be asking? I thought everyone streamed on Twitch or YouTube? A relative upstart in the streaming game has been scooped up by the Redmond giant and suddenly found itself in the limelight.

So you might find yourself wondering how to get started with it and share your Xbox One games (other consoles are available!) with the world. Twitch is built in to the Xbox One for simple streaming but with Beam, at least for now, you'll need some additional hardware and software.

That hardware will be a capture card, such as the Elgato HD60S and your PC, as well as some broadcasting software. In that regard two of the most popular options are Open Broadcaster Software (OBS) which is free, and XSplit which requires a subscription for the full feature set.

N.B. We'll be using OBS as a demonstration for this guide, but many of the steps should be similar on XSplit. It's also worth noting you need to download the newer, OBS Studio software and not OBS Classic for Beam streaming.

Before any of this you'll need to sign up for a free account over on the Beam website. You can either sign up using email or log in with Twitter or Discord.

  1. On your Beam dashboard select Hub from the sidebar menu on the right hand side of the screen.

    Beam

  2. Select Setup stream from the screen that now displays.

    Beam

  3. When asked how you want to stream, select use RTMP.

    Beam

  4. The best server should be selected automatically based on location and latency, but you can change this here. Next, copy your stream key from the highlighted box.

    Beam

That's all you need to do for now on the Beam website, next fire up your broadcasting software, in this case OBS Studio.

  1. Select Settings in OBS Studio.

    Beam

  2. Select the Stream tab on the left hand sidebar.

    Beam

  3. Select beam.pro from the dropdown box for desired streaming service. In the box below paste the stream key you copied from your Beam dashboard.

    Beam

  4. If you're using XSplit there are some slightly different steps to setting up your stream key. You'll need the streaming URL and the stream key from your Beam dashboard in order to get hooked up there.

That's about all there is to it. These basic steps will help you set up your Beam account for streaming, but there are other things to consider, such as bitrate. Beam recommends what you should use in your dashboard, in our case it's showing as 720p, 30fps and a maximum 2500kbps bitrate. You'll need to take these into account in your broadcast software as you set up your stream.

We don't know yet what the future holds for Beam, but if you're interested in seeing what it's all about, be sure to give Windows Central a follow!

How to unenroll from the Windows Insider Program for PC and Mobile

$
0
0

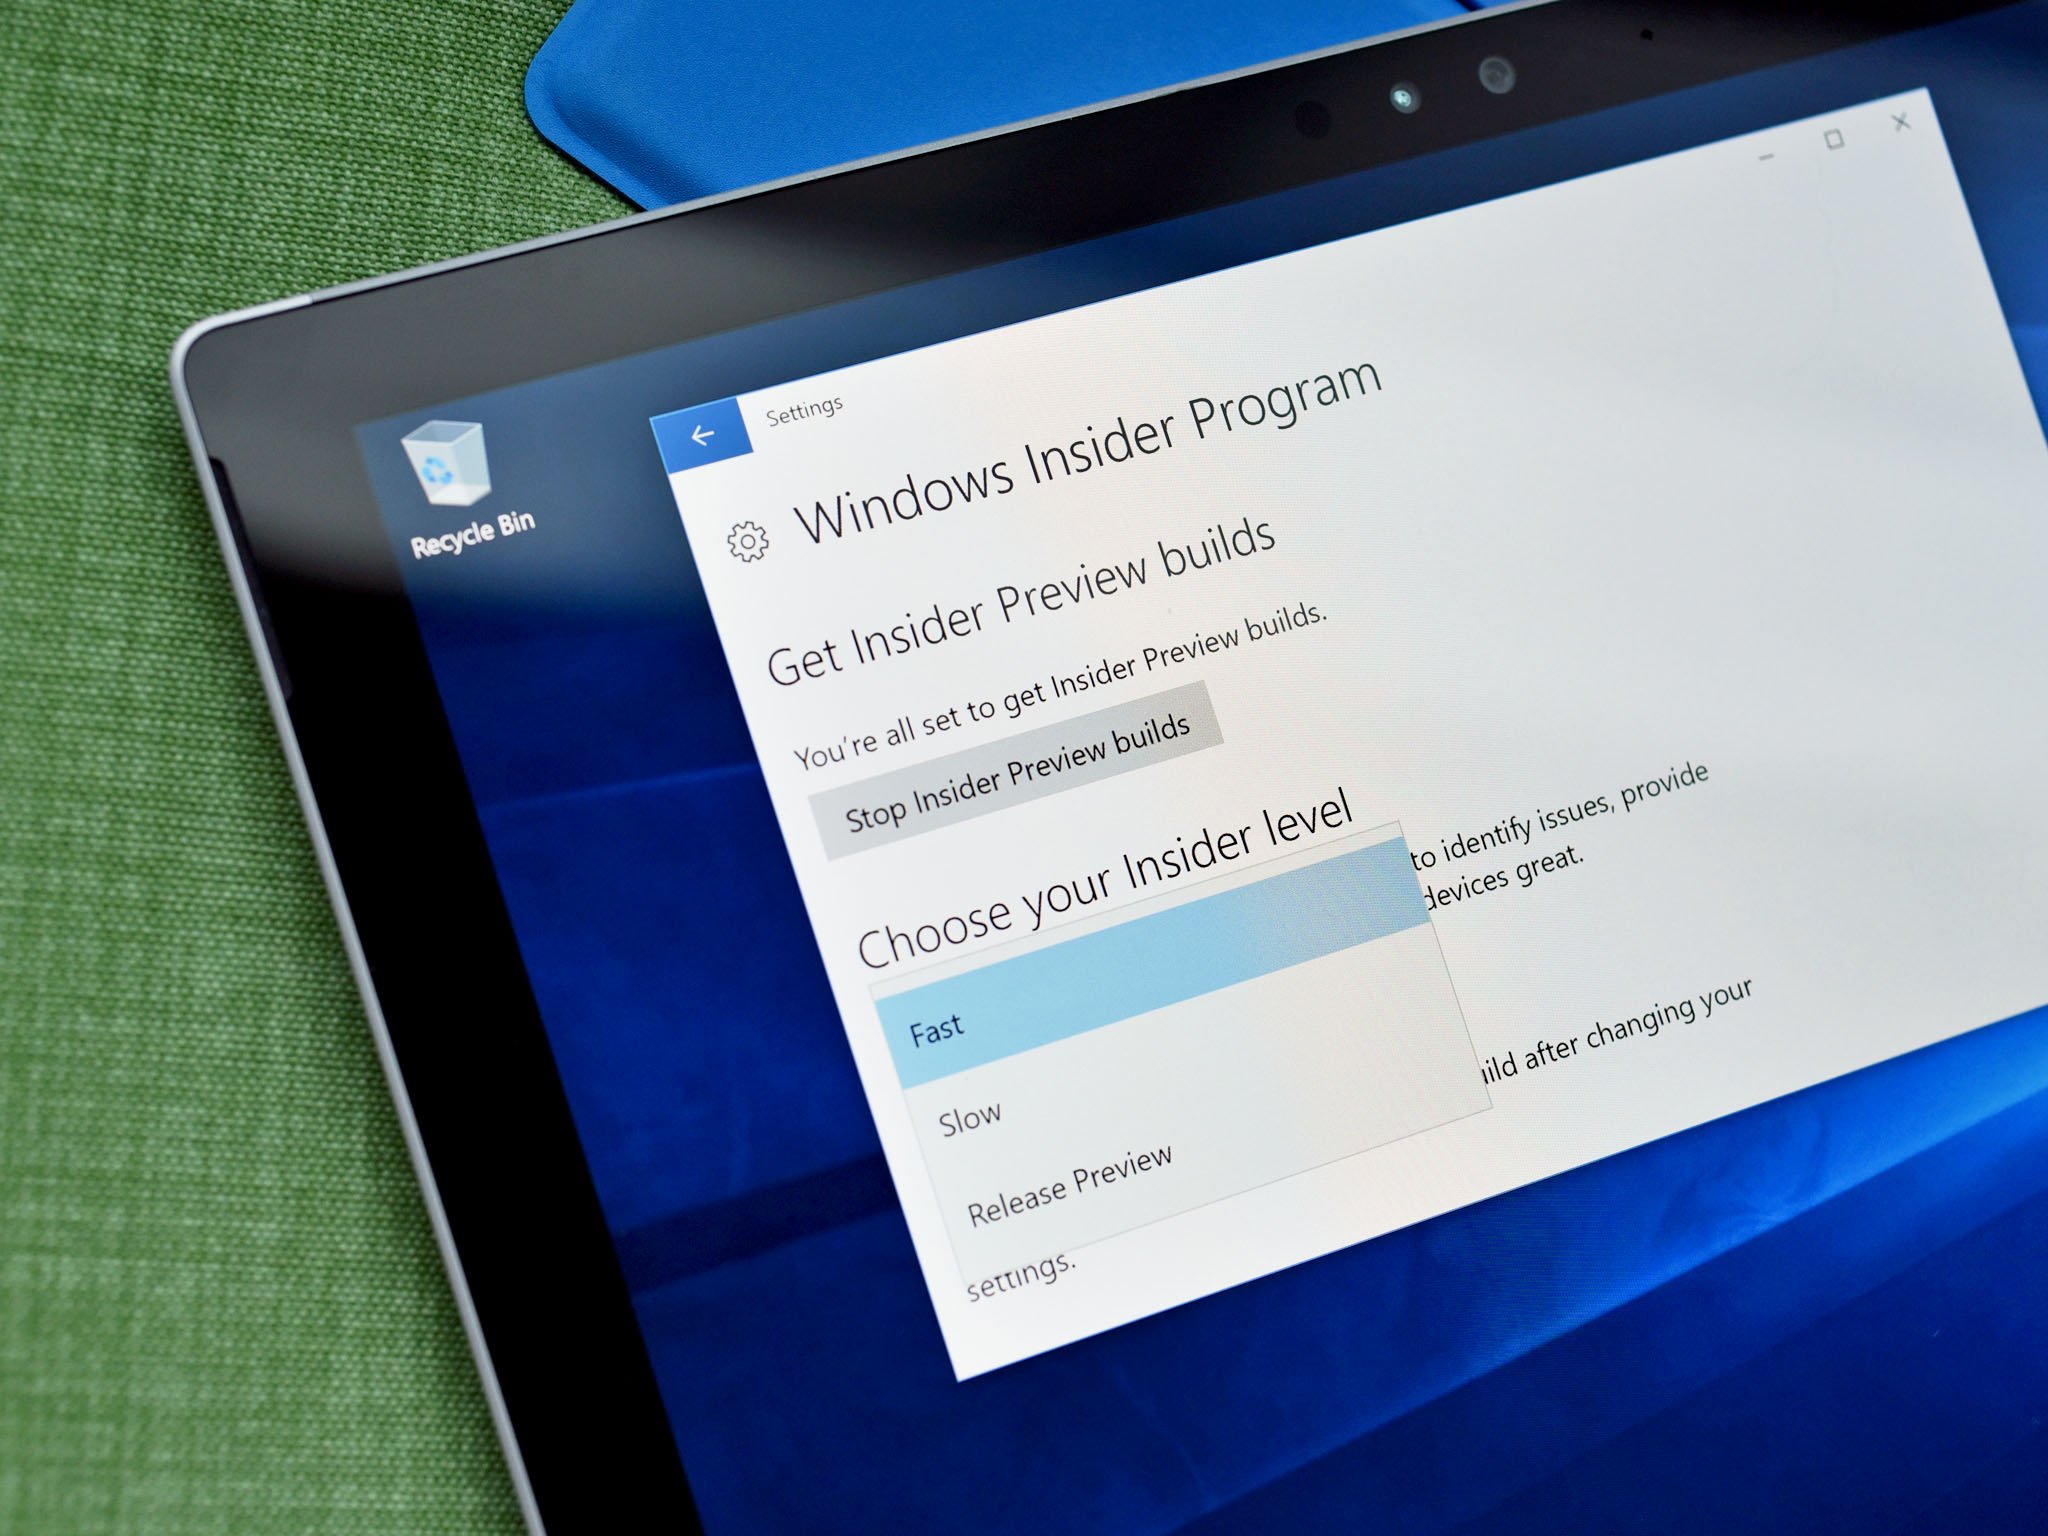
Did you have enough of Insider builds? In this guide, we'll tell you the steps to unenroll your PC and Mobile devices from the Insider program to enjoy a stable version of Windows 10.

The Windows 10 Anniversary Update is now available for all PCs, but Microsoft is now moving to developing 'Redstone 2' slated for final release early in 2017. If you have been part of the Windows Insider Program, you probably already got a taste of what's included.

At this point, you also may be thinking about opting out your computer or phone from the program and move to a stable version of the Windows 10 Anniversary Update. With Redstone 2 builds expected to hit Insider devices in early August we already know there could be stability issues and bugs at first, with fixes coming later.

Thankfully, Microsoft offers two ways to stop getting Insider preview builds on your device. You can opt out as soon as the final version of Windows 10 becomes available to the public, or you can alternatively unenroll your device by restoring the original version of the operating system.

In this Windows 10 guide, we'll walk you through the steps to unenroll your PC or Mobile from the Insider Program.

How to unenroll your PC or phone from the Insider program

If your device is running Windows 10 build 14393 or later, you're already running the final version of the Windows 10 Anniversary Update on your computer or phone, and you'll now see the option to unenroll your device while keeping current setup and files.

It's important that before proceeding, you need to check that your device is, in fact, running the latest version by going to Settings > System > About, and verifying the build number.

Once you know your device is running the correct version of the Windows 10 Anniversary Update, you can unenroll your PC or Mobile device using the following steps:

  1. Use the Windows key + I keyboard shortcut to open the Settings app. (On your phone, swipe the Start screen to the left and tap Settings.)
  2. Click Update & security.
  3. Click Windows Insider Program.
  4. Click the Stop Insider Preview builds button.

  5. Click the "Need to stop getting Insider builds completely?" link.

  6. Click Confirm.
  7. Click Restart Now.

Once your device restarts, it'll no longer be in the Windows Insider Program, but it will stay with the Anniversary Update. It's important to point out that these instructions apply for the PC and Mobile version of Windows 10.

How to stop receiving Insider builds at any time on your PC

If you don't want to wait until the production version of Windows 10 rolls out, you can still remove your device from the Windows Insider Program. However, the process involves restoring your PC back to the previous version of the operating system.

Although the process to roll back can take some time, the good news is that you don't necessarily have to reinstall an older version. Thanks to the upgrade, when you opted into the Insider preview program, you're now entitled to install Windows 10 with your Windows 7 or Windows 8.1 product key.

Important: Performing a clean installation of the operating system will erase all your personal data on your device. It's recommended that you make a full backup of your system before proceeding.

  1. Download the Windows 10 ISO from the Microsoft Tech Bench Upgrade Program site.
  2. Create a bootable installation media.
  3. Restart your computer with the bootable media to begin the installation of Windows 10.
  4. On the Windows Setup, click Next.
  5. Click Install now.
  6. If you're prompted to enter a product key and you've already activated your version of Windows 10, you can skip this step.
  7. Accept the licensing agreement and click Next.
  8. Click the Custom: Install Windows only (advanced) option.

  9. Select and delete the system partitions. Usually, you want to delete: Drive 0 Partition 1 and Drive 0 Partition 2.

  10. Click Next and follow the on-screen instructions to complete the installation.

Once the installation completes and you go through the Out-of-Box Experience, go to Settings > Update & security > Windows Update and check for update and driver downloads. Also, remember to restore your files from backup and reinstall all your applications.

At this point, your computer should no longer be part of the Insider program.

How to stop receiving Insider builds at any time on your Windows phone

The process to unenroll your phone works in the same way. Similar to the PC version, you can unenroll your phone once the final build of Windows 10 Mobile releases. There are technically three choices here: Unenroll, Suspend, or change Insider Rings. We'll cover all of those next.

How to unenroll from the Insider program (Mobile)

For Mobile the user needs to go to Settings > Update & security > Windows Insider Program.

Under this area the user can then hit Stop Insider Preview Builds. Then tap the menu item that says Need to stop getting Insider builds completely? This brings you to a new pop-up screen that explains how you will no longer receive Insider builds. Once ready choose Confirm.

How to suspend Insider builds for a few days (Mobile)

You can choose to suspend Insider builds for 1, 3, 5, or 7 days. That is useful for letting others try out the latest build and then a few days or a week later you can decide to jump back in if everything is okay.

Finally, users can opt for different Rings including Fast, Slow, or Release Preview. Release Preview is the safest and they rarely get new features from the development branch. It is only close to the public release of a new branch (e.g. Anniversary Update) that Release Preview then jumps to the new OS.

How to change Insider Rings (Mobile)

All you need to know about Slow, Fast, and Release Preview rings

Roll back your phone

Alternatively, you can also remove your phone completely from the Insider program at any time by rolling back to the original version of the operating system using the Windows Device Recovery Tool.

Important: Using the recovery tool will erase all your personal data on your device. It's crucial to create a backup of your files to your PC or OneDrive and a backup of your phone using the feature located on Settings > Update & security > Backup.

When you're ready to unenroll your Windows 10 Mobile phone from the Insider program do the following:

  1. Use this link to download the Windows Device Recovery Tool.
  2. Double-click the file and follow the on-screen directions to install the recovery tool on your computer.
  3. Connect your phone to your computer using a USB data cable.
  4. Launch the Windows Device Recovery Tool.
  5. Click the phone tile.

  6. The recovery tool will list your handset with the current version of the operating system, and you'll also see the stable version available from the Microsoft servers. Click the Reinstall Software button to continue.

  7. You'll get a warning that this process will wipe out the device. Make sure you have everything backed up, and click Continue.

  8. Answer the survey or simply click Continue without submitting.

  9. The recovery tool will now proceed to download the necessary files and reinstall the operating system.

  10. Click Finish to complete the process.

Your phone will reboot, and you'll then need to go through the guided Out-of-Box Experience to complete setting up your phone.

At this point, your phone should no longer be part of the Insider program.

Note: If you're restoring your phone from backup, the Windows Insider app will reinstall again, but new builds from the Insider program won't download until you reconfigure the app. However, you may still want to open the Windows Insider app, tap the menu (…) button and select "stop Insider Preview builds". Alternatively, you could also roll back to the previous version of the operating system and skip restoring from backup to avoid the Windows Insider app from re-installing itself. This last option will require you to re-install apps and configure other settings manually.

Wrapping things up

Keep in mind that you can continue to use the latest Insider preview build after the Windows 10 Anniversary Update releases on August 2nd. However, it's recommended that you opt out for the production build, mostly because it's a stable version that will get updates and you can use it for an extended period of time. If you skip the final build, and you stay with an Insider preview, it will eventually expire and servicing updates will also stop leaving the operating system vulnerable.

Will you be unenrolling your device now or are you waiting to opt out once the Windows 10 Anniversary Update rolls out? Tell us in the comments below.

More Windows 10 resources

For more help articles, coverage, and answers on Windows 10, you can visit the following resources:

How to stream audio over Bluetooth in Windows 10

$
0
0

Bluetooth settings in Windows 10

Free your Windows 10 PC of wired speakers by using Bluetooth streaming instead.

Streaming audio from your phone to a Bluetooth speaker is something many of us have done for a long time, but what about your PC? With the necessary hardware installed your Windows 10 desktop, laptop or even tablet can take advantage of the same, wire-free audio experience.

Here's how you set it up.

How to pair a new Bluetooth device in Windows 10

  1. Open Settings.
  2. Navigate to Devices.
  3. Click Bluetooth in the left sidebar.
  4. Set the toggle switch at the top to On.

    Devices that are either paired or ready to pair will be listed below.

  5. Select Pair to connect a new Bluetooth device.

For some Bluetooth devices you'll need to enter a PIN to confirm pairing, but once it's done you're all set. A Bluetooth speaker will be connected like headphones in that it should now be the default audio output when it's on and paired to your PC.

Bluetooth settings in Windows 10

An easy way to check this in the Windows 10 Anniversary Update is to select the speaker icon in the bottom right corner near the clock. Clicking on this will tell you the current audio output, and if you need to change in a hurry, the ^ icon will quickly open up all your available options.

If you'd like to do this on your PC but you don't have Bluetooth built in, all is not lost. You could always pick up a USB dongle that will fairly cheaply add the ability to your computer. Or, if you're in the mood for upgrading internals, some WiFi cards also come with Bluetooth built in. Either way, you need not be left out of wire free music!

How to upgrade the storage and RAM on the ASUS GL552

$
0
0

ASUS GL552

ASUS makes it simple to upgrade its popular gaming notebook.

The ROG GL552 represents ASUS' entry point into gaming laptops, and mixes decent graphical power with affordability and solid construction. The base model is pretty well equipped, but ASUS also makes it super simple to add more storage and RAM to the laptop if you want it.

Here's what you need to know.

On the GL552 you can upgrade three things: RAM, HDD storage and m.2 SSD storage. The stock model has a 128GB SSD drive to boot Windows from and install essential software on, alongside a 1TB HDD for mass storage of games, media and such. It also comes with 8GB of RAM, but you can easily upgrade this to 16GB without spending a lot.

The only tool you will need is a small Philips head screwdriver. Flip the laptop over and there are two screws in the middle of the laptop holding the upgrade panel in place. Remove these and the cover pops right off.

In terms of upgrades, there are many to choose from but we'd recommend SSDs from Samsung or Crucial, HDD storage from Western Digital and a single 8GB RAM stick from Crucial to complete these upgrades. For the SSD swap you'll also need a USB 3.0 m.2 SSD enclosure.

ASUS GL552

How to upgrade the RAM in the ASUS ROG GL552

  1. Locate the RAM slots. These are in the center of the laptop, just above the small m.2 SSD drive.

    The GL552 already has one empty slot, this is the one you will use.

  2. Line up the notch on the RAM stick with the notch on the slot
  3. Insert the RAM at a slight angle until the pins disappear.
  4. Press down gently. You should feel a slight slick as the RAM locks in to place.

  5. Turn on your computer to verify that the RAM was successfully installed and recognized:
    1. Open Settings.
    2. Click on System.
    3. Click on About. You should then see something like the screen above detailing your RAM. If it says 16GB everything is good!

ASUS GL552

How to upgrade the hard drive in the ASUS ROG GL552

If you already have data on the drive you'll need a way to transfer that across. Since Windows isn't installed on this one you needn't worry too much about cloning, a simple copy and paste should do the trick. Any external USB HDD or SSD that's big enough for your data will suffice. Then grab the screwdriver:

  1. Unscrew the four screws that hold in the drive. There is one in each corner of the metal strips.
  2. Carefully disconnect the drive.
  3. Line up the connectors of the new drive with the slot of the laptop.
  4. Push the new drive into place.
  5. Screw the four screws back in to secure the drive.
  6. Turn on your computer to verify the drive was successfully installed and recognized:
    1. Open Settings.
    2. Click on System.
    3. Click on Storage. You'll see the drives currently connected and if all was successful your new HDD will display here.

After that it's a case of copying your data back to that drive.

ASUS GL552

How to upgrade the SSD in the ASUS ROG GL552

This is where things get a little more complicated. Swapping the drive itself is simple, but because Windows is installed on the existing SSD, you need to move that over. You have two options:

  • Perform a clean install of Windows 10 on the new SSD
  • Clone the existing SSD to the new one

If you want to start fresh with a clean install, our guide on using the Windows Media Creation tool will help you on your way. Essentially you create a bootable USB stick (a 4GB thumb drive and above is required), install the new drive and install Windows 10 from this. The product key inside your laptop's firmware will be enough to activate the install.

This is probably the safest method, as it ensures you don't end up with any partition issues, something we've seen affect our ability to update Windows 10 in the past. As most of your mass storage data won't be on this drive, backing up what you do have shouldn't be much of a task.

If you want to clone the drive, you'll need to use the USB 3.0 enclosure mentioned above. Install the drive into the enclosure and attach the included USB 3.0 cable to the laptop. Samsung and Crucial SSDs come with Samsung's own cloning software and Acronis True Image respectively. The cloning process is fairly straight forward but we have guides on using both Samsung and Crucial/Acronis combinations that should help you on your way. Essentially you point the software at the old drive, the new drive and let it do its thing.

To install your new SSD:

  1. Remove the tiny screw from the left-hand edge of the m.2 SSD. It should pop up slightly for you to pull away from the contacts.
  2. Line up the new SSD at a similar angle.
  3. Gently push the new SSD in until the pins disappear.
  4. Push down on the new SSD until it slots into place.
  5. Screw in the screw to secure the SSD.

The next thing to do is pop the upgrade panel back on, screw it back in and power up the laptop. If you've cloned successfully it should boot right into Windows. Make sure not to get rid of the old drive until you're sure it worked. If you're doing a fresh install, insert the USB stick into the laptop, boot up and follow the on-screen instructions to install Windows.

And that about covers it! Many laptops can't upgrade their internals, but ASUS has given plenty of flexibility with the GL552 to get what you need from it.

Viewing all 5861 articles
Browse latest View live


Latest Images