Quantcast
Channel: Help & How To
Viewing all 5861 articles
Browse latest View live

How to get your Surface Pro 3 ready to sell in preparation for a Surface Pro 4

$
0
0

After a few tries, Microsoft hit the nail on the head with the Surface Pro 3. Today, the tablet that can replace your laptop is perhaps the best 2-in-1 device to experience Windows. Not only features a sleek design, but it's thinner and lighter than its predecessor. Also, the Surface Pro 3 is very powerful to tackle virtually any task, and you can easily connect to a 4K external monitor if you need more screen real estate.

Nonetheless, it has been over a year, since Microsoft launched the tablet to the market, which means that it's time for a refresh. While the company hasn't officially announced anything, it has been (unofficially) confirmed that Microsoft will be holding a big hardware event in October. According to the rumors, the software maker will be announcing a new flagship of Windows phones, including the Lumia 950 and Lumia 950 XL, the Microsoft Band 2, and more importantly the Surface Pro 4.

Also, according to rumors, this time around the company plans to launch a new 12-inch display, just like the Surface Pro 3, and a bigger 13- to 14-inch display version of the new tablet. This larger device should have a new name too, although currently it is not yet known. Finally, we're expecting the device to pack the new Intel's Skylake processor, possibly without fans, and with up to 16GB of RAM.

While it can be sentimentally a hard thing to do, now it's a great time to sell your Surface Pro 3. This earliness will get you the most money to buy a Surface Pro 4 when it launches later this year.

Today in this guide, we'll go through a set of steps to securely get your Surface Pro 3 ready for sale without giving away any personal information and to help get the most money so you can save up to buy a new Surface Pro 4.

What you need to do to sell your Surface Pro 3 properly

Backing things up!

As always, before modifying anything in your system, you want to create a full system image backup of your tablet. If something were to go wrong during the process, you always have a way to go back and start over.

Fortunately, Windows 10 and Windows 8.1 include the System Image Backup tool that allows you to create a bit-by-bit copy of your Surface. You can then use this as part of your recovery plan. You can refer to my previous guide to get this done.

Although, you can easily mount the image backup to recover files, there is no such as things as too many backups. As such, what you want to do is to make a backup of everything, making sure you copy all the files in the Documents, Desktop, Downloads, Music, Pictures, and Videos folders to an external USB drive.

If you use OneDrive exclusively to store your documents, then you're set! As your files are already securely backed up in the cloud.

Note that we're doing a full image backup just as a precaution, and the file backup is what actually you're going to use to move your files temporarily to another computer or to recover when you get your Surface Pro 4.

Getting ready to reset your Surface Pro 3

Windows 8.1 comes with two recovery options -- you can refresh your PC without affecting your files, or you can remove everything and reinstall Windows.

We're getting ready to sell the Surface Pro 3 to a complete stranger, so we don't want anyone to get access to our private documents. This reason is why we'll be using the "Remove everything and reinstall Windows" option.

This option will ensure no one will be able to view or easily recover files using special tools. However, when you start the reset process, you'll get a message saying that some of the files are missing, and you'll need to insert the media with your Windows installation files to continue.

If you don't have the installation media -- it's OK, just follow these steps:

1- Head over to the Surface support page to download the Surface recovery files.

2- Sign in with your Microsoft account and follow the instructions to register your Surface Pro 3 (if you haven't done it already), and download the 5.5GB zip file.

3- Once you have downloaded the files, you'll need a USB flash drive with 6 to 8GB of storage space. You also need to reformat the drive using the FAT32 file system. To do this go to This PC, right-click the USB drive, clicking Format, choosing the FAT32 file system, ticking the Quick Format option, and clicking Start.

4- Finally, unzip the installation files and copy everything to the USB drive.

Warning: Remember that everything on the USB drive will be erased after formatting, as such make sure to backup any important content prior using the "Format" utility.

It's worth pointing out that if you have already upgraded to Windows 10, you won't have any issues with the installation files. The operating system can be reinstalled using the files already in your system. As such, you don't need a Surface recovery media for Windows 10.

Deleting files and reinstalling Windows

Now that you have already created a backup, and you have followed the steps it's time actually to reset your tablet.

Remove everything and reinstall Windows 8.1

Follow these steps to reset your Surface Pro 3 running Windows 8.1:

1- Use the Windows key + I keyboard shortcut to bring the flyout menu and click Change PC settings.

2- Navigate to Update & security and go to Recovery.

3- Connect the USB drive with the Surface recovery files for Windows 8.x, and click on Remove everything and reinstall Windows.

4- On "Reset your PC", click Next.

5- You'll be given two choices: "Just remove my files" and "Fully Clean the drive". Because you're getting ready to sell your Surface Pro 3, you want to click on Fully clean the drive. This option is the one Microsoft supports when you need to recycle your PC and keep in mind that it could take several hours to complete the process.

6- On the next page click Reset to begin the process.

At this point, your Surface Pro 3 will commence the recovery process, and it will reboot to complete the reset.

After the process is complete, you'll be presented with the out-of-box experience. At this point, everything you could've done is done. You can simply power off the device and package it nicely for selling.

Remove everything and reinstall Windows 10

If you have upgraded to Windows 10, then resetting your Surface Pro 3 and getting it ready for sale should be much easier. In part, it should be easier because you no longer need to supply the installation files.

Follow these steps to reset your Surface Pro 3 running Windows 10:

1- Use the Windows + I keyboard shortcut to access the Settings app.

2- Navigate to Update & security, and go to Recovery.

3- On "Reset this PC", click the Get started button.

4- From the options available click on "Remove everything", which is the Microsoft supported option that ensure all of your files, apps, and settings will be removed.

It's worth pointing out that you won't be rolling back to your previous version of the operating system. The reset process will remove everything in your Surface Pro 3 and reinstall Windows 10.

5- Click Remove files and clean drive.

6- Then click Reset to begin the process. Your computer will not reboot, and the reset process will kick in.

If you're still skeptical that your data was completely erased, then you'll need to go through the out-of-experience aka setting up the PC for the first time. To do so, you will want create a new local account instead of using a Microsoft account and verify that everything has been erased.

Furthermore, if you continue being cautious, go through the out-of-box experience, and try to reset your Surface Pro 3 one more time with the previous steps.

Here's the alternative

Today, we have seen the supported methods by Microsoft to recycle your device, in this case, a Surface Pro 3. However, if you don't feel it's enough, you can always resource to third-party software to wipe the hard drive. Afterward, you can then do a clean installation of Windows 8.1 using the Surface recovery files or Windows 10. This method would take more time and work, but it will give a piece of mind to many users.

Removing registration of your Surface Pro 3

There is one last thing you want to make sure you do before finding a new owner for your Surface Pro 3, and that is removing the registration for your Surface. Through the time you have had the tablet or at the time you needed to download the recovery image, you have registered your Surface Pro 3 with Microsoft in your name.

Now, you need to let someone else register the tablet down the road. To do so you want to remove the registration of the tablet from your Microsoft Account before sell your Surface Pro 3.

Here are the steps:

1- Go to https://myservice.surface.com and sign in with the Microsoft Account you registered the device.

2- Click Manage devices and covers.

3- On the "Device Manager", you'll see a list with all the registered devices. If you have more than one Surface, make sure to match the serial number, and select the device.

4- Click the Remove button with the trash can icon, and click Confirm Removal.

5- Go back to the "Device Manager" to verify that the Surface Pro 3 unregistered successfully, and you should then be good to go.

Time to sell your Surface Pro 3

At this point, you have created a backup of the device, you have made a copy of all your files, you have securely erased everything, and you have removed the registration of your Surface Pro 3. Now, it can be hard to let go, but it's the time to find a new owner!

The first thing you need to do before putting your Surface up for sale is to identify how much you can sell it for. The price will depend on demand and condition.

The best way to understand pricing is to research what other people are currently doing. However, before you do that make sure to go to Amazon.com, Microsoft Store, and other online retailers, and check how much it costs for a brand new Surface Pro 3. As you can imagine pricing might have changed since you bought the device.

Next, research Amazon.com and eBay to see how much money sellers are asking for the same used model you're trying to sell. See the condition of those devices and if they're also offering free shipping.

You now likely have an idea on pricing. The next step is to decide where you want to sell your device. Here is where you need to be creative, while there many services where you can sell your used devices, you will probably end up with one of the two: eBay or Craigslist.

Before you decide, also consider selling the tablet to someone you know, as this can save you a lot of online hassles.

Whether you use eBay, Craigslist, or another service make sure to have a well-written description of the devices with all the details of its condition, don't leave anything out, and be as clear as possible.

Take good pictures of the device and the accessories you're including. Also, make sure the images are clear and they reflect the condition of the Surface Pro 3.

If you go with eBay, a good selling practice also includes offering free shipping and use good packaging to send the device to avoid shipping damages.

Wrapping things up

While we don't yet have an official release date for the Surface Pro 4, we know something is coming soon. Also, knowing that new hardware is coming gives you an opportunity to get the most money now. Of course, you can always bookmark this guide and return when Microsoft officially launches the new tablet, but it might turn out a little more difficult to find someone to buy an older version of Surface at the price you want.

Remember that we have focused on Surface Pro 3, but you can always refer to this guide for other Surface tablets and devices as well!

Will you be selling your Surface Pro 3 when the Pro 4 comes out? Let us know in the comments below.

How to boot into Safe Mode in Windows 10

$
0
0

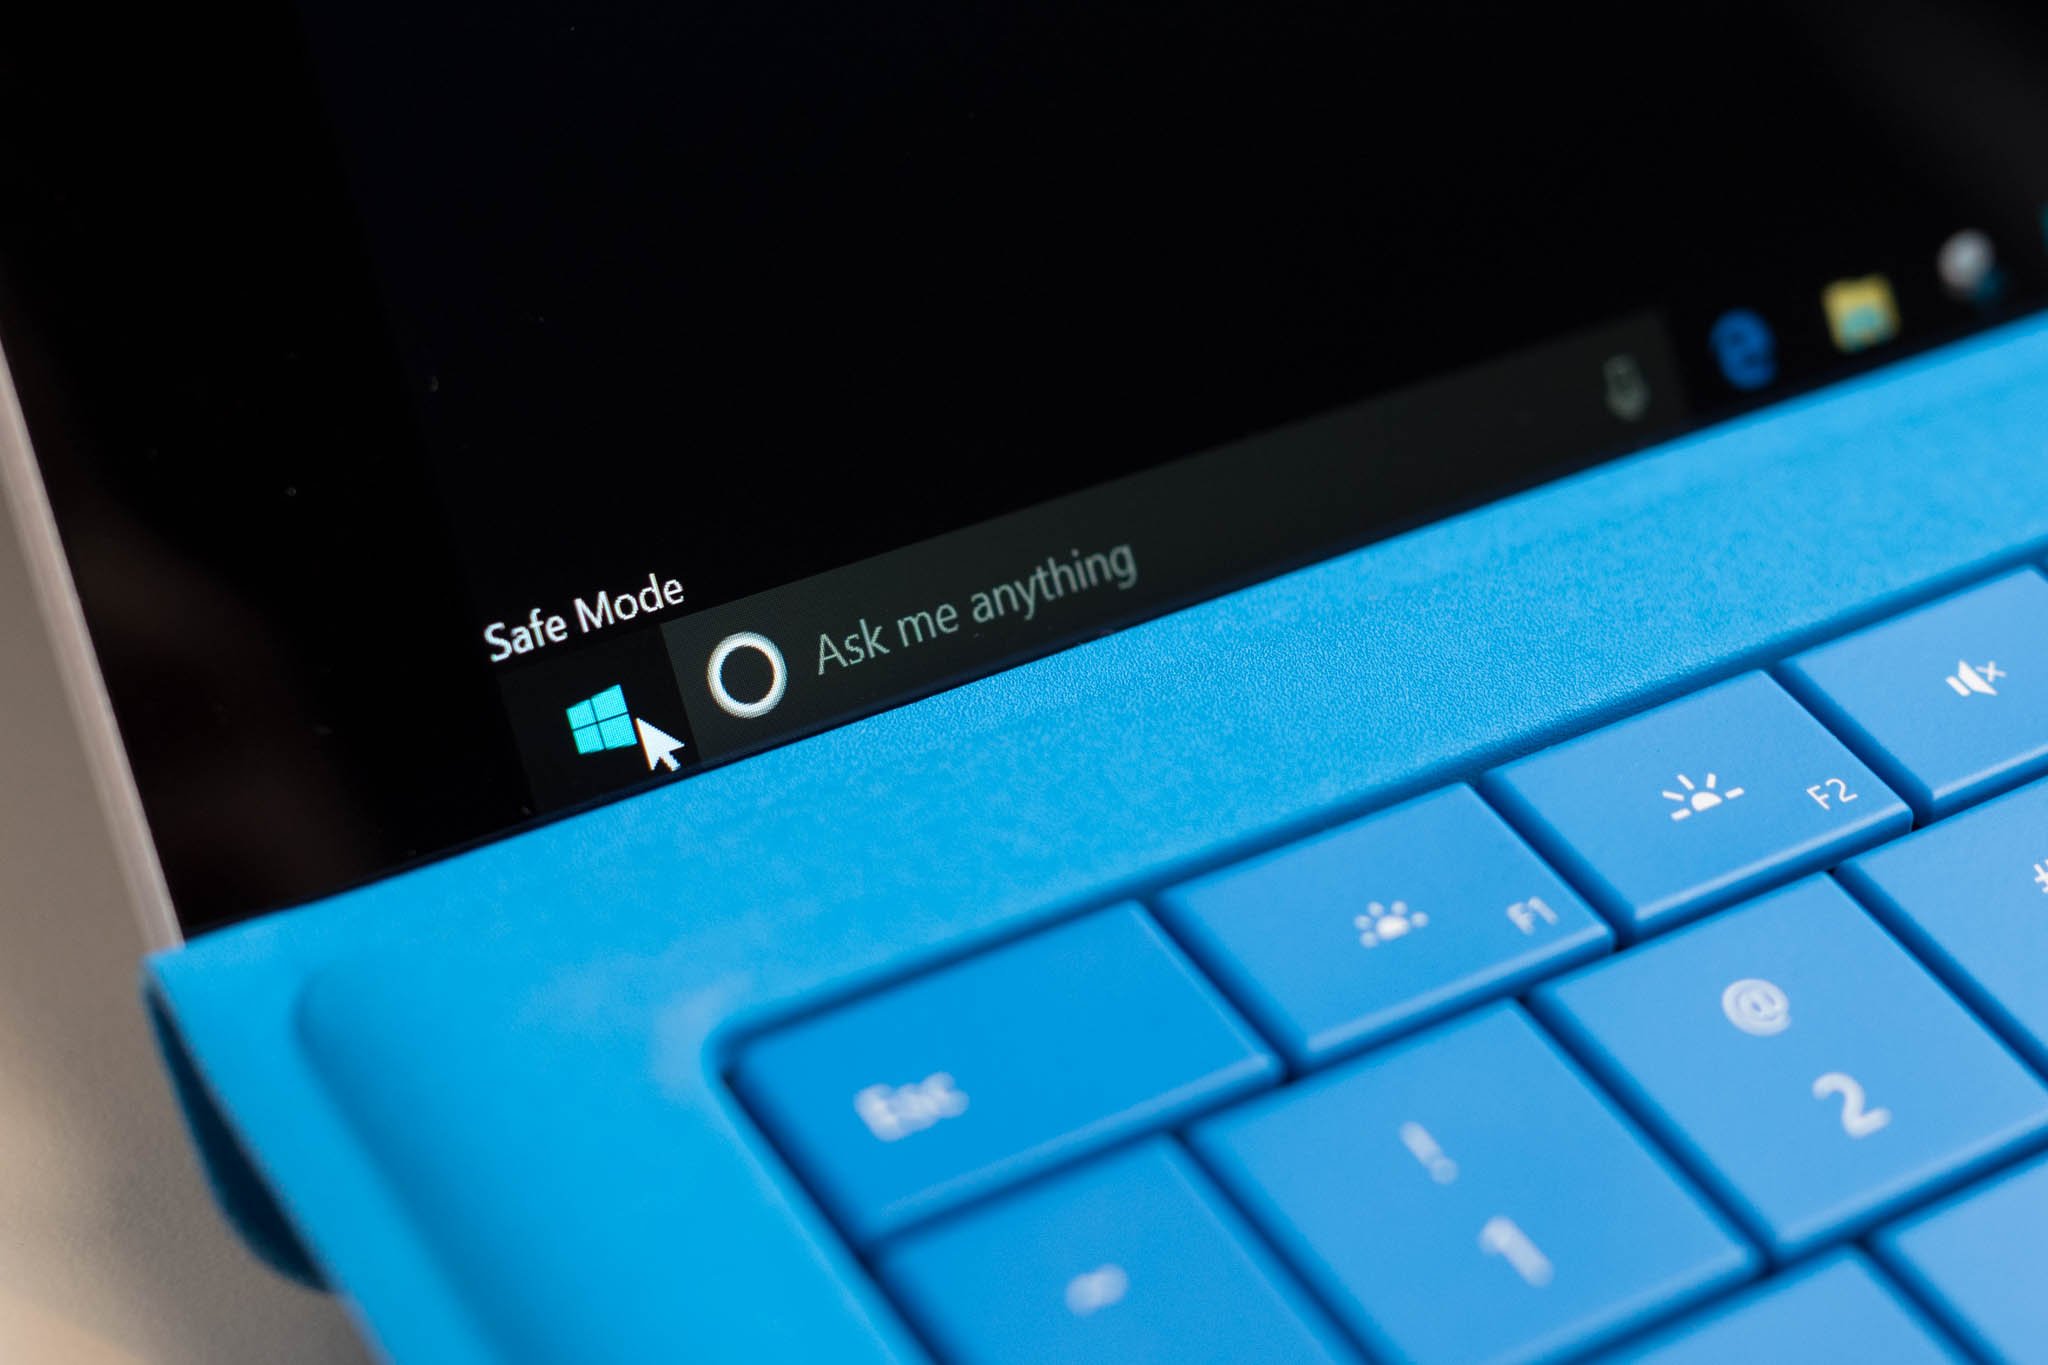
Surface Safe Mode

Safe Mode in Windows disables unnecessary drivers and programs during the startup process so you can isolate system errors and fix them. We'll show you how you can boot into Safe Mode with Windows 10.

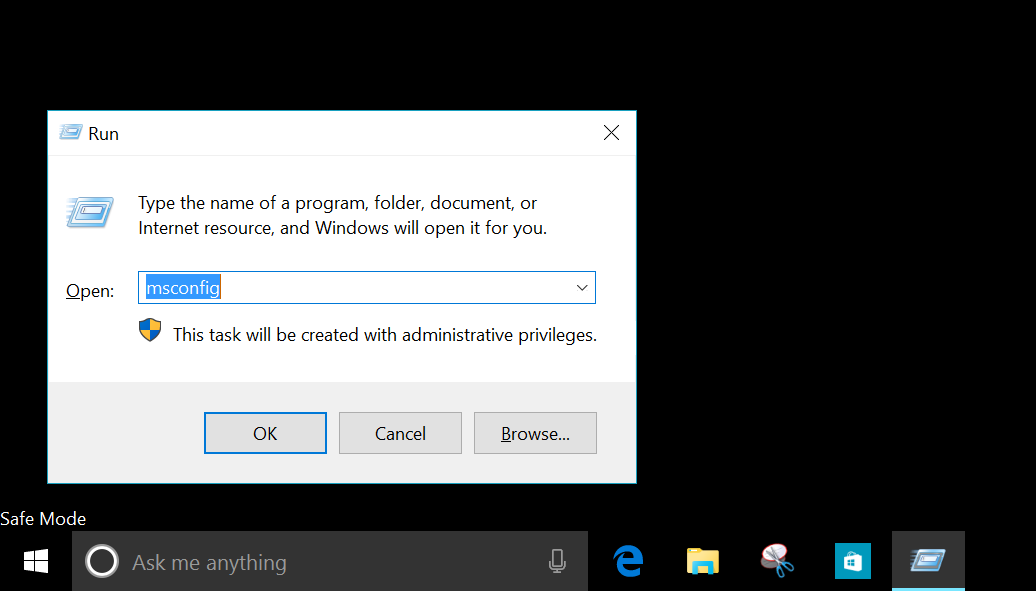
1. Tap or click the search form in the taskbar and type msconfig. This opens the System Configuration tool.

Msconfig

2. Tap or click the Boot tab and check the box, Safe boot. There are four choices for Safe boot. The minimal option is the most common choice, but read on for more details.

  • Minimal. On startup, opens the Windows graphical user interface (File Explorer) in safe mode running only critical system services. Networking is disabled.
  • Alternate shell. On startup, opens the Windows command prompt in safe mode running only critical system services. Networking and File Explorer are disabled.
  • Active Directory repair. On startup, opens File Explorer in safe mode running critical system services and Active Directory.
  • Network. On startup, opens File Explorer in safe mode running only critical system services. Networking is enabled.

Safe boot

3. Tap or click Apply, and then Ok. You can either restart right away or continue working until you need to restart.

4. After your computer restarts, you can continue troubleshooting in Safe mode.

Safe mode

How to exit Safe mode in Windows 10

1. To exit Safe Mode, open the System Configuration tool by opening the Run command (keyboard shortcut: Windows key + R) and typing msconfig then Ok.

msconfig safe mode

2. Tap or click the Boot tab, uncheck the Safe boot box, hit Apply, and then Ok. Restarting your machine will exit Safe mode.

Found this guide useful? We have many more posts like this one in our Windows 10 help, tips, and tricks page.

How to prevent Windows 10 upgrade files from downloading automatically on your PC

$
0
0

Windows 10 has been out for several weeks, and it has already proven to be a great operating system, as it's getting closer to the 100 million upgrades mark. Aside from all the great new features, perhaps one of the best selling points is that it's a free upgrade for those running a genuine version of Windows 7 or Windows 8.1.

Getting the free upgrade turned out to be a straightforward process. You simply launch the "Get Windows 10" app from the notification area, you reserve your copy, and then you're good to go. When it's your turn, you'll get notified, and after a few clicks your PC will upgrade to Windows 10.

The unpleasant news for some folks is that if you're happily running Windows 7 or Windows 8.1, and you want to delay the upgrade, or you simply don't like the operating system, Microsoft will download the upgrade files regardless of what you want.

For users who are simply procrastinating the upgrade may not be a big deal. But for those not planning to upgrade, they have limited storage space or metered internet connection, this can be an issue as the download can take up to 6GB, which it's a significant amount of space to store an update.

As such, in this guide we'll go through the steps to prevent Windows Update from downloading the Windows 10 upgrade files and reclaim the used space.

Verifying the download already exists

First, you need to see whether the upgrade files are already in your system. To do that you need to verify if the $Windows.~BT folder exists on your hard drive.

  1. It's a hidden folder, so you need to open File Explorer, and from the ribbon menu, navigate to View, and click on Folder Options.
  2. Go to View and under "Advanced settings" make sure to check Show hidden files, folders, and drives.
  3. Click Apply and OK.
  4. Go your main Windows drive and you'll now be able to see if you have the $Windows.~BT folder. If the download has already completed, checking the properties of the folder, you'll notice it's taking between 3GB to 6GB of your local storage.

Stopping Windows Update from downloading the files without your approval

Stopping the Windows 10 upgrade files from automatically downloading without your approval will slightly different if you're running Windows 7 or Windows 8.1.

  1. Open Control Panel and navigate to Programs and features.
  2. From the left pane click the View Installed Updates link.
  3. If you're running Windows 8.1 Update look carefully for these updates: KB3035583 and KB2976978. If you're running Windows 7 Service Pack 1 look carefully for these updates: KB3035583, KB2952664, and KB3021917.
  4. Right-click each update and from the context menu click Uninstall.
  5. If you're asked to restart, simply click to do it later and continue uninstalling the updates.
  6. Reboot your computer.

Now that the updates are out of the system, we need to tell Windows Update that we don't want to install those updates in the future.

  1. Open Control Panel, go to Windows Update, and click Check for updates.
  2. From the left pane, click on Important to view those updates.
  3. Depending on your version of Windows look for the updates we have mentioned above, right-click on them, and click Hide update. This last step will block the service from re-downloading the updates in questions. (The image below will show you an example on how to hide the updates.)

Reclaiming your storage space

Now, it's time to reclaim your disk space. You could try simply deleting the $Windows.~BT folder, but you might encounter some permission problems. Fortunately, there is an easier way:

  1. Open the Run command and type cleanmgr /sageset:11 and press Enter.
  2. While in the Disk Cleanup utility, click the Clean up system files.
  3. Select the Temporary Windows installation files.
  4. Click OK to complete the cleanup.

It's really important to note that when you're ready to install Windows 10, you'll need to go to Control Panel > Windows Update > Restore hidden updates to unhide the updates so they can download and install once again in your system.

The guide we went through today should help to block the upgrade files from downloading automatically. However, this shouldn't be categorized as an issue or as anything new. Microsoft has previously said that to prepare customers to upgrade to Windows 10, those who opted in to receive automatic updates will eventually receive the files automatically for future installation.

If you want to know more about this story, I would encourage you to read Daniel's: Exclusive: Bad IT admins reveal that Windows 10 downloads to your PC, which goes into details on the real problem.

Additional Resources

Remember that we have many other articles on Windows 10, if you need help you always check these for more information!

Our definitive review of Windows 10

Windows 10 on Windows Central – All you need to know

Windows 10 help, tips, and tricks

Windows 10: Help and discussion forum at Windows Central

How to reverse scrolling direction in Windows 10

$
0
0

Type Cover Mx Master

One of the first things I do when setting up a new Windows 10 PC is reverse the scrolling direction. When I scroll down with the mouse or touchpad, I want the page to scroll down. It seems more "natural" to me. Of course, many others will disagree and prefer the default direction. Either way, reversing the scrolling direction is as easy as turning on a switch.

1. Go to Settings (keyboard shortcut: Windows + I) > Devices

Settings Devices

2. Select Mouse & touchpad, and then turn on the setting Reverse scrolling direction.

Scrolling direction

That's it! We told you it was easy. While it seems more logical to flick up on your mouse or touchpad to scroll up, the default scrolling direction (flick up to scroll down) on Windows 10 mimics the way you swipe on touchscreens.

Are you happy with the default scrolling direction on your Windows 10 device or will you be reversing the direction? Sound off in the comments!

Note: Your Windows 10 device might need a Precision touchpad to have this option. To find out if your PC has a precision touchpad, go to Settings > Devices > Mouse & touchpad. Look for the message, "Your PC has a precision touchpad."

How to get free and premium DLC cars in Forza Motorsport 6

$
0
0

How to get free and premium DLC cars in Forza Motorsport 6

Forza Motorsport 6 has launched at last. The latest in Microsoft's racing simulation series, Forza 6 includes over 450 cars, 26 tracks, realistic rain and fog, and night racing. With a 70+ hour career mode, new online leagues, and 24-car multiplayer races, it's safe to call this the biggest and best mainline Forza yet. But we can always want more, right? That's where downloadable content (DLC) comes in!

Early editions of Forza 6 include a free DLC pack called the 'Ten Year Anniversary Car Pack.' Microsoft also offers the 'Fast & Furious Car Pack' for $9.99. Downloading either pack will unlock the cars it brings, but they don't just show up in your garage. Read on for a quick guide to grabbing your DLC rides in Forza Motorsport 6!

How to get free and premium DLC cars in Forza Motorsport 6

Getting the Ten Year Anniversary Car Pack

If you bought the retail version of Forza Motorsport 6 at launch, a download code for the 'Ten Year Anniversary Car Pack' should have been included in the package. The pack includes ten cars decorated in special Forza livery.

Downloadable versions will have included it as a bundle with the main game, so you won't need to deal with codes. To actually start the download, follow these steps:

  • Highlight the Forza 6 tile on your Xbox One's home screen or from the My Games & Apps list.
  • Press the Menu/Start button on the Xbox One controller and select Manage Game
  • Scroll right and select Show all add-ons
  • Pick the 'Forza 6 Ten Year Anniversary Car Pack' and choose to Install
  • That's it!

How to get free and premium DLC cars in Forza Motorsport 6

Picking up your cars

Now that you own the 'Ten Year Anniversary Car Pack' (or any Forza 6 DLC car pack), you'll want to pick up your cars and get racing. Here's what to do:

  • From the main Forza 6 menu, scroll right two screens to the Cars menu
  • Choose to Find a Car

How to get free and premium DLC cars in Forza Motorsport 6

  • Any DLC cars available to you will be listed along the left side of the screen under Free Cars
  • Select the car you want
  • Choose a design! If you'd like the car to wear a community-crafted design, simply scroll left and right until you find a design that suits you

How to get free and premium DLC cars in Forza Motorsport 6

  • If you'd rather have the default design (and the 'Ten Year Anniversary' cars all have special designs), press the Y button for Colors and pick from the official color designs
  • Buy the car (for free) and it's yours to drive!

How to get free and premium DLC cars in Forza Motorsport 6

  • Repeat until you've claimed all available free cars for your garage
  • To hop into a car and race, choose the car in My Cars and then head to Free Race

How to get free and premium DLC cars in Forza Motorsport 6

Getting more car packs

At launch, Microsoft offers three premium car packs for Forza 6. You can be sure that more packs will follow!

  • 'Forza 6 Fast and Furious Car Pack'– Price: $9.99
  • 'Forza 6 Car Pass'– Price: $29.99 (Includes six car packs to be released monthly, for a total of 42 cars)
  • 'Forza 6 VIP Membership'– Price: $19.99 (Includes five cars, doubles credit earnings, free gift cars, and more)

We'll try to review the Car Pass and VIP Membership soon. In the meantime, check out our detailed Forza 6 review with 60 FPS video review.

Stay tuned for more Forza 6 guides from your pals at Windows Central!

How to manually add internet APN settings in Windows 10 Mobile

$
0
0

Windows 10 APN settings

Your Windows 10 Mobile device normally recognizes the SIM card you are using, and you shouldn't need to change anything to have a working data connection. However, if you are experiencing problems connecting after inserting a new SIM card, you can check to make sure you have the correct Internet APN settings. We'll show you how to manually add your carrier's internet APN settings.

1. Go to Settings (swipe down from the top of the screen and tap All settings).

2. Tap Network & wireless, Cellular & SIM, and then SIM settings.

APN Settings

3. Scroll down and tap Add Internet APN

4. Fill in the blanks with data from your carrier. For example, here's what to include if you have AT&T:

  • Profile: Anything you want
  • APN: phone

5. Leave everything else and then tap save. Tap the back button to go back to SIM info.

6. Scroll down and tap the profile name you typed above. Tap Apply. When you see the word Activated, you are good to go. Go ahead and test your connection.

APN Settings

I followed these steps to add the AT&T APN settings to the Lumia Icon from Verizon. The data connection works, but LTE isn't supported. You can find your carrier's APN information from their websites.

Found this helpful? We'll have more guides like this as we get closer to the official launch of Windows 10 Mobile.

How to change the email signature in Outlook for Windows 10 Mobile

$
0
0

Outlook Signature

When sending an email on Outlook for Windows 10 Mobile, a signature is automatically inserted by Microsoft. It says, "Sent from Outlook Mail for Windows 10." If you don't mind having that in all your emails, then move along… nothing to see here. However, continue reading if you want to remove or change the default signature.

  1. Open Outlook and tap the hamburger button on the top left corner.
  2. Tap Settings (gear icon) on the lower right corner and then select Options.
  3. Scroll down to the Signature option. You can edit the signature or completely turn it off. You can have a different signature for each account. Just tap the dropdown menu at the top to switch to other accounts.

Outlook Windows 10 Mobile

I like using signatures on emails sent from my phone. I use "Sent from Windows 10 Mobile." It's one way of telling the person I'm emailing that I'm not in front of a computer to write a long or more detailed email.

Do you use an email signature on your phone? Let us know what is it in the comments!

How to use the Windows RT 8.1 Start menu

$
0
0

On September 15, Microsoft quietly began rolling out the third and last major update for its Windows RT operating system. As we have been expecting, Windows RT 8.1 Update 3 brings the new Start menu and a few other improvements to the now retired OS.

The update KB3033055 is available now through Windows Update for every Windows RT devices, which mainly will include Surface RT, Surface 2, and the Nokia Lumia 2520.

The new Start menu was designed to replace the Start screen and still be able to access all your Windows RT 8.1 apps.

The Windows RT Start menu looks similar, but it's not identical to the Start menu you will find on Windows 10. As you can see in the images, the menu looks more like the one in Windows 7.

If you look closely, you will notice that the Start menu actually looks pretty similar to the menu Microsoft showed off at the Build conference in 2014 when we were expecting to see the new Start menu follow the Windows 8.1 Update. It never happened and it looks identical to the Start menu design that appeared on early builds of Windows 10 Insider Preview.

There is a good reason Windows RT is getting this version of the Start menu. The Start menu we see today on Windows 10 was written on XAML and it uses new API's which are not found in Windows 8.

Let's see more details and how to set up the new menu:

Getting the new Start menu

Getting the new Start menu involves making sure you install update KB3033055. If you don't see the update, make sure to check the Optional update section, install the update, and you are good to go.

Enabling and disabling the Windows RT Start menu

Microsoft isn't replacing the Start screen by default, as such once you have installed Windows RT 8.1 Update 3:

  1. Right-click on the Taskbar and click Properties.
  2. Navigate to the Start menu tab.
  3. Make sure you check the option Use the Start menu instead of the Start screen. If you want to go back to the Start screen, you will need to reverse this step by clearing the Use the Start menu instead of the Start screen check box.
  4. Click OK to save the changes.
  5. Finally, you'll be prompted to sign out and sign back in to complete the process. Go ahead and sign out and in again to enable the Start menu.

Understanding the sections of the Start menu

Once you have disabled the Start screen, clicking the Start button will reveal the new Start menu. The new menu for Windows RT 8.1 includes six main sections:

Image credit Microsoft

Header (1): Here's where you'll see your profile picture and name, and you'll have access to the Power button options.

Pinned List (2): Like in Windows 7, this area is where you'll see all your pinned applications (traditional and modern apps) with Jump List support.

Most Frequently Used Applications lists (3): As you use applications, the once you use the most will be listed here.

All Apps (4): Similar to Windows 10, this button will get you access to all the applications installed in your system.

Search text box (5): While Windows RT 8.1 Update 3 doesn't bring Cortana to the operating system, you will get a traditional search box to look for files, folders, applications, and settings just like in Windows 7.

App grid (6): The App grid is your Windows 8 tiles section. In this area, you can easily pin Windows RT and supported traditional apps.

Managing apps on either side of the menu

Managing the Start menu on Windows RT is as easy and familiar like in Windows 7 or Windows 10:

To pin or unpin apps to the App grid:

  1. Find the app that you want to pin to the App grid in the "All apps" list, do a search, or select and app from the "Most Frequently Used" list.
  2. Press and hold (or right-click with your mouse) the apps and simply select Pin to Start.
  3. Unpinning is as easy, simply press and hold or right-click the app with the mouse, and select Unpin from Start.

To pin or unpin apps to the Pinned List:

  1. Find the app that you want to pin to the App grid in the "All apps" list, do a search, or select and app from the "Most Frequently Used" list.
  2. You can drag your apps directly to the Pinned List, or you can hold down the Shift key, press and hold (or right-click with your mouse), and select Pin to Start list.
  3. Unpinning is as easy, simply press and hold or right-click the app with the mouse from the Pinned List, and select Remove from this list.

App pinning to the "Most Frequently Used" list happens automatically as you use apps in Windows RT 8.1, but if there is ever app you don't want to see listed, simply press and hold, or right-click, the apps and select Remove from this list.

Remember that you're not upgrading to a new operating system, you're still running Windows RT 8.1. As such, the app tiles that you pin to the "App grid" also support different sizes, which means that you can press and hold a tile and choose one of the supported sizes (small, medium, wide, and large).

The Start menu included with Windows RT 8.1 Update 3 also allows you to rearrange apps on the App grid, Pinned List, and Most Frequently Used list. Simply find the app you want to relocate and drag it to the location you want. Also, you can drag apps between these areas.

Here're a few things worth noting

In case the apps you pin exceed the viewing area, the Start menu will provide a scroll bar to access all the apps. Also, any apps that are pinned to the Taskbar, Pinned List, or App grid won't appear in the Most Frequently Used list. Any apps you removed from this list will no longer appear.

As you know, Windows 8.x comes with two versions of Internet Explorer (desktop and modern). Now that Microsoft is changing how things work on Windows RT, it's important to know that depending from where you're launching the web browser you'll get a different version.

If you pin Internet Explorer to the Taskbar, Most Frequently Used list, or Pinned List, then the desktop version of the IE will open. Now, if you pinned the browser to the "App grid" and you click this tile, and then you will open the modern version of Internet Explorer.

Also, Windows Store apps that need to open a web page in the browser will use the modern version of Internet Explorer.

If you want to change this behavior, head over Control Panel, open Internet Options, navigate to the Programs tab, and change the settings under Opening Internet Explorer area.

Wrapping things up

Without a doubt, this is a welcome addition to the operating system and more now that Microsoft has announced that devices running Windows RT won't upgrade to Windows 10 or Windows 10 Mobile. The downside is that unlike Continuum for Windows 10, you're required to sign out and sign back in to switch between the Start menu and the Start screen, which could be a little problematic when removing the keyboard from the tablet. You'll be forced to close all running applications.

While the new Start menu doesn't have the same design as the menu in Windows 10, it's still a great design, and in many cases users will feel even more comfortable using this menu.

Do you own a Windows RT device? Are planning to switch to the new Start menu? Tell us what you think in the comments below.

Images credit @teroalhonen


How to get and apply custom decals in Forza Motorsport 6

$
0
0

How to get and apply custom decals in Forza Motorsport 6

Forza Motorsport 6 has launched at last. The latest in Microsoft's racing simulation series, Forza 6 includes over 450 cars, 26 tracks, realistic rain and fog, and night racing. With a 70+ hour career mode, new online leagues, and 24-car multiplayer races, it's safe to call this the biggest and best mainline Forza yet.

For creative gamers, a big part of the Forza series' draw is creating custom decals and car designs. Forza 6 does not disappoint, offering the same robust editor as found in Forza 4 and 5. Users can even share and download their designs, making it easy to decorate your car with community designs. This guide will walk you through downloading custom decals and applying them to your cars.

Forza 6 Birth Movies Death car decal

Why custom decals

The designs players can apply to their cars in Forza 6 are referred to as decals, vinyls (yes this is a word), or layer groups. We'll mostly call them decals because I like to imagine that our custom designs actually get turned into stickers that people will apply to their cars. Also, the word vinyls makes some people cranky.

We're saving decal creation for another guide, so this one focuses entirely on how to get decals made by others and apply them to your vehicle of choice. You don't need to be creative or invest a lot of time when applying existing vinyl designs, so anybody can do it in a snap.

Forza 6's menus are a bit clumsy and confusing as far as procuring decals, but there are two ways to get them. Either go to Create Vinyl Group or Paint Car. Use Create Vinyl Group when you want to find designs for future use. Pick Car painting when you want to apply designs directly to your car.

Car painting is the more streamlined approach, so that's what we'll explain.

How to get and apply custom decals in Forza Motorsport 6

Getting custom decals

  • From the main Forza 6 menu, head right four pages to Customize.
  • Select Paint Car.
  • Go to Car Select and choose the car you'd like to Customize. If you already have that car selected, skip this step.
  • Select Apply Decals.
  • Choose which side of the car you'd like to decorate. Use the LB and RB buttons to switch sides and surfaces.
  • Pick New Layer and then Apply a vinyl shape. If you already downloaded or created the decal you want to use, you could Load a layer group instead.

Forza Motorsport 6 vinyl select

  • From the Vinyl Select menu, you can press LB to view a small selection of custom designs or use RB to browse the default shapes and letters provided by Turn 10.
  • To really personalize your car's appearance, you'll want to search for custom decals. Press the View/Back button to Search.

Forza Motorsport 6 Vinyl search

Using the Vinyl Search menu

The Vinyl Search menu has four meaningful criteria to help you find designs. You can ignore the Max Layers field as it's basically useless.

  • Keyword 1 and 2 allow users to browse designs by category. Set Keyword 1 to see all of the designs within that category. Set Keyword 2 as well to narrow the design results.
  • Creator is a great way to find designs that friends and people you know have shared. Search for EastX to find all of my designs - be sure to hit the X button and Follow Creator as well!
  • Description lets you search for specific keywords that appear in a vinyl's description. For instance, you can search for all designs with Mario or Zelda in their descriptions. This is the best way to find just the right decal when you already have something in mind.

Any designs you pick will be saved to your profile for later use, even if you end up removing them from the car. You can delete decals from your profile from the My Vinyl Groups menu.

How to get and apply custom decals in Forza Motorsport 6

Applying custom decals

Having selected a decal, you can now position it on your car. Use the following options to modify the decal's position and appearance:

  • Move: Slide the decal around as needed using the left analog stick or d-pad.
  • Size: Press RB to switch from Move to Size. Use the left analog stick or d-pad to adjust the vinyl's size. Setting the size to a negative value will flip the design 180 degrees, but it will not mirror it.
  • Spin: Press RB to switch from Size to Spin. Use the left analog stick or d-pad to rotate the decal.
  • Color: Press the Y button to adjust the color of the decal. This will change the design to a solid color, not adjust specific colors within the design. Use it to create shadows, silhouettes, etc.
  • Stamp: If you want to apply more than one of the same vinyl on the same side of the car, press the Y button to stamp as many copies of the decal as you'd like. If you only want to apply the decal once, press A instead.

Forza Motorsport 6 selecting multiple decals

More application tips

  • Adjusting multiple decals: You can adjust multiple vinyls at once by highlighting them. To select multiple specific decals, press or hold Right Trigger on every decal you want to select. Press RT again to deselect a decal. Alternately, select one decal and pick Highlight all layers to do just that. You can now perform mass adjustments from the Edit selected layers menu.
  • Changing decal order: Want to move a decal in front of or behind other decals? Highlight or place the cursor over the decal(s) to move and press the X button to Cut them. Now scroll left or right on the decal list and press the Y button to Insert the decal(s) in the desired place. You can also Insert decals on different sides of the car.

Forza Motorsport 6  mirrored decals

  • Mirroring decals: Forza 6 doesn't make it easy to mirror a design (flip it on the X axis), but there is a way! Apply the decal whose orientation you want to change to either the left or right side of the car. Then switch to the other side, pick New Layer, and choose Insert all from right/left side. Anything that faced right will now face left and vice versa!

When you're finished decorating your car, press the B button to access the Save menu. Choose Save to current car to complete and apply the design. If you're not working with other players' custom decals, you can choose Save to design catalog and share to let other players download your car design.

Forza Motorsport 6 Custom decals by EastX

Decorate your car with the Windows Central logo and more

Want to show your Windows Central pride when racing online? Then grab our logo decals and apply them to your favorite cars! I've created a large library of decals for our readers to enjoy, including logos and a variety of videogame sprite designs.

  • To see all of my decals, search by Creator for EastX. Be sure to hit the X button and Follow Creator as well!
  • To grab only the Windows Central logos, search by keyword for Windows Central.

Be sure to share screenshots and photos of your Windows Central-decorated car in the comments of this guide and our other Forza 6 articles!

Forza Motorsport 6 Ferrari 458 Speciale Windows entral logo

More Forza Motorsport 6 overage

Don't miss our other big Forza 6 stories!

Stay tuned for more Forza 6 guides from your good friends at Windows Central.

How to set an alarm in Windows 10 Mobile

$
0
0

Cortana Alarm

Setting an alarm on Windows 10 Mobile is really easy. When you swipe towards the app list, Alarms & Clock is usually on top, so it's hard to miss. We'll show you how to set an alarm whether you need to set it every day for work or need to make sure to wake up after a quick nap.

  1. Open Alarms & Clock and tap or click the Alarm tab.
  2. Tap the new button at the bottom of the screen. Alternatively, you can edit an existing alarm in the list by tapping it.
  3. Set the name, time, repetitions, sound, and snooze time for the alarm and then tap save.

Alarm

How to set an alarm with Cortana

You can also set an alarm using Cortana on Windows 10 Mobile. Here's how to do it:

  1. If you have Hey Cortana enabled, first say "Hey Cortana." Alternatively, you can tap and hold the search button.
  2. Say, "Set an alarm for [time]" or "Wake me up at [time]"

Cortana Alarm

That's it! Cortana automatically adds the time in the Alarms & Clock app. Do you use Cortana to set your alarms, or do you prefer to use the app? Let us know in the comments!

Note: Cortana is only available in certain countries/regions, and some Cortana features might not be available everywhere.

How to set up a Sonos system on Windows 10

$
0
0

Sonos Play:1

Microsoft's Groove is now officially supported on Sonos, the popular Wifi connected audio system. While there's no official app in the Windows Store, there is still an official, Windows 10 compatible desktop application.

Here, we walk you through every step to getting your new Sonos system up and running using your Windows 10 PC or tablet.

The first thing you need to do is download the installer for Windows. You'll find that at the link below.

Then follow these steps:

1. Install Sonos Controller

Sonos setup

A process as straight forward as it sounds. Once you've downloaded the file linked above, open it up and follow the onscreen prompts as shown in these images. You'll be asked to dictate where you want Sonos to install on your machine, but once you've clicked "Install" leave it a minute to do its thing.

2. Set up a new Sonos network

Sonos setup

If you're reading this chances are you're setting up for the first time. However, if you're just new to using Windows to control your system, you'll see this box when you open up the app for the first time, too. The difference is you'll just click "Connect to Existing System" and the app will find your setup on its own.

The option above, "Set up New System" is what we want here.

It's also important to note at this point that no matter how many units you're planning to install on your network, you can only add them one at a time. Once the system is set up it'll be a shorter process to add new players to it later on.

3. Choose your network type

Sonos setup

This determines whether you're just going to be using your local Wifi network to connect the speakers together, or if you're using additional Sonos hardware to create a proprietary one. If you have a Sonos Boost or Bridge, for example, select "Boost Setup." But since we're looking at Wifi we're going to go ahead and select "Standard Setup."

4. Plug it in, but only the power

Sonos setup

No, really. OK, you plugged it in straight away, but there's an additional reminder here. Power is good (of course) but Ethernet is less so. So if you went ahead and connected your first bit of Sonos kit up to your router with a cable, pull it out.

If you need to connect via Ethernet at any time, setup will prompt you to to so.

5. Wait for the green light

Sonos setup

When you turn on your Sonos for the first time, in our case, a Play:1, you'll first see a white light. Then it'll go green. When you get the green light, hit "Next" and you'll be greeted with something that resembles the image above prompting a specific button press. Do it right and you'll hear a 'bong' indicating success.

Sonos setup

Then you just have to wait a little while for the app to connect to the player.

6. Set up your Wifi network

Sonos setup

Sonos requires a 2.4GHz 802.11 b/g network to operate. Providing you're good on this front, simply enter your local Wifi network details and hit "Next."

7. Designate a room

Sonos setup

Since Sonos is a multi-room system, to help you distinguish where things are you can assign a room to each speaker. The dropdown box has a whole bunch of selections to cover pretty much every eventuality.

Sonos setup

And that's it! You should now see something like the image above telling you that you've successfully added your first Sonos player. The system is now set up and from here you go forward and personalize as well as adding as many extra players as you want.

We'll be following up with a bunch more guides on how to get the best from your Sonos system with both Windows 10 and Windows Phone, so stay tuned.

How to remove the background picture on the Windows 10 sign-in screen

$
0
0

Windows 10 Sign-In

One of the new features on Windows 10 Insider preview build 10547 is the ability to remove the Windows background picture on the sign-in screen. Removing the picture is as easy as flipping a switch in the settings. If you need guidance, we'll show you how to do it.

1. Go to Settings (keyboard shortcut: Windows + I) > Personalization> Lock screen

Windows 10 Settings

2. Scroll down and turn off the option, "Show Windows background picture on the sign-in screen."

Windows 10 sign-in background

That's it! No, really… that's all you need to do. Instead of the default black and blue Windows 10 wallpaper on the sign-in screen, you'll see the solid color matching your theme. What would be even more awesome is if we have a built-in option to replace the image instead of just removing it. Hopefully, Microsoft will add that option in a future update.

Need more visuals? You can see this setting in our hands-on video for Windows 10 Insider preview build 10547.

Are you removing the Windows 10 wallpaper on the sign-in screen? Let us know in the comments!

How and why to use Bluetooth on your Windows 10 computer

$
0
0

We're rapidly moving from a wired to a wireless area very quickly as more people are switching to mobile devices, such as laptops, tablets, and phones, and moving away from traditional computers.

In these computing devices, we can connect all sort of accessories from headphones to speakers, mice, keyboards, and other peripherals that can connect wirelessly to virtually any device thanks to Bluetooth.

Bluetooth is now a ubiquitous wireless technology that transmit data back and forth between devices over a short distance. It allows you to get rid of cables around your desk.

Of course, Windows 10 includes support for Bluetooth. However, Microsoft is making it just a little bit easier to connect different peripherals with this wireless technology.

In this guide for beginners, we're going to look at how to connect any Bluetooth peripheral to your Windows 10 devices (of course, if your computer supports this type of wireless connectivity).

Connecting Bluetooth devices to Windows 10

  1. For your computer to see the Bluetooth peripheral, you need to turn it on and set it into pairing mode. It typically involves pressing and holding the Bluetooth button until you see a flashing light that indicates the pairing is ready.
  2. Then using the Windows key + I keyboard shortcut, open the Settings app.
  3. Navigate to Devices and go to Bluetooth.
  4. Make sure the Bluetooth switch is in the On position. (You'll know it is working because you'll notice the message that reads "Your PC is searching for and can be discovered by Bluetooth devices.")
  5. Select the device you want to connect and click Pair.

Once you click Pair, you're all done. Windows 10 will take care of the rest. You'll notice the "Connected" label under the device name.

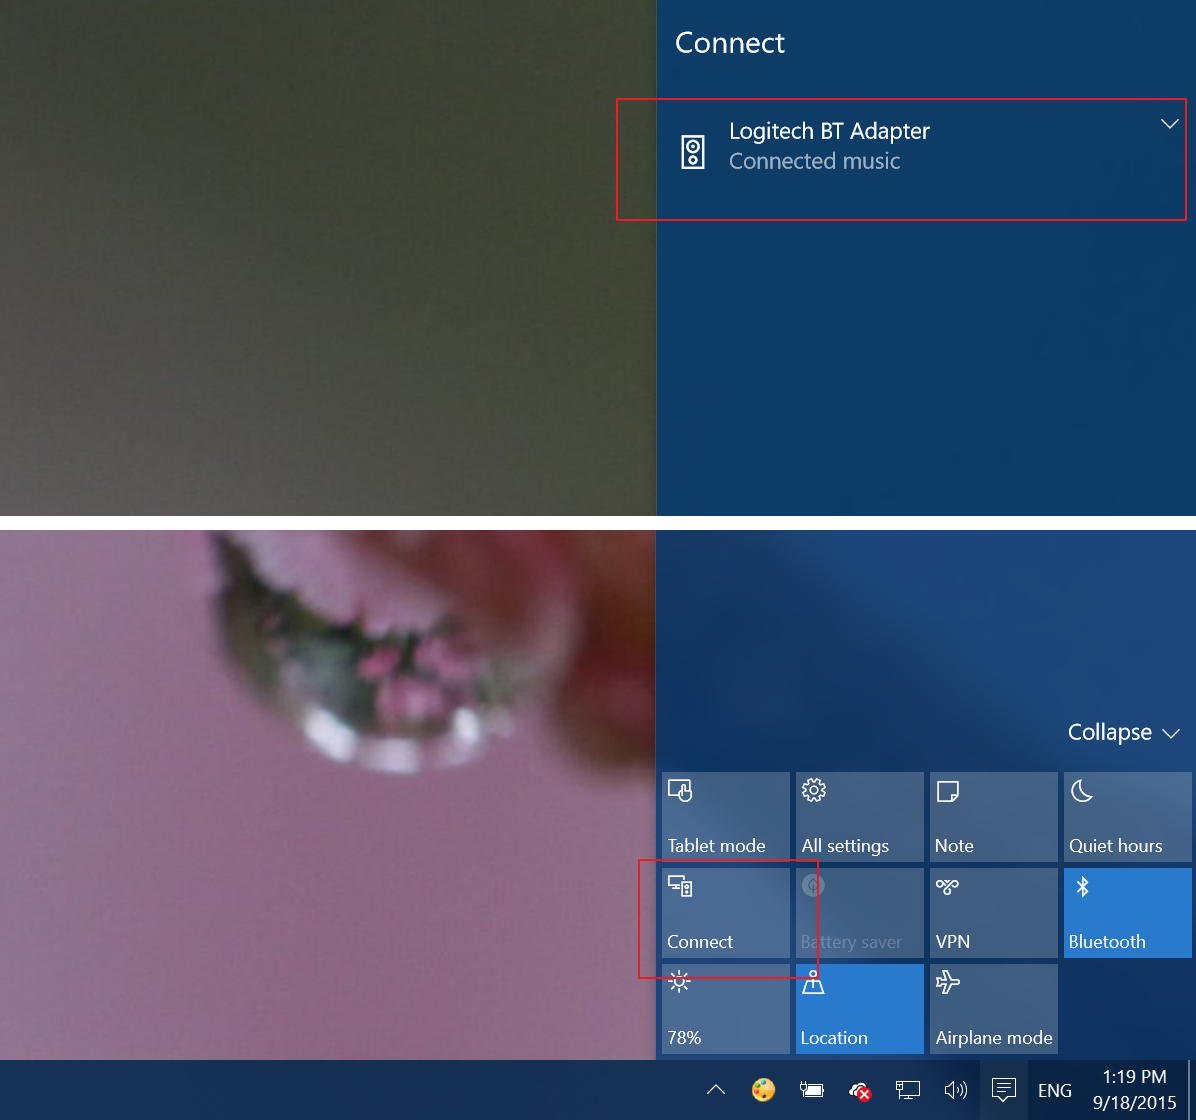
Alternatively, if you're simply trying to connect a Bluetooth audio or wireless display, you can simply do the following:

  1. In the notification area in the Taskbar, click to open the Action Center button (or use the Windows key + A keyboard shortcut).
  2. From the Quick actions area, click the Connect button.
  3. Then all the enabled devices will appear in the list, click on the device, and it should pair automatically.

Quick troubleshooting tips

If you don't see the Bluetooth section on Devices, chances are that there are issues with Bluetooth driver. Make sure to right-click the Start button, and go to Device Manager to verify the driver is present and installed correctly. If everything looks alright, but you don't see the option, you may want to download and reinstall the latest Bluetooth driver from your computer's manufacturer support website.

If the problem is with the speakers, headphones, mouse, or keyboard, make sure to turn the peripheral off, wait a few seconds, and turn it back on to try again.

Removing a Bluetooth peripheral from Windows 10

Disconnecting a wireless peripheral is as easy as connecting. Just follow the steps below:

  1. Use the Windows + I keyboard shortcut to open the Settings app.
  2. Navigate through Devices and go to Bluetooth.
  3. Click on the peripheral you want to disconnect, and click the Remove button and then click Yes to confirm.

That's all there is to it.

If you have come across issues using Bluetooth in Windows 10 and found a different workaround, make sure to share your solution in the comments below.

How to add Microsoft Groove to your Sonos system

$
0
0

Groove on Sonos

If you're an old Sonos pro then you'll likely already know how to achieve everything written here. But, if you're new or thinking of getting into Sonos, perhaps because Microsoft Groove is now supported on the system, we're here to walk you through adding your favorite music service.

A quick note: Many of the steps contained within this guide apply to the range of services available on Sonos. There are some specific differences when it comes to authentication, for example.

1. Open Sonos Controller on your chosen platform

We're using the desktop Sonos Controller app on Windows 10 for the purposes of this guide, but the steps should apply to whichever app you're using. Be that Android, iOS or Mac. Groove may not be available in third-party clients, so check your favorite before continuing.

2. Add a new music service

Add Groove to Sonos

In the app you'll see a list of whatever services are currently enabled on your Sonos system. In the Windows app these are on the right hand side of the main window. On mobile apps you may need to slide out a hamburger menu.

Wherever located, the option you're hunting for is "Add music services."

3. Select Groove from the list of available services

Add Groove to Sonos

Select Groove from the list and the resulting box will ask if you're an existing account holder or not. For the purposes of this guide we're going to assume you are and that you have a Groove Music Pass.

If you're not and you need guidance, check out the link below for everything you need to know.

Add Groove to Sonos

Existing account holders will then be presented with a unique URL that needs to be opened in a web browser. It helps identify your system at the next step.

4. Authorize your account for Sonos access

Add Groove to Sonos

The URL you were given in the previous step will take you to a sign in page for Groove. Enter the account login and password for the Microsoft account attached to your subscription.

You'll see this message providing everything went to plan.

And that's all you need to do. When you go back to the Sonos app you'll see all of your Groove Music Pass music there to stream directly to your system.

To confirm, you do need a Groove Music Pass to use this feature, it doesn't appear at this time that your personal, cloud stored music is accessible on Sonos through Groove.

How to use one-handed mode in Windows 10 Mobile

$
0
0

One Handed Mode

One of the features I like on Windows 10 Mobile preview is one-handed mode. Just tap and hold the home button and the whole display moves down to half the size, letting you navigate and interact with links or buttons with just your thumb. This feature isn't unique to Windows 10, though. It was introduced with the iPhone 6 and iPhone 6 Plus by Apple as Reachability. How does it compare with the one-handed mode on Windows 10 Mobile? We'll show you.

Windows 10 Mobile one-handed mode

Tap and hold the Windows button to enable one-handed mode. You can use your thumb to scroll, tap, and interact with the items that are usually on top, but is now more reachable in one-handed mode. Previously, this feature was limited to devices with screens that are 5 inches or larger, but it is now available on all devices running Windows 10 Mobile. The top half of the screen turns black. Things go back to normal if you tap the black part of the screen, don't touch anything for a few seconds, or tap and hold the Windows button again.

Compared to iOS reachability

One-handed mode in the iPhone 6 and 6 plus is called Reachability. The screen will lower in order to allow you to reach buttons and objects towards the top. You enable Reachability mode when you double-tap (not double-click) the Home button. Instead of plain black, iOS uses a darker version of the background photo. In the Home screen, however, the background stays put, while the icons move down. Things go back to normal after a few seconds of inactivity or touching the space on top.

iPhone and Lumia one handed

Going further

While we like one-handed mode on Windows 10 Mobile, we think it can be better. Instead of just a plain black space, we'd like the ability to see our background image instead. Also, on bigger devices, it'd be nice to have the screen shift towards the left or right in addition to moving down. You can see a similar behavior in the Samsung Galaxy Note 5.

Some readers at the Windows Central forums are really happy with the new one-handed-mode feature. How do you feel about it? What are some improvements you'd like to see?


How to create Groove playlists on your Sonos system

$
0
0

We've shown you how to get up and running with a new Sonos system with Windows 10 and how to get your Groove on and get set up with Microsoft's streaming service. So, you're enjoying your tunes now in potentially every room of the house. But did you also know you can create new Groove playlists from within the Sonos app?

Here's how. Again, as with other posts in this series we're using the offical Windows desktop application, so your mileage may vary in mobile and unofficial apps.

1. Select Groove as your chosen music source

Groove playlists on Sonos

2. Select "playlists"

Groove playlists on Sonos

3. Hit the "new playlists button"

Groove playlists on Sonos

4. Give it a name and hit "OK"

Groove playlists on Sonos

5. Put some music in it

Groove playlists on Sonos

Of course, a playlist with no music is pointless. But that's no worries. In the Sonos app you can explore and find music in almost the same way as in the dedicated Groove apps. Whether it's something in your collection or something you've find through search of general browsing, a right click in the Windows app is all you need. You'll then see an option to "Add to Groove Playlist." Click it and select the playlist you want.

This also means when you go back to the Groove app on any platform or on the web, the playlists you've just created and the music you added to them will have synced across. Simple!

How to set up a new Sonos system on Windows 10

How to add your Groove account to Sonos

How to start using eight of the new features in Microsoft Office 2016

$
0
0

Office 2016 has finally arrived on Windows. On September 22, Microsoft released the next version of the most popular apps for the office, and the suite is now available for Office 365 Home, Personal, University, Business subscribers, and for those who purchase the standalone version of the suite.

However, after installing Word, Excel, PowerPoint, OneNote, Outlook, and the other apps part of the 2016 suite, you'll notice that apps look very identical to the Office 2013 version with the exception that they now feature a new colorful theme. But, if you look closely, Microsoft is adding some new improvements and features that may change your mind and they will make you want to upgrade if you are a daily user of the apps.

For starters, Office 2016 is now moving toward the new servicing model we see with Windows 10. This change means that Office will never be considered complete. Instead, Microsoft will continue to release new updates with bug and security fixes and new features for apps as soon as they are ready. (So, if you're experiencing a known issue, be sure that it will be addressed in due time.)

Then we have the new features. Even though there are not a lot of them, there are quite a few, and in this new guide we're going to list some of them and how you can start using these new features.

Office 2016 features

1. How to share a file in Office 2016

The new version of Office is focusing on collaboration, which means that more than ever, the desktop version of Office depends on the cloud.

Before you can collaborate in real-time with other people you need to save and share your document using OneDrive and Office 2016 makes it easy -- just follow the steps below:

1- Open to edit or create a document in Word, Excel, or using any of the other apps.

2- On the top-right corner of the app, click the new Share button. (Assuming, you're sign-in with your Microsoft account you'll see the following pane.)

3- Click Save to cloud, you'll then be redirected to the "Save As" section, pick you OneDrive account and the location to store the file.

4- In the Share pane, you can invite people by simply typing their email address or accessing your contact list. You can also change the share permissions to edit or view only.

5- Then add a message describing the document or any note you want to communicate to those who can access the file, and click Share.

If you don't want to use this sharing mechanism, you can click the Get a sharing link at the bottom of the Share pane to get the edit or a view link of the file. With this link, you can copy and send it via email, IM, or by other means.

2. How to collaborate in real-time

Once you have shared the document through OneDrive, people with the editing permission can simply open the file with the desktop version of Office 2016 or Office Online and start collaborating automatically -- just like that.

If you're the person who has created and shared the document, you'll also get a notification alerting you that other people are editing the document. You'll be prompted whether you would like to share automatically changes as they happen. If this is something you like, simply click Yes on the alert.

Yes, it's amazing that you can collaborate in real-time with other people from the desktop and web version of the apps. However, this doesn't mean you can just jump to any line and edit whatever you want.

When you're collaborating in real-time, you can only work and edit your content or any other content the other person isn't already editing. For example, if you're working on a paragraph, you can keep editing that content. But you can't edit another paragraph that is being edited by someone else until that person jumps to another new paragraph.

If there is something you need to communicate with the other person, go to the Share tab. This action will list all the people that are currently editing the file. Then hover over the person you want to contact and you'll see the choice to IM, voice, video chat, or send an email.

Note: Keep in mind that you'll need to have Skype installed and setup before you can start a conversation.

3. How to use Smart Lookup

Another feature included in the Office 2016 apps is Smart Lookup. This feature is similar to the one you'll find in Microsoft Edge when you ask Cortana for assistance in the web browser. The Smart Lookup allows users to research specific content using the web information through the Insights functionality.

If you need to know the definition of a word, or you need to research a place or a person, or you simply want to know more about something specific. Instead of using the web browser and leaving the document, simply select and right-click the text you want to research, and select Smart Lookup.

4. How to use Tell Me

Although, there aren't many new features in Office 2016, over the years Microsoft has been adding a lot of new features and even has added new apps (e.g., Sway and Planner). So, today is becoming more difficult to track and remember where a feature or a button is located within the app. This is when Tell Me becomes very useful.

Tell Me sits on the tabs menu of every Office 2016 app. To use the feature, simply click on "Tell me what to do", and type what you want to know, such as commands you can't find or options you want to configure.

On the results, you will have instant access to the feature you're seeking. From the results, you can also get more help from the online Office documentation, and you can even jump right to Smart Lookup.

5. How to import web data into Excel

In previous versions of Excel when you needed to import data from the web, you needed to do the work manually by copying and pasting all the data and reformat everything on the document. Depending on the data, this could result in a lot of work.

In Excel 2016, Microsoft is adding an easier way to make it all happen simple and fast. If you need to grab a specific piece of data such as tablet with content, you need to follow these steps:

1- While in the web browser, visit the webpage that has the data you want, right-click and copy the link to the clipboard.

2- Open Excel and go to Data tab.

3- Click on New Query, select From other Source, and click on From Web.

4- On the next window, paste the source link and click OK, and select how you want to access the data, and click connect.

5- Excel 2016 will open the "Navigator", and it will load the data available from that web page, click on the table you would like to import, and click Edit.

6- Now, Excel will fetch the data. Because this is an automated process, and data from the web isn't very reliable, you can easily clean up the table before inserting the data into your new document.

You can right-click on one of the columns to remove, or you can click the top-left corner of the table to convert the first row as headers, and much more. When you're satisfied with the data, click the Close & Load button.

Now that the table is in Excel 2016, you can manipulate the data any way you want by using graphs, formulas, and more.

Tip: Furthermore, now that you have imported data from the web, Excel will save the source link into the file. This ability means that you can right-click the table and clicking Refresh. If the data has changed on the web, you will see the new data also updating in your table. This feature is particularly useful if you make any changes, and you want to roll back to the original data.

6. How to use new charts in Excel 2016

Microsoft is also adding some new charts (Waterfall, Histogram, Treemap, Pareto, Box & Whisker, and Sunburst) for Excel, Word, and PowerPoint.

If you want to analyze the data using the new charts, you need to do the following:

1- Create a table and select its content.

2- Go to the Insert tab, and choose from one of the new charts.

If you want to use the sunburst chart, you'll need to create a table in a hierarchy. The first column should be to enter general categories, the second column should contain subcategories, and the third column should more specific details, and a fourth column should contain numbers, such as pricing, products sold, etc. Then select the table's content and from the Insert tab, click the new Sunburst chart.

7. How to attach OneDrive files to Outlook 2016

In Office 2016, Microsoft is also improving many aspects of Outlook 2016. For example, in the new version you can attach a recent file you have been working on to a new message. To do so simply click the Attach File (paperclip) button and you'll see a list with all the recent files. Then just pick the file and you're good to go -- no more spending time browsing your computer for a specific document.

Also, the software giant is making it very simple to attach OneDrive documents. The attachment works in the same way as a local file, but for OneDrive files, Outlook 2016 will create a special cloud attachment link. When the recipient double-clicks the attachment, the document won't download and open with the default app. Instead, the document will open in the web browser.

8. How to use the Groups feature in Outlook 2016

As part of Office 365, last year, Microsoft introduced Office 365 Groups, which enables users to create different types of groups to allow people to communicate easily while collaborating on new projects. Now, as part of Office 2016, the company is integrating Groups into Outlook 2016 to make it easier to group people and contact each other on an IM like environment. This ability differs from the typical back and forth emails and hunting messages on an already clutter inbox.

There is also now a Windows Phone app for Outlook Groups too.

In Groups, people can chat, share OneDrive files, calendars, and OneNote notebooks -- all you need to get your project done.

Groups on Outlook 2016 is only available for Office 365 subscribers, and you can get started by following these steps:

1- While in Outlook 2016 using an Office 365 subscription, click the New Items button in the "Home" tab, and click on Groups.

2- In the "Create Group" page, by choosing a name and group ID, and setting the groups as private or public, and then click OK.

3- Find and app new members to the group and add a description as necessary and click OK to finish creating the group.

It's that easy. The newly created group have access to a shared inbox and shared calendars to view and create meetings, files hosted on OneDrive, and to the OneNote notebook for the group, right from the ribbon's menu.

If you need to send a group message, simply click the New Conversation button from the "Home" tab. Then compose the message and attach a new file as necessary, and click Send -- just like any other email you send every day.

The group members can post messages, and there is a choice to like updates for those messages that don't need replies.

Outlook Groups is available for Windows PCs and phones through the mobile app that you can download here:

Download Outlook Groups for Windows 10 Mobile / Windows Phone 8.1

Wrapping things up

While the features and changes aren't massive in Office 2016, this version of the most popular suite of apps still represents a major milestone for Microsoft. This update includes significant changes that should make work a lot easier for Office 365 subscribers and in particular for business users.

Of course, if you're a regular user that only needs a canvas to write a document or a spreadsheet to manage your household finance without sophisticated features, you can always opt for Office Online or other platforms such as Google Docs with Google Drive integration. These services are free, but the new features are a welcome addition to Office 2016 that many customers will appreciate.

If you're not an Office 365 subscriber, you can get a the Personal edition for $70 per year or Home edition $100 per year. With these versions, you can install Office on up to five devices, or Office Home & Student 2016 (one-time purchase) for $150. (For more info, visit https://www.office.com.)

Do you think it's worth the upgrade? Which feature do you like the most? Let us know in the comments below.

How do you scan QR codes and barcodes in Windows 10 Mobile?

$
0
0

One question we see a lot of around these parts is how do you scan QR codes in Windows 10 Mobile?

Back in the days of Windows Phone 8.1 you could just launch the camera and dive into Lenses for Bing Vision. That app from Microsoft included a nice QR and barcode scanner, but it has since been deprecated and is not even in Windows 10 Mobile.

Unfortunately, for now, the short answer to the QR question is you need a third-party app in Windows 10 Mobile. Seeing as Windows 10 Mobile is not yet complete Microsoft could still cram one in somewhere. However, we don't see this feature exactly being a priority for them either.

So, what to do?

To be clear, there are easily a dozen or so QR and barcode scanning apps found in the Store. Most range from the super simple and free to a full-featured one for $1.99 or more. Today, I'm going to focus on the two I find most useful and reliable, both from the same company. One is free, the other more feature complete one runs for $1.99 (but it runs on Windows 10 desktop as well for tablet owners).

QR Scanner RS (Free)

For myself, QR Scanner RS is likely one of the better free ones on the market. It's fast, and it has a few features on board including letting you pick your search provider and adjust some camera settings too. The app is no-frills, but it has zero ads, launches quickly and you can donate 99 cents to the developer to buy them a cup of coffee.

Now, I'm not saying I have tried every QR scanner out there, but I like this one so far under the free category. If you are looking to scan QR codes for Windows Store apps or basic barcodes for products you can't go wrong. There is an occasional nag to rate the app in the Store, but I can't fault a dev for that as these apps live or die by your votes and reviews.

QR Scanner RS is available for Windows Phone 8.1 and Windows 10 Mobile devices. Remember, if you like it give the dev a good review and maybe throw them 99 cents for a coffee.

Download QR Scanner RS (Free)

QR: Qrscannerrs

QR Scanner+ ($1.99)

If you are looking for something a little more powerful, actually a lot more, then grab QR Scanner+. The app is unsurprisingly made by the same dev who makes the above QR Scanner RS. Considering I liked the free one so much, its paid bigger version should not be a shock.

So what does QR Scanner+ do that makes it worth the $1.99? Probably the best feature is the ability to control how fast the scanner goes using the camera. Indeed, you can pin a Rapid Scan tile to your Start screen, and this version of the app is so fast to scan you may miss it if you blink. Just look at a sample of the Settings and you may be shocked that a QR scanning app could offer so much.

This app can also handle more codes, including:

  • URL
  • contact information / business cards (vCard, meCard, bizCard)
  • calendar event / appointments (vEvent)
  • geo-location
  • eMail address
  • eMail message
  • phone number
  • SMS
  • WiFi
  • text
  • SEPA Credit Transfer (Giro Code)

Now, the question is, do you need all of that? If you are just scanning QR codes for the Windows Store then no and grab the free one above or something else. However, if you want the most full-featured QR scanner out there is, then this may be your app.

There're two other things to note:

  1. QR Scanner+ has a free seven-day trial, so feel free to give it a go
  2. QR Scanner+ runs on Windows 8.1 and Windows 10 tablets and PCs too

You may not need a QR scanner for your Surface, but hey, I like the idea that this works everywhere for my $2. Anyway, give the trial a shot and see if it meets your needs.

Download QR Scanner+ ($1.99, free trial)

QR: qrscanner+

Don't like my choices for QR or barcode scanners? Fair enough. Shout out in comments what you like better and let others know too (and why you think it's better!).

Four things you might have forgotten to do after installing Windows 10

$
0
0

Windows 10 is out the door, and millions of users have already upgraded to the latest version. In part is because the new operating system packs a lot of new features, such as a more useful Start menu that combines part of the Start screen in Widows 8.x and functionality found in Windows 7. The Action Center, which is the new centralized location to review system and apps notifications. There is also the new Settings app that slowly begins to replace the Control Panel; Cortana arrives on the desktop with Windows 10 as well, and many new features.

However, it's also helping to the fast adoption that Microsoft is making the operating system a free upgrade for computers running a genuine copy of Windows 8.1 and Windows 7 Service Pack 1.

Today, in this new Window 10 help guide, we're going to go through a few things you might have forgotten to do after installing the operating system. These tips are also useful information for those who are planning to upgrade to Windows 10 in the near future – perhaps when Windows 10 Threshold 2 releases, as the operating system will be even more stable.

1. How to rename your Windows 10 PC

Since the beginning, users had the ability to name their computers anything they want, and it has been relatively an easy task to do for some people. Most of the time, users will simply choose a name during the installation process, but if you're performing a clean install of Windows 10, you'll notice that you won't be prompted to choose a computer name.

For some reason to speed up the installation process, Windows 10 will randomly name your computer on your behalf, instead of letting you pick a custom one.

In previous versions of Windows, you needed to go to System Properties in Control Panel to rename your computer, and while it's still true in Windows 10, for regular users this can be considered an advanced task to perform.

However, the new operating system also includes the Settings app. This is the centralized location that hosts many of the Windows 10 configuration options, (eventually, it will host all the Control Panel options, but it will take time until that happens). It makes a lot easier to configure many aspects of the operating system, including renaming your PC.

If you like to know or change your computer name in Windows 10, do the following:

1- Open the Settings app by clicking the Start button and clicking Settings, or use the Windows + I keyboard shortcut that will get right into the app.

2- Go to System and navigate to the About page.

3- On the About section, like in System info, you'll find your computer name, operating system edition and architecture, processor, installed memory, and more useful information about your system.

In this section, you're also going to find the button to change the name of your computer. Simply click Rename PC and enter the new name in the dialog box. You can choose anything you want, but you want to avoid using unsupported characters, such as < > ; : " * + = \ | ? ,.

As you can see in the screenshot, the length of the name doesn't seem short, but in practice, you don't want to go with a name longer than 15 characters (letters and numbers). You don't want to use spaces either. If you need to separate the name, a hyphen will be a better option.

4- After you enter your desired name, click Next, and then you'll need to restart your computer for the setting to take effect.

Note: If you have upgraded your PC to Windows 10, and it carried over your previous PC name, at least now you know how to change it.

2. How to change Date & time

Another setting the setup process doesn't let you configure is your time zone, and you probably have been using Windows 10 with the wrong time or zone.

To change the time zone and correct the time in Windows 10, do the following:

1- Open the Settings app by clicking the Start button and clicking Settings, or use the Windows + I keyboard shortcut that will get right into the app.

2- Go to Time & language and navigate to the Date & time page.

3- Under Time zone, choose your current time zone and that's it.

3. How to setup File History on Windows 10

In the same way Microsoft included a tool to backup files on Windows 8, Windows 10 also bundles the File History feature.

For those unfamiliar, File History is a tool in Windows that allows users to keep the all their files backed up on an external drive in case you need to restore one or all your files due to damage, accidental deletion, etc.

Compared to the previous version, setting up File History is much easier in Windows 10 than in previous versions.

To configure a file backup using File History, do the following:

1- Connect an external USB hard drive to your computer that know you won't be disconnecting very so often. Also make sure to the external drive has enough space, and space to the backup to grow over time.

2- Open the Settings app by clicking the Start button and clicking Settings, or use the Windows + I keyboard shortcut that will get right into the app.

3- Go to Update & security and navigate to Backup.

4- Click on Add a drive and from the list select the USB drive you connected.

5- Click More options. Here you can configure many options, such as how often to make a backup and how many versions of the of the backup to keep. Also, you can control which folder locations to include or exclude from the backup, and you have the option to stop using the drive for backups.

If you ever need to restore a file, simply use the Restore files from a current backup link from More options or right-click a file or folder, click Properties, and navigate to Previous Versions to recover the file or folder.

4. How to reclaim space after the upgrade

If you have performed an upgrade of Windows 10, to protect your previous installation and allow you to roll back, the setup saves a copy of your old installation. And this could take a lot of valuable space in your system, especially if you have a device with limited storage.

As such, if you're not planning to revert to the previous version and the upgrade went through successfully. You can easily get a lot of gigabytes back doing the following:

1- Go to This PC, right-click the Windows drive (C:), click Properties, and then click Disk Cleanup.

2- Then click the Clean up system files.

3- Make sure to select "Previous Windows Installation(s)" and click OK to delete files.

Now you might have free up between 10 to 15GB, which you can use for more important files.

Wrapping up

While the setup process of Windows 10 is pretty straightforward, there are still a few things you need to configure manually. However, with today's reminder your system should be a little more complete and safer from data lost.

If you have other suggestions, don't forget to share them with everyone in the comments below.

How to select which calendars appear on Outlook for Windows 10 Mobile

$
0
0

Calendar Outlook

After setting up your accounts for Outlook Calendar in Windows 10 Mobile, you can change which calendars are visible on the app. Since one account can have multiple calendars like one specifically for holidays, another for birthdays, and another for work meetings, you can choose to filter what shows up to make it more manageable. We'll show you how.

  1. Open Calendar app and tap the hamburger menu on the top left corner
  2. Tap the checkboxes next to the calendar you want to appear. You can also choose to include or exclude reminders. Tap the hamburger button again when you're done.

Outlook Calendars

That's it! This is helpful to me because I have three accounts with 12 calendars in total. I don't want all of them to show up in my app. I really only want three of those calendars to be visible in my app.

If you need to play with more of the settings, tap the ellipsis on the lower right corner, then go to Accounts or Calendar settings. Don't forget that you can also personalize the look of the app by changing colors, select between light or dark theme, or use your current theme.

Do you make all your calendars visible or do you select only a few? Let us know in the comments!

Viewing all 5861 articles
Browse latest View live


Latest Images