Quantcast
Channel: Help & How To
Viewing all 5861 articles
Browse latest View live

How to solve the Thirsty Gods Tomb in Shadow of the Tomb Raider

$
0
0

Don't let the Ancient Aqueduct get the best of you.

This tomb is found in the Mission of San Juan area toward the southeast.

Related: Full Shadow of the Tomb Raider review

See at Amazon

See at Microsoft

How to complete the Thirsty Gods Challenge Tomb

The following steps will guide you through the aforementioned Challenge Tomb in Shadow of the Tomb Raider:

  1. You'll want to jump into the water to reach the entrance of this tomb. (Do not follow the dirt path along the cliff as it will take you to another area.)
  2. Continue toward an underwater tunnel and swim to the other side, avoiding the moray eel roaming about.
  3. You'll enter a chamber with dead Yaaxil in the water and a giant stone face in front of you that is partially submerged.

  4. Swim toward the upper level of the stairs to your left.
  5. Look up and to your right to view a wooden barrier you can pull apart with your bow and rope. (This will then drain the water in the room.)
  6. Once the water drains, head through the open mouth of the stone face.
  7. Follow the path until you slide down a slope into another pool of water.
  8. Continue swimming straight and through a crack in the wall ahead.
  9. Cut the rope holding down the submerged raft.
  10. Climb onto the raft to jump over to the next section.
  11. Climb the wooden ladder past the base camp on your left. (From here you'll enter the main puzzle chamber.)

  12. Jump down below, being careful to initially avoid the water as piranhas are feeding on Yaaxil corpses.
  13. Jump across both rafts until you see a submerged raft.
  14. Then jump into the water to cut the rope holding down the third raft, allowing it to float.

  15. Now swim towards the fourth raft being held under.
  16. Cut the rope to free this one as well.
  17. At this point, you can climb onto the fourth raft and jump onto the ledge.
  18. Follow the path past the stationary water wheel and across a fallen tree.

  19. Turn the mechanism to the right until the water is flowing onto a large block of stone. (This will lower the water level in the entire chamber.)
  20. Jump onto the now surfaced wooden platform to the right of the water wheel.
  21. Connect a rope between it and the circular metal object hanging below the stone face at the ruins.

  22. Jump back to where the turning mechanism is.
  23. Turn it so that the water is once again flowing over the water wheel.
  24. This will raise the water level and the gate near the ruins along with it.
  25. Before jumping into the water, turn the mechanism after the gate rises so that the water is not flowing over the water wheel anymore.
  26. If you keep it over the water wheel, the rope will snap and the gate will fall before you can swim to it.
  27. With the gate now open, swim into the ruins.

Follow the path to the top and you'll have completed the tomb. This unlocks the Sip's Strike skill, which increases the damage of charged arrows against armored enemies.

Remember to check out our thoughts of the game in our full review (spoiler free, of course) and why we consider it to be "Lara Croft's best adventure yet."

See at Amazon

See at Microsoft


How to solve the Howling Caves tomb in Shadow of the Tomb Raider

$
0
0

Don't let the Howling Caves get the best of you.

This is the only tomb in the Kuwaq Yaku region. Upon entering the tomb, you'll notice an unbreakable barrier unless you have the rope ascender. You do not need to worry about this as this section isn't needed to complete the tomb.

See at Amazon

See at Microsoft

How to complete the Howling Caves Challenge Tomb

The following steps will guide you through the aforementioned Challenge Tomb in Shadow of the Tomb Raider.

  1. Go toward the path left of the unbreakable barrier.
  2. Jump down into the water below, swimming to the ground ahead.
  3. You'll enter a dark cave and immediately see a large pit with spears strewn across the bottom and sides. Do not try to jump this. You cannot.
  4. Instead, climb the ledge to your left to make your way around the spears.

  5. Making your way down the path, you'll come to an area where Lara begins to slide down a muddy slope.

  6. Near the end of your slide, jump onto the rock wall and snag it with your pickaxe at the appropriate time to avoid falling to your death.
  7. Rappel down and swing to the platform in front of you.
  8. Leap onto the ledge on the wall ahead of you.
  9. Make your way to the right toward a rock wall, then rappel down.
  10. At this point, you'll crawl through a small tunnel near the ground.
  11. When you try to leap across the jump and grab the next ledge, the ledge will snap away.
  12. After you fall, you'll need to fight a few animals attempting to kill you.

  13. Make your way to the side of the room where fires are burning.

  14. Connect a rope with your bow and climb to the other side of the fires.
  15. Follow the path to your right past a base camp and into a wind chamber with a fallen tree.
  16. Ignore the tree for now and go toward the wall it leads to and hop up to grab the ledge. Attempting to walk over the tree now will only cause the wind to knock Lara down.

  17. Upon entering the main puzzle chamber, you'll see two suspended "chandeliers" and fire blocking your center path.

  18. Use the turning mechanism on the right side of the room to open up shutters and allow strong winds to move the first chandelier.
  19. Time it so that when the wind dies down, you jump onto the chandelier before it moves to the other side once the wind picks up again.
  20. Once you're close enough to the left side of the room, jump onto the ledge.
  21. Use the next turning mechanism to open up the next set of shutters to extinguish the first fire blocking your center path.
  22. Make your way back to the center and past where the fire previously was, then follow the path to your right.

  23. Shoot the swinging chandelier with your arrow and it in such a way that it smashes the next chandelier on the ground to its right, unblocking more of the center path.

  24. Go back and close the shutters on the left side of the room so that you can now walk across without being blown down by the wind.
  25. Jump to your left where there will be third and final turning mechanism, but don't turn it just yet.
  26. Instead, jump up the wall to the right next to it and climb across the chandelier attached to the wall.
  27. Once there, attach a rope between that chandelier and the middle one.
  28. Then go back and open up the middle shutters.
  29. After the last chandelier breaks away from the force of the wind, close them again.
  30. Now go back to the third turning mechanism and open the third set of shutters, blowing away the last of the fire in your path.

At this point, you'll have reached the end of the tomb where you will unlock the Huracan's Mantle skill, which reduces damage from fire and explosions.

Remember to check out our thoughts of the game in our review (spoiler free, of course) and why we consider it to be "Lara Croft's best adventure yet."

See at Amazon

See at Microsoft

How to solve the Path of Battle tomb in Shadow of the Tomb Raider

$
0
0

Don't let the Path of Battle get the best of you.

This tomb (which you'll see referred to as the Warrior's Trial and/or Path of Battle) is found in The Hidden City of Paititi, near the western end of the city. You'll find the entrance underwater.

See at Amazon

See at Microsoft

How to complete Path of Battle/Warrior's Trial Challenge Tomb

The following steps will guide you through the aforementioned Challenge Tomb in Shadow of the Tomb Raider.

  1. Squeeze through the two rocks with yellow paint denoting the entrance.
  2. Follow the underwater tunnel until you get to the other side.
  3. Jump onto the rock wall and rappel down.
  4. Make your way through the crack in the wall littered with obsidian blades.

  5. Follow the path until you reach what appears to be a stone jaguar head with a mechanism that can be pushed inward.

  6. Push this in, and the gate on the far side of the chamber will open up.
  7. Turn around and use the ramp to jump over to the next ledge
  8. Follow the path while jumping over the spinning blades on the ground.
  9. Use your grapple to reach the rock wall and rappel down, swinging to the ground below.
  10. Push the handle connected to the stone animal head and this will open up the lower gate that you see, bringing you to the main puzzle chamber.

  11. Upon entering, a center pillar will rise from the floor with spinning bladed beams attached to it. Run towards the center pillar and around to your left, jumping over the blades and across the ramp to the other side.

  12. Continue on the path to your right, avoiding any blades until you reach the next handle mechanism you'll need to pull. Do so, and the bladed beams will retract.
  13. Quickly run back down the path you came and past all of the spinning blades.
  14. Push the next mechanism to lower the pillar.
  15. Make your way back toward the center pillar and repeat your actions on the right side.
  16. Run back down the path you came, avoiding the spinning blades until you reach the next lever.
  17. Push this lever to completely stop the center pillar.

  18. With the platform stopped, you can climb your way to the top.

Once you reach the top, the tomb will be complete. You unlock the Sip's Quiver skill, which allows you to loose up to three arrows without pulling from the quiver.

Remember to check out our thoughts of the game in our review (spoiler free, of course) and why we consider it to be "Lara Croft's best adventure yet."

See at Amazon

See at Microsoft

How to complete the Underworld Gate tomb in Shadow of the Tomb Raider

$
0
0

Don't let the Underworld Gate get the best of you.

The entrance to the Underworld Gate tomb is right next to a base camp in the Peruvian Jungle. This will be one of the first tombs you come across along with Judge's Gaze.

See at Amazon

See at Microsoft

How to complete the Underworld Gate Challenge Tomb

The following steps will guide you through the aforementioned Challenge Tomb in Shadow of the Tomb Raider.

  1. To enter the area, you'll need to crawl through a long path until you reach the other side.
  2. Follow the path until you reach a tree right before a ledge.
  3. Jump across the tree and make your way to the rock wall, gripping it with your pickaxe.
  4. Shimmy to your left until you can jump down onto the platform.
  5. You'll come to a collapsed bridge. Look to your right and walk across the fallen tree, jumping from branches until you reach the rock wall.
  6. Rappel down and swing onto the ground below.
  7. You'll come to an area with an abandoned camp and corpses. Go to your right and jump onto the rock wall.

  8. Climb all the way to the top of the rock wall and jump to the ledge to your left, shimmying across to the other side.

  9. At this point, you'll come to a base camp. You'll want to squeeze through the rocks ahead it.
  10. In the room with the blocked staircase, jump up the wall to your right and climb up to view the main puzzle.

  11. Follow the path to the left and rappel down from the rock wall, swinging onto the ground below.

  12. Next to a small cave, you'll see a tree that you can climb. Climb up it and jump from the branch using your grapple-swing to get to the other side.
  13. You can largely ignore the area to your left and keep going forward until you reach another fallen tree you can cross.

  14. Pull the large wooden mechanism so that you can see and attach a rope between it and the ledge across from it.

  15. Use the rope to get to the other side.
  16. In this area, you'll see a large wooden lever. Pull this toward yourself until it releases a suspended box that swings by.
  17. Jump onto the box and down onto the platform where the first wooden mechanism was.
  18. Then push the wooden mechanism back to its original position and attach a rope between it and the box.
  19. Jump back onto the box to get to the section you were just at and pull the lever forward once again.
  20. Quickly run and jump onto the suspended box before the rope breaks. It will then carry you toward the next section.

  21. Follow the path down a ledge and up a rock wall until you reach the top.

From there you'll have completed the tomb. This will unlock the Eagle's Perch skill which increases your speed when climbing.

Remember to check out our thoughts of the game in our review (spoiler free, of course) and why we consider it to be "Lara Croft's best adventure yet."

See at Amazon

See at Microsoft

How to solve the Judge's Gaze tomb in Shadow of the Tomb Raider

$
0
0

Don't let the Judge's Gaze get the best of you.

The Judge's Gaze tomb will be one of the first tombs you will encounter in the game after you reach the Peruvian Jungle. You will not be able to access this tomb right away until you have your pickaxe again.

See at Amazon

See at Microsoft

How to complete the Judge's Gaze Challenge Tomb

The following steps will guide you through the aforementioned Challenge Tomb in Shadow of the Tomb Raider.

  1. Entering this tomb, you will see a cave and a long jump down. Jump into the water and swim toward the next area.
  2. Climb the ledges to the right of the statue.
  3. Jump onto the counterweight to raise the statue.
  4. Continue following the path across the bridge until you reach the main puzzle room. There will be a large fallen ladder in the center, two pulley carts on the left, a large bust in the middle, and two suspended statues on either side of the bust.

  5. Shoot arrows at the white ropes on each statue. This should automatically attach them to the white ropes on each corresponding side of the fallen ladder if you are standing close enough.

  6. Next, focus on the left side of the room with the two carts.

  7. Pull the cart with the weight latched into it all the way back, releasing the weight.
  8. Then move that same cart all the way forward until it hits the bridge and you cannot push any further.
  9. At this point, you'll want to move that second cart to the place the first cart was initially, which will be on top of a small square in the ground. The prongs will open up on each side of the cart once it enters the correct position.

  10. Climb up the wall to your left, taking care to avoid the trap on the ground.

  11. Jump onto the weight that is now suspended so that it falls back down and latches into place on the cart. This will raise the ladder while snapping the rope attached to the statue on the right.
  12. Now push the other cart under the raised ladder until the prongs open up again on the other side.
  13. Attach another rope to the right statue and right side of the ladder.
  14. Jump to the ledge on your right and repeat what you did previously, jumping onto the weight so that it falls down and latches into place on the cart.

  15. The remaining statue should raise and the collapsed ladder along with it. You can climb up the ladder to complete the tomb.

This will unlock the Caiman's Heart skill, which allows Lara to regenerate health more quickly.

Remember to check out our thoughts of the game in our review (spoiler free, of course) and why we consider it to be "Lara Croft's best adventure yet."

See at Amazon

See at Microsoft

How to solve the Temple of the Sun tomb in Shadow of the Tomb Raider

$
0
0

Don't let the Temple of the Sun get the best of you.

This next tomb is one of three that you'll find once you reach The Hidden City of Paititi, near the southern end hidden behind a large cavern.

See at Amazon

See at Microsoft

How to complete the Temple of the Sun Challenge Tomb

The following steps will guide you through the aforementioned Challenge Tomb in Shadow of the Tomb Raider.

Note: Use your survival instinct while standing next to a mirror in the main puzzle chamber in order to hear which number it is, one through four.

  1. Squeeze through rocks and enter the tomb.
  2. Use your grapple-swing to reach the rock wall ahead.
  3. Continue following where the ledges lead you until you reach a final rock wall you'll need to rappel down.
  4. Swing toward your left to grab the next ledge.

  5. Climb the rock wall to the top and jump to the ledge to your left, making your way to the ground in front of the temple entrance.

  6. Once in the temple, you'll immediately notice two statues with fire to light the room.
  7. Do not go down the path leading to your right.
  8. Instead, climb up the ladder between these two statues on the wall.
  9. Follow the path past a base camp toward the opening in the wall on the right side of the room.
  10. Jump across to the rock wall, rappelling down into the next chamber.
  11. Follow the path and crawl through the small space near the ground to enter the main puzzle chamber.

  12. There will be two beams directly in front of you and one to your left that you cannot cross yet.

  13. Turn the mirror on the left which is reflecting light until the light reaches the beam on your left. The beam will then turn in such a way that you can run across it.
  14. Walk across the beam to the left side of the chamber.
  15. Turn the next mirror (mirror two) so that the light reflects through the pillars of the center platform and hits the second beam on the right side of the room.

  16. Backtrack to the first mirror and turn it so that it hits the first beam that was directly in front of you when you entered the chamber.

  17. You'll now be able to follow the path on the right side of the room, crossing both beams to reach the platform on the other end with the third mirror.
  18. Turn the mirror so that the light reflects off of the beam next to the large center platform in the water. This will lower a section of the platform, blocking the second mirror's light and turning one of the beams you used to cross the water.

  19. You'll need to turn the third mirror again until it hits the beam that you just jumped off of.

  20. Use the rock wall on your left to get back onto the beam.
  21. Make your way back to the second mirror.
  22. Turn it so it strikes the beam to your right which is already being held in place with the first mirror.
  23. Run back to the first mirror.
  24. Turn it so that the light reflects through the pillars of the center platform and strikes the farthest beam on the left side of the room.

  25. Go back to mirror two again.

  26. Turn it so that the light reflects off the left beam closest to you.
  27. You will then be able to follow the path across the beams on the left side of the room to reach the fourth mirror.

  28. Turn the fourth mirror so that the light hits the beam to your left with all of the vines attached to it.

  29. Make your way to the large center platform using the rock wall and beams you just came from.
  30. Once here, you can now run across both center beams and reach the end of the tomb.

The tomb is now complete once you interact with the stone monolith. You'll unlock the Hoatzin's Hunger skill, which increases the amount of natural crafting resources gathered from each source.

Remember to check out our thoughts of the game in our review (spoiler free, of course) and why we consider it to be "Lara Croft's best adventure yet."

See at Amazon

See at Microsoft

How to solve the San Cordoba tomb in Shadow of the Tomb Raider

$
0
0

Don't let San Cordoba get the best of you.

This is the only tomb found in the Cenote region. It's a little difficult to reach as you'll need to swim underwater through a cavern and avoid any eels in your path.

See at Amazon

See at Microsoft

How to complete the San Cordoba Challenge Tomb

The following steps will guide you through the aforementioned Challenge Tomb in Shadow of the Tomb Raider.

  1. Make your way through the subterranean caverns until you reach a point where you can dive into the water.
  2. Following the tunnel, you'll come to a fork in the road with skulls and a yellow wooden plank.
  3. You can either go left or right. Go right.
  4. Once in the underwater cavern with the moray eels, follow the left side until you reach a point where you are pulled away through a strong current and down a waterfall.
  5. Swim over to the embankment on your left and climb up the rock wall.
  6. Make your way to the right across another ledge and second rock wall.
  7. Follow the path and jump into the water below next to the base camp.
  8. Continue into the next chamber where Lara will remark about an incredible battle taking place long ago.

  9. Run down the stairs and toward the far end of the chamber with the cannon (falconet) and cart behind it.

  10. Move the cart so that it is no longer blocking the cannon's path.
  11. Push the cannon backward so that it rolls down the ramp and smashes the barricade, allowing you to enter the main chamber and view a Spanish Galleon.

  12. Follow the path to the right until you reach the end with the raft ashore.

  13. Kick the raft so that it moves toward the ship next to the climbable ledges.
  14. Continue up until you reach the ship's main deck.
  15. Go down the left set of stairs.
  16. Turn the mechanism all the way to the left until the falconet is in position (Lara will remark when this happens).
  17. Jump into the water where the ship has broken apart in the middle.

  18. Swim toward the metal gate on the back right.

  19. Pry it open with your pickaxe.
  20. Then swim through to the other side of the ship.
  21. Hop up the marked walls until you reach the main deck again.
  22. Ignore the turning mechanism for now.
  23. Instead, run to your left and climb up the rock wall.
  24. Follow the path and leap back onto one of the masts on the ship, running into a crow's nest.
  25. Free the other mast with your pickaxe when prompted.

  26. Staying in that same crow's nest, leap up onto the wooden plank next to you.

  27. Climb the ladder to the next beam up.
  28. Run across this beam to your left and leap to the cliff.
  29. Rappel down the rock wall and swing onto the beam in front of you.
  30. Jump down back onto the main deck of the ship.
  31. This is where you'll turn the mechanism you previously ignored. Turn it so that the beam lines up with the suspended box to your right.

  32. Now jump onto the beam you just moved using the ramp and box next to you.

  33. Jump across the suspended box and climb your way up the ladder to a higher portion of the mast.
  34. Pry open the winch so that the falconet falls through the floor and into the captain's cabin.

After you descend the rope and hop into the cabin, the tomb will be complete. You'll unlock the Caiman's Breath II skill, which further increases breath capacity when swimming underwater.

Remember to check out our thoughts of the game in our review (spoiler free, of course) and why we consider it to be "Lara Croft's best adventure yet."

See at Amazon

See at Microsoft

How to solve the Ancient Aqueduct tomb in Shadow of the Tomb Raider.

$
0
0

Don't let the Ancient Aqueduct get the best of you.

This tomb is one of three located in The Hidden City of Paititi. It is near the Temple of Kukulkan base camp.

See at Amazon

See at Microsoft

How to complete the Ancient Aqueduct Challenge Tomb

The following steps will guide you through the aforementioned Challenge Tomb in Shadow of the Tomb Raider.

  1. You'll notice a bridge leading to the prison. Ignore this and jump to the rock wall on your left.
  2. Rappel down to find the tomb entrance.
  3. Swim through the underwater passageway until you reach the next side. The tunnel is linear so you will not get lost.
  4. Continue following the path up a rock wall and jump into the water below.

  5. Climb up onto the ground next to the wooden barrier blocking your path.

  6. Then jump up to the ledges above and continue following the path.
  7. Jump down into a pool of water and progress forward until you reach the main puzzle chamber.

  8. Hop into the large basin where the aqueduct is draining.

  9. kick the wooden raft toward the wooden barrier on the bottom left.
  10. Use your bow to attach the raft and barrier with a rope.

  11. Jump back up the walls and pull the wooden mechanism in front of you when you entered the chamber and let it retract back, causing the water to rise.

  12. With the rope attached between both objects, the raft will lift the wooden barrier, allowing you to swim under and past it.
  13. Follow the underwater path until you reach a wall you'll need to pry through with your pickaxe.
  14. Use your survival instinct to locate the lever on the left side of the room on the farthest wall.
  15. With your pickaxe, pry it forward so that the gate opens up and drains the water.

  16. Pull the other wooden barrier apart with your bow and rope so that you can enter the first section you were in with the raft.

  17. At this point, you'll need to fend off a few Yaaxil enemies.
  18. Cut the rope on the raft.
  19. Kick the raft into the next section through the open hole in the wall, lining it up with the ledge on the far wall.
  20. Run back to the first section and pull the wooden mechanism to raise the water again.
  21. Swim back to where the raft is and use it to climb into the next section where you'll need to fight more Yaaxil.
  22. Pull the next wooden mechanism you see upon following the path.
  23. After the water rises, jump onto the raft and use a rope to connect it to the rotating water wheel.
  24. Then jump onto the wall once the water wheel pulls you close enough and before the rope snaps away.

  25. Look up toward the aqueduct and shoot the hanging crane hook with your bow to attach a rope between it and the water wheel. More Yaaxil will show up that you'll need to defeat.

  26. Timing it just right, pull the raft toward you once again with a rope and the water wheel.
  27. When it's close enough, shoot an arrow at the hook hanging near the aqueduct to attach it to the water wheel.
  28. Quickly jump onto the raft before it floats away.

  29. While the raft is floating by the center area, jump up the walls and across the platform that was raised with the hook.

Leaping into the next room, the tomb will now be complete. You'll unlock the Jaguar's Paw skill, which increases the chance to known down enemies with melee attacks.

Remember to check out our thoughts of the game in our review (spoiler free, of course) and why we consider it to be "Lara Croft's best adventure yet."

See at Amazon

See at Microsoft


How to simplify your model for 3D printing

$
0
0

Simplify, reduce meshes or decimate. Choose your terms.

The best way to simplify a complex model for 3D printing is to reduce its triangle mesh. Sometimes called decimating, this process takes away a lot of the complex geometry that is great to have for model online but not so good for models on the print bed.

All STL files are made of lots of triangles some big, some very small, that reproduce the curves and bumps you see on the model, so when you look at a curve what you are seeing is hundreds of tiny triangles making that look curved.

With 3D Builder, we can decimate those triangles to reduce the complexity and decrease the time the model takes to print, thereby saving us filament as well.

More: How to split your models for 3D printing

Step by step

  1. Open the model in 3D Builder
  2. Select the Edit tab
  3. Choose Simplify
  4. Use the slider to select the percentage of reduction
  5. Select the Reduce Faces checkmark
  6. Click the Repair model box in the bottom right.

In depth

Once you have chosen which model you want to decimate, you can load it into 3D Builder. From there you will need to go to the edit tab and click simplify. Here you will see a slider that allows you to chose the percentage of triangle to reduce the model by, the higher the percentage, the more triangles will be removed. There is a lot of trial and error involved here as removing too many triangles will destroy the fine details of your model.

The default is set to fifty percent, but I find that can be too aggressive. I would start at around twenty-five percent and move up to thirty-three percent if you feel confident the model will support it. As you can see in the above pictures the more you decimate this less detail you get — take a close look at the medallion around Buddy Cthulhu's neck — so start with a lower number and work your way up.

Once you have clicked the Reduce Faces checkbox, you will almost always see a warning box in the right-hand corner asking you to repair your damaged model. This is perfectly normal as removing the triangles can make the model no longer a solid object. By clicking on the repair button, 3D Builder will automatically repair those errors and make the model printable again.

More: Everything you need to start 3D printing

After Care

Once you have reduced your model to the appropriate level there a few things you can do to make sure it still looks excellent and prints well, hollowing, smoothing and fixing.

Hollowing

By Hollowing your model, you reduce the amount of plastic needed to print it. Now a lot of slicing software will automatically hollow your model for you and use infill to fill up space, but sometimes this is counterproductive. A lot of models require very little, if any, infill to print successfully. By using the hollow tool in 3D Builder, you can create a wall thickness of around 1mm-1.5mm and potentially cut out the need for infill altogether.

Smoothing

Using 3D Builders smoothing tool will help you with some models, to remove some of the sharp edges caused by reducing faces. This will essentially add more triangles back to certain areas and so can feel counterproductive, but it always adds fewer triangles than you took away, so you still have the net win of lower triangles and a great model.

Netfabb Model Repair

Using a repair service like Netfabb is always the last thing I do before setting a model into a slicer for printing. By uploading your model into Netfabb, they can analyze it, find the errors that 3D Builder may have missed and repair them. It will then spit out a new model for you with _fixed suffix. You should save and use that model for 3D printing.

Final thoughts

Decimating models is incredibly helpful whether you are using someone else's or when you are making your own, especially if you are making your own. When creating 3D models, the programs tend to overdo the geometry as they assume you are making models for computer-based applications. By reducing the faces of your models, you can get a much better outcome for your 3D prints.

Have you ever decimated models for 3D printing? Let us know in the comment section any tips or tricks you might have for making your models simpler.

Here's how to complete every Challenge Tomb in 'Shadow of the Tomb Raider'

$
0
0

Raiding tombs is just a typical Monday for Lara Croft.

Shadow of the Tomb Raider features 9 main Challenge Tombs so far. Whether you get caught up in one tricky spot or need a step-by-step guide on how to complete them, we've got you covered with guides for every single one.

Remember to check out our thoughts of the game in our review (spoiler free, of course) and why we consider it to be "Lara Croft's best adventure yet."

See at Amazon

See at Microsoft

How to change Surface Go screen orientation

$
0
0

The Surface Go is the ultimate Surface sketchpad for digital artists and notetakers, especially coupled with the Surface Pen. But how do you orient the screen in portrait mode?

(Note: This method will work for any current Surface device not just the Surface Go.)

Products used in this guide

How to change screen orientation on Surface Go

By default, simply rotating the screen in either landscape or portrait modes will swap the orientation of your device automatically, but if you want to find the manual controls, here's how:

  1. Open the Start Menu in the bottom left-hand corner of your display.
  2. Select the Settings cogwheel on the left.
  3. Select System from the Settings menu.
  4. Under the Display submenu, scroll down to find Orientation and Orientation lock.

Find rotation lock more quickly

  1. You can also find the rotation lock more quickly by opening the action menu in the bottom right-hand corner.
  2. Select Expand near the bottom.
  3. Then select Rotation lock to lock and unlock screen orientation modes.

Our top equipment picks

If you're using portrait mode, you may want to consider picking up a Surface Pen for document inking and note taking. It's a valuable tool that adds a whole new dimension to Surface Go.

Best Go stylus

Surface Pen

$100 from Microsoft

Convenient inking for the masses.

The Surface Go combined with the Surface Pen is the most accessible digital sketchpad on the market. The Surface Pen supports 4,096 levels of pressure on the Surface Go, complete with tilt support and a magnetized edge for keeping your Pen safely stored on the side of your Surface device.

Where should you go to get a GTX 1080 Ti?

$
0
0

GTX 1080 Ti

Best answer: There are no shortages of retailers selling graphics cards but an easy place to go is definitely either Amazon or Newegg.

Always great deals

Large online retails like Amazon and Newegg deal a lot in volume, more so than more localized, niche retailers. You won't always find the best deals here, but you can say with a high degree of accuracy there will always be some kind of a great deal on some of the products you're interested in.

Amazon in particular with Prime can make a difference with free shipping and occasional member exclusive deals and pricing.

There's also the possibility to pick up certified refurbished hardware. These are always cheaper than retail price and come with the same protection you'd get buying anything else from a major retailer.

Lots of choice from different card makers

These large online retailers are also some of the best places to compare prices and products across a wide range of manufacturers. The GTX 1080 Ti attracts a number of manufacturer variants with differing designs, custom coolers, factory overclocks, and more to differentiate from the rest.

At both of these stores, you'll find graphics cards from all the leading manufacturers, which makes it easier to find not only the right card for you, but also score the best price.

Online tools to help you find deals

If you're shopping for graphics cards like the GTX 1080 Ti there are a couple of awesome online tools that can help you find deals and availability.

For Amazon, CamelCamelCamel is the best tool around, allowing you to compare and track pricing with custom alerts to help you get what you want at the best possible price.

For Newegg and other, smaller retailers, PCPartPicker is a superb resource that tracks daily and weekly deals and price changes on graphics cards.

Global support

One other important thing that should be pointed out about both Amazon and Newegg is that they support international customers. Either with local stores or international shipping, you're not isolated just for living outside of the U.S.

Our pick

Gigabyte NVIDIA GTX 1080 Ti

GTX 1080 Ti

$650 from Amazon

A great graphics card at a superb price.

One of the best prices we've seen on a GTX 1080 Ti comes to this card from Gigabyte with a factory overclock and support for the company's RGB Fusion lighting system.

Another pick

EVGA NVIDIA GTX 1080 Ti

GTX 1080 Ti

$710 from Newegg

Incredible cooling technology for your 1080 Ti.

EVGAS's iCX cooling technology offers not only control but supreme performance to keep your GPU frosty when you're turning up the heat.

Where can you get a replacement XPS 13 9370 battery?

$
0
0

Dell XPS 13

Best answer: Dell doesn't sell replacement batteries directly, so if you want to swap it yourself you'll need to hit the listings at eBay.

eBay: XPS 13 replacement battery ($90)

Fairly hard to find

Whether it's because the parts aren't made readily available, because the 9370 is still fairly new, or a combination of both, replacement batteries for the latest version of the XPS 13 aren't that easy to find.

Dell doesn't sell the parts directly, but as ever, there's always a way. If you hit the listings on eBay you'll find a handful of third-party retailers selling what you're looking for.

Making sure you get the right battery

The new XPS 13 might look a lot like the older models, but that doesn't mean you can just grab a battery and it'll fit. You should always make sure you get the correct battery.

Specifically for the XPS 13 9370, you're hunting for the DXGH8 battery that is a 52W capacity.

Where possible, also try and make sure you get a brand-new item. Pre-owned batteries could have a history that leads to sub-par performance or lifespan, despite the likelihood they're cheaper to buy.

Dell could also do it for you

Alternatively, Dell will happily replace the battery for you. If your laptop is still under warranty then it's likely you can get it done free of charge, but even outside of the warranty you can get the work done.

Dell has a number of options available including a mail-in service or authorized partners that can carry out the work on their behalf.

The right choice

XPS 13 DXGH8 battery

$90 from eBay

Make sure you get the right one.

While not the easiest thing to find, you should double check you're getting the DXGH8 battery before you hit buy.

Is Halo: The Master Chief Collection worth returning to?

$
0
0

The Master Chief Collection has finally been updated, but was the patch successful?

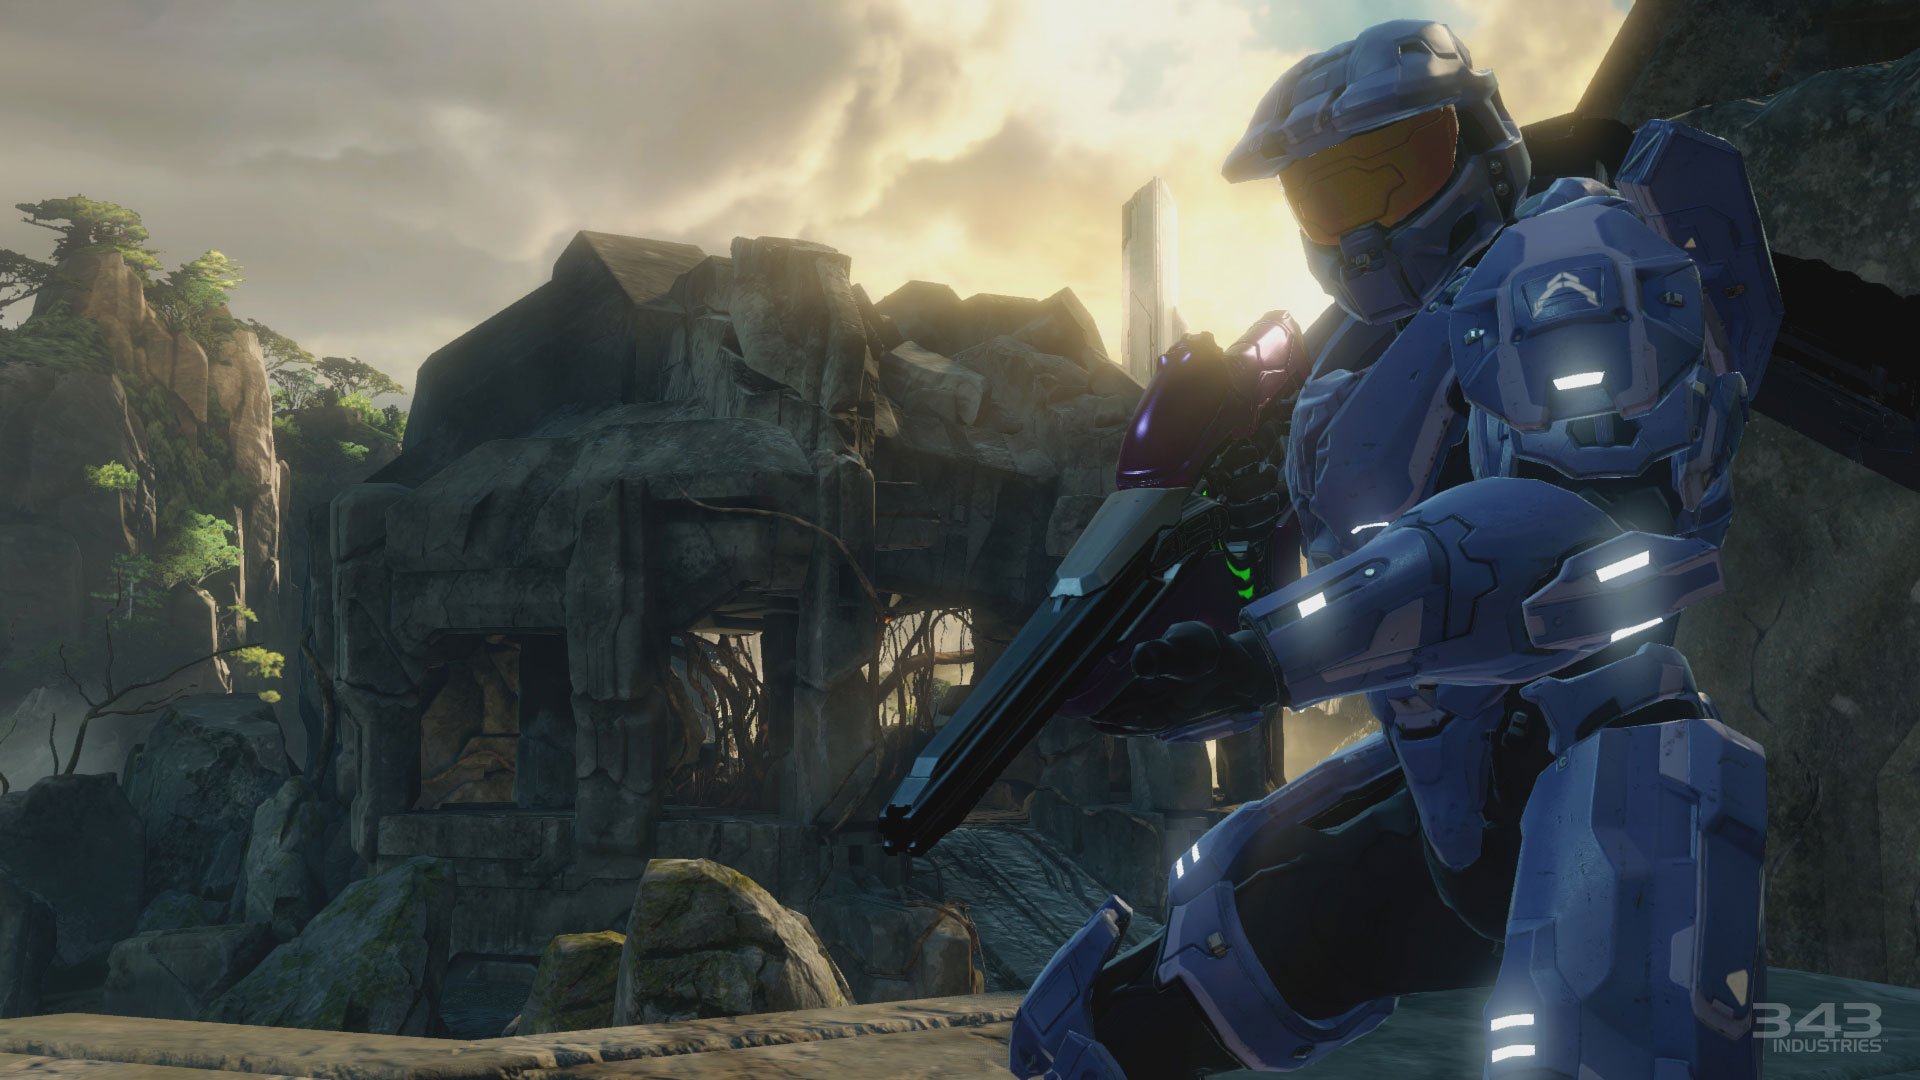
Halo: The Master Chief Collection (hereby referred to as the MCC) was one of gaming's all-time biggest disappointments. What was promised as a definitive collection of all the main Halo titles before Halo 5: Guardians turned out to be a bug-ridden, glitchy disaster that heavily damaged the reputations of both 343 Industries and the Xbox brand.

Despite this, 343 committed to fixing the MCC as a side project while they develop Halo Infinite. Near the end of August, the MCC was updated with a plethora of fixes and new features, and on the first of this month, it released on Xbox Game Pass. But does the update deliver on what it promises? I decided to test the game extensively to find out for myself.

See at Microsoft

Features: Selective install, interface, and more

One of the coolest things to come to the MCC in this update is selective install, which lets you choose which Halo games to install. For people without external hard drives or a massive game library, this is a dream come true. Additionally, the multiplayer playlists have been expanded on significantly, which allows people to have more control over which games they play and what modes they play in them.

Also new is a completely redone user interface that's cleaner, more concise, and less laggy than the one that preceded it. Concerning graphics, the update added Xbox One X enhancement, which improves the visuals of every game in the collection across the board on that console and gives users the ability to edit high definition resolution settings.

The only negative to come out of the new features is the fact that matchmaking servers are now region locked, which means that you can only play with people in your country. This won't be a problem for United States players like me since the MCC is popular here, but in other countries where it's not, finding a match takes ages. Granted, this does guarantee good connections, but I think people would rather play with some lag than wait dozens of minutes to find a match.

Read: 343 'evaluating' Halo: Reach for the MCC

Performance: Bug fixes, stability, and consistency

The real meat of this update is the extensive list of fixed bugs and glitches. The MCC's poor performance was what originally made it a failure, so it was critical that 343 Industries solved these issues. Thankfully, for the most part, they have. While there's the occasional glitchy moment or net code mishap, the MCC is in excellent working order ninety-nine percent of the time.

The most noticeable improvement is by far the speed of matchmaking — provided you aren't a victim of the region locking issue, the time required to find a game ranges between two-to-four minutes, which is on par with most current games with matchmaking. Other positive changes include faster load times, more consistent hit registration with weapons, and fixes for almost every campaign bug across all four of the included Halo games.

Should you return to the MCC?

Ultimately, people should definitely give the MCC another try after this update. Almost everything now works as intended, and the new features allow the player to customize their MCC experience more than ever before. The region lock issue is a problem for players in countries where the game isn't popular, but nothing is stopping them from adding some people on Xbox Live and playing Custom Games.

The MCC is available on Xbox One for $29.99, or with a $9.99 subscription to Xbox Game Pass.

See at Microsoft

Liquid and water cooling guide for NVIDIA GeForce GTX 1080 Ti

$
0
0

In this guide, I'm going to run you through the process or taking off your old NVIDIA GTX 1080 Ti GPU cooling shroud and components, and how to fit a new water block to the card for it to be included in a custom water cooling PC loop.

Products used in this guide

How to install the GTX 1080 Ti water block

Firstly, you'll need to buy a water block that supports your GTX 1080 Ti. Not all of them are made the same so shop around and make sure it'll be compatible with your PCB. For instance, this XSPC GTX 1080 Ti water block we use here works with NVIDIA Founders Edition cards only. Usually, these kits include all the screws and tools you need.

  1. Remove the factory-fitted cooling system. This differs per manufacturer and cooler design, but usually involves the removal of numerous screws, including the backplate.
  2. Using a dry cloth or paper towels, gently rub a small amount of isopropyl alcohol to the GPU surface to remove the old heatsink paste.

  3. Once the card is clean and dry, apply a small amount of heatsink paste.
  4. Peel away all the protective labels on the GPU block.
  5. Gently sit the water block on the top of the GPU, lining it up and press down slightly to spread the heatsink paste.
  6. Flip the GPU over and rest it on the block.
  7. Lay down the backplate onto the rear of the GPU.
  8. Screw all three parts together.

All that's left to do is flush out the block, which you can do prior to connecting the GPU to the water loop in the PC or do it in one go with the loop. Just be sure to use a good kit to make sure the PH balance is about right. I've included a link to purchase the Mayhems Blitz kit which has always served me well.

Our top equipment picks

As touched on already, pick up a water block that supports your GTX 1080 Ti. The last thing you want to do is spend a lot of money on a component that doesn't fit or does not adequately cool the die and other components. This XSPC water block is for the Founder's Edition.

GPU Water Block

XSPC GTX 1080 Ti Water Block

$163 at Amazon

Perfect for Founders Edition cards

This water block from XSPC has everything you need to keep your reference GTX 1080 Ti from NVIDIA cool under load.

Not only will you be able to overclock this card after installing a water block like this XSPC solution, the company even took the time to include RGB lighting as well as tempered glass and a copper base. You'll be creating a light show, which has been scientifically proven to add an extra 50 frames to your gaming performance.

Additional Equipment

As well as the GPU water block, you'll need some alcohol and thermal paste.

Isopropyl Alcohol

$12 at Amazon

You can't take off an older cooler, leave the thermal paste behind and reuse it with a new cooler. You need to remove it, which is where alcohol comes in.

Thermal Paste

$8 at Amazon

This is some seriously good stuff. The thermal compound from ARCTIC allows the transfer of heat from a component like the GPU to an active cooler.

Mayhems Blitz Kit

$23 at Amazon

The Mayhems Blitz Kit is the ideal package full of everything you need to clean out a water cooling loop to get it prepared for new fluids.


Is the Dell XPS 15 9570 good for gaming?

$
0
0

Best answer: The Dell XPS 15 is great at gaming, so long as you make sure to include an NVIDIA GTX GPU.

Dell: Dell XPS 15 ($1,400)

Choose the right XPS 15

Dell refreshed the XPS 15 in 2018 to include the latest iterations of processors and GPUs from Intel and NVIDIA, respectively. What this means is if you kit out the XPS 15 with a Core i7 and GTX 1050 Ti, you'll be able to play a large selection of PC games without much effort.

A drawback to wanting to play games on the XPS 15 is the $1,000 base model is out of the question. It only comes packing an Intel Core i5 with integrated GPU, which can technically play some games, but you'll have to turn down all the settings and even then it won't be a visually pleasant experience.

Your XPS 15 needs an Intel Core i7 and GTX 1050 Ti. Don't settle for less.

Stepping up a model to the configuration with a Core i7 and GTX 1050 Ti bumps the price up to $1,400, which isn't too expensive when you remember you are paying for a premium notebook. Not only will the beefy processor and GPU allow for more serious gaming, the combination will make it possible to do video editing and more intense PC tasks too.

This model, in particular, only comes with 8GB of RAM so you may want to upgrade at a later date, which is possible. At the end of the day, not all XPS 15 notebooks are created equal, and some are more powerful than others resulting in better PC gaming. What you need to do is ensure you have the upgraded internals that you can't change yourself. RAM can be swapped out, a GPU ... well, not without problems.

When viewing all the configurations on the Dell website, the more affordable options start on the left with the Core i5 processor and integrated GPU. Moving across to the right will reveal more expensive configurations of the Dell XPS 15, adding the Core i7, more RAM (up to 32GB), GTX 1050 Ti GPU, and a 4K display. I'd recommend the $1,400 configuration if you plan on doing a little gaming on the side.

No matter the configuration, the Dell XPS 15 9570 is an excellent Windows 10 notebook in general.

Our pick

Dell XPS 15

$1,400 at Dell

Built for work and play with latest Intel and NVIDIA tech.

Rocking both a powerful Intel Core i7 processor and NVIDIA GTX 1050 Ti GPU, you're going to have a good time with most PC games.

A GPU isn't a good choice for mining Bitcoin

$
0
0

GTX 1080 Ti

Best answer: Mining Bitcoin with a GPU is no longer a profitable endeavor and your money is better spent on a dedicated ASIC miner.

Amazon: AntMiner S9i ($599)

GPU Bitcoin mining has been surpassed for most people

Mining Bitcoin is a harder task than it used to be. Unless you're going to build a serious rig with a lot of GPUs in it, it's not really worth the time.

Using a single GPU to process the algorithm for Bitcoin won't be profitable, as the return is so low, especially compared to the cost of buying the GTX 1080 Ti, and the power to run the machine its attached to.

Other cryptocurrencies can be mined with GPUs, but for Bitcoin, other methods are required. The time it takes to mine Bitcoin would far exceed the life of the graphics card.

An ASIC miner doesn't require a PC

One of the more accessible ways for folks to jump in and do a little home mining is with an ASIC miner. These don't require a PC and are a self-contained unit with a dedicated power supply, built purposely for mining using the SHA-256 algorithm.

The miner will have a simple web interface you can interact with on your regular PC, but for the purposes of mining, it can just sit there doing its own thing.

Your returns will vary depending on the power of your miner, of course. The better the hash rate, the more you'll be paying.

An ASIC miner is around the same cost as a GTX 1080 Ti

A beginner ASIC miner like the AntMiner S9i with a power supply is around the same price as a GTX 1080 Ti. The difference is you'll get better returns, and have lower overheads since you're not powering an entire PC. ASIC miners are much more power efficient.

It's a fairly small unit, too,

There's also the simple fact that this is a really intensive process, and a dedicated miner won't be taking up any of the resources on your PC. By contrast, mining on your personal PC is going to take its resources away from work or gaming.

Our pick

AntMiner S9i

AntMiner S9i

$599 from Amazon

A lot Better than a GTX 1080 Ti.

This ASIC miner is built to mine currency like Bitcoin, and is not only better suited to the task than a graphics card but is power efficient and around the same price.

How to factory reset Microsoft's Surface Go

$
0
0

The Surface Go is a great device for use on the move or when you need to do some light computing. If your device isn't running well, or you simply want to wipe it clean for a resale, the process is simple. This is how to factory reset your Surface Go.

(Note: This method will work for any current Surface device, not only Surface Go.)

Products used in this guide

Microsoft: Surface Go (from $400)

How to factory reset your Surface Go

Factory resetting your Surface Go is an easy process, and it can be done in just a few clicks. Here's how:

  1. Open the Start Menu in the bottom left-hand corner of your display.
  2. Select the Settings cogwheel on the left.
  3. Select Update & Security from the Settings menu.
  4. Under the Recovery submenu, find Reset this PC, and select Get started.

  5. It will give you the choice of keeping your personal files (if you plan to keep), or removing everything and starting over (if you plan to sell).

  6. Choose the option you want and confirm the choice. The Surface Go will then begin to reset, rebooting and refreshing Windows in the process.

Our top equipment picks

For its price, size, and versatility, the Surface Go is one of the best Windows 10 "pure tablets" on the market right now. And if you ever have to factory reset it, you shouldn't have any issues.

The most affordable Surface yet

Surface Go

From $399 at Microsoft

A powerful portable PC for peanuts.

The Surface Go is a uniquely versatile tablet PC complete with inking, the powerful of full Windows 10, in a svelte, affordable package.

Build your Forza Horizon 4 influence by watching Mixer streams, here's how

$
0
0

Forza Horizon 4

If you're going to play Forza Horizon 4, you already start earning influence today.

Forza Horizon 4 is Microsoft's next big racer and while the game's early access period doesn't start until September 28, prospective players can begin earning influence now.

Influence is what progresses you through the ranks of the Horizon Life, so the more you earn, the quicker you rank up and unlock new items and experiences. Here's how to get a head start on it, with the help of Microsoft's Mixer live streaming service.

How to earn Forza Horizon 4 influence on Mixer

Forza Horizon 4

You can earn influence in two ways: Streaming Forza Horizon 4 on Mixer yourself or watching other streamers playing the game. That's all it takes, but there are some caveats that need to be addressed.

Firstly, your Mixer account should be linked to the Microsoft Account which holds your Xbox Live profile. If you signed up recently then you've likely got this in place already, however, if your account was created in the old "Beam" days you may need to follow the below steps.

  1. Log in to Mixer.
  2. Click on Account.
  3. Navigate to Link Accounts under the "Settings" tab.
  4. Select Link your Microsoft Account.
  5. Follow the on-screen steps.

So long as you interact with Forza Horizon 4 streams on Mixer with this account you'll begin earning influence as you watch or stream the game. As you build influence, it will become available to you in-game at launch, however, not immediately. This key quote from the Mixer blog highlights some minor restrictions.

Notably, you'll have to spend a small amount of time unlocking the "Mixer" thread in the campaign – but once you do, all the influence you've accrued will be waiting for you!

So get watching those streams and start building that influence! Just remember that the influence will arrive at a later date, so don't expect levels to appear upon starting the game.

Forza Horizon 4 Ultimate Edition owners can begin playing on September 28, with general release set for October 2.

See at AmazonSee at Microsoft

How to fix Surface Go issues using a USB recovery device

$
0
0

The Surface Go is a traveler's best friend, providing lightweight, powerful computing on the go. If your device isn't running well, you can easily restore it to factory settings using a USB device. Here's how.

Warning: Restoring your Surface to factory settings will result in the loss of your files. So be sure you have backed them up before restoring your device.

This method will work for any current Surface device, not only Surface Go. Although you will need a USB-C flash drive for the Go, since it doesn't have a full-size USB port.

Products used in this guide

How to create a Surface recovery USB-C device

  1. First, you'll need to create a USB (type C) recovery stick. Head to this webpage on Microsoft's support site.
  2. You'll have to select your Surface device and input the serial number. The website will tell you where to find it.
  3. Download the recovery files. The file size will vary based on which device you need, but the Surface Go image is around 7.4 GB.

  4. Extract the files to a new folder, I tend to choose a folder on the desktop to make finding them easier.

  5. Next you'll need a USB drive. Microsoft recommends up to 16 GB worth, but 8 GB should be enough for the Surface Go. You can pick up cheap USB-C drives on Amazon.. Plug the USB drive into your PC.
  6. Type "Create a recovery drive" into the Start Menu.
  7. This new menu will help you prepare the USB drive for recovering your Surface device. Uncheck the box that says "Backup system files."

  8. Click next and then select the USB drive you have connected to your PC.

  9. Hit next to create the recovery drive. This will copy a few files over necessary to boot from USB.
  10. Go back to the recovery image you downloaded and unzipped in steps 3 and 4. Copy the files to the USB recovery device. If prompted, select Replace the files in the destination.

Boot from a Surface recovery USB device

  1. Insert the USB recovery device into your Surface.
  2. Hold down the volume up button, then press and release the power button to turn on the Surface device you want to recover.

  3. The Surface UEFI menu should open.
  4. Select Boot configuration.
  5. Select the up arrow to move USB to the top of the priority list.

  6. Select Exit then Restart.
  7. The Surface should now boot from the USB device. Select the language and keyboard layout you want to use.
  8. Select Troubleshoot.

  9. Select Recover from a drive. If you're asked for a recovery key select Skip this drive.
  10. On the next screen, select Just remove my files.
  11. Select Recover.
  12. After a few minutes it will restore your Surface to factory settings.
  13. Go through the steps on-screen to set up your Surface again.

Our top equipment picks

You'll need a USB-C flash drive to recover your Surface Go in this way, and thanks to SanDisk, you can get a high-quality drive for pretty cheap.

Speedy USB-C storage

SanDisk Ultra USB-C Flash Drive

$11 at Amazon

USB-C storage on the cheap.

SanDisk is an industry-leading company when it comes to storage solutions, and their cheap and cheerful USB-C Ultra Flash Drives continue that tradition. USB-C is far faster than older, bulkier USB ports, and lo and behold, reversible, meaning it doesn't matter which way up you plug it in. The future is awesome.

Viewing all 5861 articles
Browse latest View live


Latest Images